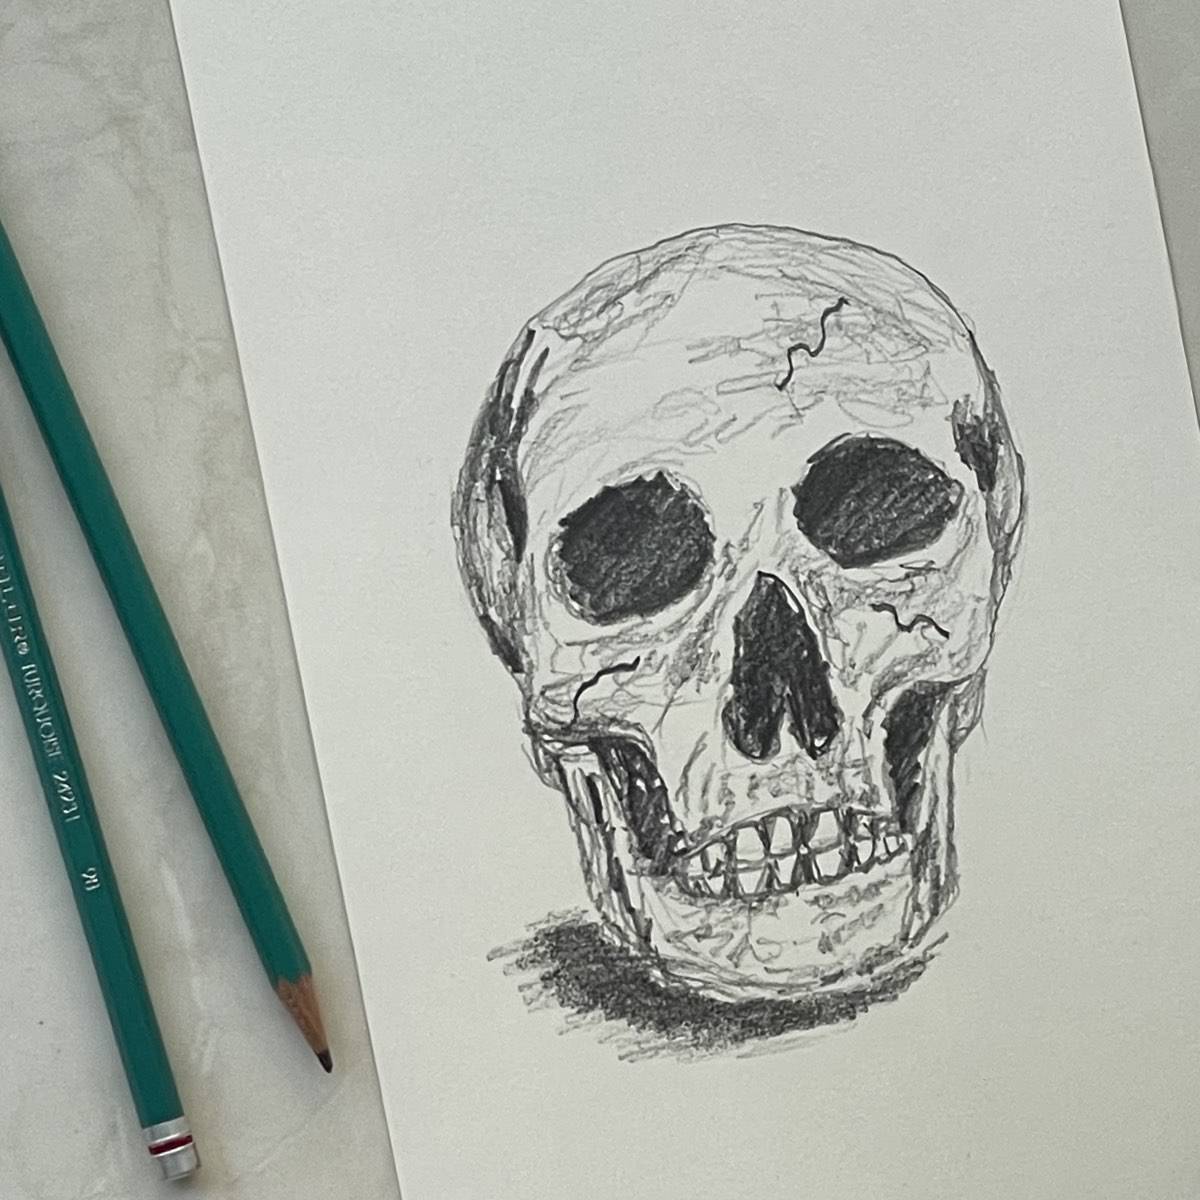
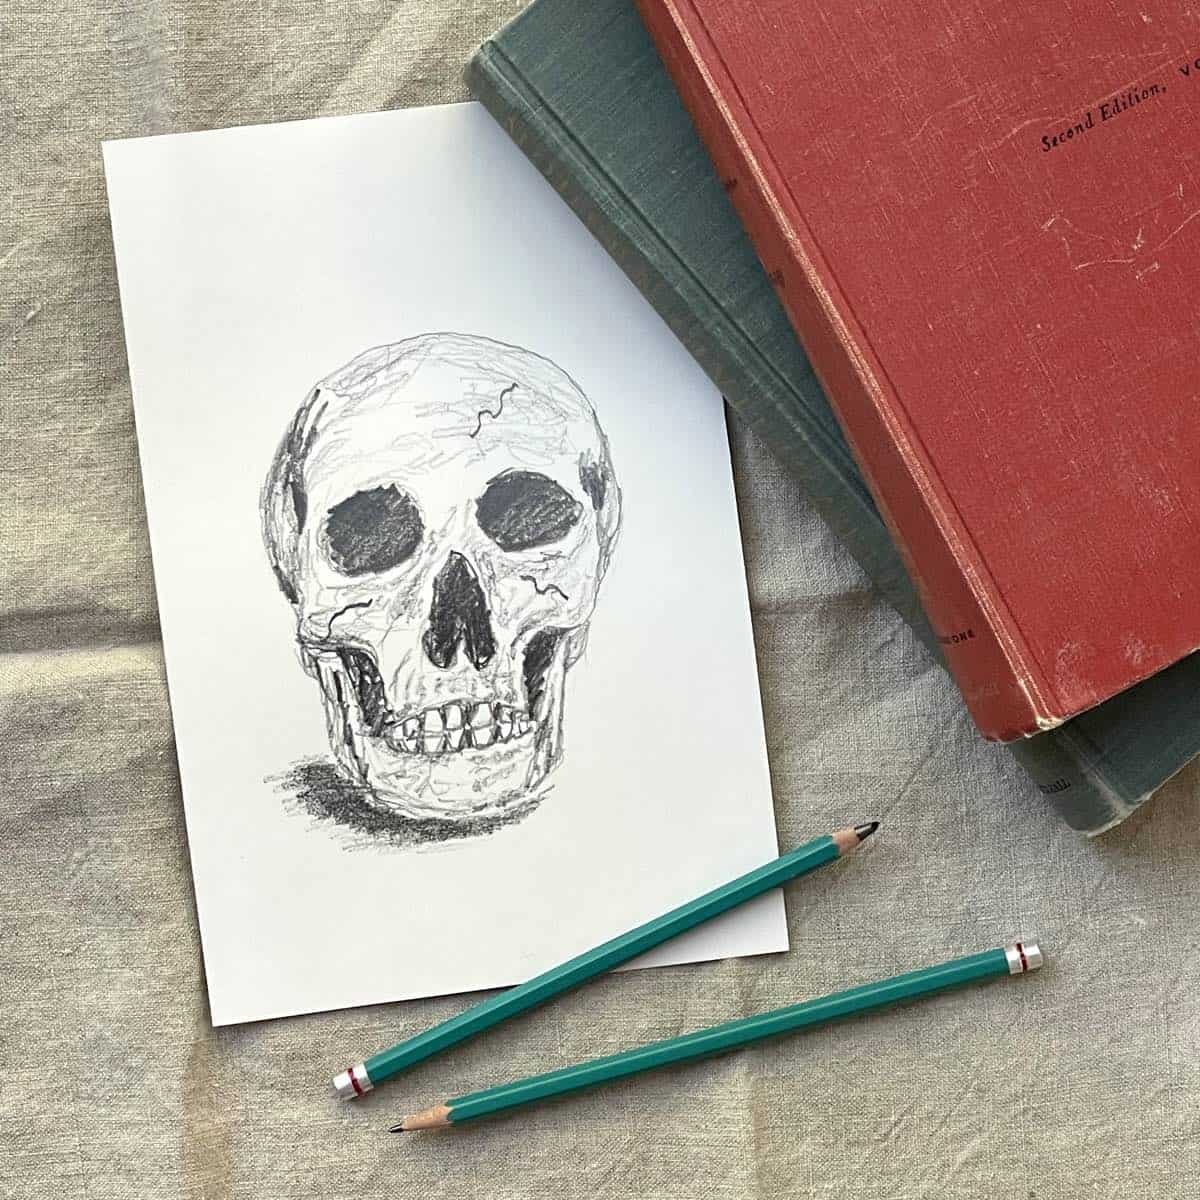
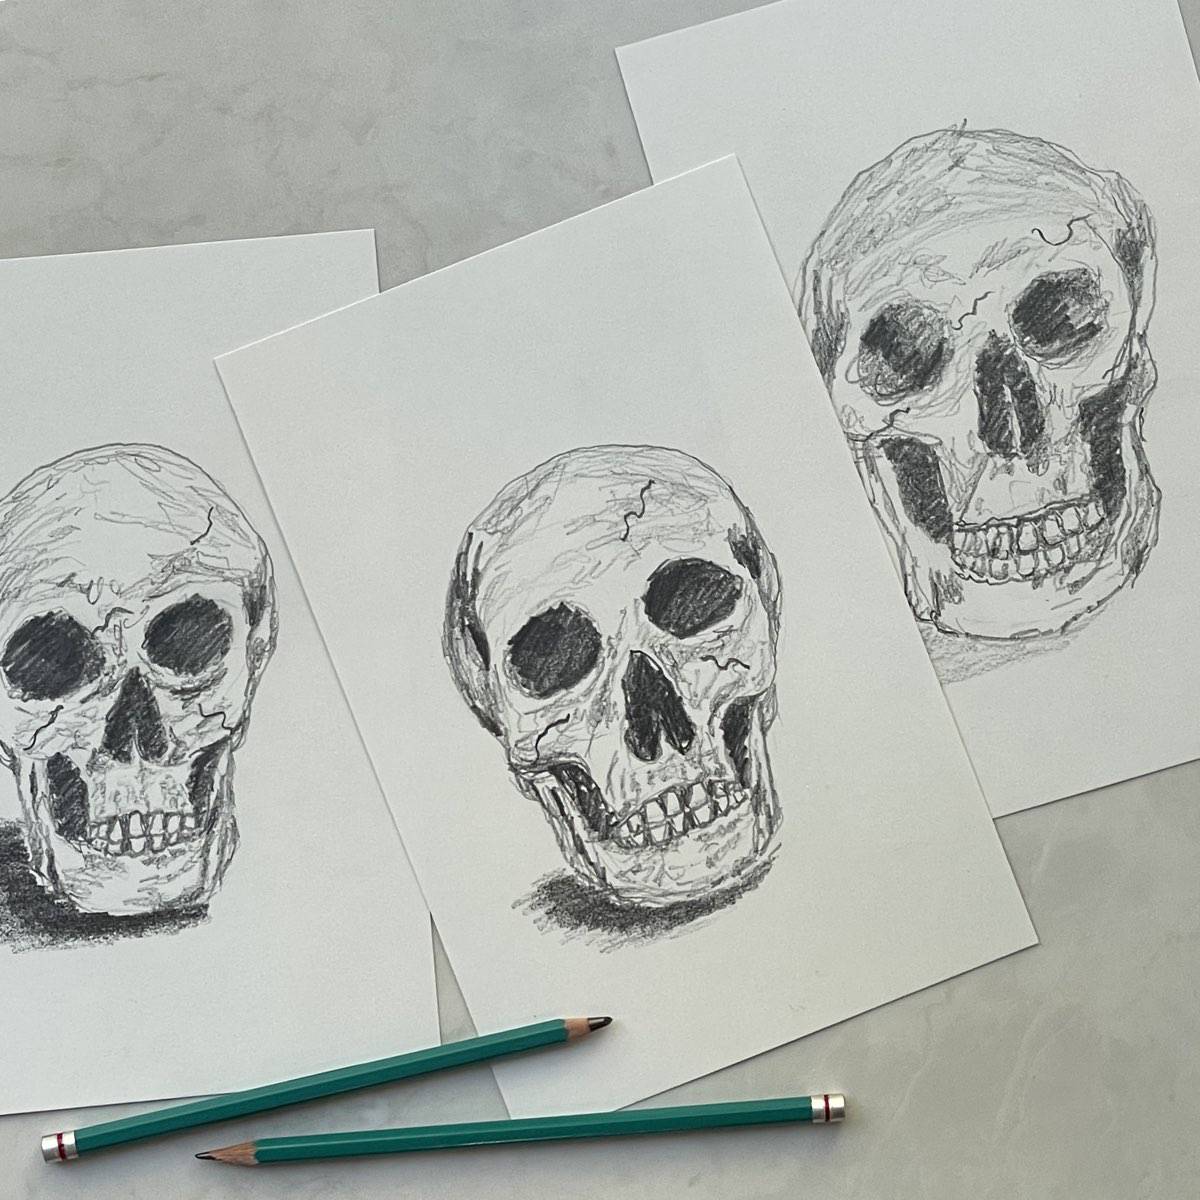
Learn how to draw a skull step-by-step in this easy tutorial. In this simple online art class find out how to sketch a realistic skull in pencil.
A perfect art lesson for beginners or advanced artists, this lesson easily teaches how to draw a skull one step at a time. It is fun to practice drawing a human skull and explore new art skills and techniques at the same time.
Jump to:
Drawing a human skull might appear to be complicated, but when broken down into easy-to-follow steps, it is not as difficult as it seems. Discover the basics of how to draw a 3d skull, add texture, and shade it.
Whether it is just in time for Halloween, the Day of the Dead, to celebrate the fall season, thinking about Shakespeare, or for the love of human anatomy, learning how to draw a skull is an important skill to practice.
Just follow the directions to get started sketching a skull quickly and easily.
Check out more beginning drawing lessons and watercolor painting classes.
Materials
- Pencils (HB for 2B or light sketching and 9B or other soft, dark pencil for shading)
- Paper - 70 pound / 115 gsm. drawing paper 9 x 6 inches (or use whatever you have on hand)
- Eraser - White Vinyl or other
Drawing a Skull Video Tutorial
Transcript
Read TranscriptHow to Draw a Skull Step by Step
Sketch the basic skull shape and guidelines
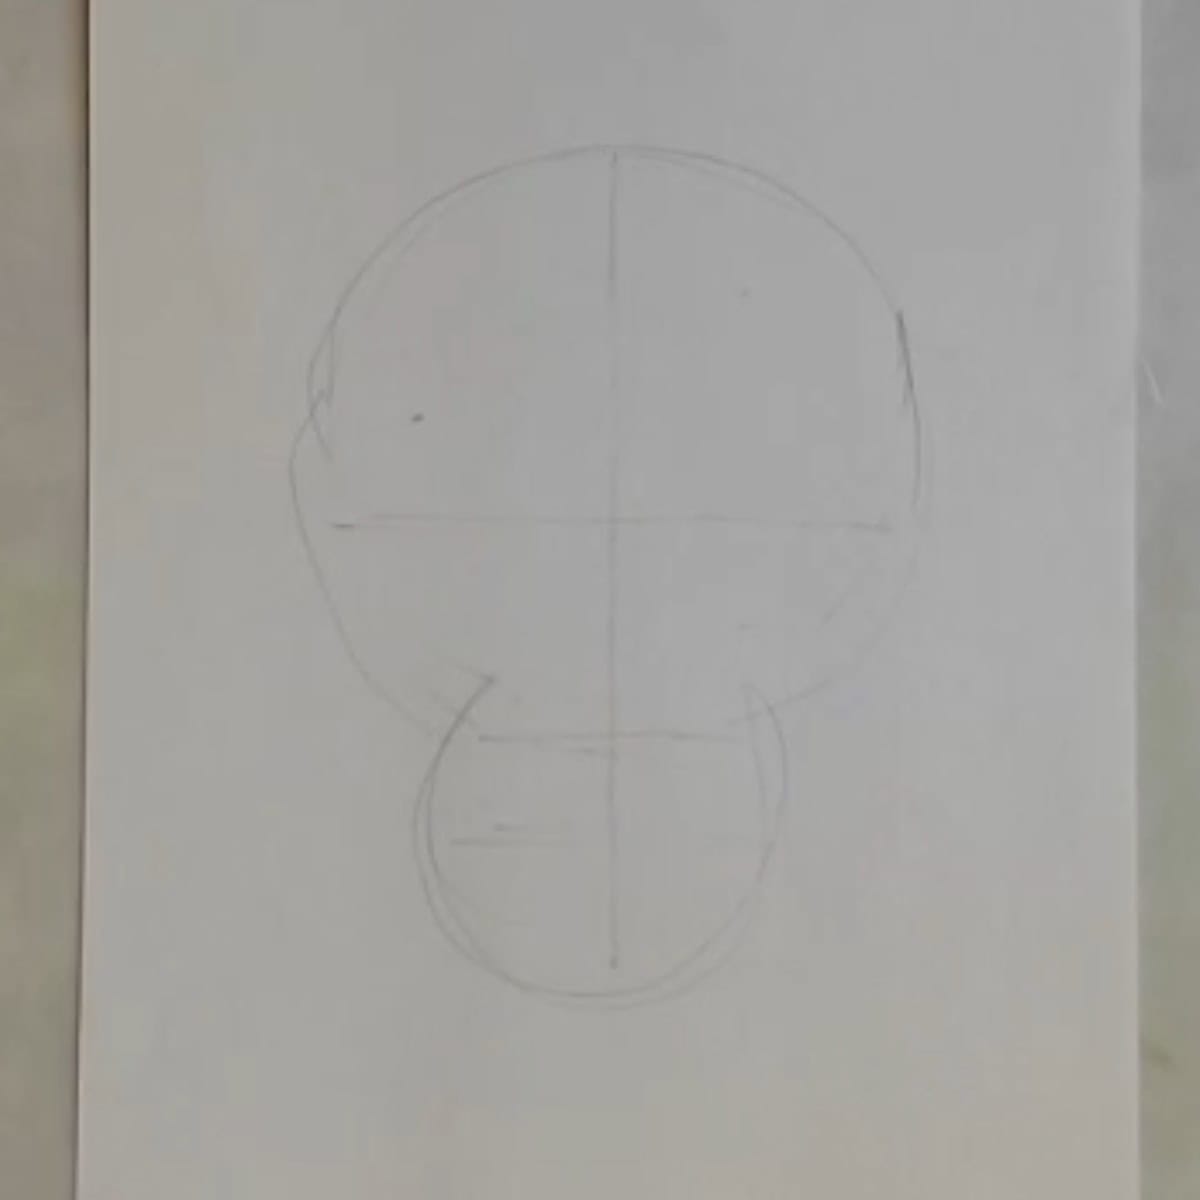
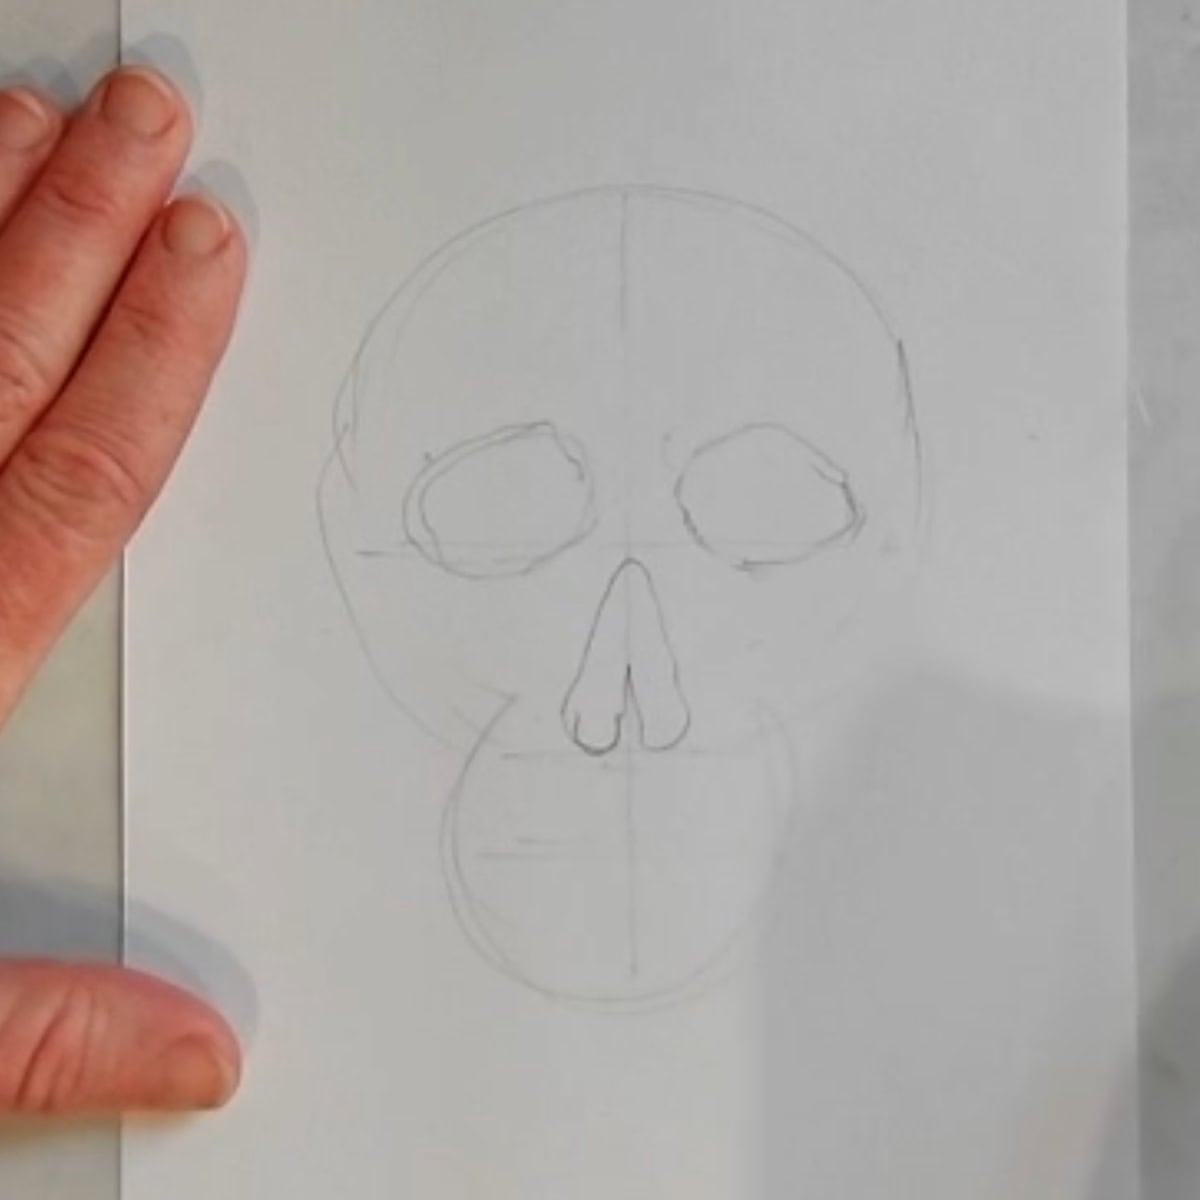
- Sketch a circle with an HB or 2B Pencil. Then draw a smaller circle below the first. Erase the lines where they overlap.
- Draw a guideline down the center of the skull. Add a guideline halfway between the top and bottom of the head where the eye sockets will go. Sketch a guideline halfway between to the bottom of the jaw, for the nose. Lastly, add a line halfway between the nose and chin, for the mouth.
Add the eyes, nose, and define the bones
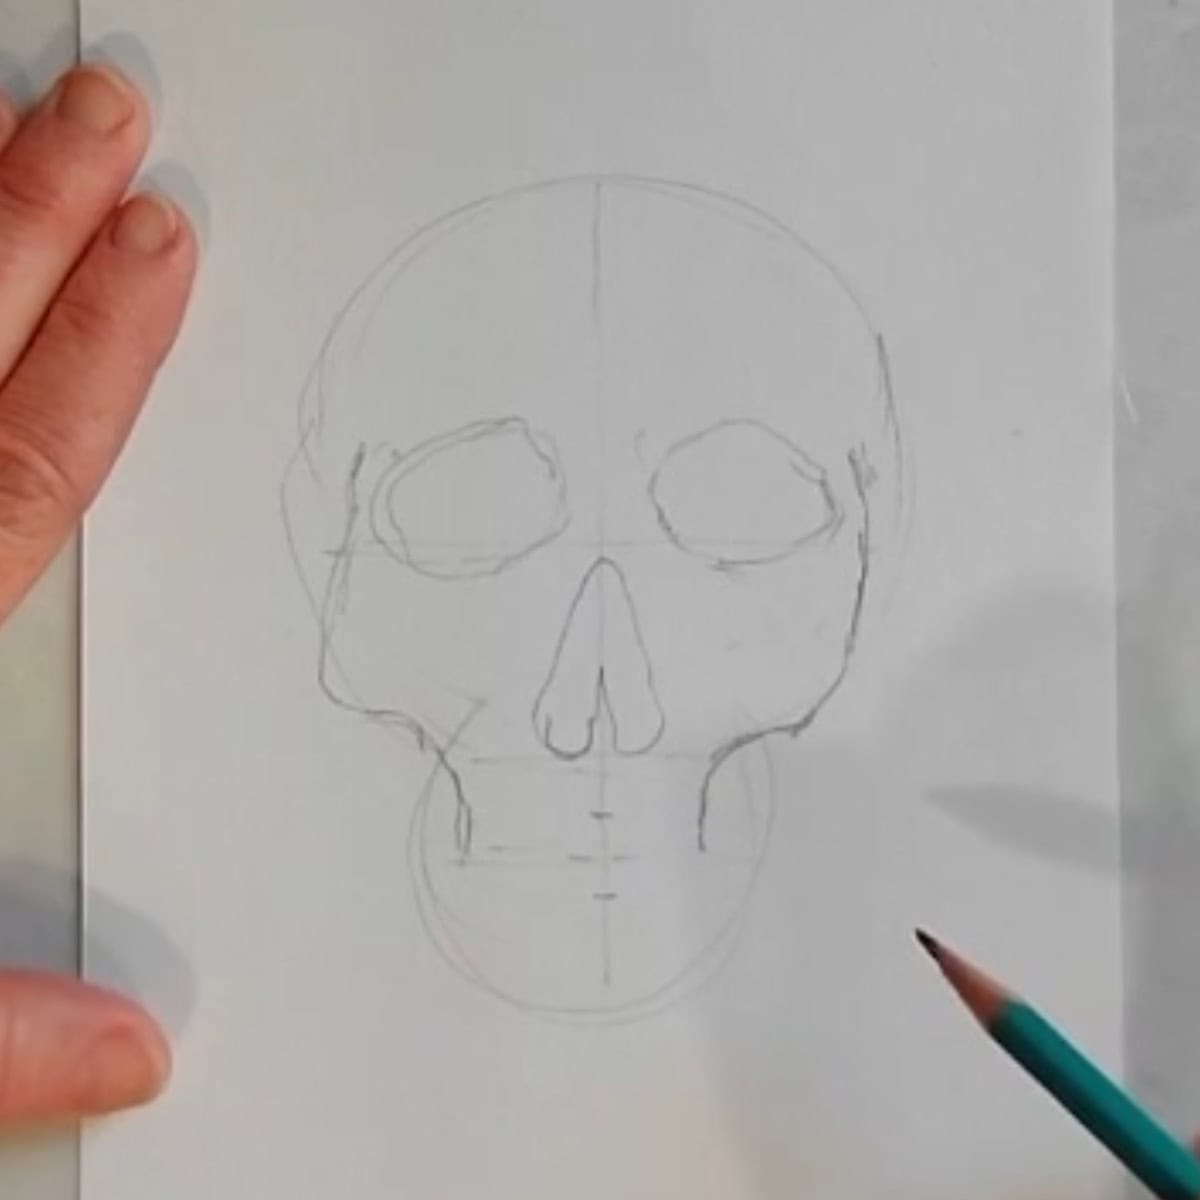
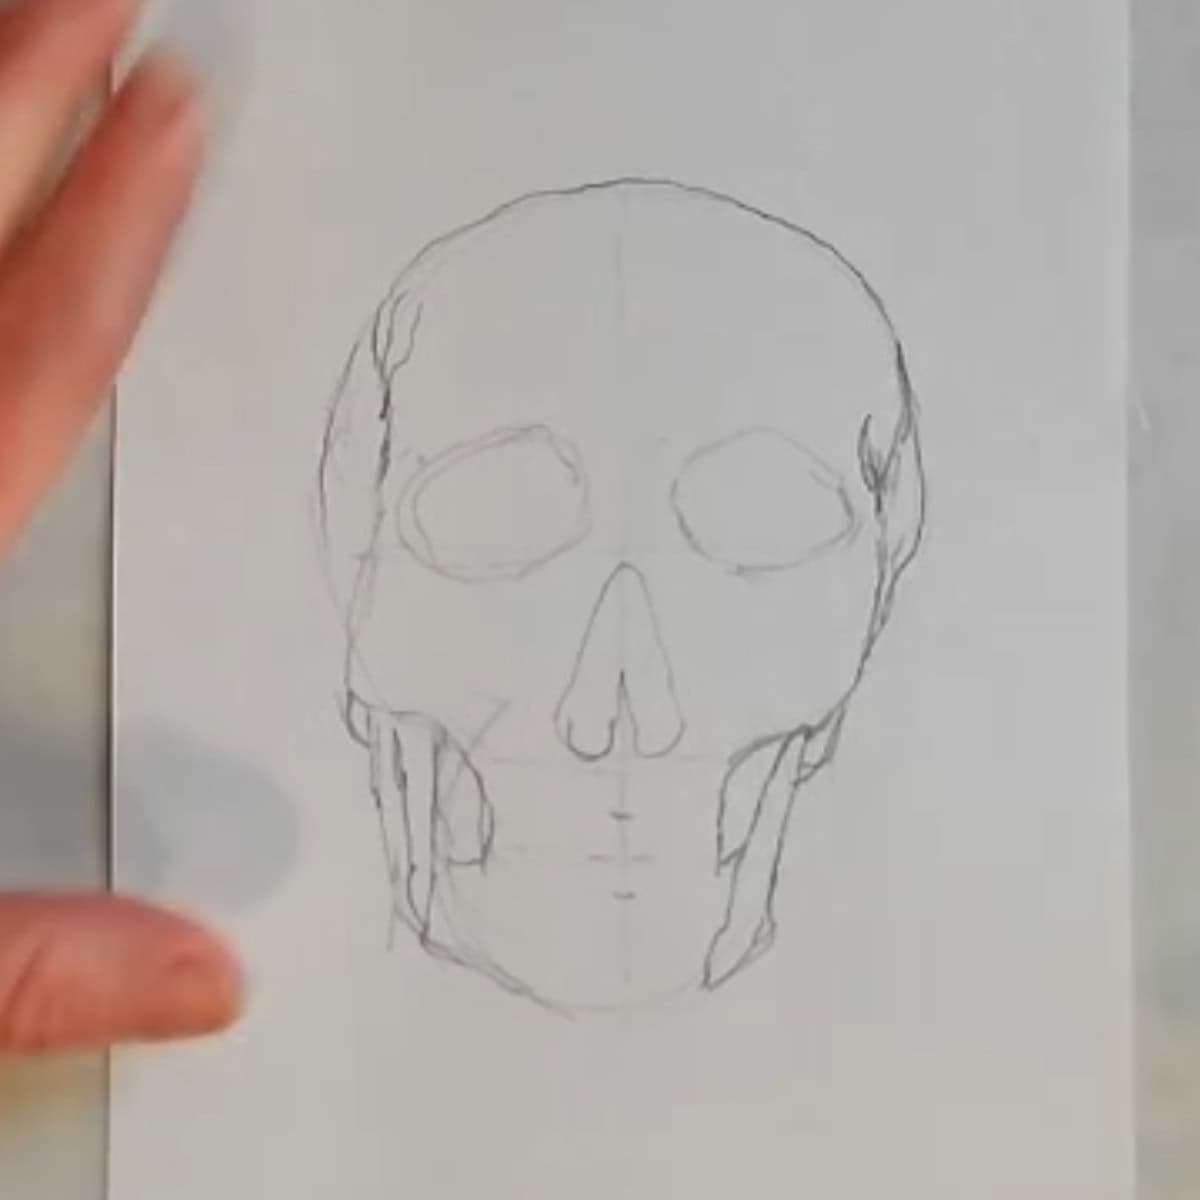
- Sketch in the eye sockets. They are roughly oval shapes but tilted to the side.
- Sketch in the nose. It is an upside-down heart shape that is rounded on the top. Leave some of the division between the two nasal cavities visible.
- Sketch in the facial bone beginning near the eye sockets. Draw the cheekbones and then sketch in and down for the front part of the teeth. The cheekbones will line up roughly with the bottom of the nose.
- Draw the back part of the jaw from the cheekbone down to the chin. Draw the inner part of the jaw from the cheek and curve it down to meet the center of the mouth.
- Sketch in a rounded mandible joint, most of it is covered up from the front view, so it is just a rounded bump in the back of the jaw.
- Sketch in a few lines to indicate the dips behind the eyes.
Draw the mouth and teeth
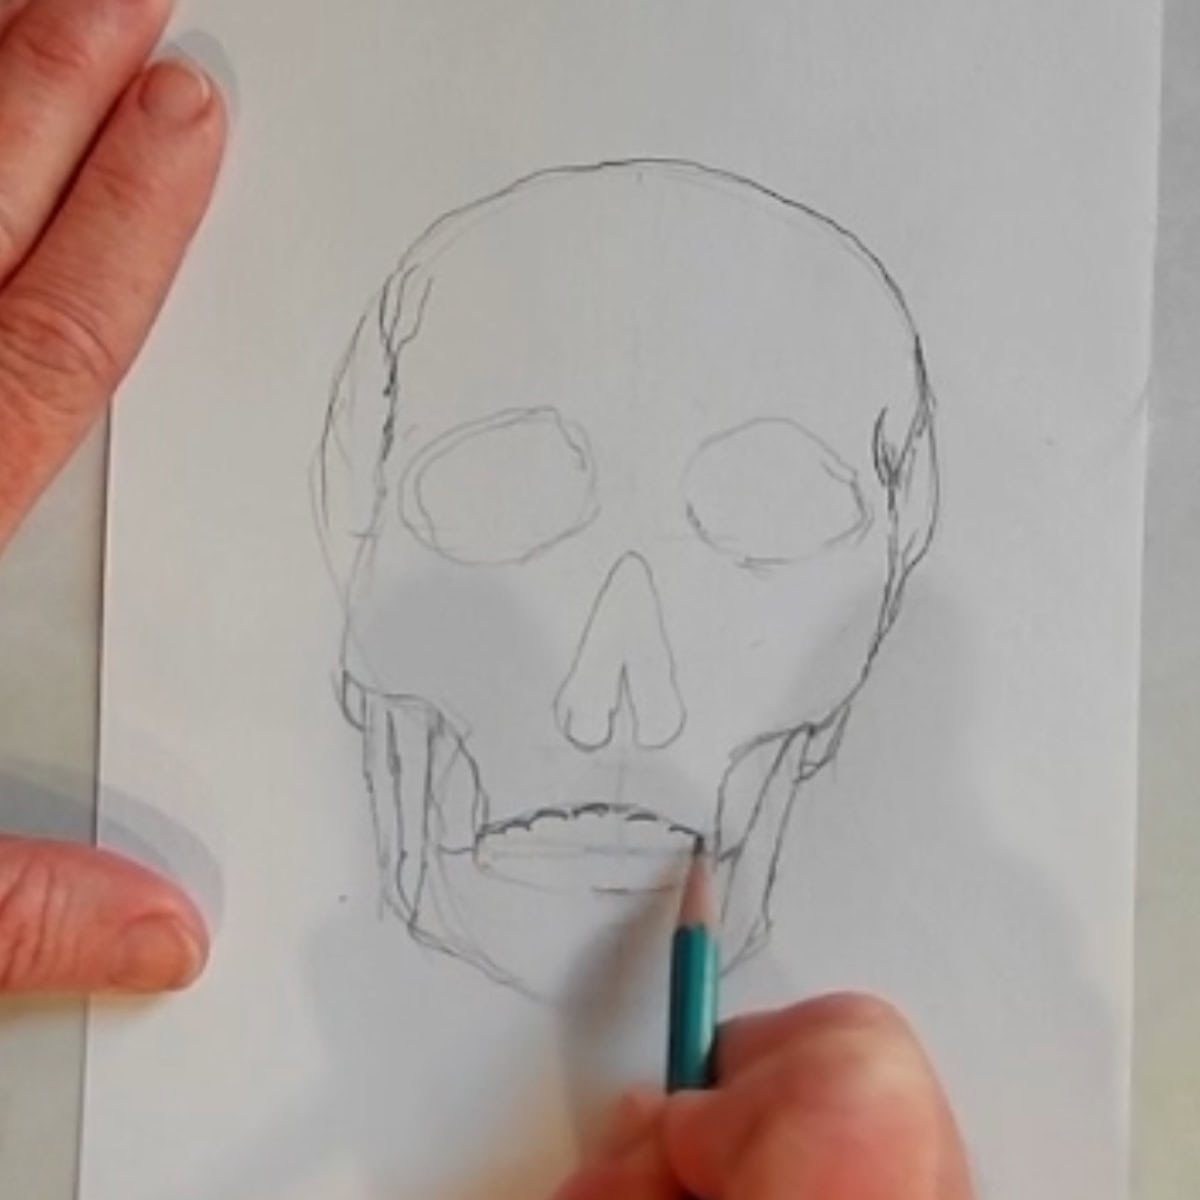
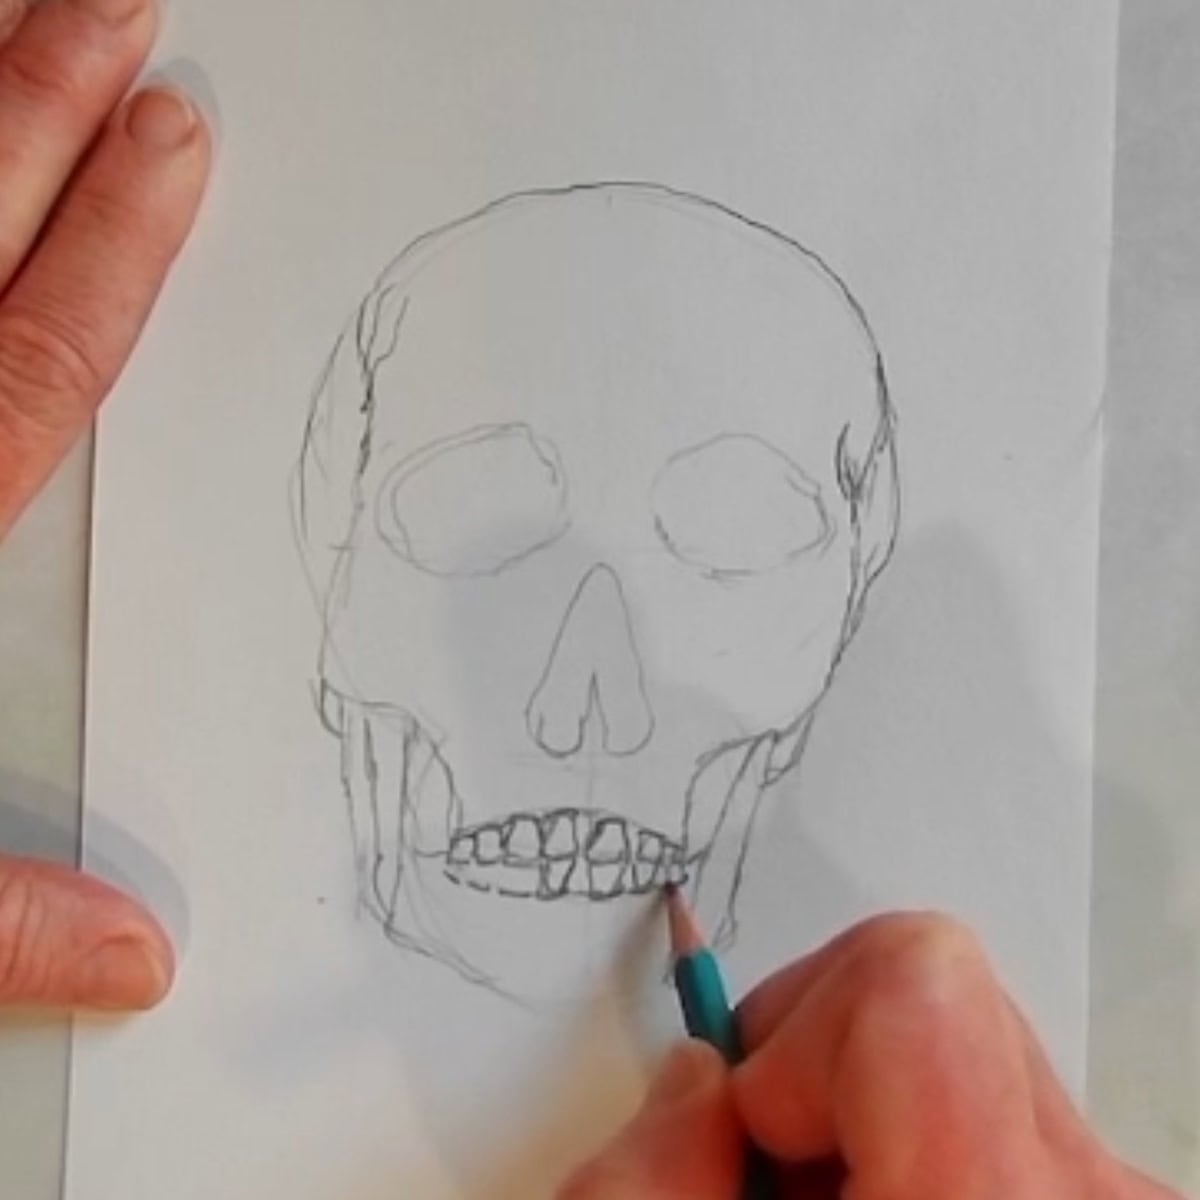
- Sketch in the mouth. Draw a curved line for both the bottom and top teeth. The top teeth will be larger than the bottom row.
- Starting with the top teeth, draw a small curve for the top of each tooth. The teeth will be smaller toward the back of the mouth. Three or four teeth should fit on each side.
- Repeat this process for the bottom teeth. The top teeth cover the tops of the bottom teeth so no need to draw the tops, just draw in the sides. Shade in between the teeth.
Shade in the dark areas
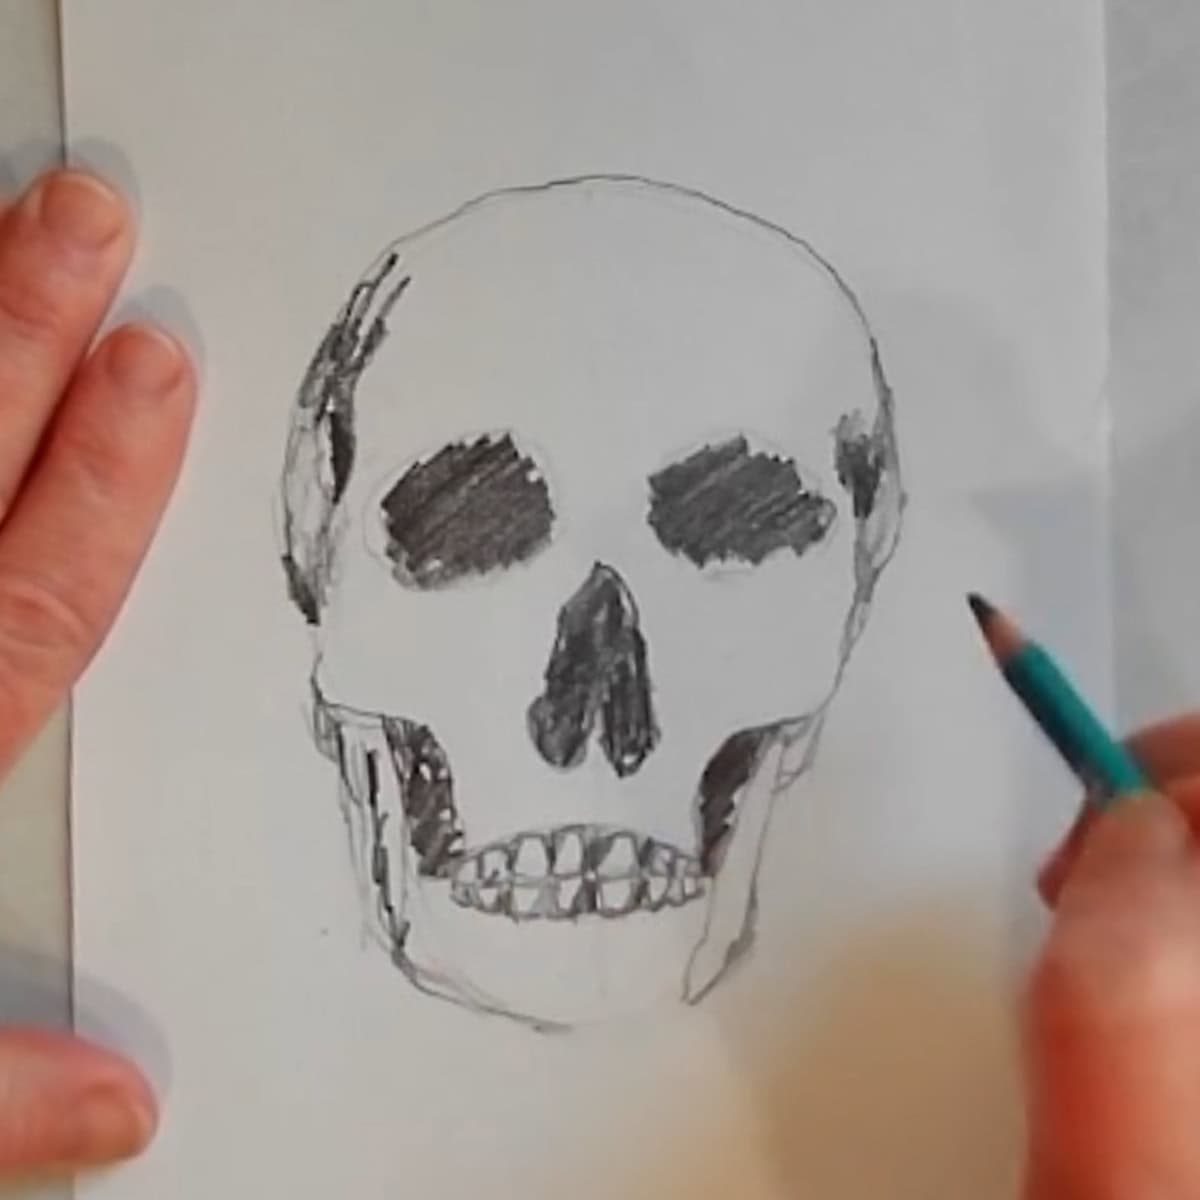
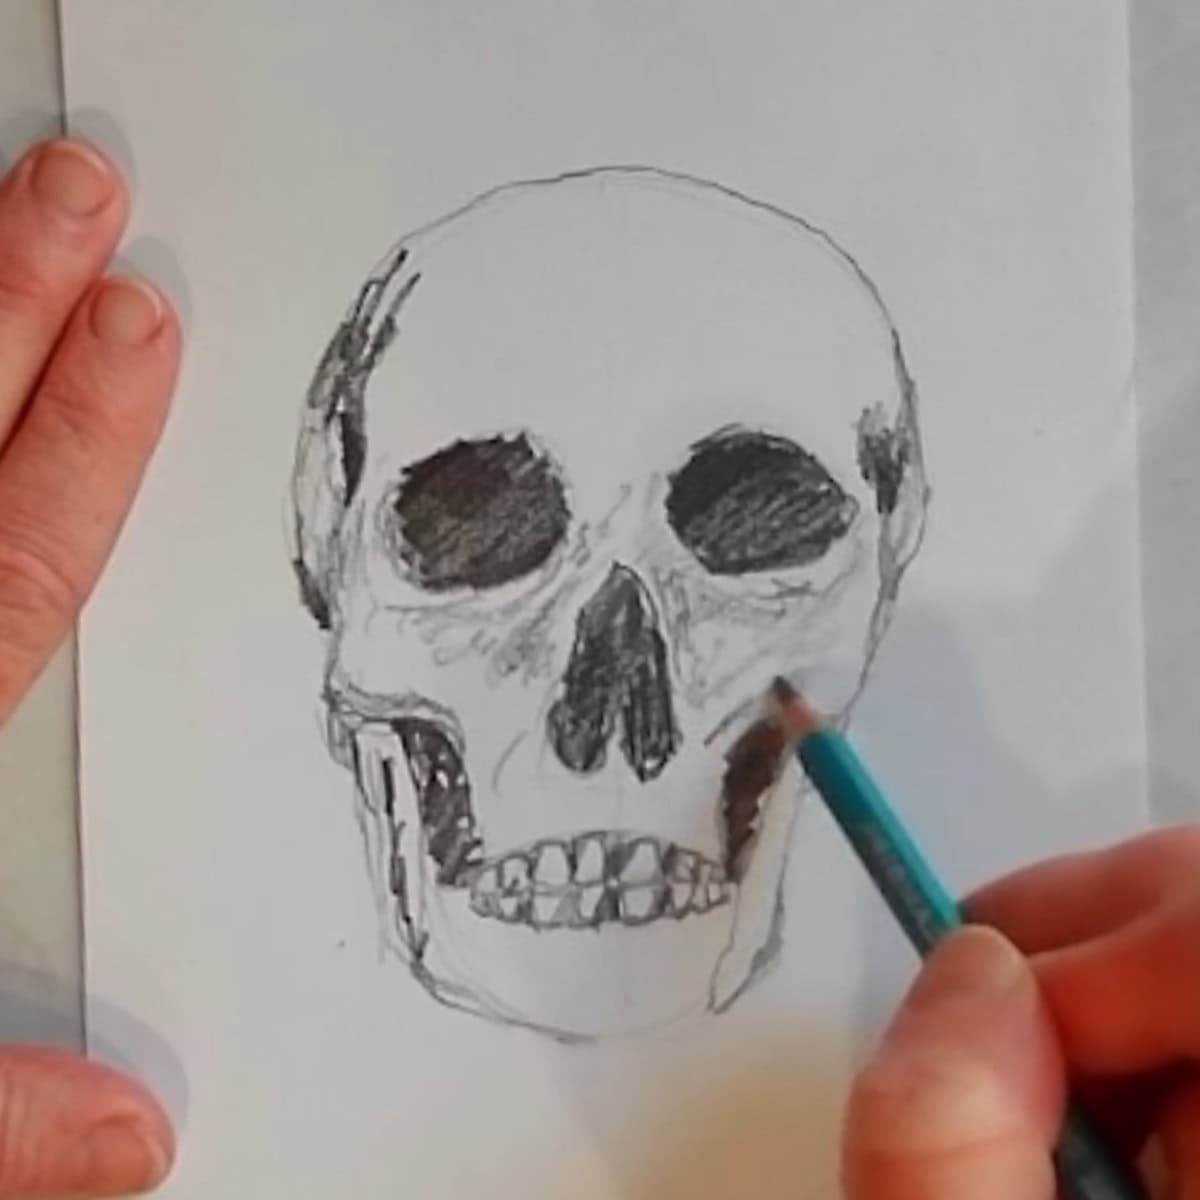
- Using the softer pencil, shade in the eye sockets, nose cavity, in between the jaw, and the digits behind the eyes. Go over them several times if necessary to give them very dark value.
- Add loose sketchy lines for more texture and detail
- Using loose sketchy lines, add some texture over the rest of the skull. Follow the natural lines and flow of the form, under and around the eyes, above and below the teeth, and roundness at the top of the skull.
- Darker values tend to come toward the viewer so make sure to add some value to the top of the skull and back of the jaw but do not make them too dark. The darkest areas should be the eyes, nose, and the space between the jaw.
Add the final details and touches
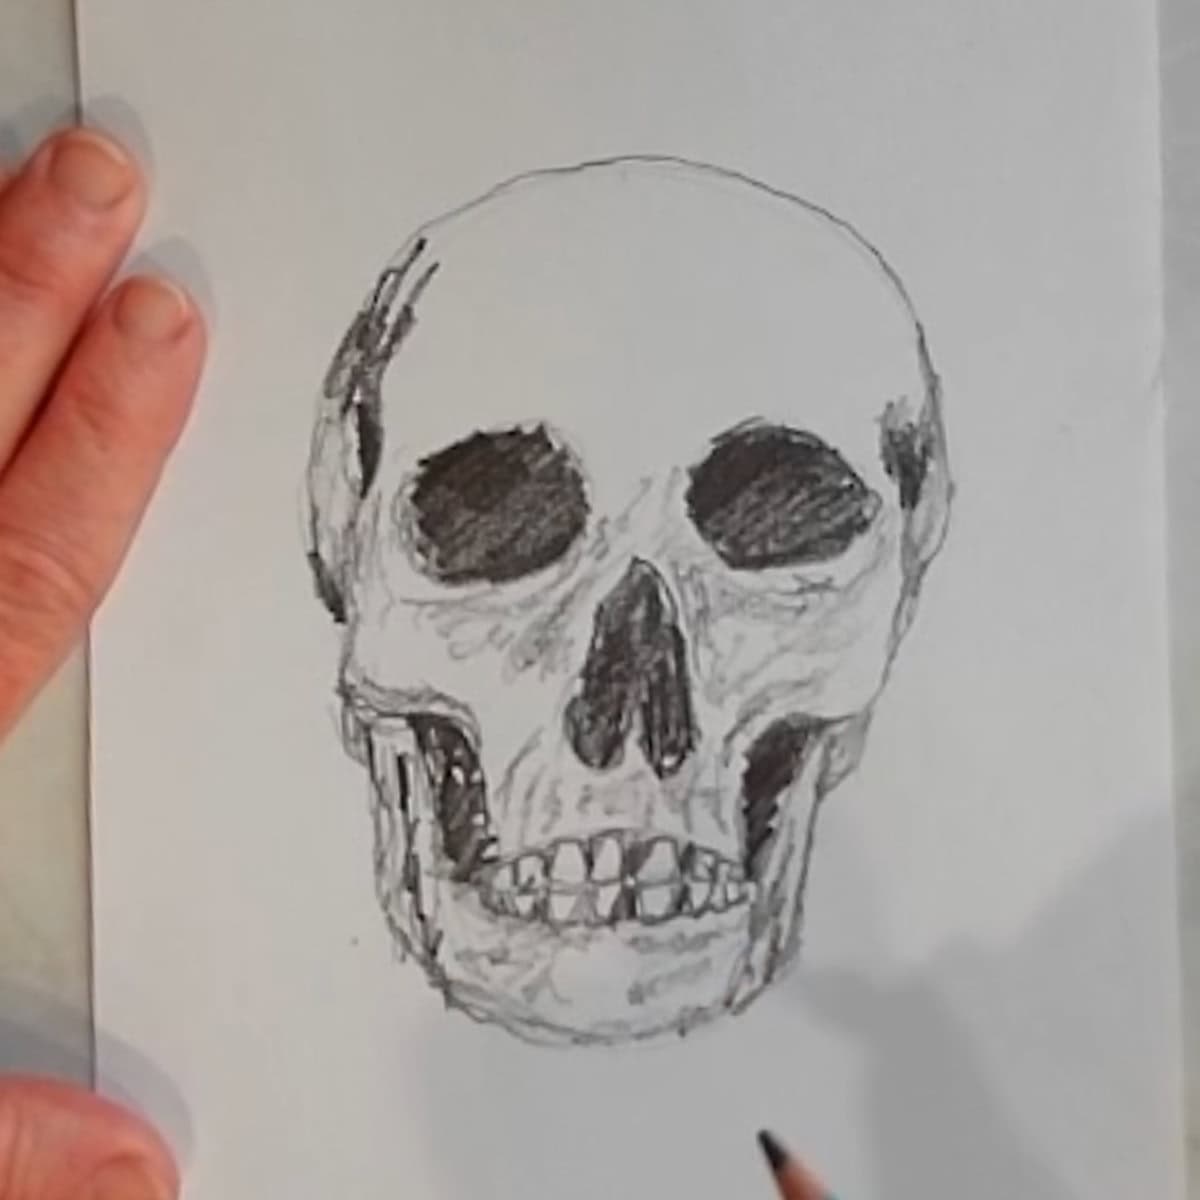
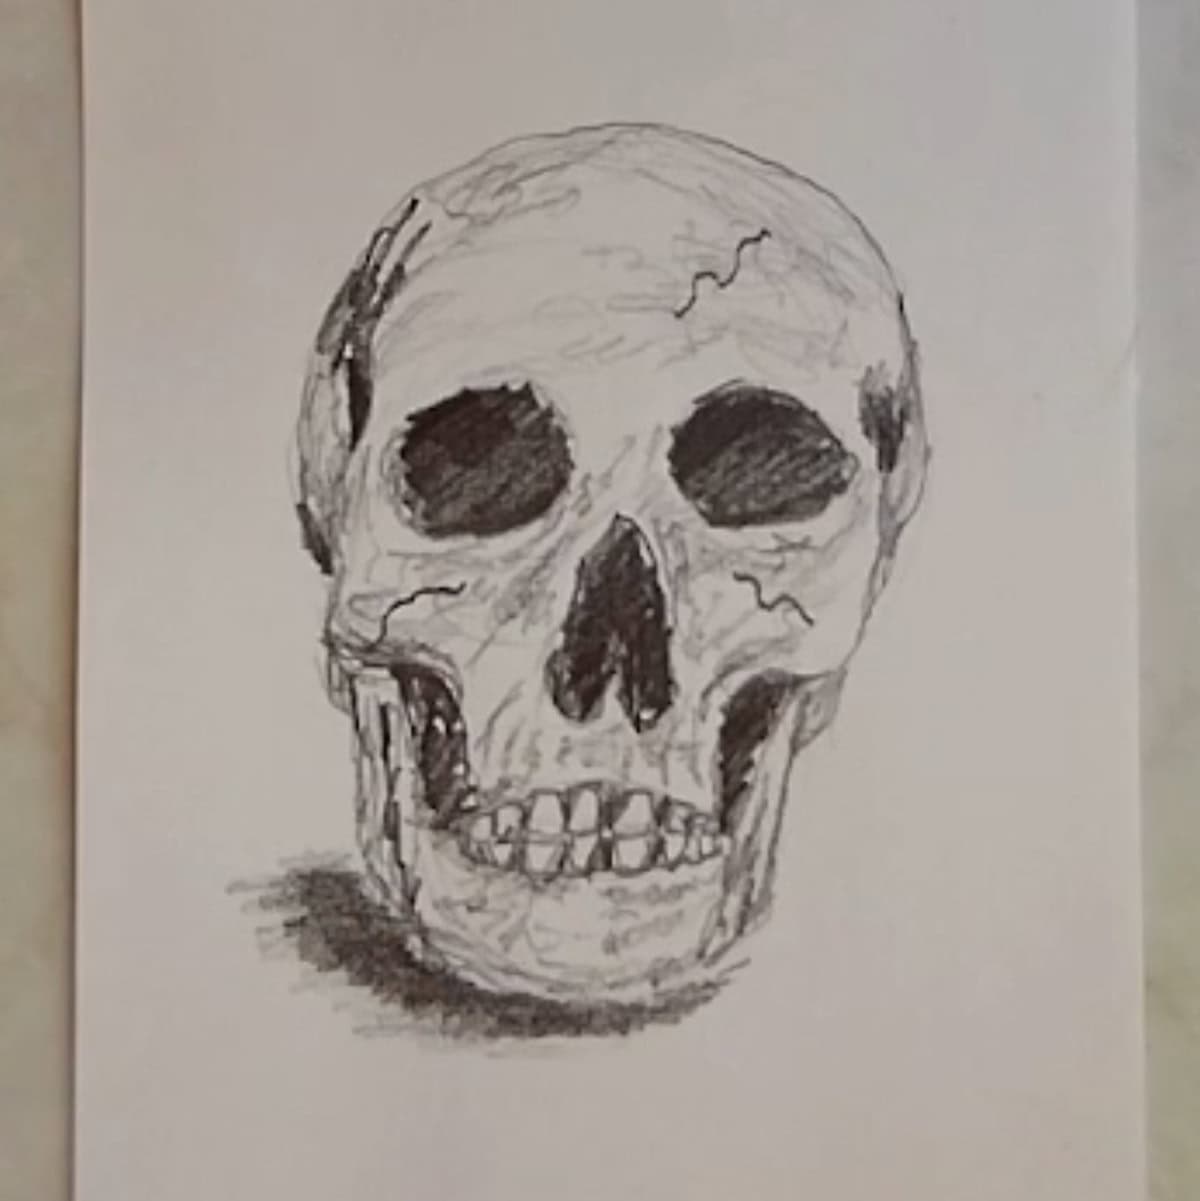
- You can add in a few irregular squiggly lines for cracks in the bone if you want.
- Look over the whole drawing and make any adjustments. If any areas need brightening, use an eraser on them, if any areas need darkening, add more value. Add more details, if needed.
- Lastly, shade in a dark shadow on the bottom of the skull to show is sitting on a table or some kind of surface. Soften the edge of the shadow with a bit of lighter value.
Tips and tricks
- Turn your paper as needed to make the sketching and shading easier.
- Keep your shoulder and arm loose to get nice sketchy lines, don’t tense your muscles.
- Darker values tend to come toward the viewer so make sure to add some value to the top of the skull and back of the jaw but doo not make them too dark. The darkest areas should be the eyes, nose, and then space between the jaw.
- Concentrate on drawing where you see the light and dark values of the skull.
Detailed Instruction Card for Drawing a Skull
How to Draw a Skull Step by Step
Equipment
- Pencils (HB for 2B or light sketching and 9B or other soft, dark pencil for shading)
- Paper - 70 pound / 115 gsm. drawing paper 9 x 6 inches (or use whatever you have on hand)
- Eraser - white vinyl or other
Instructions
Sketch the basic shape and guidelines
- Sketch a circle with an HB or 2B Pencil. Then draw a smaller circle below the first. Erase the lines where they overlap.
- Draw a guideline down the center of the skull. Add a guideline halfway between the top and bottom of the head where the eye sockets will go. Sketch a guideline halfway between to the bottom of the jaw, for the nose. Lastly, add a line halfway between the nose and chin, for the mouth.
Add the features
- Sketch in the eye sockets. They are roughly oval shapes but tilted to the side.
- Sketch in the nose. It is an upside-down heart shape that is rounded on the top. Leave some of the division between the two nasal cavities visible.
- Sketch in the facial bone beginning near the eye sockets. Draw the cheekbones and then sketch in and down for the front part of the teeth. The cheekbones will line up roughly with the bottom of the nose.
- Draw the back part of the jaw from the cheekbone down to the chin. Draw the inner part of the jaw from the cheek and curve it down to meet the center of the mouth.
- Sketch in a rounded mandible joint, most of it is covered up from the front view, so it is just a rounded bump in the back of the jaw.
- Sketch in a few lines to indicate the dips behind the eyes.
Draw the mouth and teeth
- Sketch in the mouth. Draw a curved line for both the bottom and top teeth. The top teeth will be larger than the bottom row.
- Starting with the top teeth, draw a small curve for the top of each tooth. The teeth will be smaller toward the back of the mouth. Three or four teeth should fit on each side.
- Repeat this process for the bottom teeth. The top teeth cover the tops of the bottom teeth so no need to draw the tops, just draw in the sides. Shade in between the teeth.
Shade in the dark areas
- Using the softer pencil, shade in the eye sockets, nose cavity, in between the jaw, and the digits behind the eyes. Go over them several times if necessary to give them very dark value.
- Add loose sketchy lines for more texture and detail
- Using loose sketchy lines, add some texture over the rest of the skull. Follow the natural lines and flow of the form, under and around the eyes, above and below the teeth, and roundness at the top of the skull.
- Darker values tend to come toward the viewer so make sure to add some value to the top of the skull and back of the jaw but do not make them too dark. The darkest areas should be the eyes, nose, and the space between the jaw.
Add the final details and touches
- You can add in a few irregular squiggly lines for cracks in the bone if you want.
- Look over the whole drawing and make any adjustments. If any areas need brightening, use an eraser on them, if any areas need darkening, add more value. Add more details, if needed.
- Lastly, shade in a dark shadow on the bottom of the skull to show is sitting on a table or some kind of surface. Soften the edge of the shadow with a bit of lighter value.
Notes
- Turn your paper as needed to make the sketching and shading easier.
- Keep your shoulder and arm loose to get nice sketchy lines, don’t tense your muscles.
- Darker values tend to come toward the viewer so make sure to add some value to the top of the skull and back of the jaw but doo not make them too dark. The darkest areas should be the eyes, nose, and then space between the jaw.
- Concentrate on drawing where you see the light and dark values of the skull.
For More Practice
- Find a photo of a skull online and practice drawing from the image.
- Practice drawing a skull from a different point of view. Try a side view, three-quarters view looking down from the top.
- Draw a skull using colored pencils, charcoal, pen and ink, or another medium.
- Sketch in the basic outline of the skull. Instead of shading it with pencil, paint it with watercolor paint. Get creative with the color!
How to Download an Image from the Internet
I recommend getting an image of a skull to practice drawing from. You can find images in magazines such as National Geographic and Smithsonian or from the internet.
To download an image from the internet right click on the image with your mouse. A box will pop up. Scroll down to “save image as”. Click on that and it will allow you to save it on your computer for reference.
If you are using an older Mac, push the keyboard’s command button and click on the mouse at the same time. Then select “save as” and choose the location to save on your computer.
Frequently Asked Questions
To draw a skull easily, focus on the overall shape. Sketch the basic shape, add the features, draw the mouth and teeth, shade in the dark areas, and add sketchy lines for more texture and detail.
No, absolutely not! All you need to draw a skull is a photo image for referral. Then sketch the basic outline, draw in the features, and shade the lights and darks. You can also follow along with this great video tutorial here at Artlooklearn.com.
How do you draw a realistic skull?
To make your skull more realistic take your time drawing it. Find a photo of a skull to use as a reference for your drawing. Start with a basic sketch of the entire skull then add more detail gradually. Concentrate on the lights and ears of what you see. Use smooth pencil shading to get fluid transitions between the light and dark areas.
You also might like
Please leave your questions, comments, and ratings below!

Leave a Reply