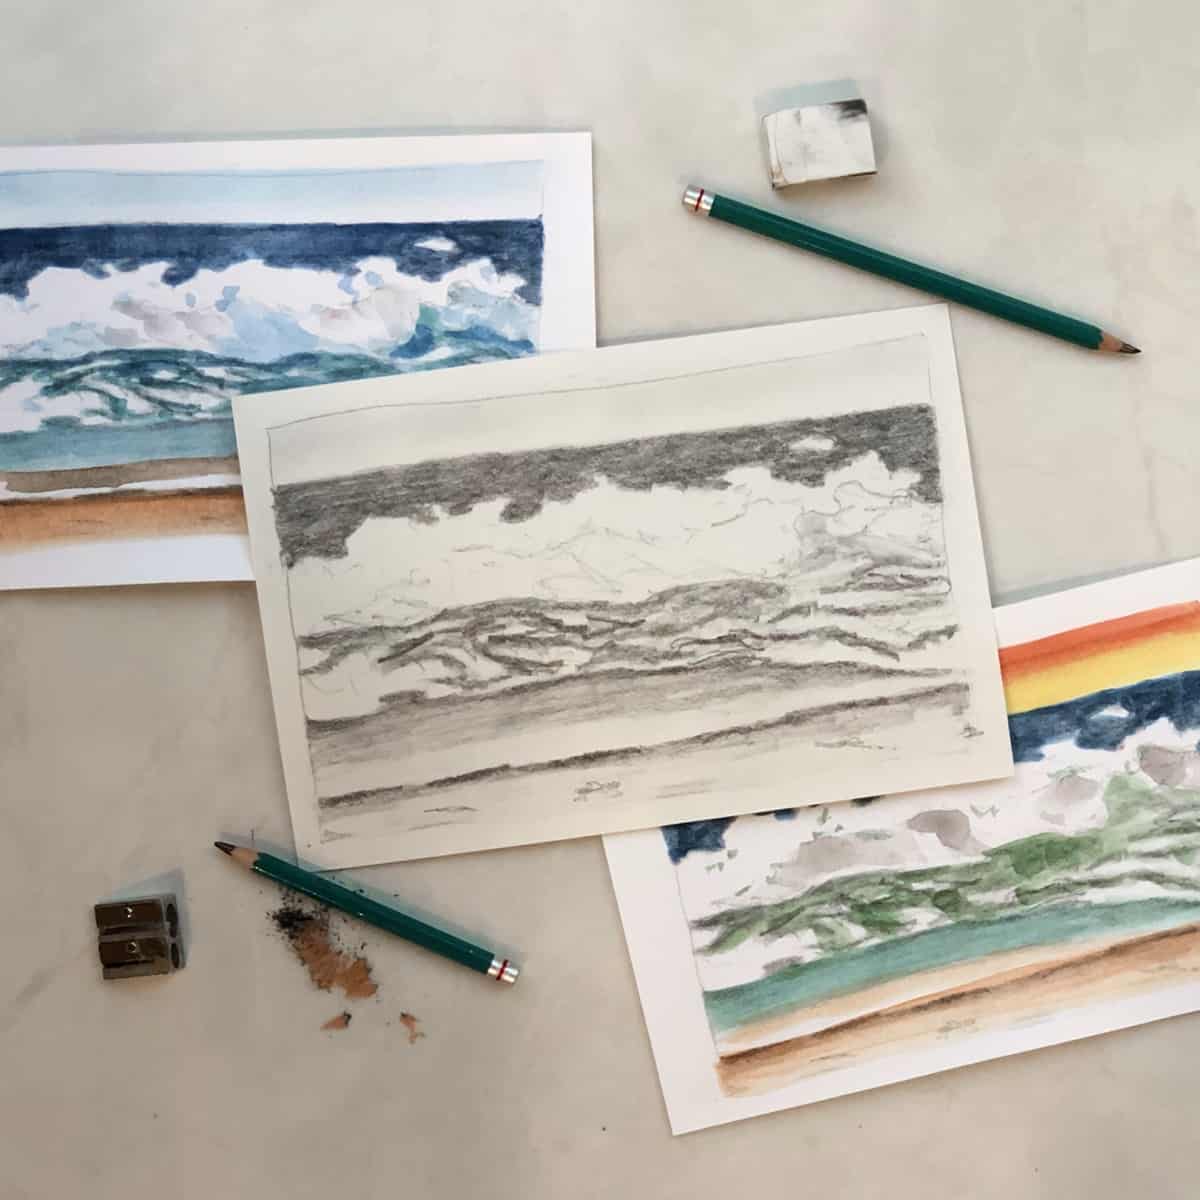
Check out this simple ocean drawing tutorial (easy pencil seascape sketch) in this beginning art lesson. Drawing ocean waves can be easy with a few simple steps.
Creating a beautiful and realistic ocean scene in pencil can be very satisfying and relaxing. Follow along with my step-by-step video art class to learn how to draw the sea.
Jump to:
Materials
- Pencil - 8B or other soft, dark pencil
- Paper - 70 pound / 115 gsm. drawing paper 6 x 9 inches (or use whatever you have on hand)
- White vinyl eraser
- Chip brush to brush off eraser dust
- Blending stump (or could use a finger, rolled-up tissue or a Q-tip)
Video
Transcript
Read TranscriptArt Lesson Overview
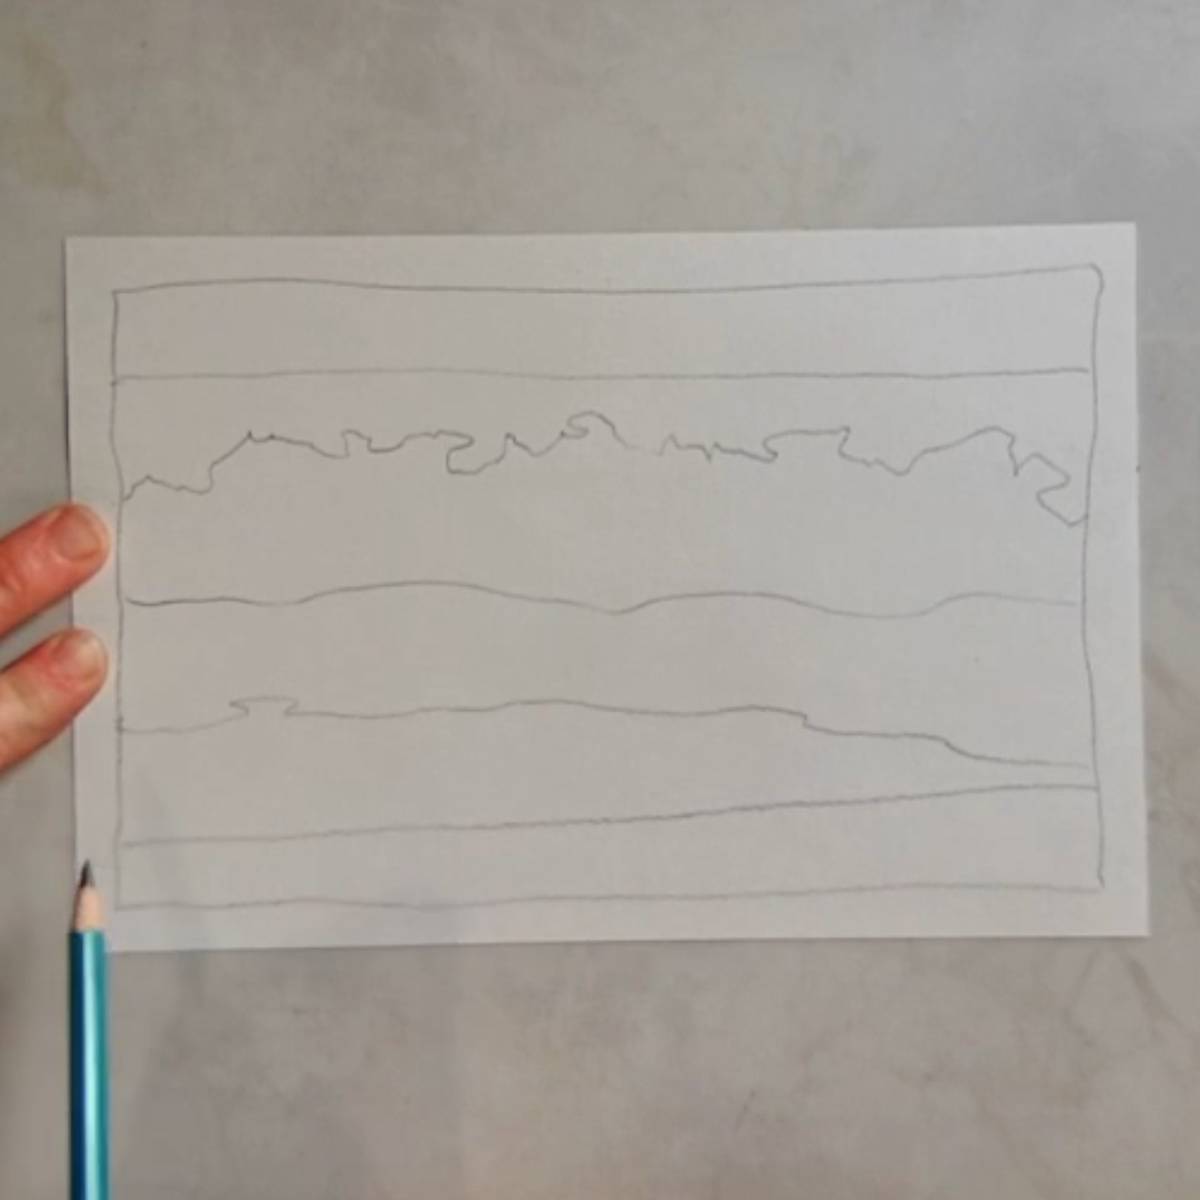
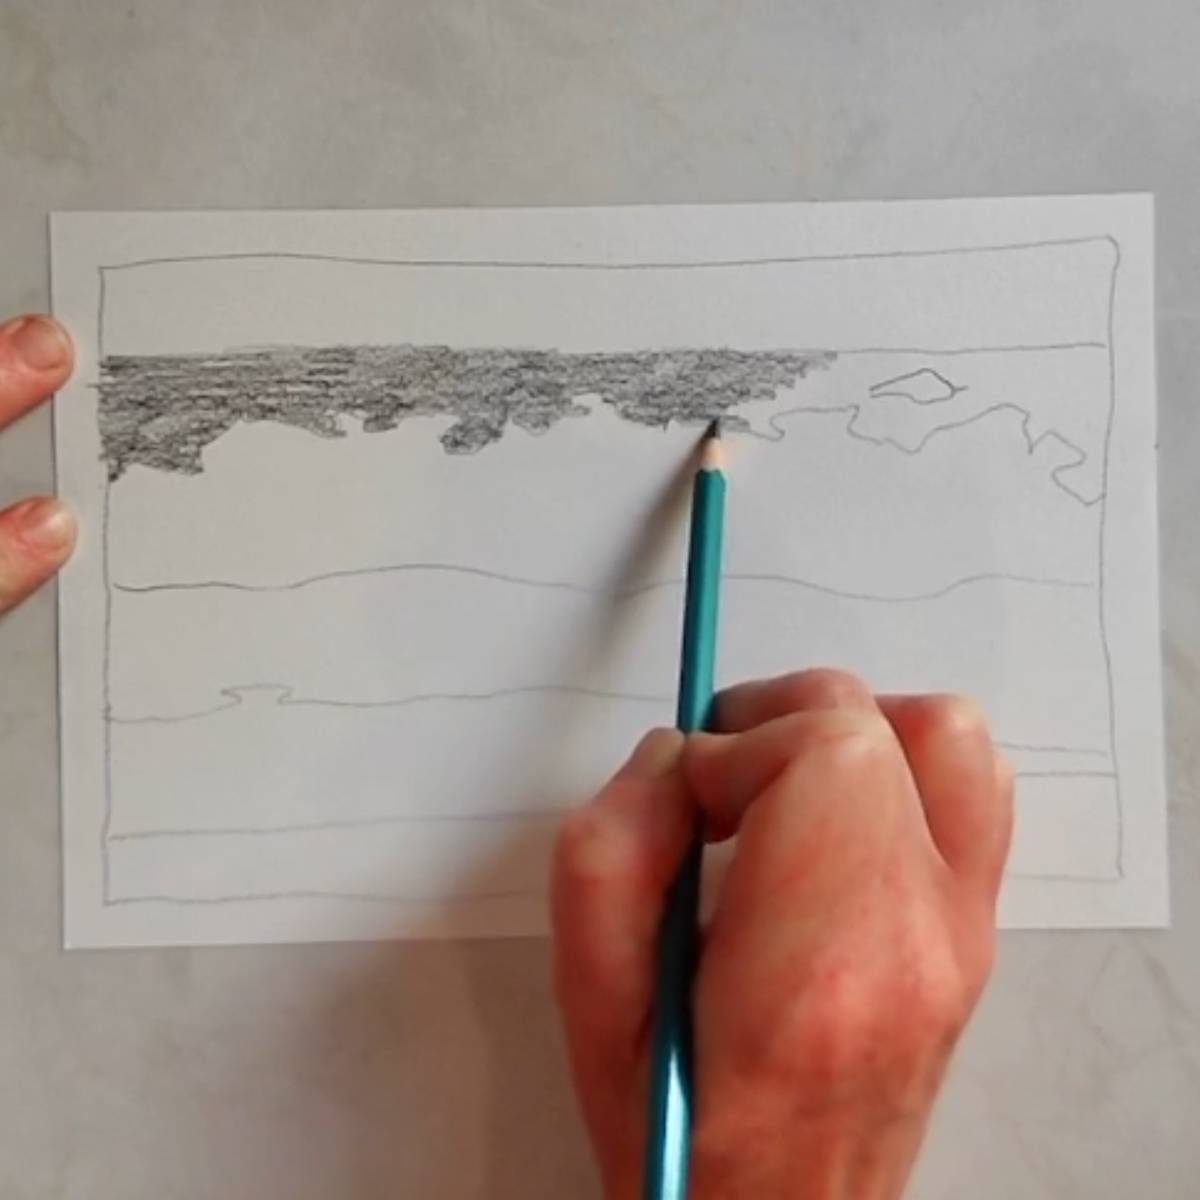
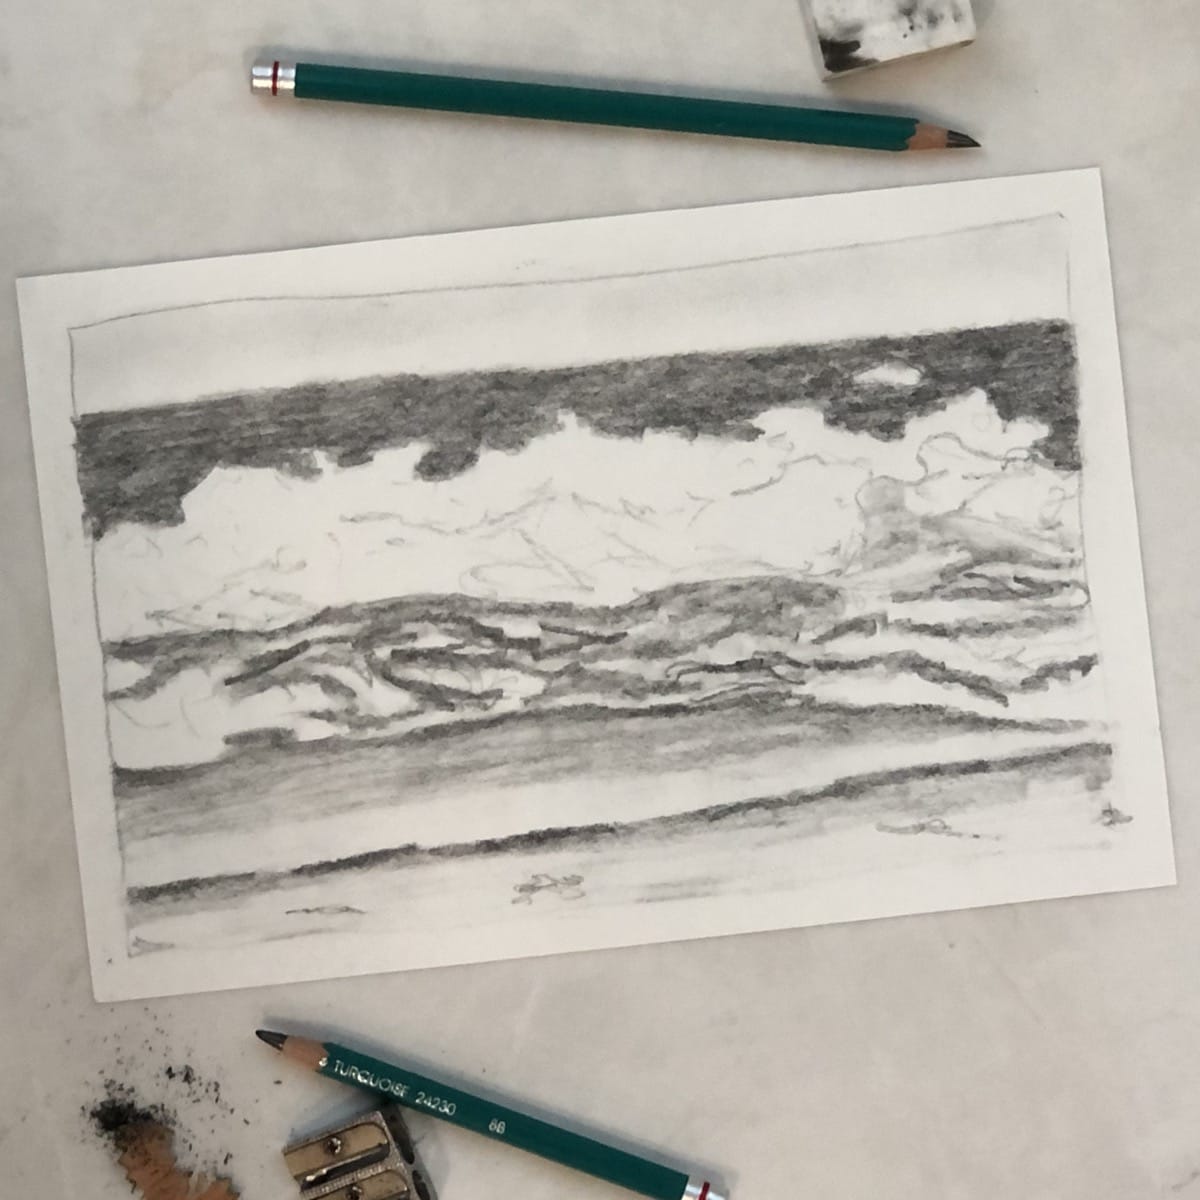
- Draw a border around the edge of the paper. Don’t worry if the lines are not very straight. It can help to keep your wrist straight and use your whole arm when drawing.
- Draw the tops and bottoms of the different layers of waves.
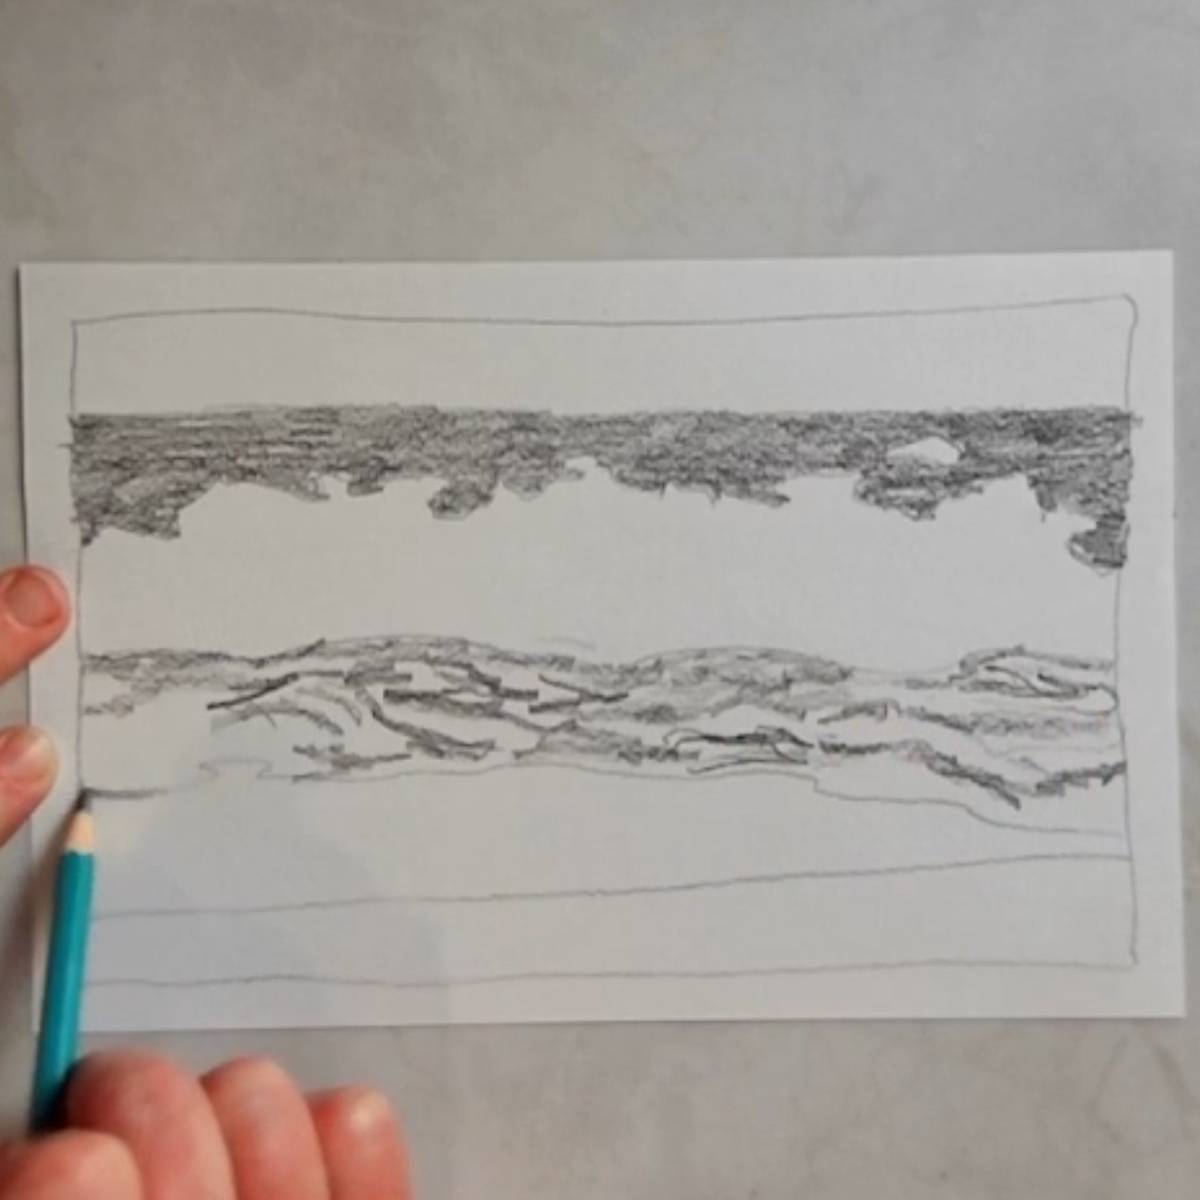
- Shade in the area between the horizon line and the top of the wave.
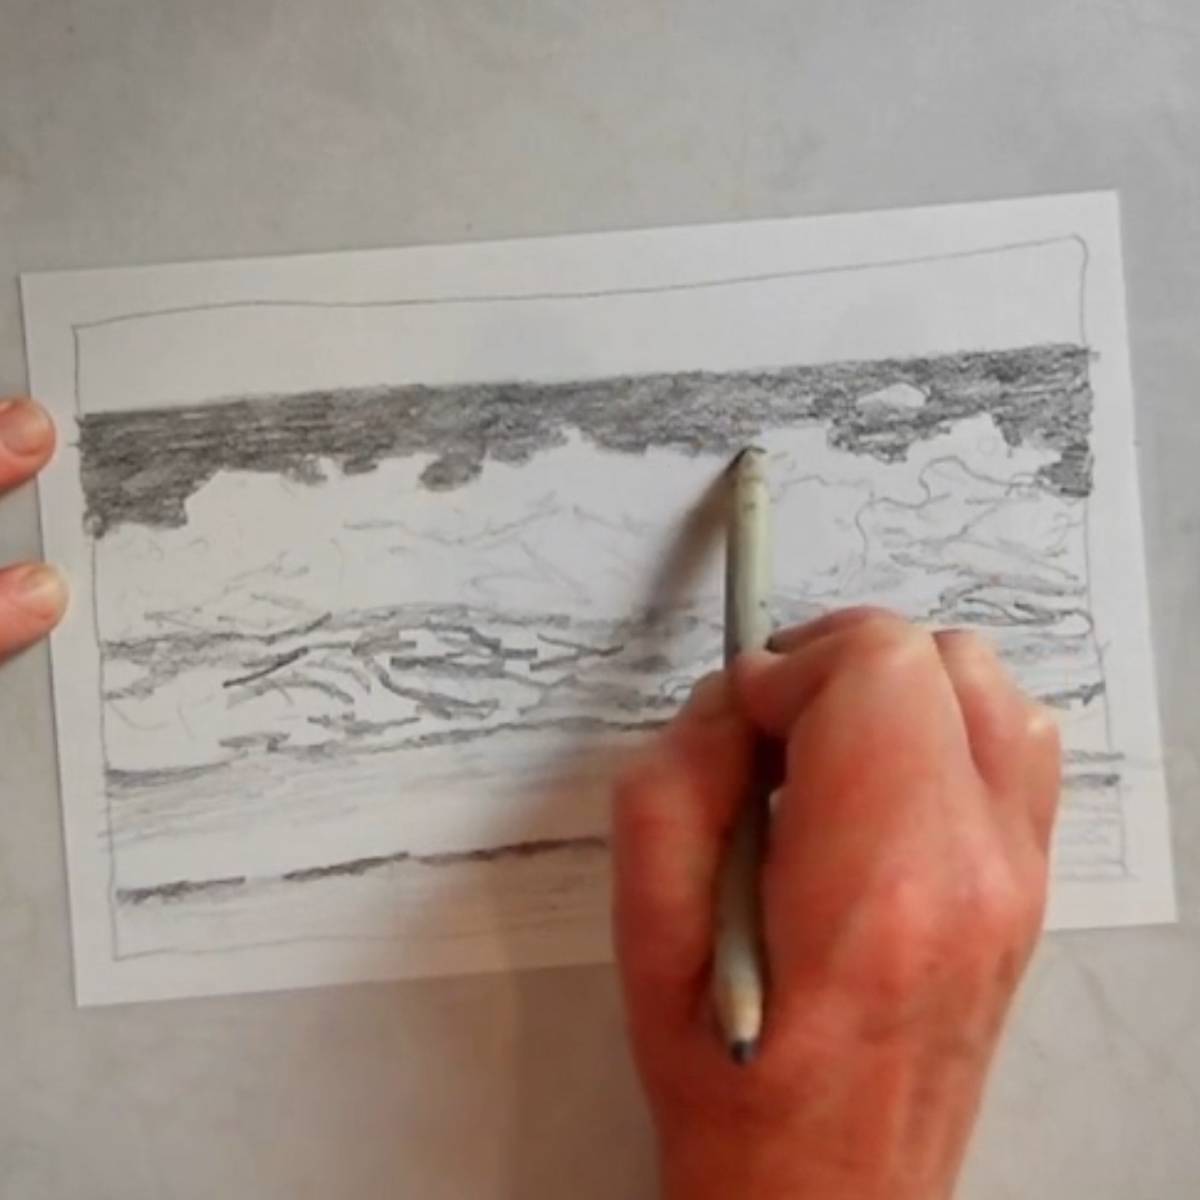
- Leave the large wave white for now. Below the wave, add some areas of shading. Draw in irregular strips of shading, wrapping some of them around in wave or circular patterns. Leave some areas white where light is reflecting off the water.
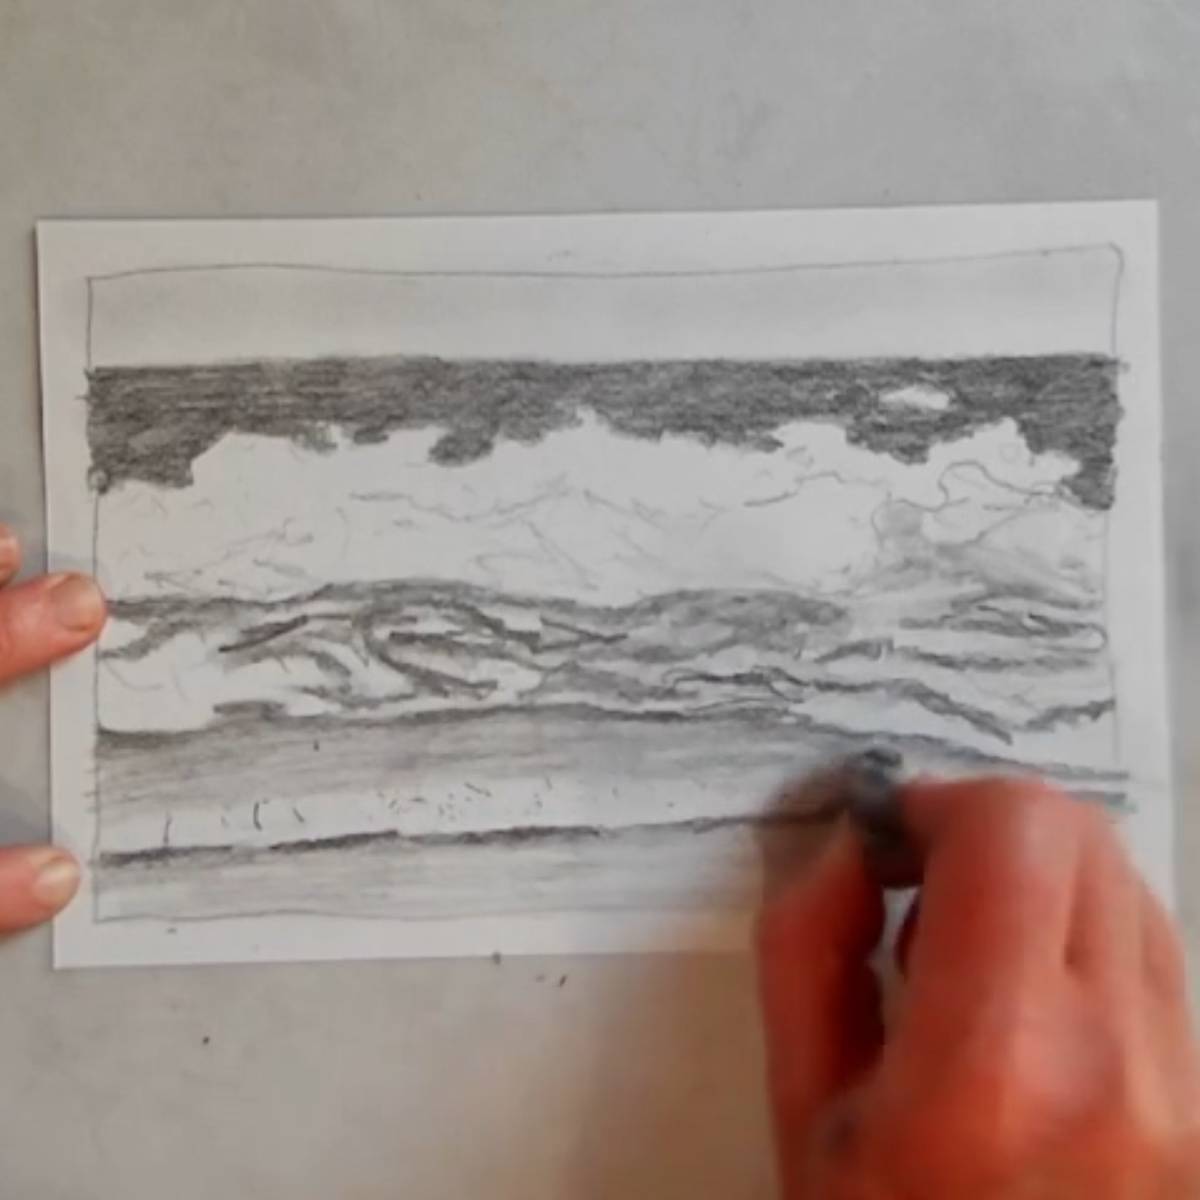
- Draw broken and irregular lines along the edges where the waves meet land. Out with a gradual transition, leaving some white area before the last wave.
- Shade in the sand.
- Add some nice loose lines in the wave to indicate the direction that the water is going and some lights and darks. Use scumbling or “scribble hatching” on the top of the wave to indicate texture.
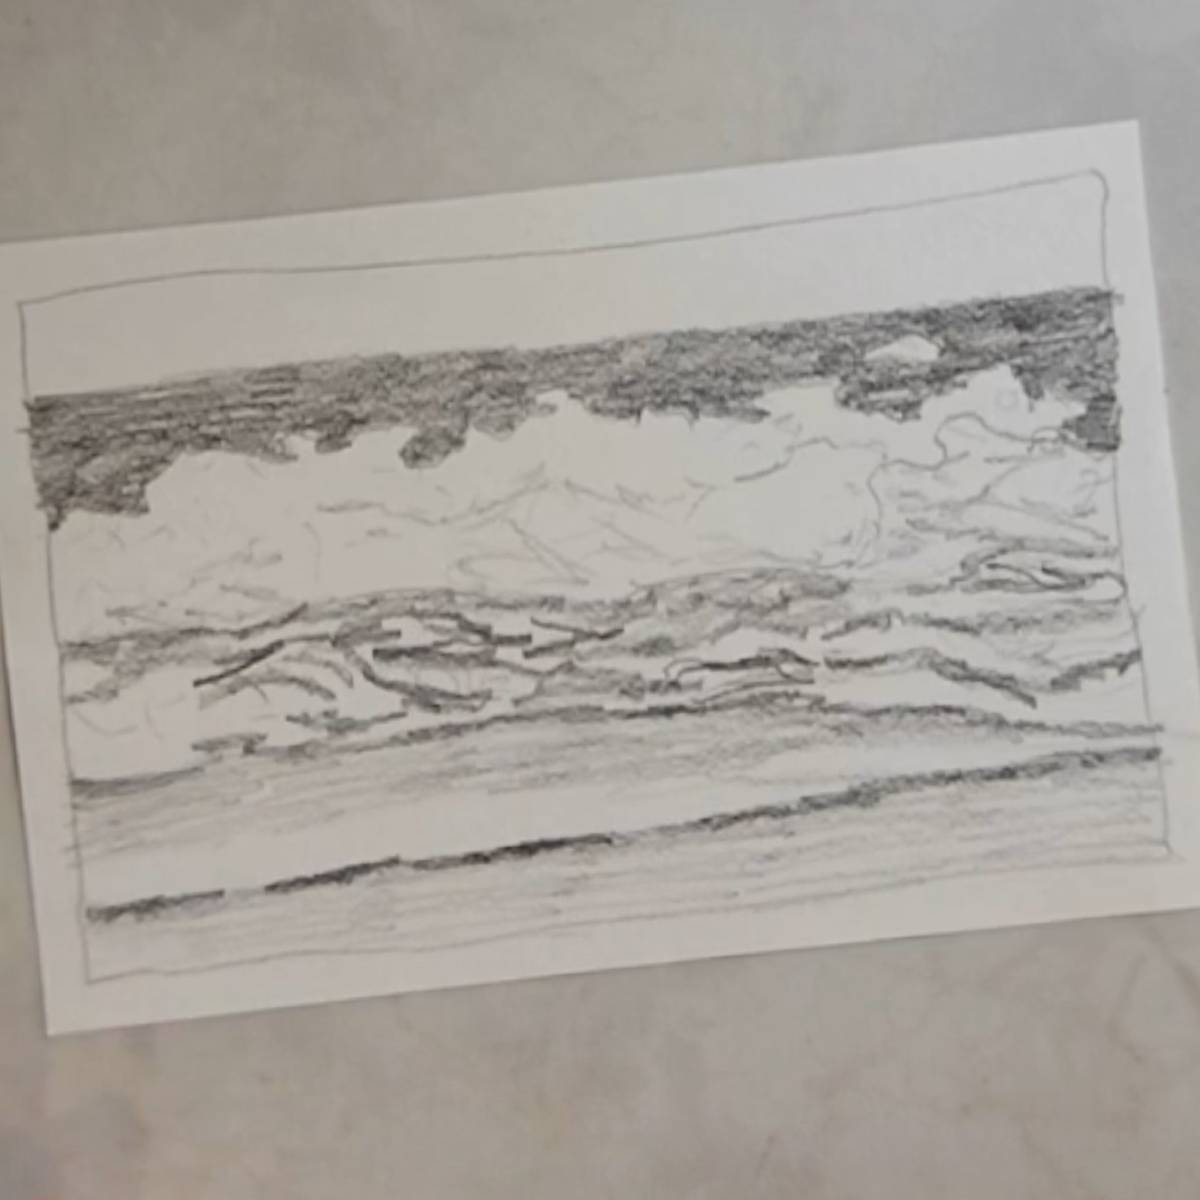
- Use a blending stump (or tissue, q-tip, or finger) to blend the dark area at the top just below the horizon.
- Drag a finger through that shading then drag it in the sky towards the top of the paper. The sky is always lighter at the horizon line.
- Blend the lines in the middle area under the wave to soften the darks. Also, blend the two waves that touch the shore to create a smooth transition between the darks and lights.
- Use an eraser to brighten up any areas that you want highlighted and clean up the edges of the drawing. Use a chip brush, if you like, to brush away the eraser dust.
Variations
- Draw the oceanscape with colored pencils.
- Sketch a boat or a people swimming within the seascape.
- Brush some watercolor paint into the drawing to add some color to your sketch.
- Try adding some color to the waves with soft pastels.

Tips and tricks
- Use a blending stick for more detailed blending (but you could also use a finger, rolled-up tissue, or a Q-tip).
- Follow this tutorial or refer to photos of the ocean until you have solidly learned the structure of waves and how to draw them.
- Make sure to leave some white areas where the top of the wave is and where light is reflecting off the water.
- When adding shading to the sky, remember that the sky is darker higher up and lighter at the horizon.
Detailed Instructions
Simple Ocean Drawing Tutorial (Easy Pencil Seascape Sketch)
Equipment
- 8B or other soft Pencil
- Paper - 70 pound / 115 gsm. drawing paper 6 x 9 inches (or use whatever you have on hand)
- White Vinyl Eraser
- Chip brush to brush off eraser dust
- Blending stump (or could use a finger, rolled-up tissue or a Q-tip)
Instructions
- Draw a border around the edge of the paper. Don’t worry if the lines are not very straight. It can help to keep your wrist straight and use your whole arm when drawing.
- Draw the bottom of the large wave about halfway down the paper.
- Divide the top half into thirds and draw lines across. The top line is the horizon line.
- Draw the second line down from the top with a lot of movement and waves because it is the top of the wave.
- In the bottom section, a little bit more than a third of the way down that section draw in a slightly wavy and down-angled line where one small wave meets the sand. Draw in a final line, slightly diagonally where the final wave meets the shore.
- There are multiple layers of waves.
- Shade in the area between the horizon line and the top of the wave.
- Leave the large wave white for now. Below the wave, add some areas of shading. Draw in irregular strips of shading, wrapping some of them around in wave or circular patterns. Make sure to leave some areas white where light is reflecting off the water.
- Draw a solid but irregular line along the edge where the first wave meets land and shade it. Out with a gradual transition, leaving some white area before the last wave.
- Draw an irregular and broken line across the last wave and then shade in the sand.
- Add some nice loose lines in the wave to indicate the direction that the water is going and some lights and darks. Use scumbling or “scribble hatching” on the top of the wave to indicate some texture.
- Add in a few more details and a little bit more scribble hatching below the top of the wave in the reflective area.
- Use a blending stump (or tissue, q-tip, or finger) to blend the dark area at the top just below the horizon.
- Drag a finger through that shading then drag it in the sky towards the top of the paper to add just a little bit of soft tone. Remember that the sky is always lighter at the horizon line.
- Blend the lines in the middle area under the wave to soften the darks. Also, blend the two waves that touch the shore to create a smooth transition between the darks and lights.
- Use an eraser to brighten up any areas that you want highlighted and clean up the edges of the drawing. Use a chip brush if you like, to brush away the eraser dust.
For More Practice
- Practice drawing a single wave.
- Try drawing several waves together to create an entire seascape.
- Try sketching waves that are at different angles to the shore.
- Draw the ocean in different types of weather conditions, still calm weather, stormy, rainy, sunny etc.
What to do with your sketch
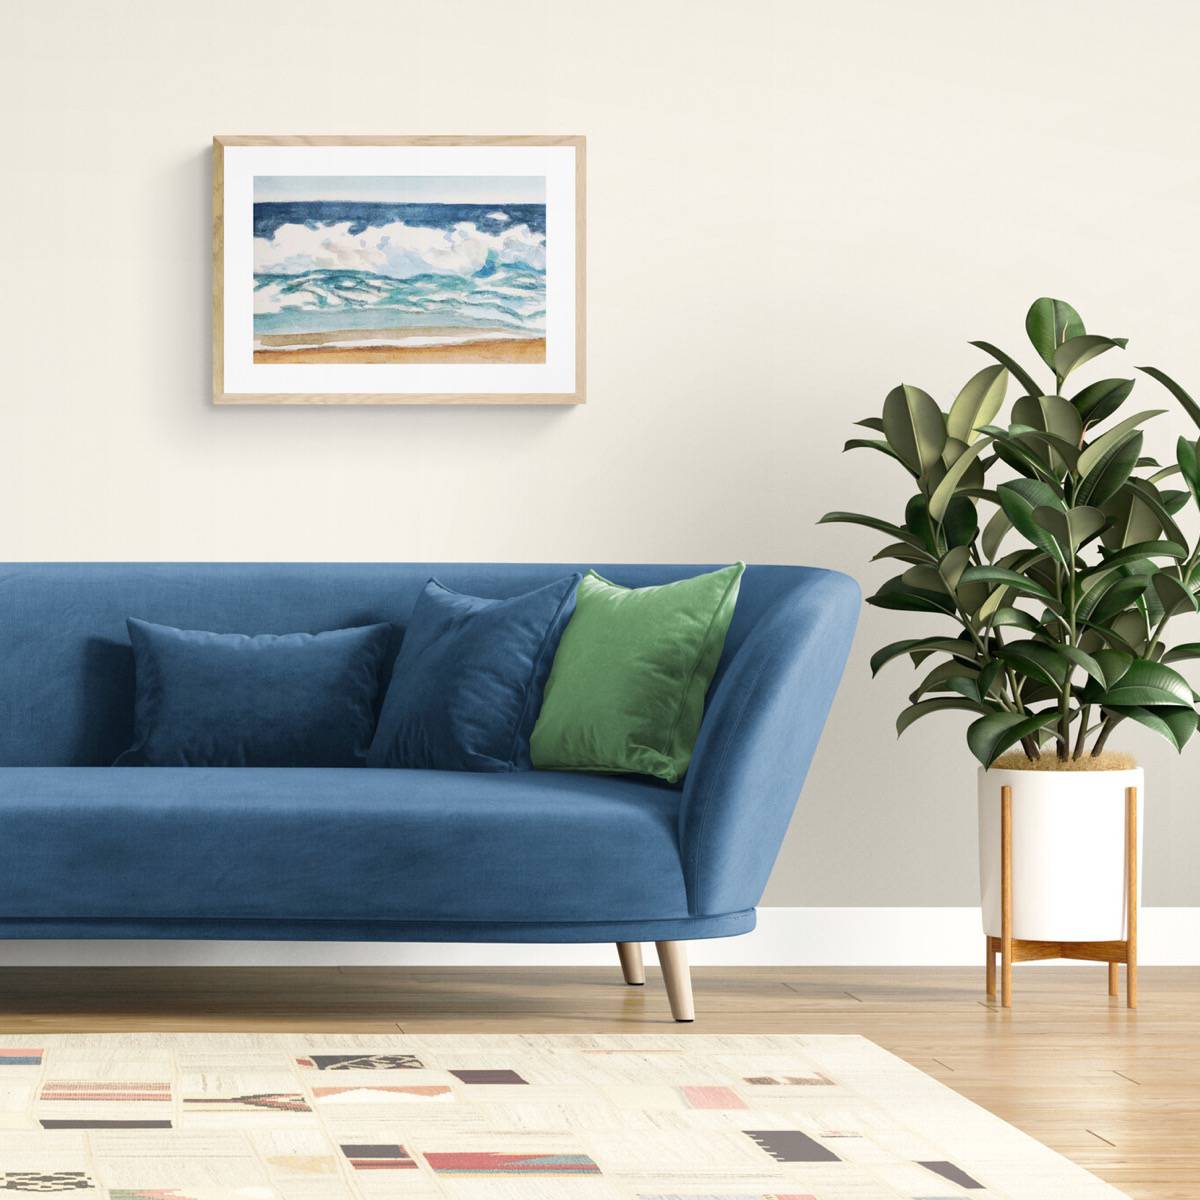
Frame your drawing and decorate your home with your seascape drawing. A hand-made drawing is a beautiful addition to any room.
You could also leave it in your sketchbook to create a portfolio of your completed drawings, sketches, and art projects.
Your sketch would also make a wonderful homemade gift for a special occasion such as Christmas, Hanukkah, or a birthday. Hand-drawn art makes a wonderful and thoughtful present.
Frequently Asked Questions
It helps to look at a photo of the ocean or follow this tutorial. Start by drawing in the tops and bottoms of the waves. Shade in the dark areas while leaving the highlighted areas white. Blend the shading for a smooth texture.
The trick to drawing realistic waves is to be patient and take your time with the drawing. Make sure to leave the tops of the waves and the reflective areas of the water white. Blend the shading a bit to get a smooth transition between lights and darks.
Start by drawing in the tops and bottoms of the waves. Shade in the dark areas while leaving the highlighted areas white. Blend the shading for a smooth texture. It can help to look at a photo of the ocean while you are drawing. Take your time while practicing, it will probably take many attempts to learn how to draw an ocean or seascape well.
You also might like
- Paint a simple watercolor pumpkin
- Learn about scribble hatching and other drawn lines
- Draw a simple mountain landscape
- Sketch an easy oak tree with pencil
- Draw a simple Thanksgiving turkey
Please leave your questions, comments, and ratings below!


Jennifer says
Perfect way to draw the ocean. Great drawing practice.