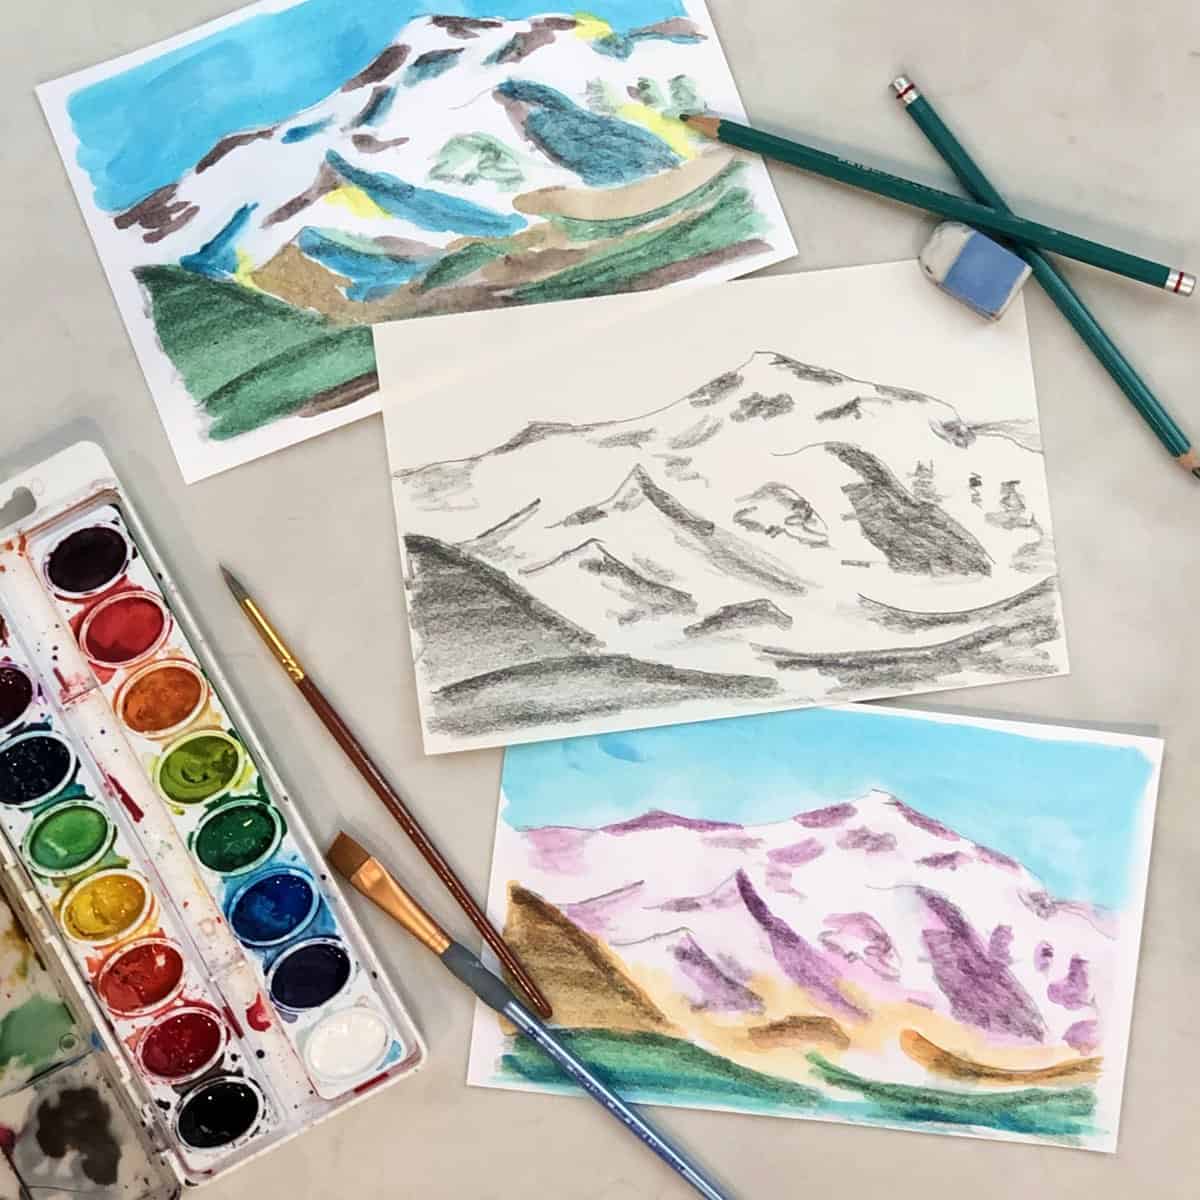
Learn how to draw an easy mountain landscape in this video tutorial. Just follow along with the simple step by step directions in this art lesson!
Drawing this craggy mountaintop is a perfect tutorial for beginners and it is fun and simple. With just a pencil and paper you will be drawing a realistic mountain in no time.
Jump to:
Mountains might seem difficult to sketch but with just a little bit of practice and patience you can easily draw a mountain scene. Learning how to draw a mountain peak is quick (and painless, aside from paper cuts) with this online art school class.
Whether it is a single towering mountain, a snow covered summit, or a sprawling mountain range this lesson will help you begin your artistic journey. Keep practicing your drawing and painting skills to learn new techniques and use what you already know.
Materials
The materials needed for this lesson are very simple, you probably have them on hand already:
- Pencil
- Paper (Drawing paper is best but you can use whatever you have available. I am using a 5.5 x 8.5 inch spiral bound sketchbook with 60lb paper)
Video Tutorial
Transcript
Read TranscriptCharacteristics of Mountains
Understanding the basic structure and organization of mountains is important when it comes to drawing or painting these summits.
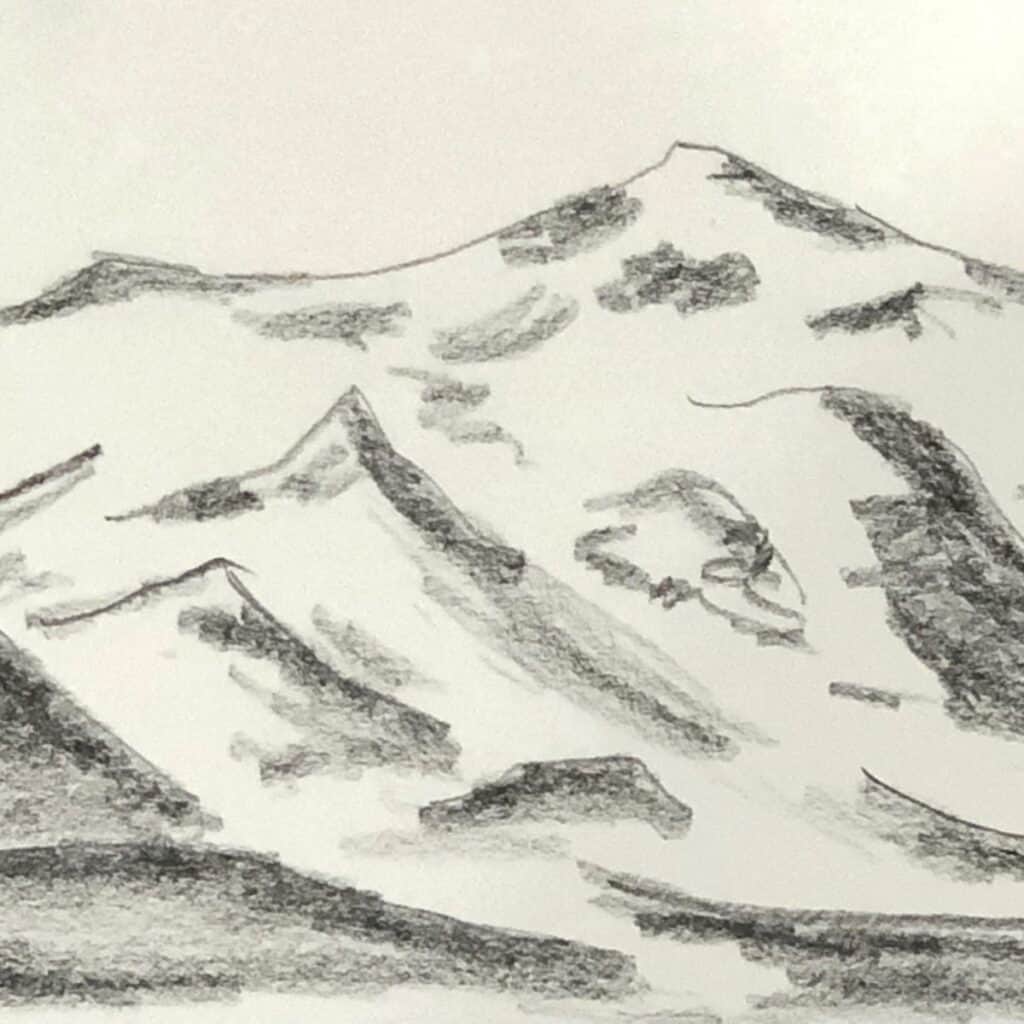
- Mountains are generally a triangle shape
- Think about the texture, rocky mountains are sharp and jagged, tree or grass covered mountains may have a softer silhouette
- Depending on where the light is coming from, one side of the ridge is usually darker and one side is lighter
- Mountains are most often found together, connected to one another in mountain ranges and overlapping
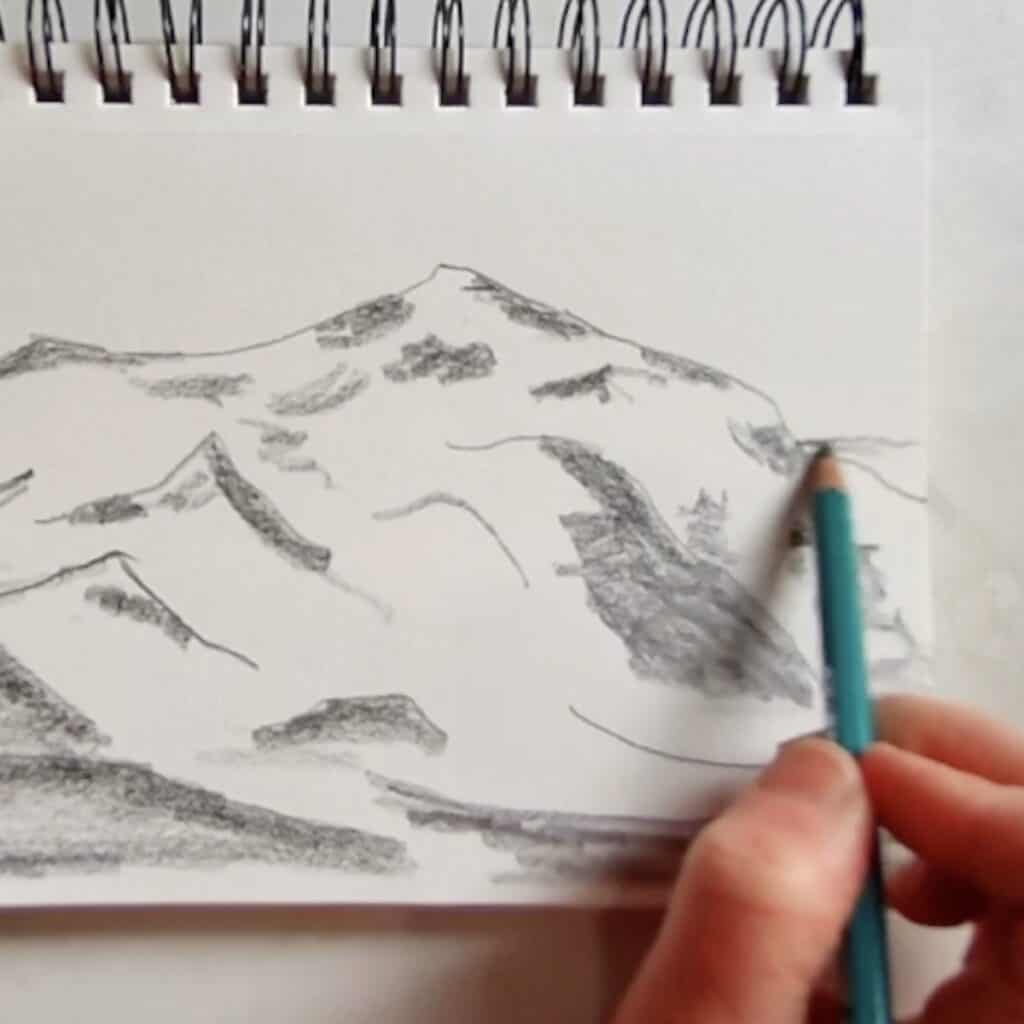
How to Draw a Mountain Step by Step
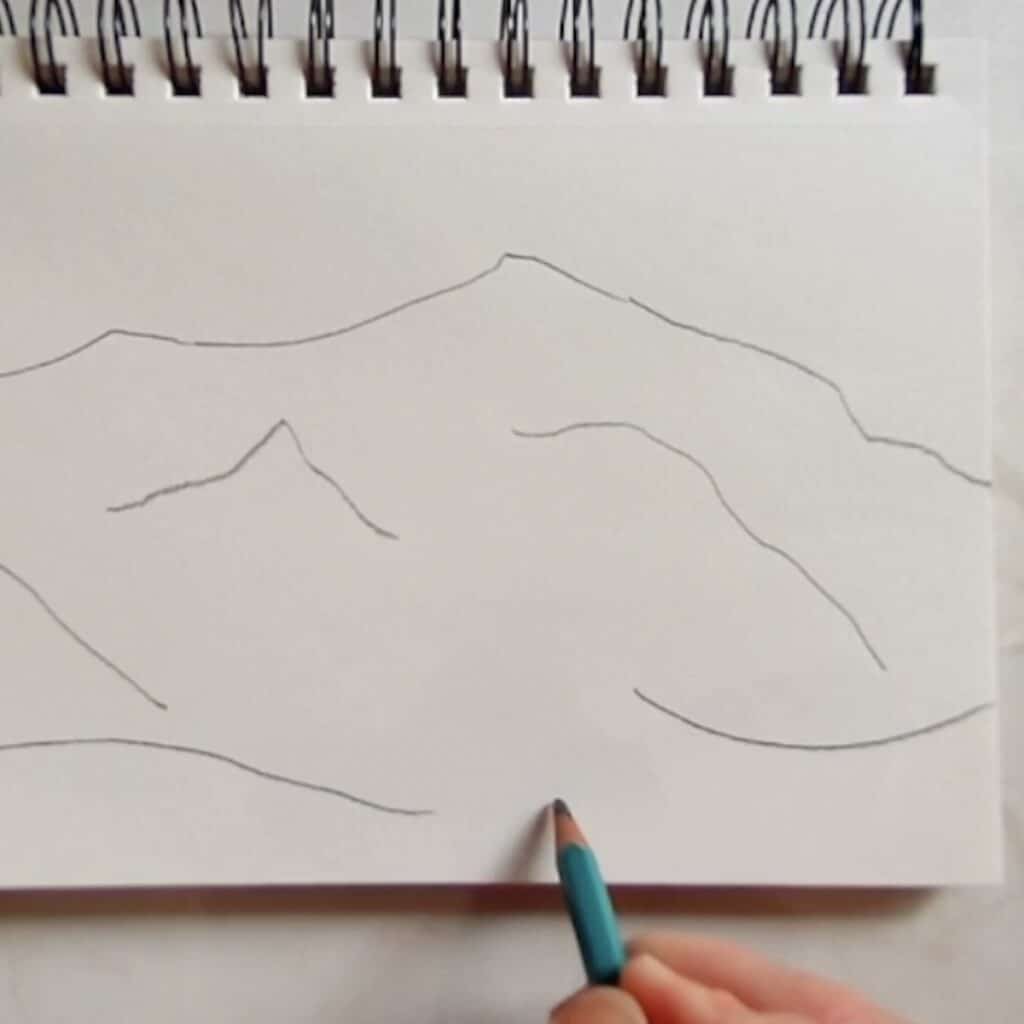
- Begin by roughly sketching in the outline of the mountain. It is helpful to look at an actual picture of a mountain if you are not drawing along with the video.
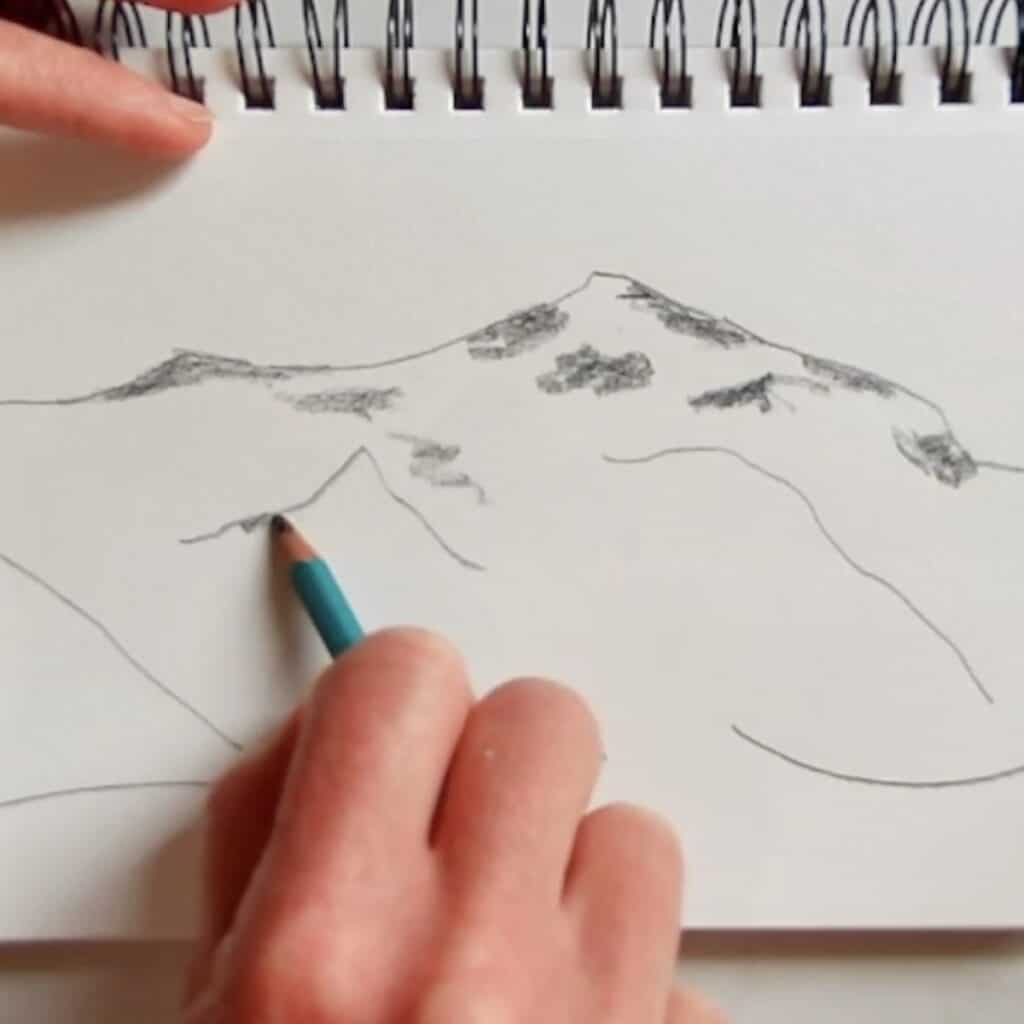
- Then add some dark values. Turn your pencil on the side and push down from the top to add a lot of value quickly.
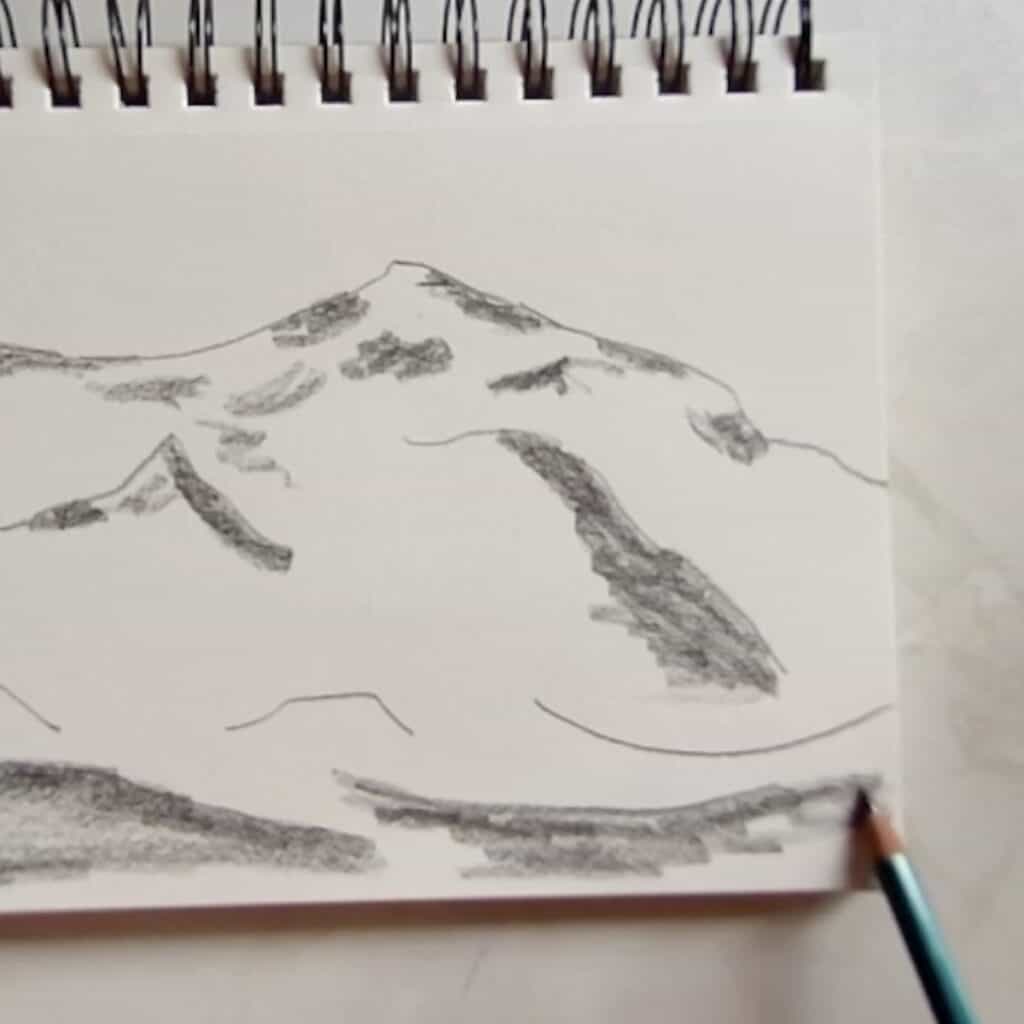
- Determine where the whites and lights values will be. Leave these the color of the paper.
- Lastly go back through the entire drawing to add more detail and fine tune your image. Add more darks as needed. You can also erase any lines that seem out of place
- Look at your drawing overall. Is it believable and fairly accurate? Is there enough contrast (difference between lights and darks)? Is there enough detail with out adding too much?
Variations
- Try adding in plants, trees, people, or rustic shacks into to your mountain scene. Place these additions in background further away with a light sketchy quality.
- To add snow to your mountain peak, leave some spots white.
- If you place them in the foreground you will want to add more detail. Look at a picture for reference of what you are actually drawing.
- Drawing a mountain seen from your own photo is another great way to practice your drawing skills.
- You could also challenge yourself by using a different drawing material such as pen and ink or even charcoal.
Tips and tricks
- Turn your pencil on the side and push from the top to shade a lot of area quickly.
- Create a sense of 3 dimension by including some very dark values. Add these in the foreground and closer to the viewer. Dark values will come toward the audience while light values will appear to be further away.

How to Draw a Mountain Landscape Easy
Materials
- Pencil
- Paper Drawing paper is best but you can use whatever you have available. I am using a 5.5 x 8.5 inch spiral bound sketchbook with 60lb paper
Instructions
- Begin by roughly sketching in the outline of the mountain.
- It is helpful to look at an actual picture of a mountain if you are not drawing along with the video.
- Then add some dark values. Turn your pencil on the side and push down from the top to add a lot of value quickly.
- Determine where the whites and lights values will be. Leave these the color of the paper.
- Lastly go back through the entire drawing to add more detail and fine tune your image. Add more darks as needed. You can also erase any lines that seem out of place
- Look at your drawing overall. Is it believable and fairly accurate? Is there enough contrast (difference between lights and darks)? Is there enough detail with out adding too much?
Notes
What to do with your sketch
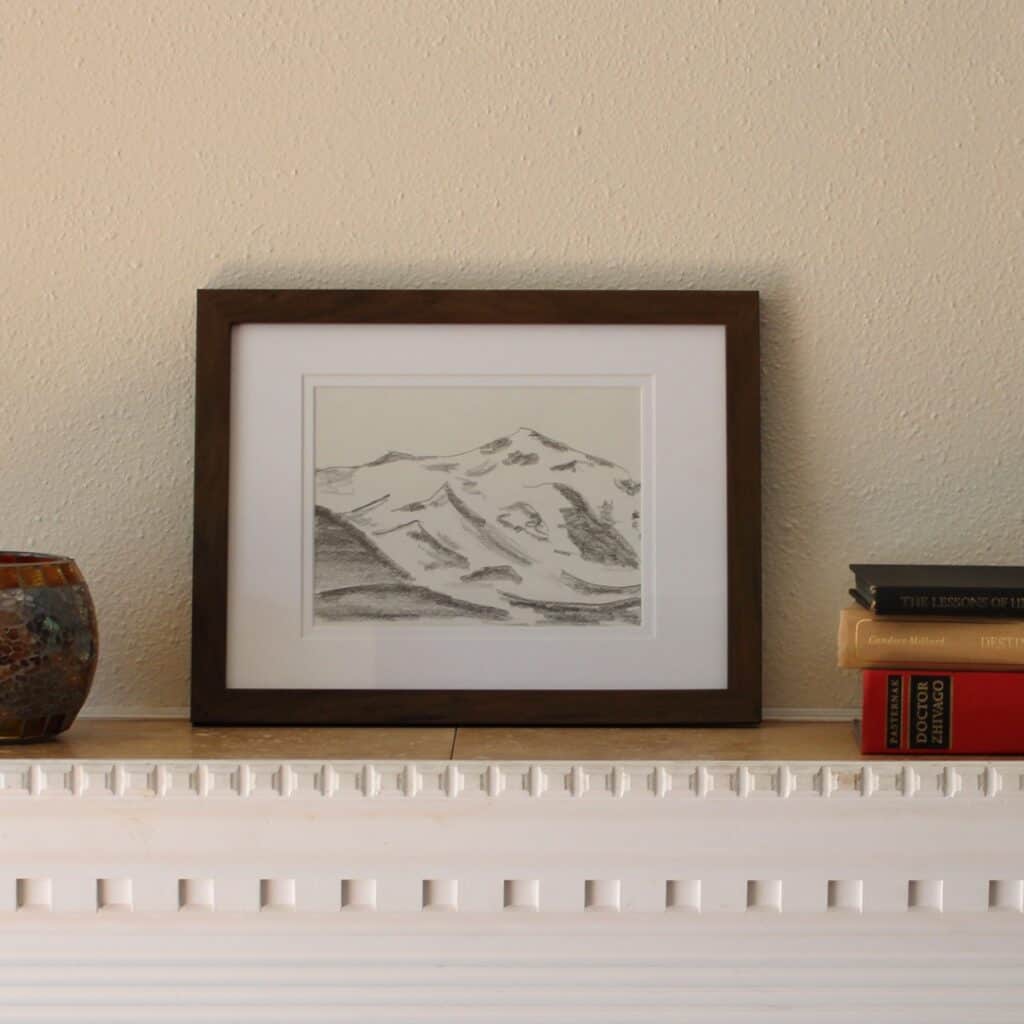
Your completed sketch also makes a great decoration for your home or a beautiful gift.
You can also leave your drawing in your sketchbook. When combined with other drawings it makes a great portfolio or archive of your skill and progress.
Frequently Asked Questions
Draw a mountain peak by sketching in the outline of the peak and hilltops. Then shade in the dark areas leaving the white colors the color of the paper. Lastly, add more detail and more lights and darks where needed.
Treat different surfaces of the mountain differently to add texture. The snow, rocks, dirt, trees and greenery all might have a different texture. Use different shading techniques to imply this varied difference in surface quality. Use hatching, cross hatching, stippling, scribbles or simple shading to indicate different texture.
Plants, trees, people, and houses, barns or rustic shacks can all be added to your mountain scene. Place these additions in background further away with a light sketchy quality. If you place them in the foreground you may want to add more detail so look at a picture for reference of what you are actually drawing.
To make your mountain more realistic look at a photo while you are drawing. Slow down and take your time. Look at the overall drawing for shapes and lights and darks. Don’t focus too much on small details. Practice makes perfect.
You also might like
- How to Draw a Realistic Rose Step by Step with Pencil
- How to Draw a 3d Cylinder (Tube) with Shading
- How to Draw a 3d Cube Step by Step with Shading
- Draw a Simple Ocean Scape Drawing Tutorial
- Watercolor Paint an Easy Lake Scene for Beginners
Please leave your ratings, questions and comments below!

Sharon says
Such a nice landscape. It was very easy and relaxing to draw. Thanks.