Learn how to draw a pear step by step in this easy art tutorial. Practice drawing a pear and discover how to shade it, with simple easy steps, perfect for beginners or more advanced artists.
Drawing a pear is a simple and beautiful way to improve your drawing skills and practice shading and shaping techniques. Become a better artist by training your hand and eyes to work together to draw objects or still lives that you see.

Jump to:
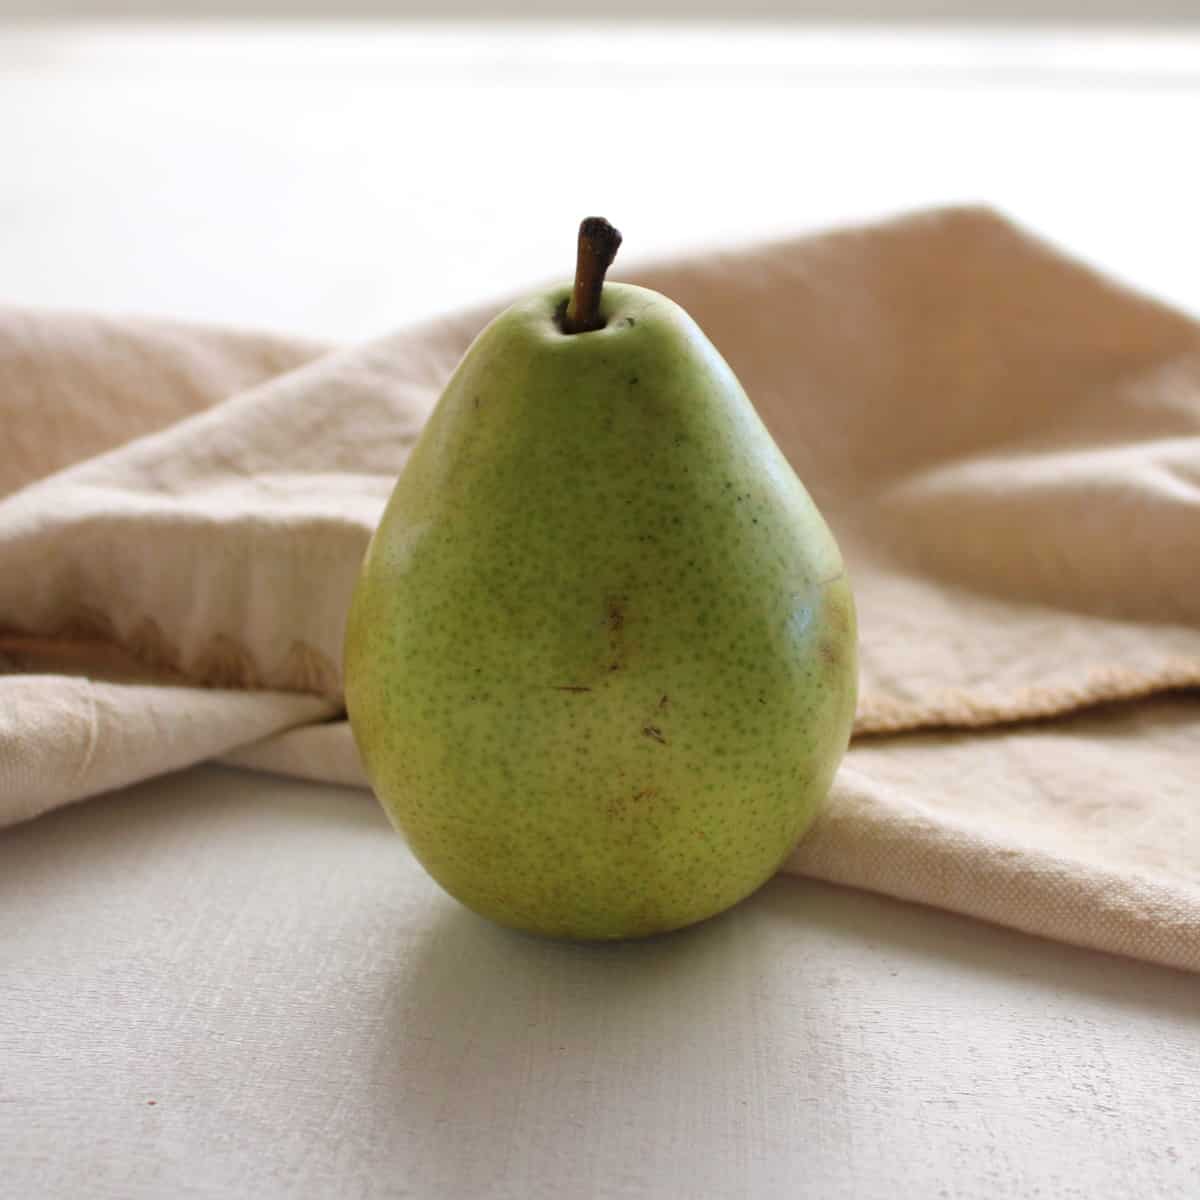
It can be helpful to learn how to draw a single pear before drawing several pears or a bowl of fruit. It is important to understand the shape, the way that light hits it, and how to draw what you actually see when drawing a pear or other object.
Exploring the details and nuances of how to draw a pear is fun and uplifting.
Follow along in this online art lesson to learn the best way to draw a pear. Practice sketching the basic pear shape, shading in the darker areas, and blending it all together.
Materials
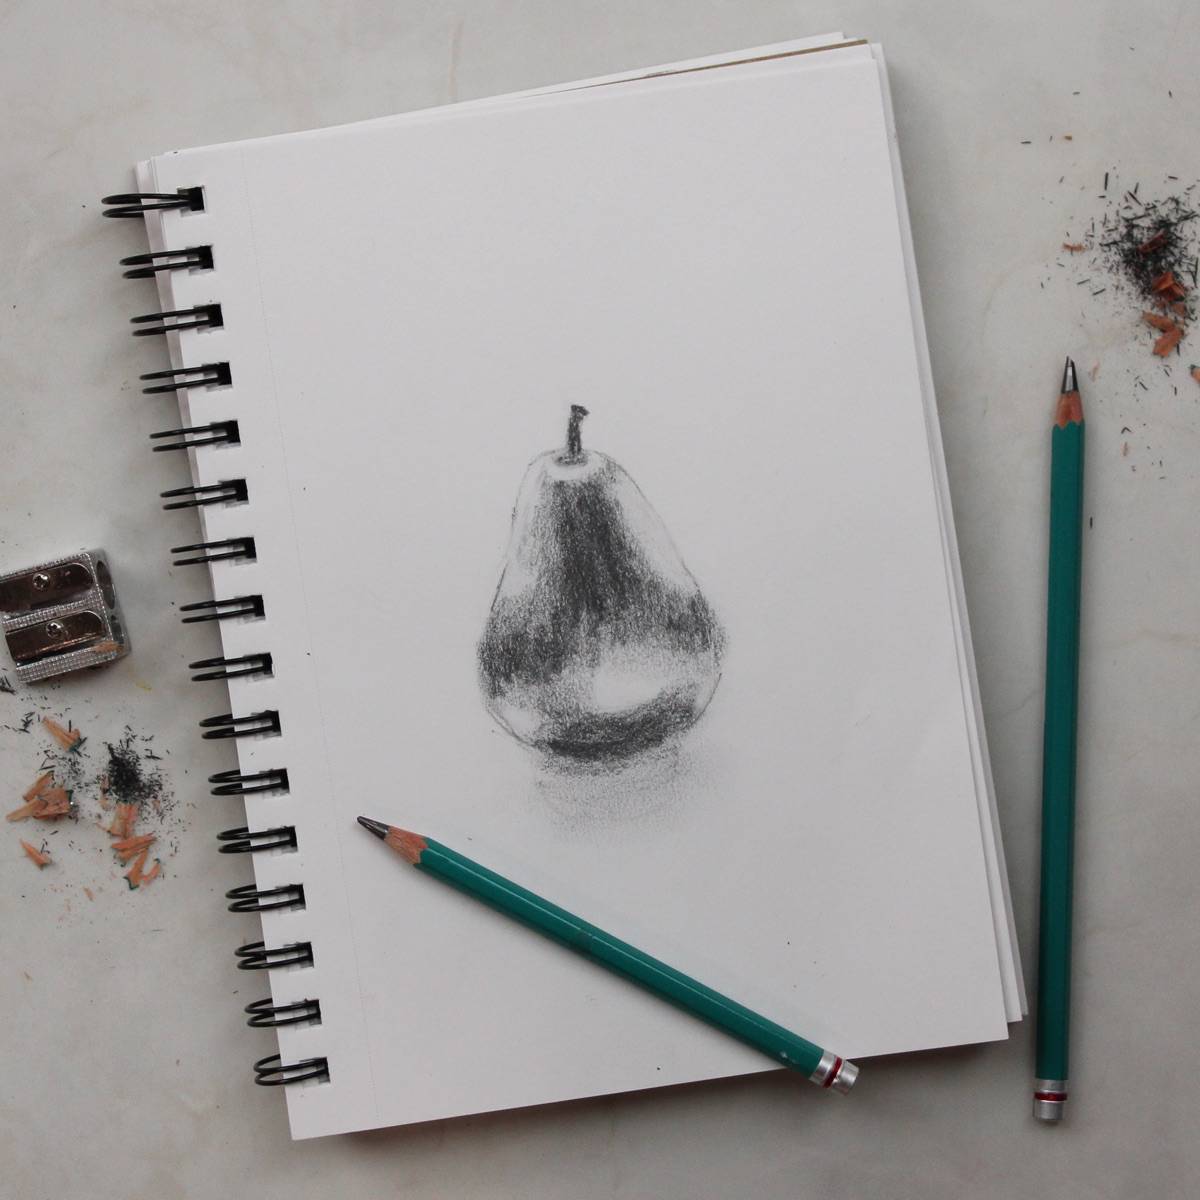
- Paper (Drawing paper is best but you can use whatever you have available. I am using a 5.5 x 8.5-inch spiral-bound sketchbook with 60lb paper)
- Pencil - use a soft pencil for the shading (a 7B, 8B, or 9N will be best, the higher the number the softer the pencil) and a hard pencil for the lines (H is good for this) or just use whatever pencil you have
- Eraser - white vinyl or other
- Brush - 2-inch chip brush for brushing away eraser dust, optional
Video (Drawing a Pear)
Transcript
Read TranscriptHow to Draw a Pear Step by Step
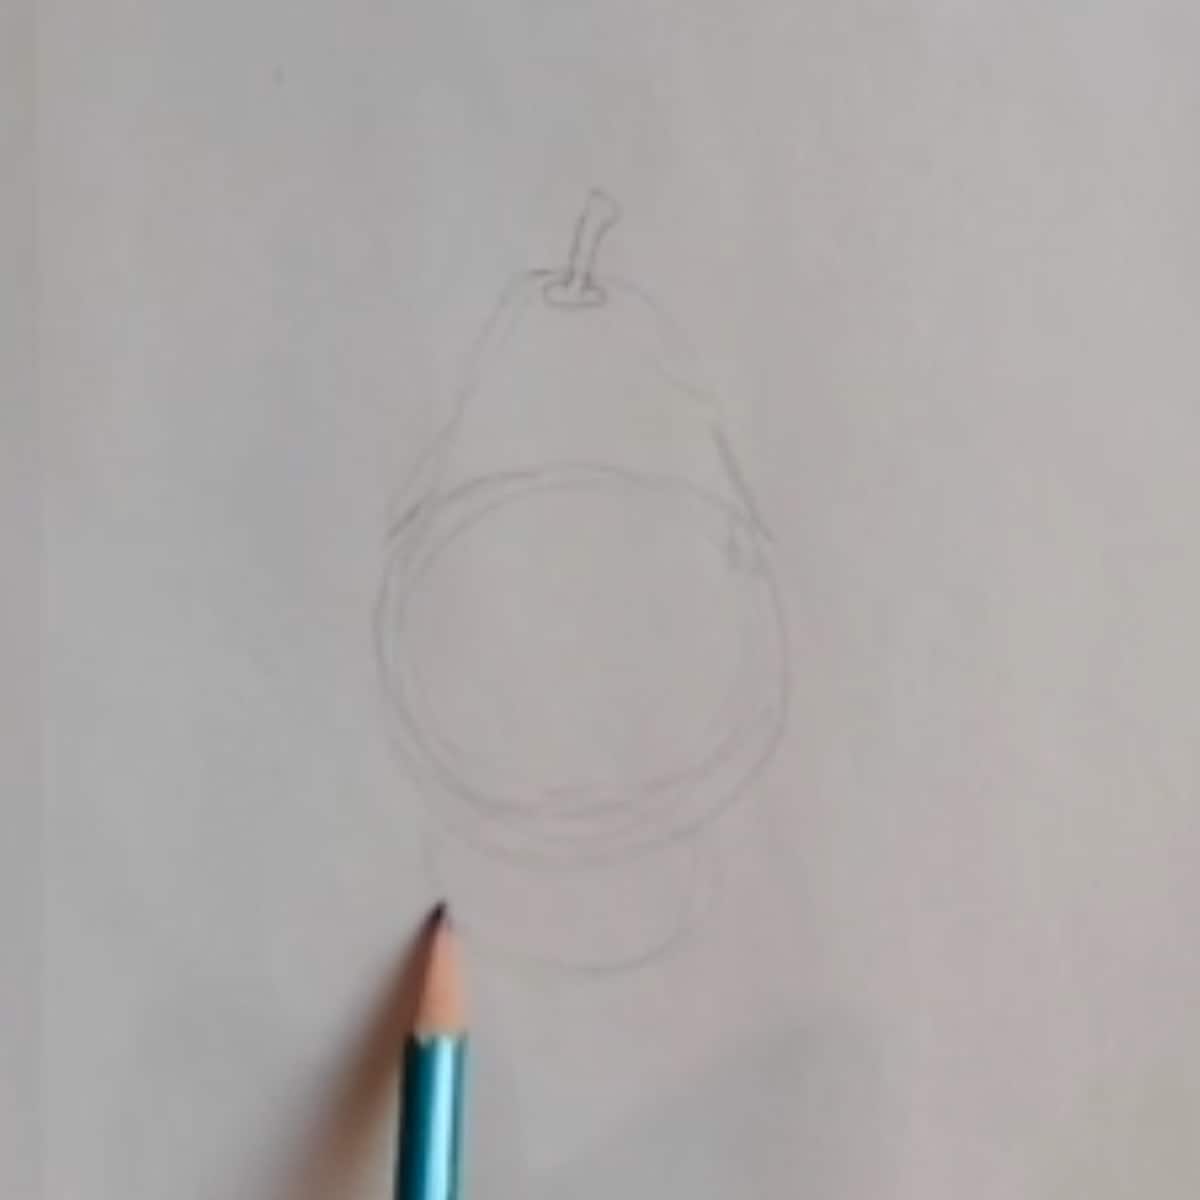
- Using the hard pencil mark the top and bottom of the pear.
- Draw a guide line down the center of the pear if you want.
- Sketch in a sphere for the bottom of the pear.
- Draw in the top of the pear. Look at the photo or a real pear to get the shape correct. It might not be perfectly symmetrical. This is ok, fruit often is asymmetrical. Your drawing will be more realistic if you include this and other imperfections.
- Sketch in the stem.
- Lightly draw in the shadow area.
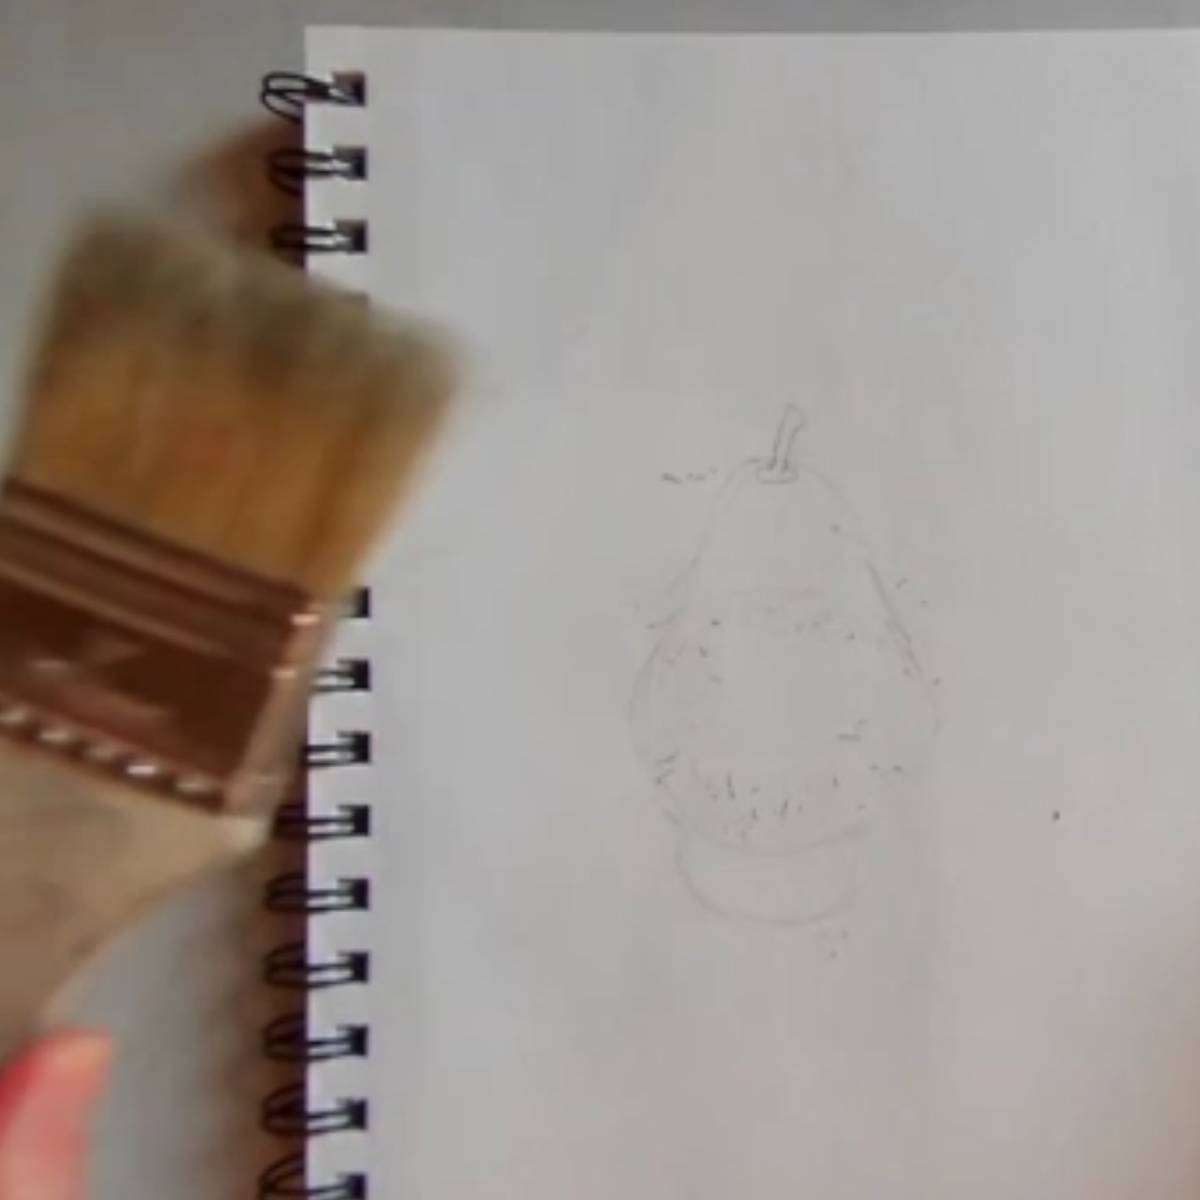
- Erase the guidelines that you don't need. Use the brush to sweep away any eraser dust.
- Look at the shape of your pear and make any adjustments to the lines or form.
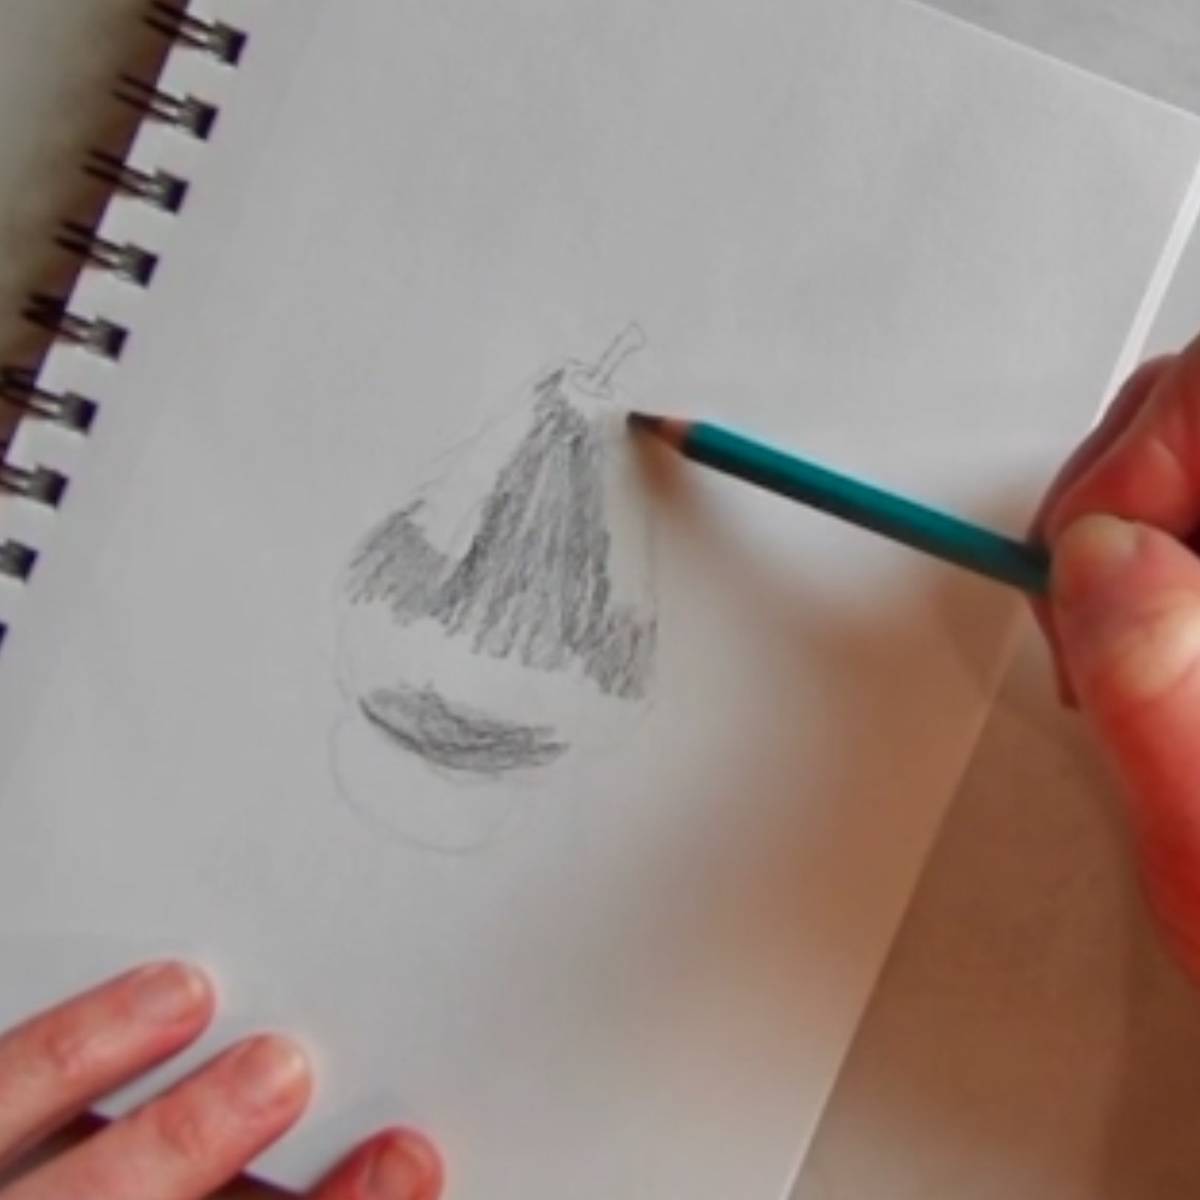
- Using the soft drawing pencil shade in the pear. Turn the paper as needed to make it easier.
- Shade the entire pear, starting with the darkest areas. Leave the lightest highlight areas white.
- Follow the contour of the pear along the sides and bottom.
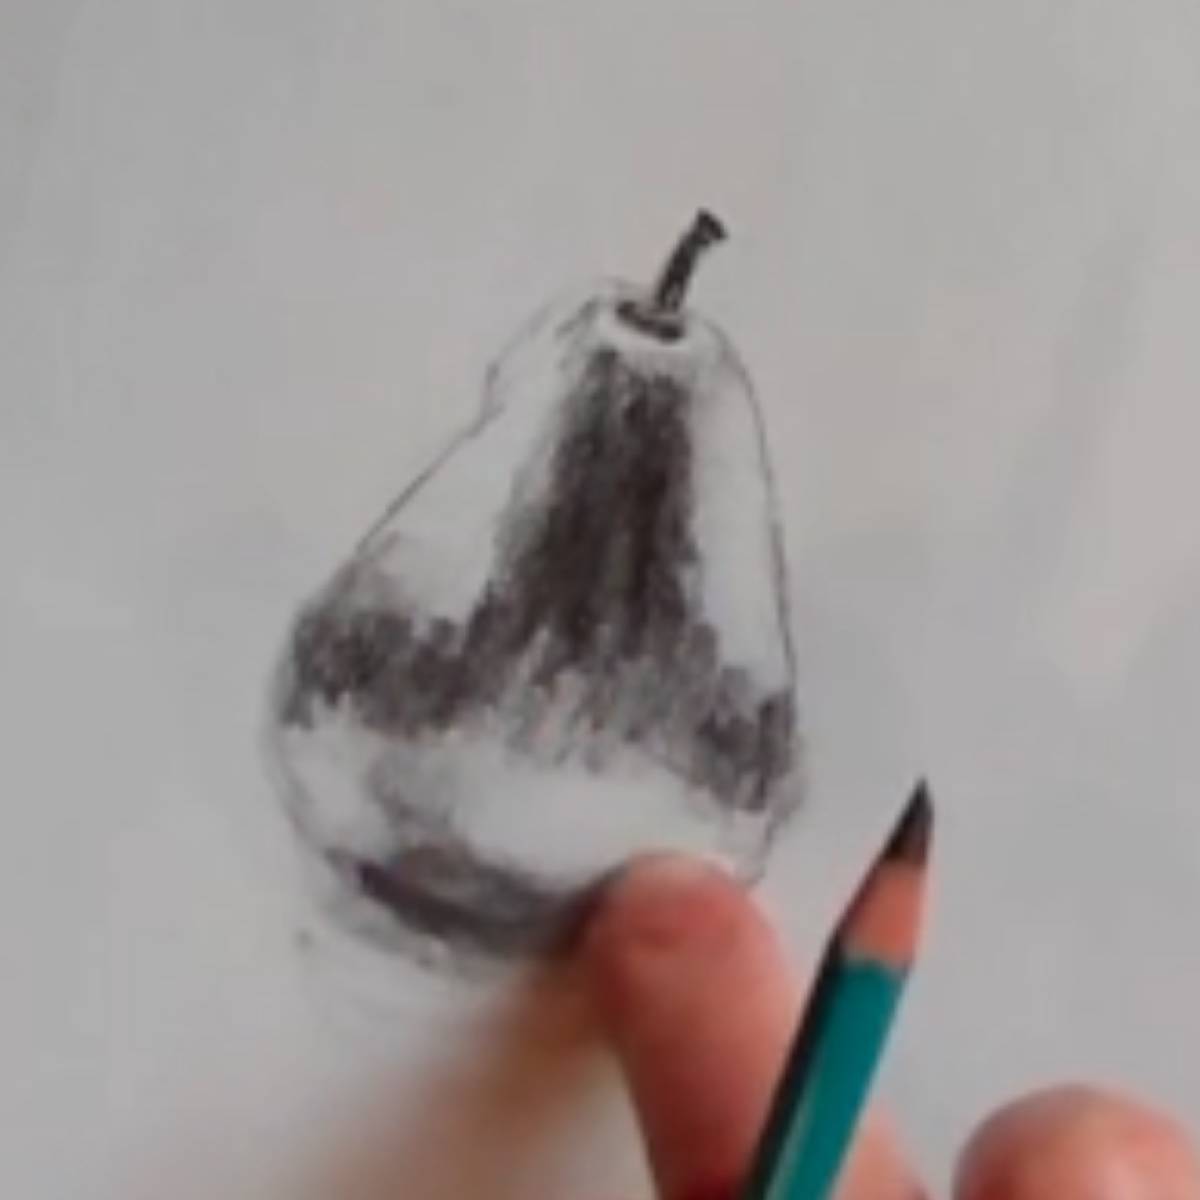
- Leave a small light spot on the left side of the stem near the bottom. Then shade the rest of the stem very dark.
- Shade in the oval-shaped depression at the base of the stem very dark. Immediately outside of the depression is a highlight, so leave that area white.
- Go over all the shaded areas again making them darker and creating contrast in the drawing.
- Shade in the shadow area under the pear with a very light tone.
- Use your finger to blend the shaded areas. This will help make nice soft shading over your pear and smooth the transitions between the dark and light areas.
- Fine-tune your drawing and shading as needed.
- Erase any highlighted areas that need to be a brighter white.
Variations for Drawing a Simple Pear
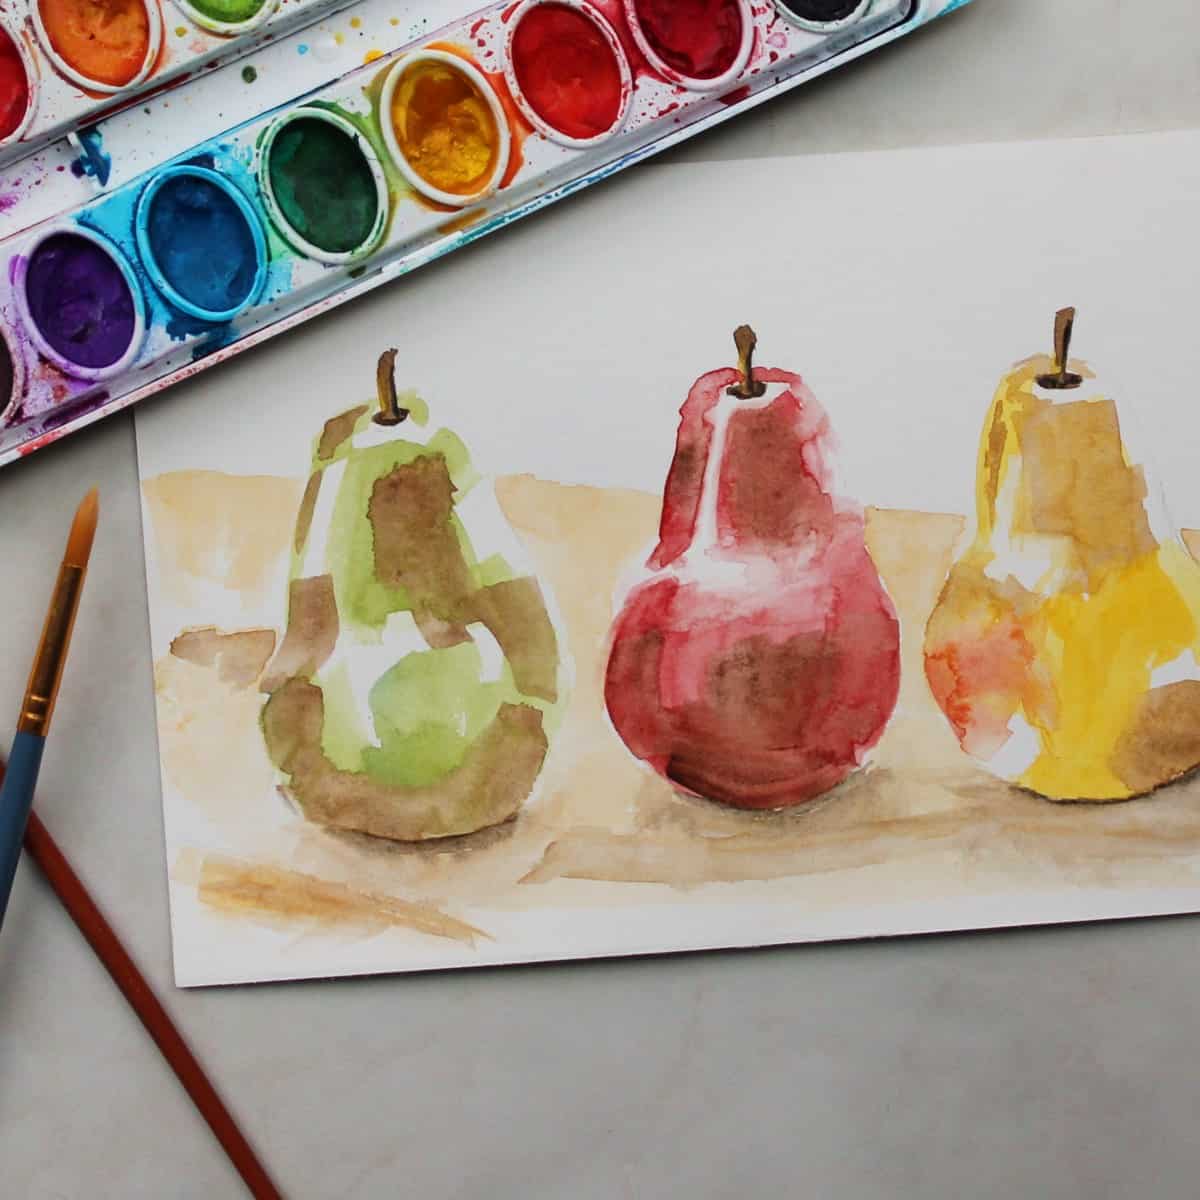
- Add color to your pear drawing by painting it with watercolor paint.
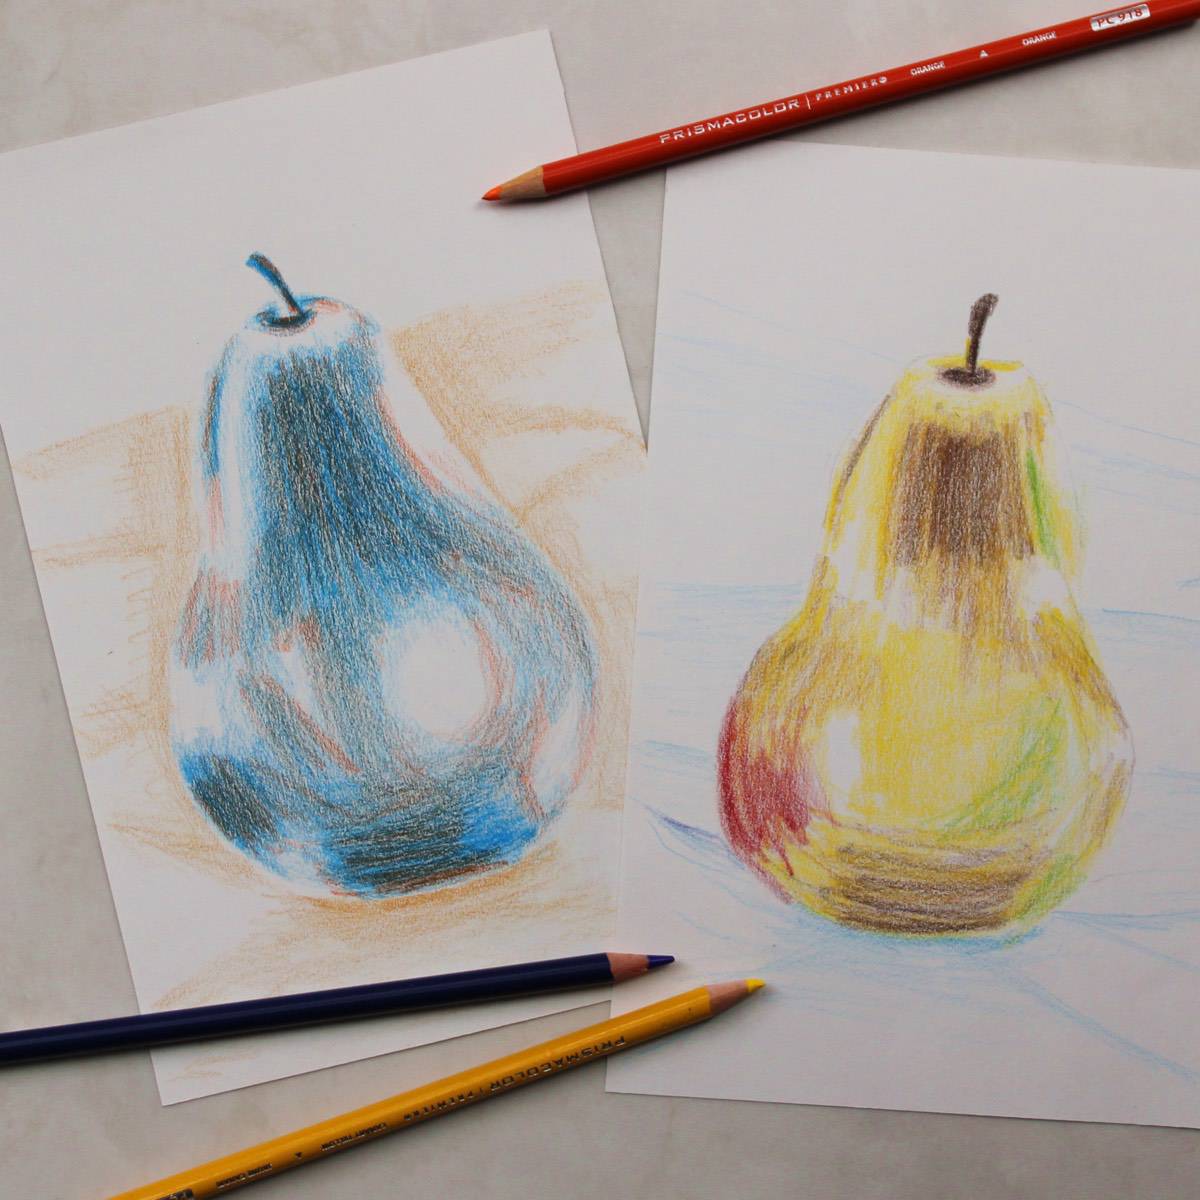
- Practice sketching the same pear with a variety of colored pencils.
- Add some background behind your pear. You could add walls, a tablecloth, windows etc. Use crosshatching to shade in the background.
Tips and tricks
- Make your initial sketch very light so the lines are easy to erase if not needed.
- The bottom of the pear is round so you can sketch it in like a sphere.
- Work across the entire drawing all at once. Don’t just focus on one small area at a time.
- Use the H pencil for the sketch and the softer 7, 8, or 9B pencil for shading.
- If you want, use your finger to gently blend the shading.
How to Draw a Pear (Sharable Directions)
How to Draw a Pear Step by Step
Equipment
- Paper (Drawing paper is best but you can use whatever you have available. I am using a 5.5 x 8.5 inch spiral bound sketchbook with 60lb paper)
- Pencil - use a soft pencil for the shading (a 7B, 8B, or 9N will be best, the higher the number the softer the pencil) and a hard pencil for the lines (H is good for this) or just use whatever pencil you have
- Eraser - white vinyl or other
- Brush - 2-inch chip brush for brushing away eraser dust, optional
Instructions
- Using the hard pencil mark the top and bottom of the pear.
- Draw a guide line down the center of the pear if you want.
- Sketch in a sphere for the bottom of the pear.
- Draw in the top of the pear. Look at the photo or a real pear to get the shape correct. It might not be perfectly symmetrical. This is ok, fruit often is asymmetrical. Your drawing will be more realistic if you include this and other imperfections.
- Sketch in the stem.
- Lightly draw in the shadow area.
- Erase the guidelines that you don't need. Use the brush to sweep away any eraser dust.
- Look at the shape of your pear and make any adjustments to the lines or form.
- Using the soft drawing pencil shade in the pear. Turn the paper as needed to make it easier.
- Shade the entire pear, starting with the darkest areas. Leave the lightest highlight areas white.
- Follow the contour of the pear along the sides and bottom.
- Leave a small light spot on the left side of the stem near the bottom. Then shade the rest of the stem very dark.
- Shade in the oval-shaped depression at the base of the stem very dark. Immediately outside of the depression is a highlight, so leave that area white.
- Go over all the shaded areas again making them darker and creating contrast in the drawing.
- Shade in the shadow area under the pear with a very light tone.
- Use your finger to blend the shaded areas. This will help make nice soft shading over your pear and smooth the transitions between the dark and light areas.
- Fine-tune your drawing and shading as needed.
- Erase any highlighted areas that need to be a brighter white.
Notes
Lesson Downloads
For More Practice
- Draw a pear and use crosshatching to shade it in.
- Sketch several pears together. Can you draw them in overlapping positions?
- Set up your own still life with pears or other fruit and try drawing what you see.
- Try drawing a pear with charcoal, colored pencils or pen and ink.
What to do with Your Pear Sketch
You can also frame your drawing and decorate your home. A hand drawn rose is a stunning addition to any room.
Your sketch would make a lovely homemade gift for Christmas, Hanukkah, birthdays, or any other special occasion. Hand-drawn art makes a wonderful and thoughtful present.
Another idea is to leave it in your sketchbook to create a portfolio of your completed drawings, sketches, and art projects.

Frequently Asked Questions
Mark the top and bottom of the pear. Sketch in a sphere for the bottom of the pear.
Draw in the top of the pear. Look at the photo or a real pear to get the shape correct. Sketch in the stem. Lightly draw in the shadow area.
Shade the entire pear, starting with the darkest areas. Leave the lightest highlight areas white. Shade the stem and the oval-shaped depression at the base of the stem very dark.
Go over all the shaded areas again making them darker and creating contrast in the drawing. Shade in the shadow area under the pear with a very light tone.
Use your finger to blend the shaded areas. This will help make nice soft shading over your pear and smooth the transitions between the dark and light areas.
Using the colored pencil color of your choice Mark the top and bottom of the pear. Sketch in a sphere for the bottom of the pear. Draw in the top of the pear. Sketch in the stem.
Shade in the darker areas with a darker colored pencil. Leave the highlights the color of the paper. Overlap different colors to develop more color and volume.
You also might like
- Crosshatching Drawing
- How to Draw a Sphere
- How to Draw an Easy Rose
- Learn all about Drawing Pencils
- How to Draw Autumn Leaves
Pleae leave your questions, comments, and ratings below!

Robbie says
Super easy way to draw a pear.