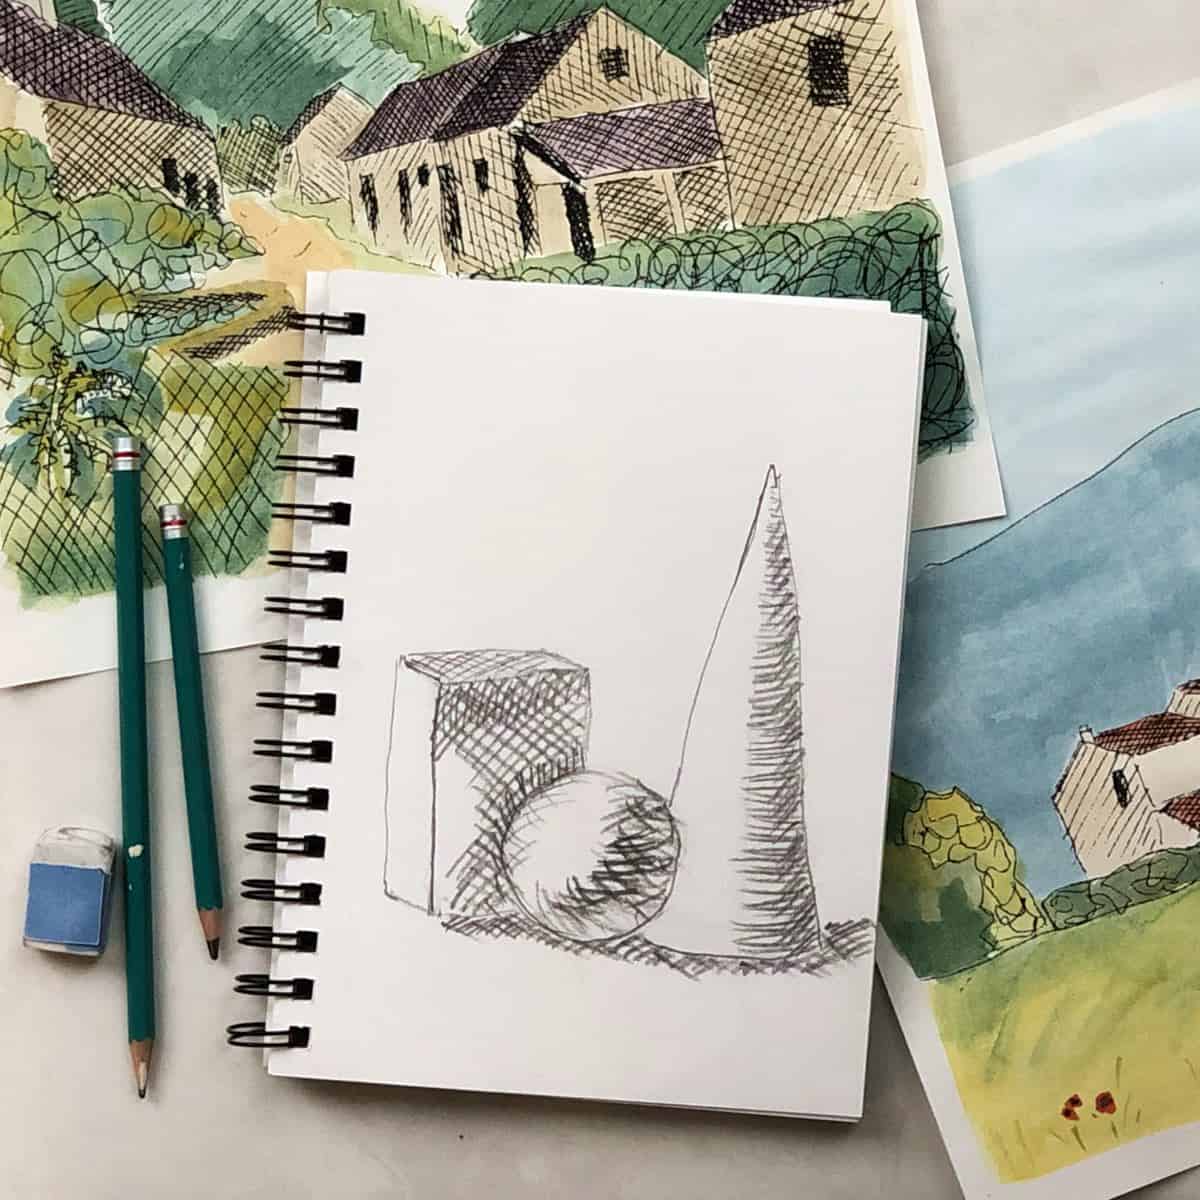
Learn how to create an easy drawing with crosshatching line technique in art in this online art lesson. Practice shading in a quick and easy still life using simple hatched lines. Draw with me in this quick step-by-step tutorial.
Cross-hatching is a method that uses sets of crossing parallel lines to quickly add value, shading, and texture to a drawing. In this lesson from my online art school, I show you how to use cross hatching.
Jump to:
While this tutorial focuses on using cross hatching in a quick still life, these techniques can be applied to any kind of drawing. It can be used in sketches, finished drawings, or even as an underpainting for watercolor or other mediums.
Crosshatching can be used for so much more than still lives. Try it in landscapes, portraits, figures, animals, cityscapes, abstract art, or even in mixed media.
Cross Hatching Lines in Art
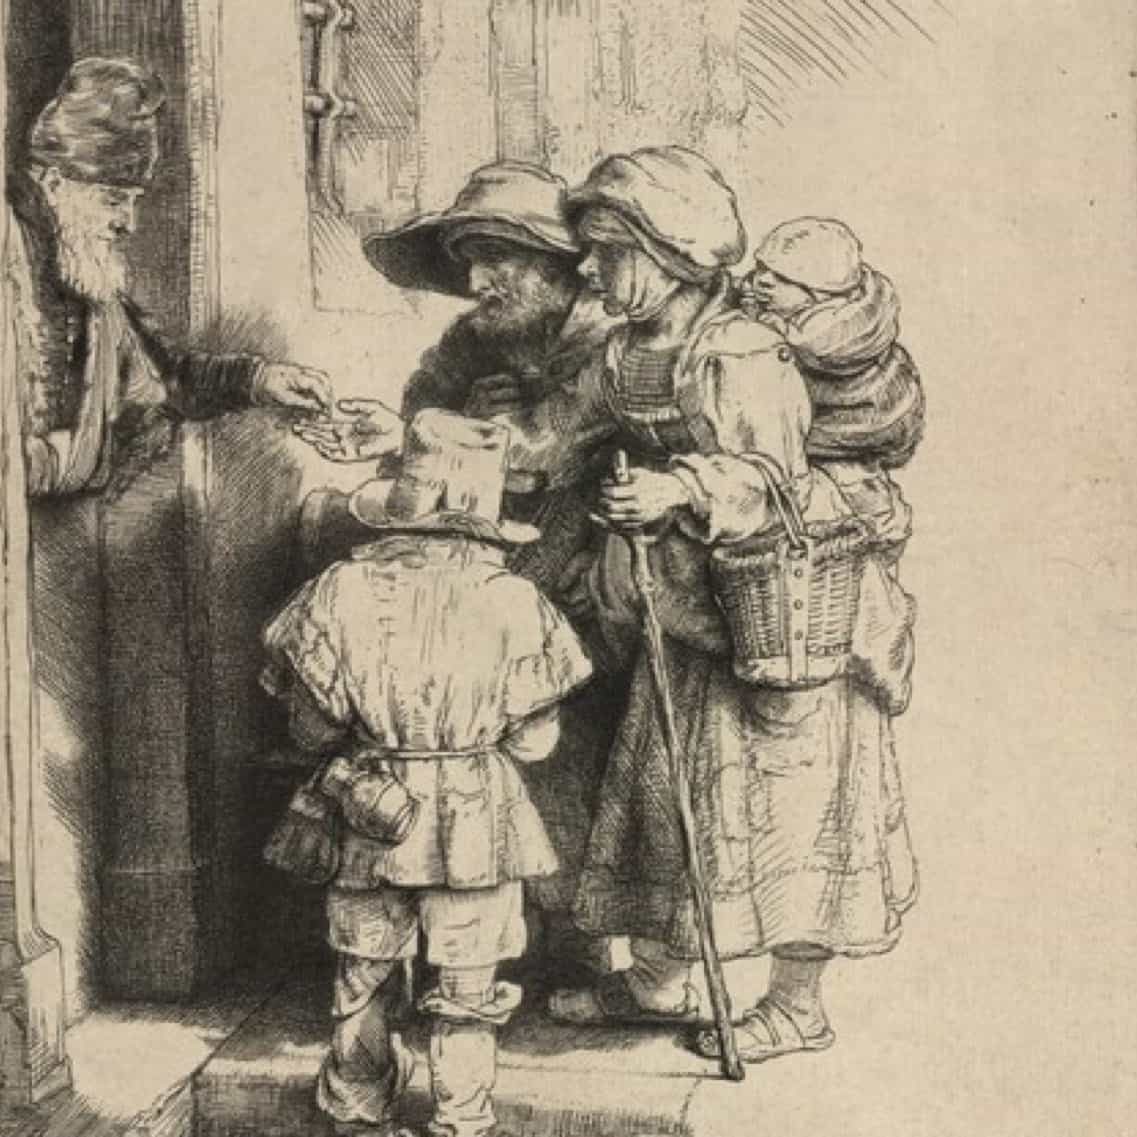
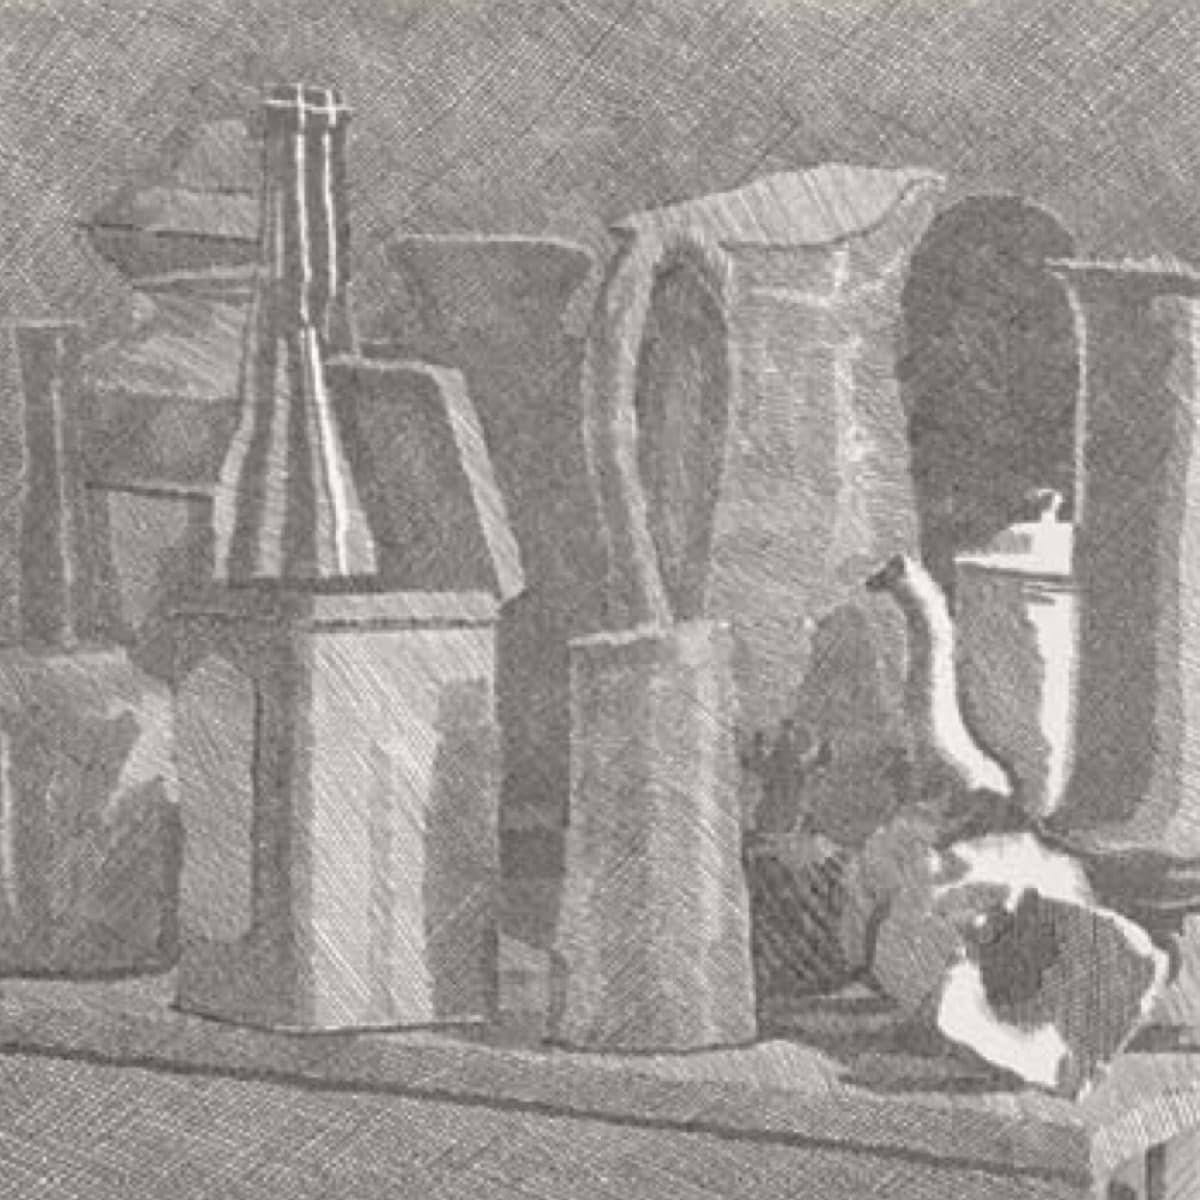
Throughout history, artists have used hatching and crosshatching in sketches, drawings, and even etchings. Here are some examples of some remarkable artists.
Materials
The materials that you need for this lesson include:
- Pencil
- Paper (Drawing paper is best but you can use whatever you have available. I am using a 5.5 x 8.5-inch spiral bound sketchbook with 60lb paper)
How to Use Crosshatching (Art Lesson)
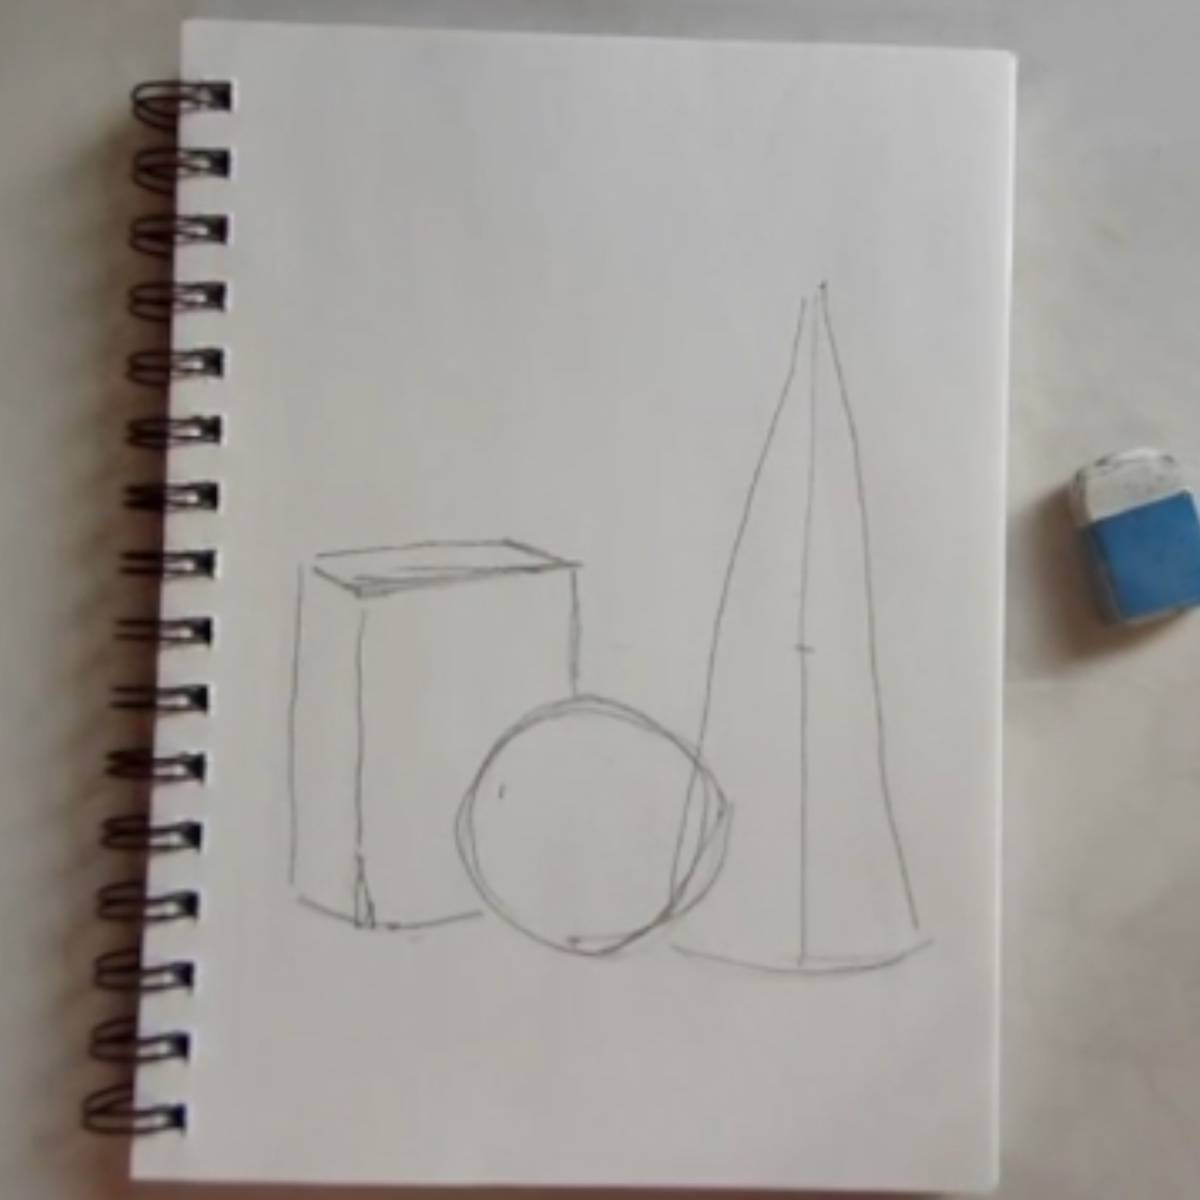
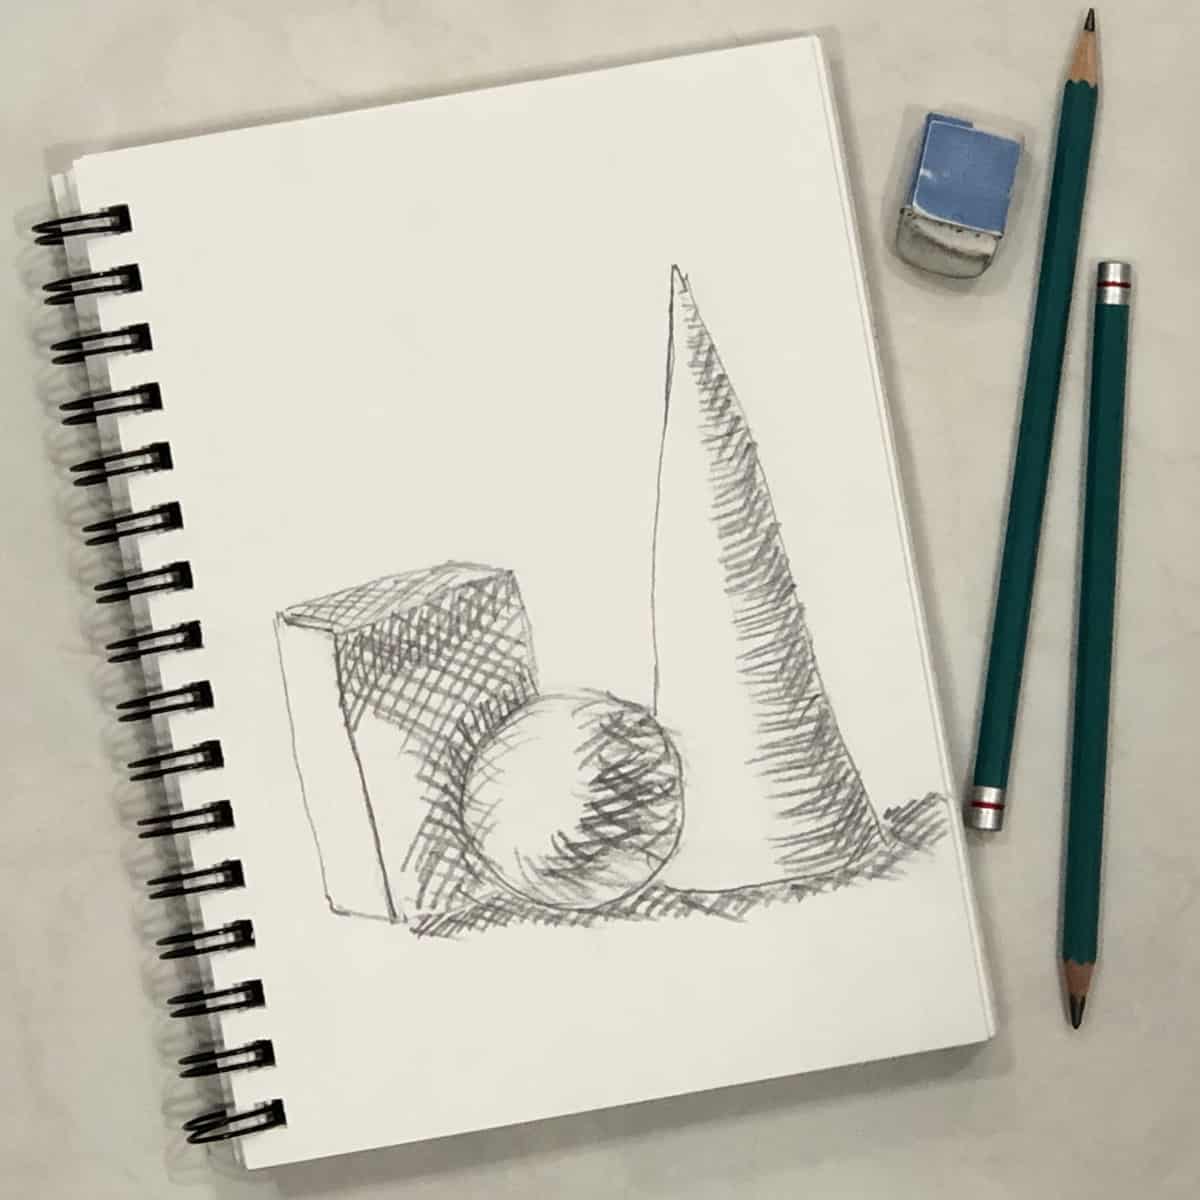
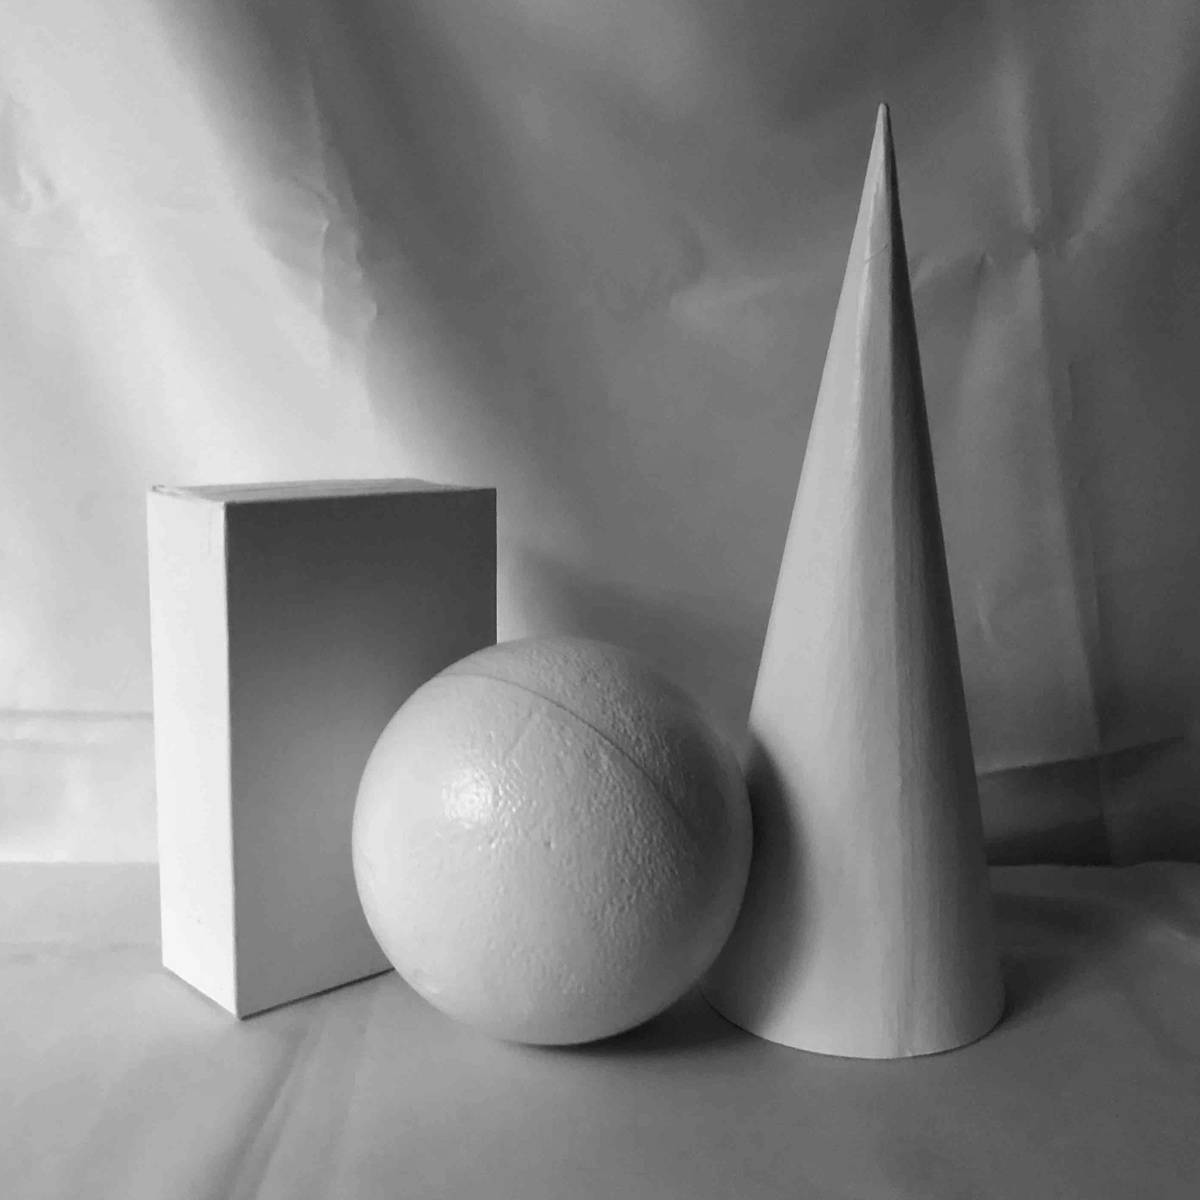
- Mark the top and bottom of the cone. Draw a guide line down the center of the cone. Make a curved line for the bottom of the cone and then draw in the sides.
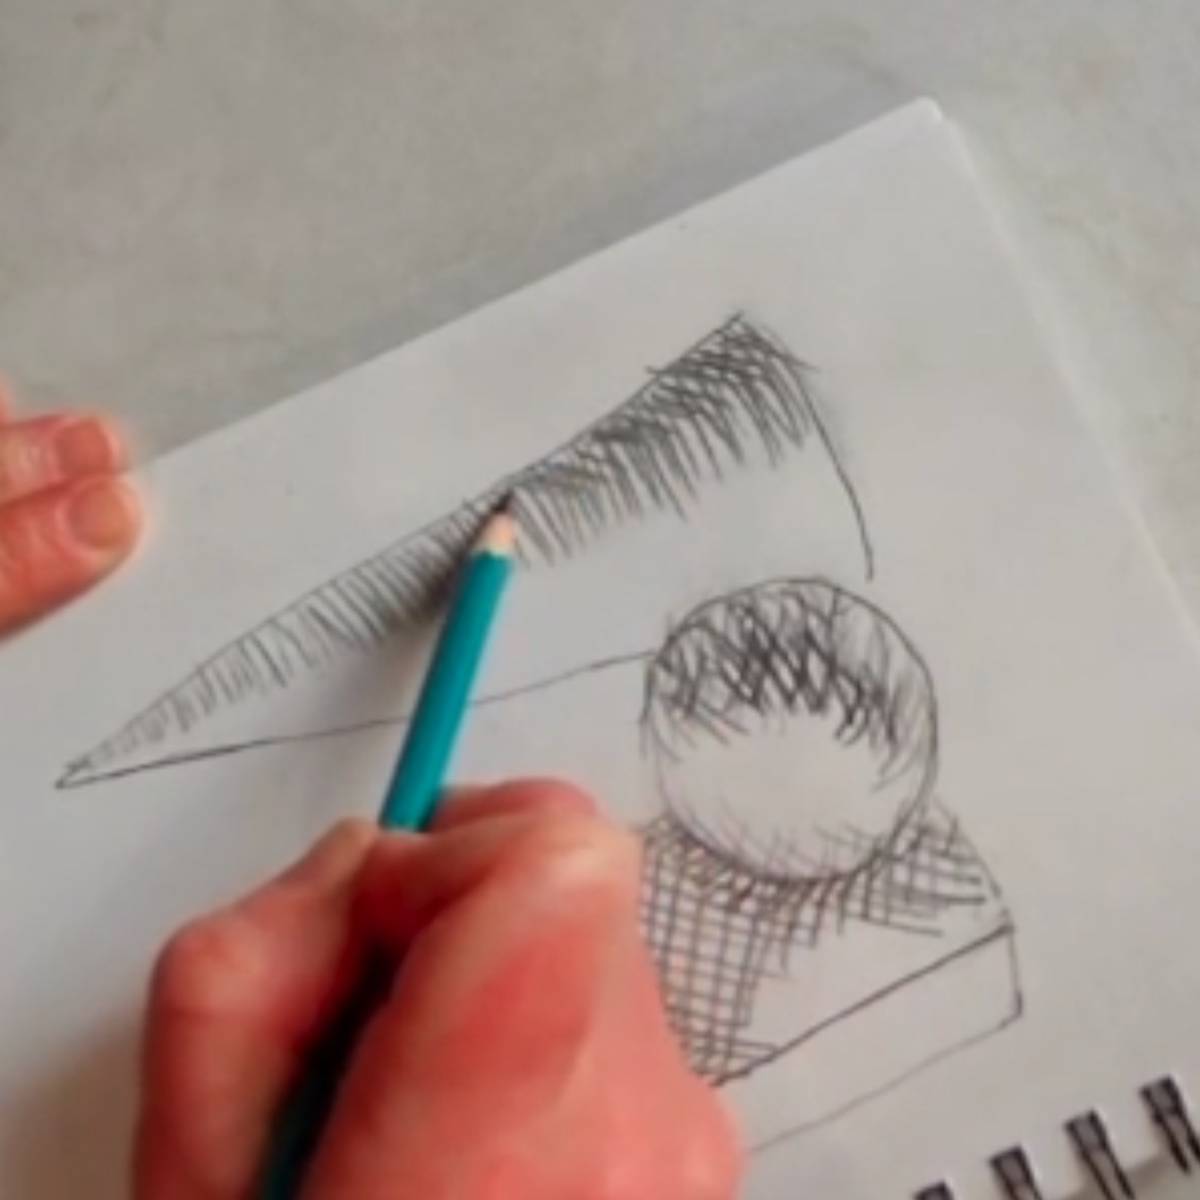
- The sphere sits just a little bit lower than the halfway point of the cone. Lightly sketch in the sphere. Continue to go over the lines until it is round.
- The box sits just a little higher than halfway point of the cone and behind the sphere. Draw in the front of the box then angle the sides back. Connect the sides to form the back of the box.
- Shade in your drawing by crosshatching. Start by making a set of parallel lines then turn your direction and make another set of lines in the opposite direction. Leave the lightest areas with no crosshatching at all. The top of the box and the area behind the sphere is in more shadow so hatch over that area again making it even darker.
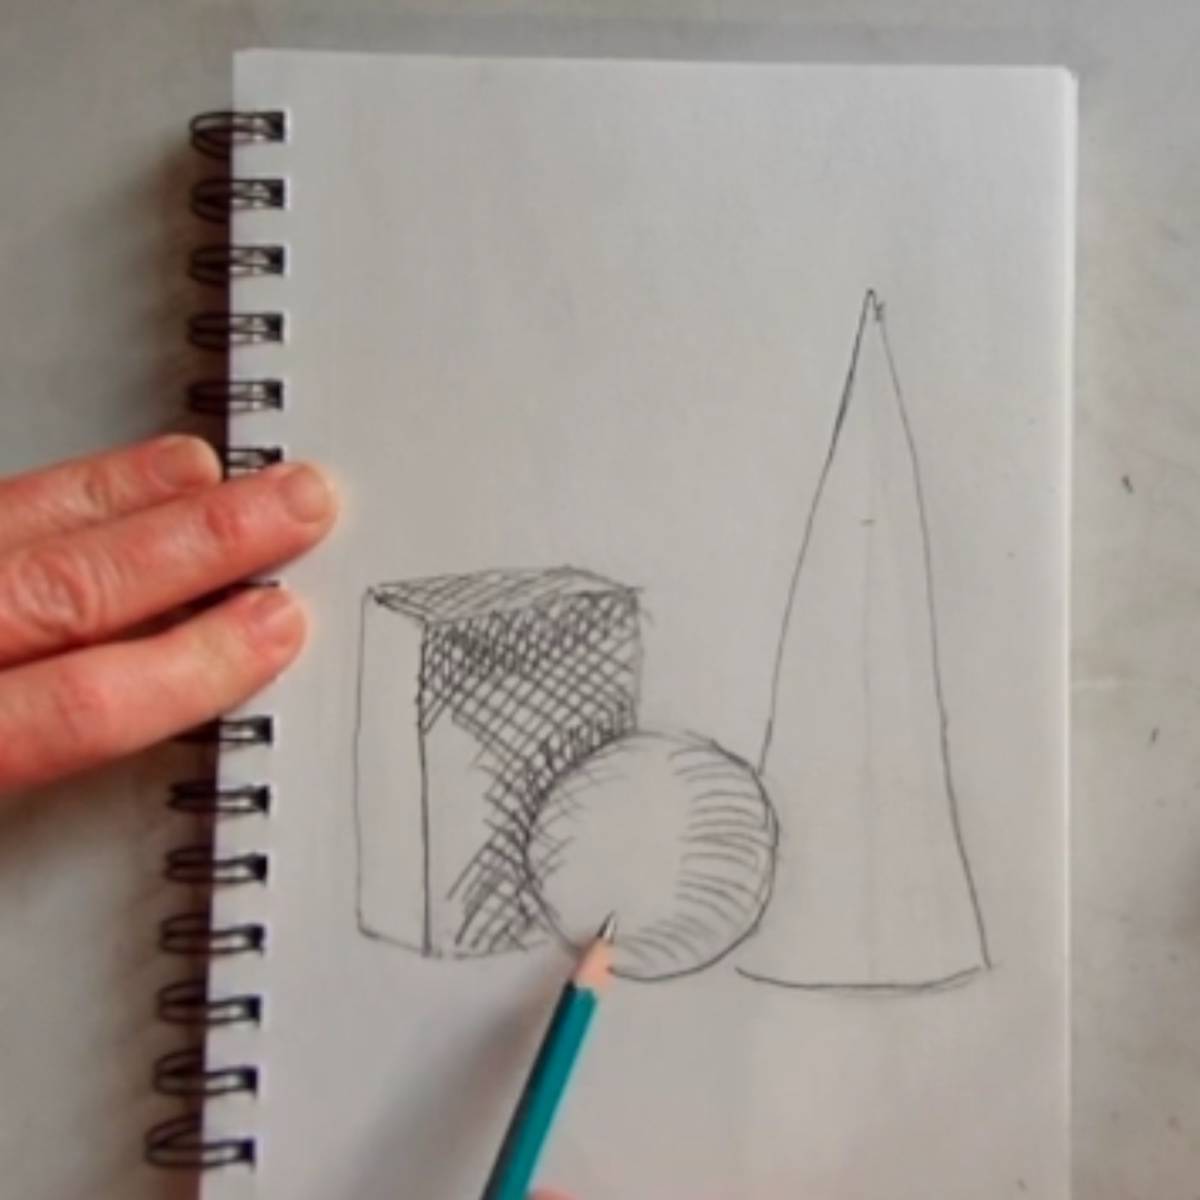
- Erase the guidelines and darken the lines of the shapes.
- To shade in the sphere, use crosshatching lines that are slightly curved. This is also called contourhatching. Turn and make another set of slightly curved lines in another direction. Leave the highlighted area white and the reflected highlight area (at the bottom, in the shadows where the light hits the table and reflects back onto the sphere) slightly lighter.
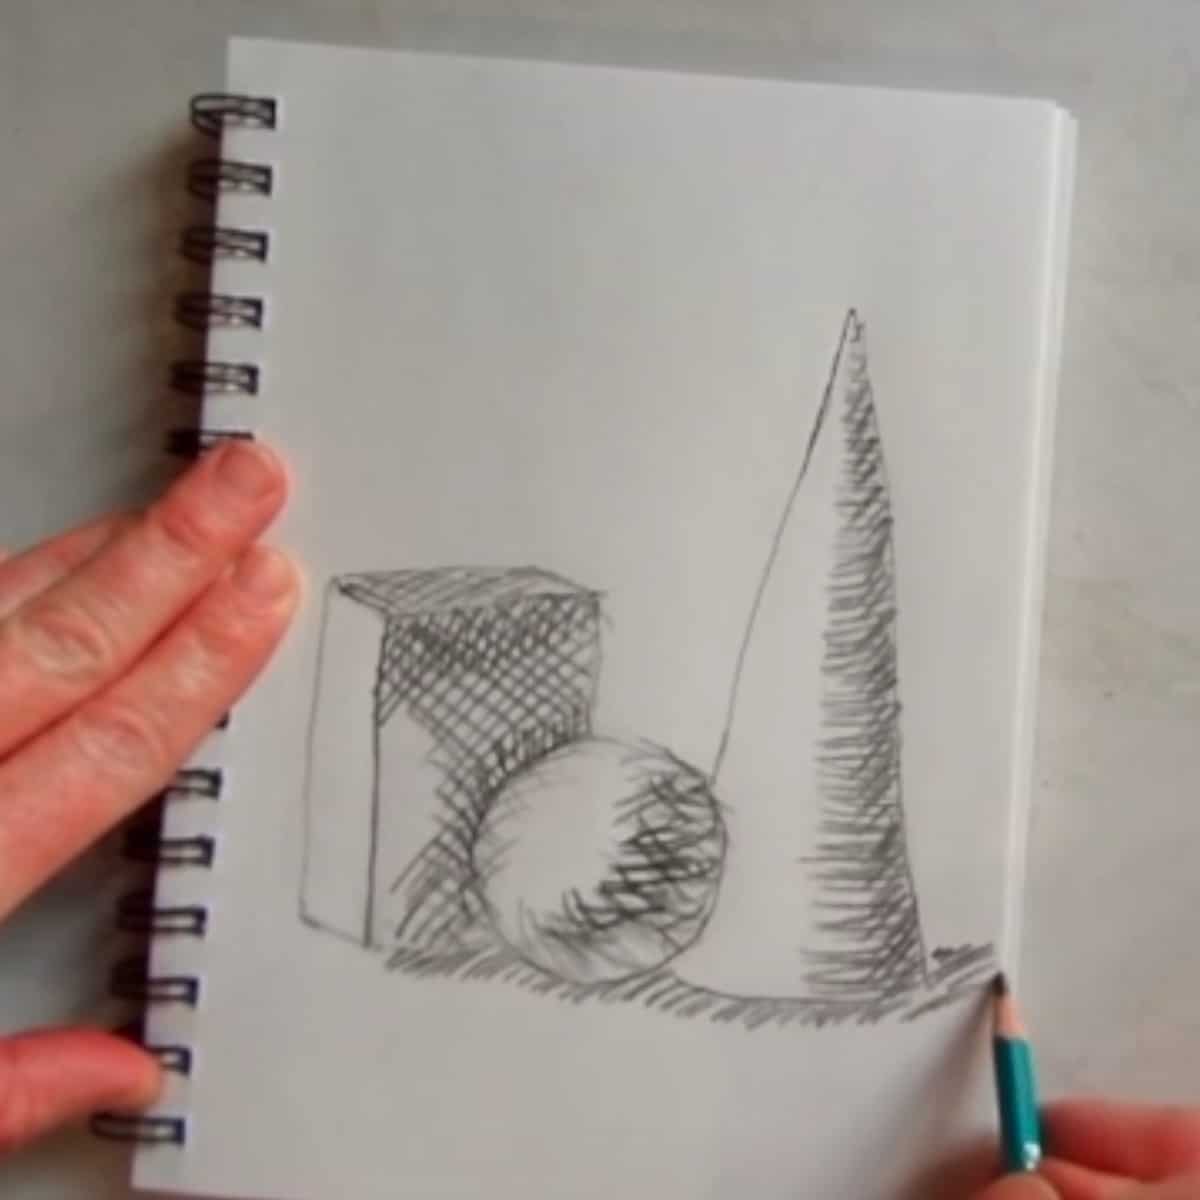
- Sketch in slightly curved hatch lines, following the bottom contour of the cone. Allow the lines to go about halfway across the cone. Make lines in another direction but only cross about halfway over the first set of lines to show a transition to lighter values.
- Add shadows at the base of the shapes where they meet the table by drawing lines and then adding another set of lines going in the opposite direction.
Variations
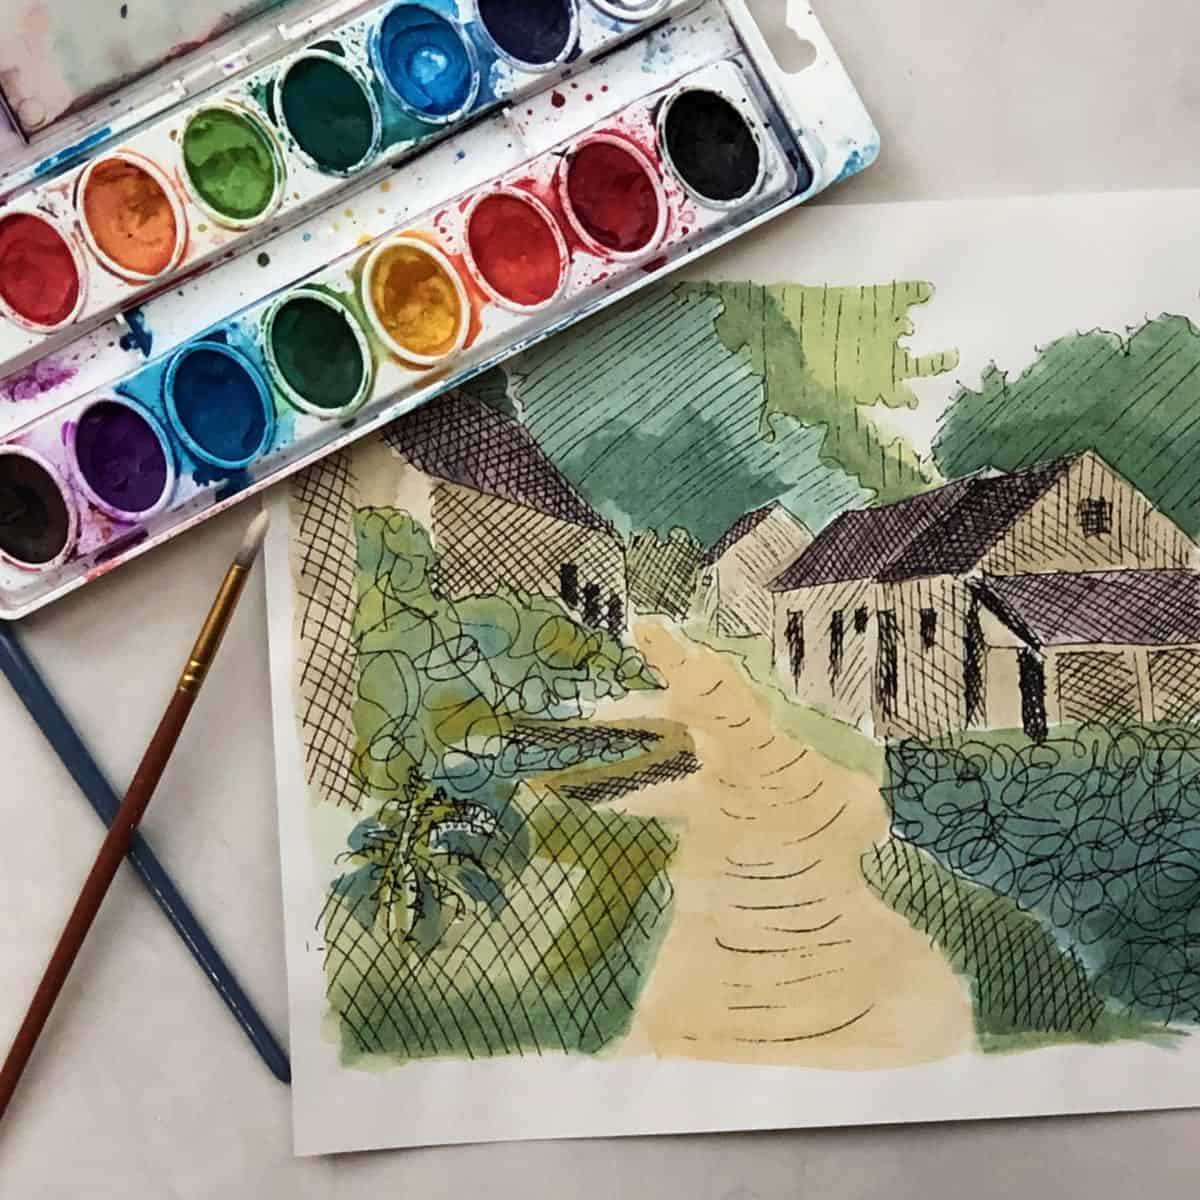
- Add color to your still life by painting it with watercolor paint.
- Draw the same still life and crosshatching with colored pencils, charcoal, or pen and ink.
- Add some background behind your still life. You could add walls, a tablecloth, windows etc. Use crosshatching to shade in the background.
Tips and tricks
- Keep your first lines and guidelines or marks very light so they are easy to erase if needed.
- You can keep going over a crosshatched area in different directions until it is as dark as you want it.
- For very light areas don’t use any cross-hatching at all, just leave it the color of the paper.
- Hatching and crosshatching lines do not always need to be regularly spaced, the spacing can be different between different marks or different areas of a drawing.
- Crosshatching can also be combined with shading to create overall value in a drawing.
Video of Cross Hatching Drawing
Transcript
Read Transcript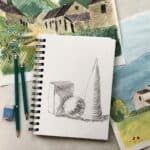
Easy Drawing with Crosshatching Line Technique in Art
Equipment
- Pencil
- Paper (Drawing paper is best but you can use whatever you have available. I am using a 5.5 x 8.5 inch spiral bound sketchbook with 60lb paper)
Instructions
- Mark the top and bottom of the cone. Draw a guide line down the center of the cone. Make a curved line for the bottom of the cone and then draw in the sides.
- The sphere sits just a little bit lower than the halfway point of the cone. Lightly sketch in the sphere. Continue to go over the lines until it is round.
- The box sits just a little higher than halfway point of the cone and behind the sphere. Draw in the front of the box then angle the sides back. Connect the sides to form the back of the box.
- Erase the guidelines and darken the lines of the shapes.
- Shade in your drawing by crosshatching. Start by making a set of parallel lines then turn your direction and make another set of lines in the opposite direction. Leave the lightest areas with no crosshatching at all. The top of the box and the area behind the sphere is in more shadow so hatch over that area again making it even darker.
- To shade in the sphere, use crosshatching lines that are slightly curved. This is also called contourhatching. Turn and make another set of slightly curved lines in another direction. Leave the highlighted area white and the reflected highlight area (at the bottom, in the shadows where the light hits the table and reflects back onto the sphere) slightly lighter.
- Sketch in slightly curved hatch lines, following the bottom contour of the cone. Allow the lines to go about halfway across the cone. Make lines in another direction but only cross about halfway over the first set of lines to show a transition to lighter values.
- Add shadows at the base of the shapes where they meet the table by drawing lines and then adding another set of lines going in the opposite direction.
Notes
You can keep going over a crosshatched area in different directions until it is as dark as you want it.
For very light areas don’t use any cross-hatching at all, just leave it the color of the paper.
Hatching and crosshatching lines do not always need to be regularly spaced, the spacing can be different between different marks or different areas of a drawing.
Crosshatching can also be combined with shading to create overall value in a drawing.
Lesson Downloads
For More Practice
- Set up your own still life from objects around your home. Draw it and then shade it in using crosshatching.
- Sketch a landscape or figure and add in crosshatching.
- Experiment with different materials. Try crosshatching with colored pencils, markers, charcoal, and pen and ink.
- Draw something from a photo. Crosshatch it with a ballpoint pen and then paint it with watercolor paint.
Frequently Asked Questions
Hatching and crosshatching techniques are commonly used in sketching and drawing to add a sense of shading and texture. It can also be found in traditional printmaking techniques such as etching and engraving.
Hatching lines are done by sketching a series of parallel lines close to one another to create a sense of shading and texture. The lines can be either regularly spaced or irregularly spaced.
Make the lines darker and closer together to show a darker value, lighter, and further apart for a lighter value. The direction of your lines can also help indicate different planes of the object or subject that you are drawing.
Contour hatching is simply regular hatching or crosshatching but drawn to follow a curved contour. Anything that is curved or rounded can be enhanced with contour hatching.


Trinity says
I'm glad that you covered these line techniques. I always see them used in sketches and really like them. I just need to practice them now. lol.