Learn how to draw an easy rose step by step in this art tutorial. Sketch a simple rose and shade it with this online art class.
Discover how to draw an easy rose with a pencil. It might look hard, but creating a rose drawing step by step is simple, especially with some practice.
Jump to:
Sketching a realistic rose is a fun art project for Mother’s Day, Valentine’s Day, a birthday, or other holiday. Celebrate spring or summer flowers by drawing a rose.
Practice drawing a beautiful rose and learn all the tips and tricks to make drawing the petals easier. This is a perfect drawing for artists of all abilities, from beginner to more advanced.
So how do you draw a rose? Follow along with the instructional video to learn the easy way to draw a rose.
Materials
- Pencil
- Paper (Drawing paper is best but you can use whatever you have available. I am using a 5.5 x 8.5 inch spiral bound multimedia sketchbook with 98lb paper)
How Do You Draw a Rose
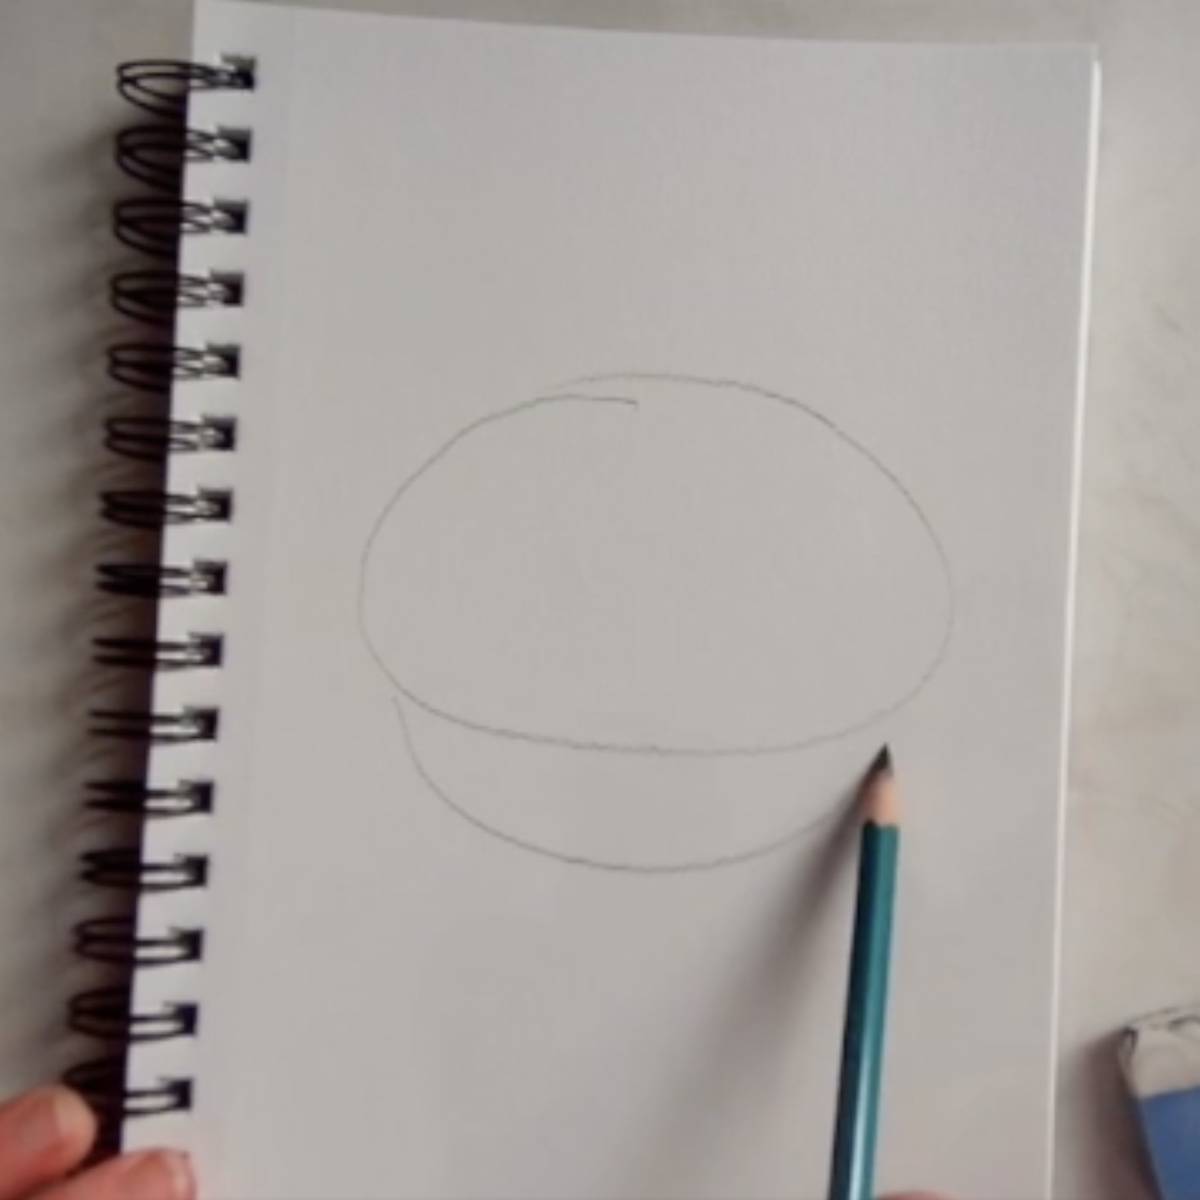
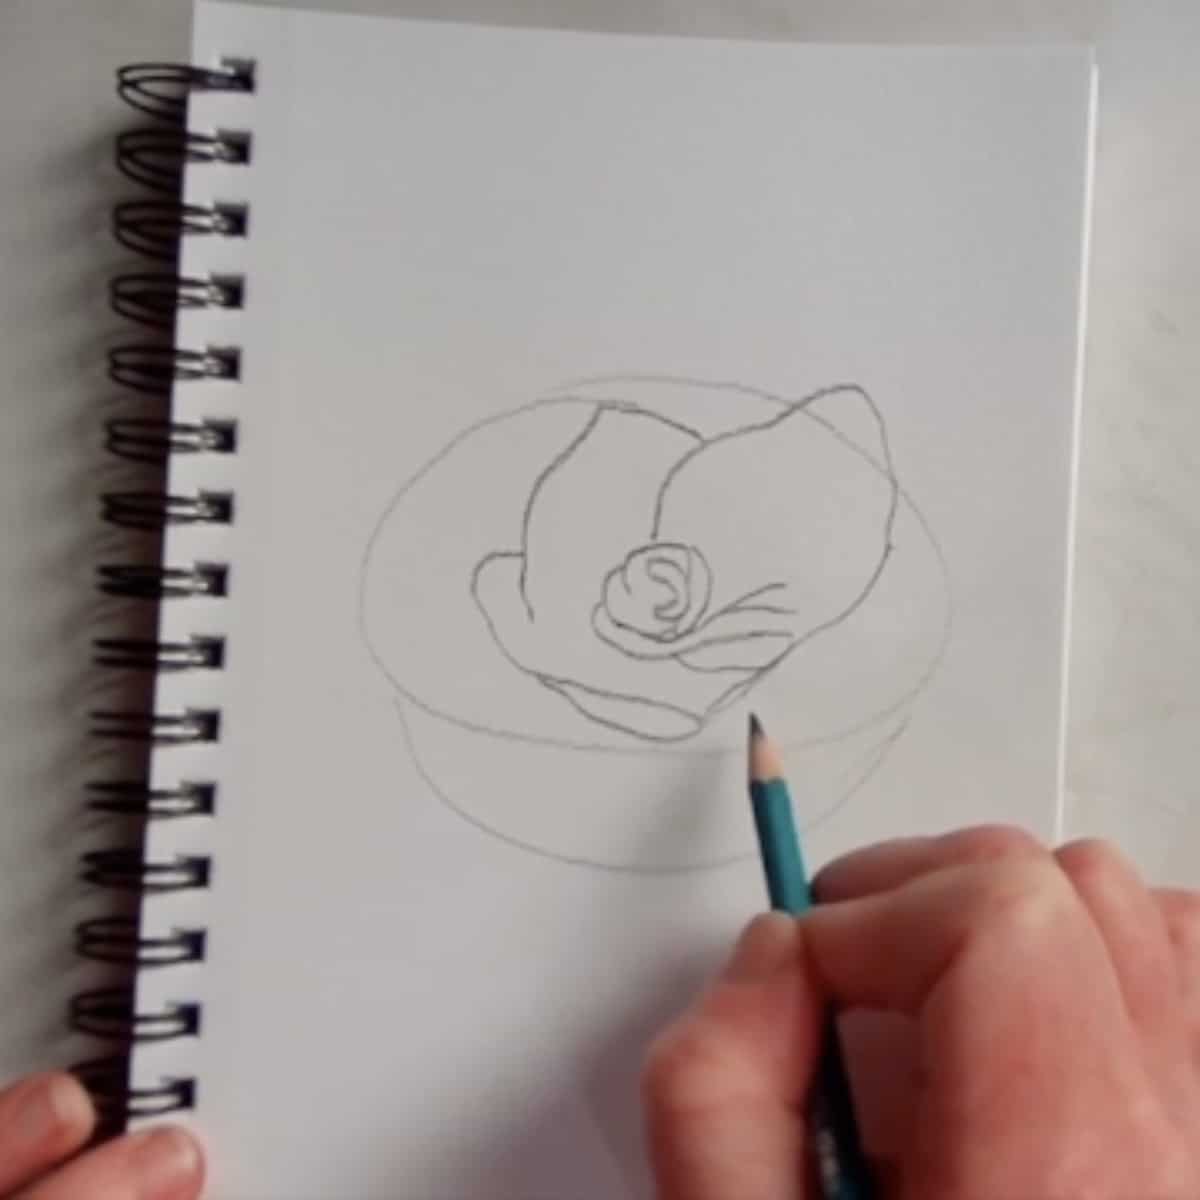

- Begin by sketching in some guidelines very lightly. Draw a circle or an oval. This will be the top of the rose. Then draw a semi-circle or bowl shape below that. This is the front of the rose.
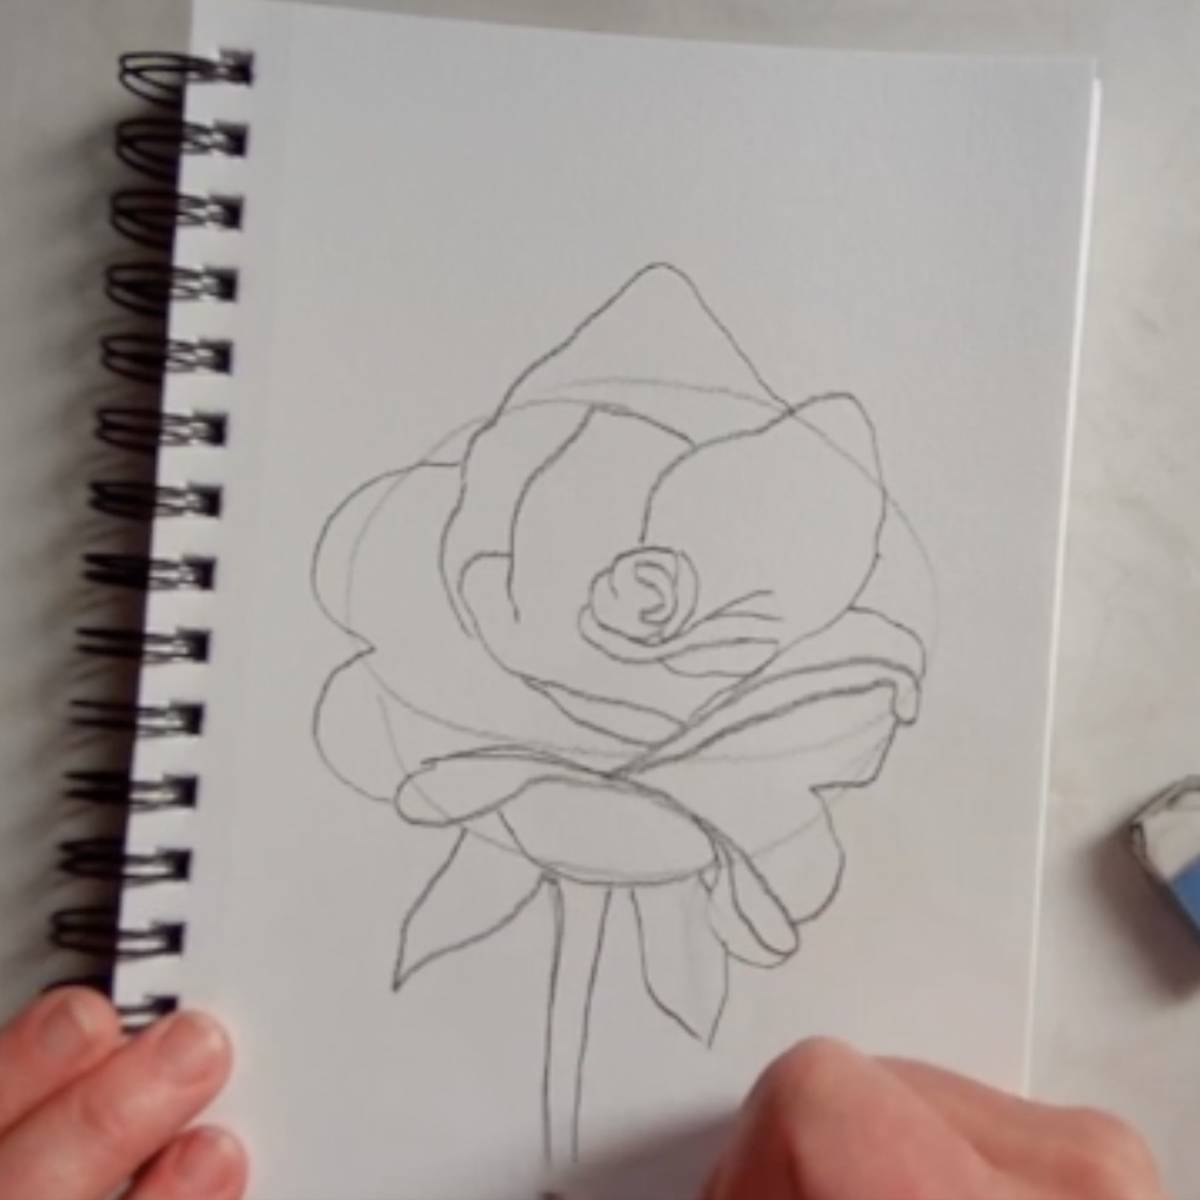
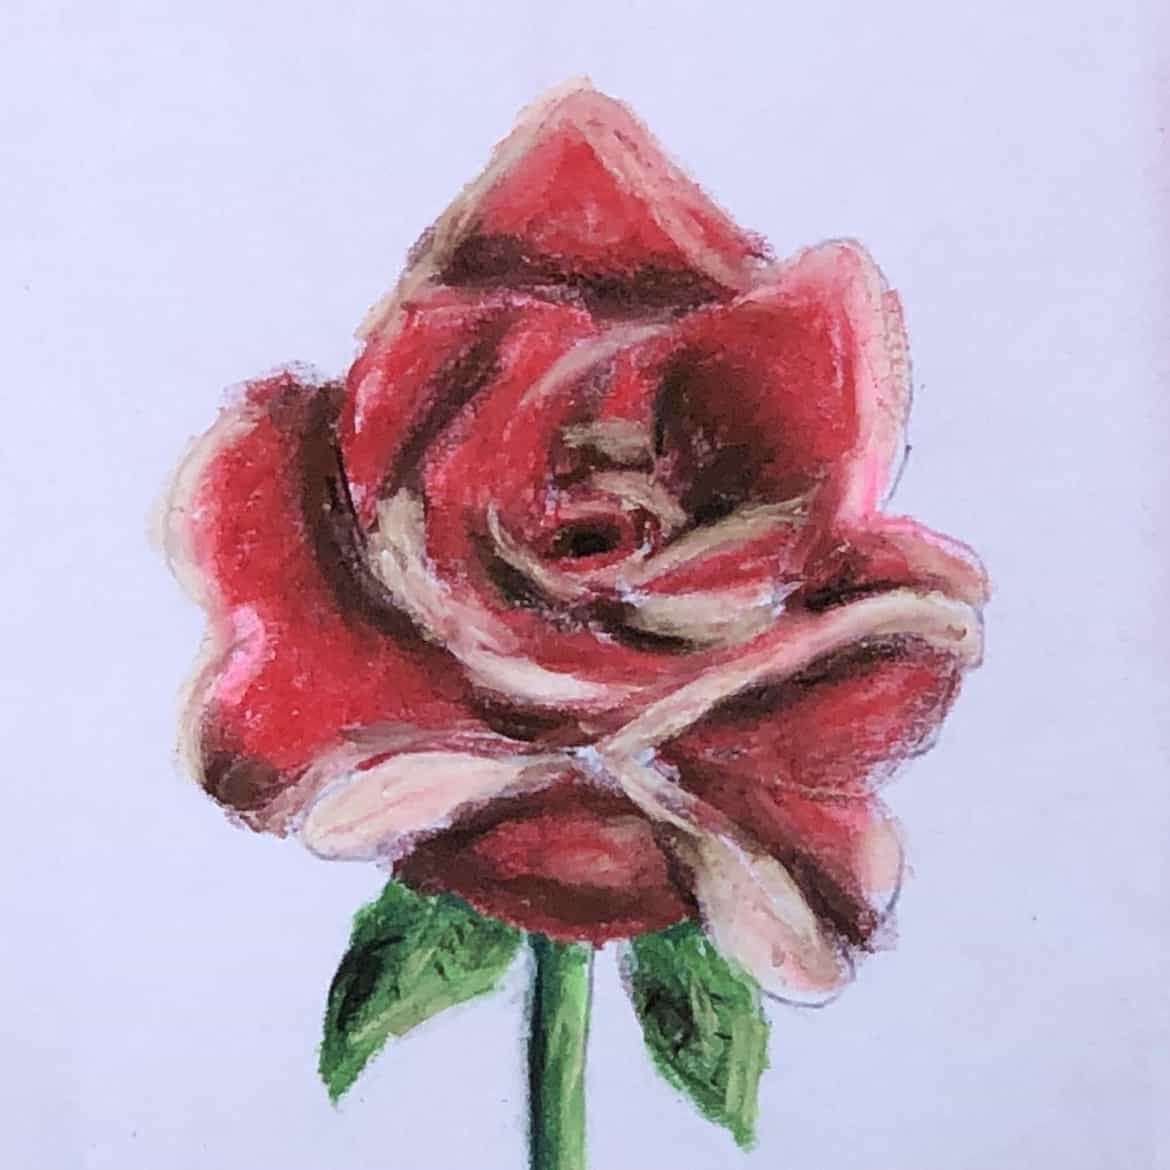
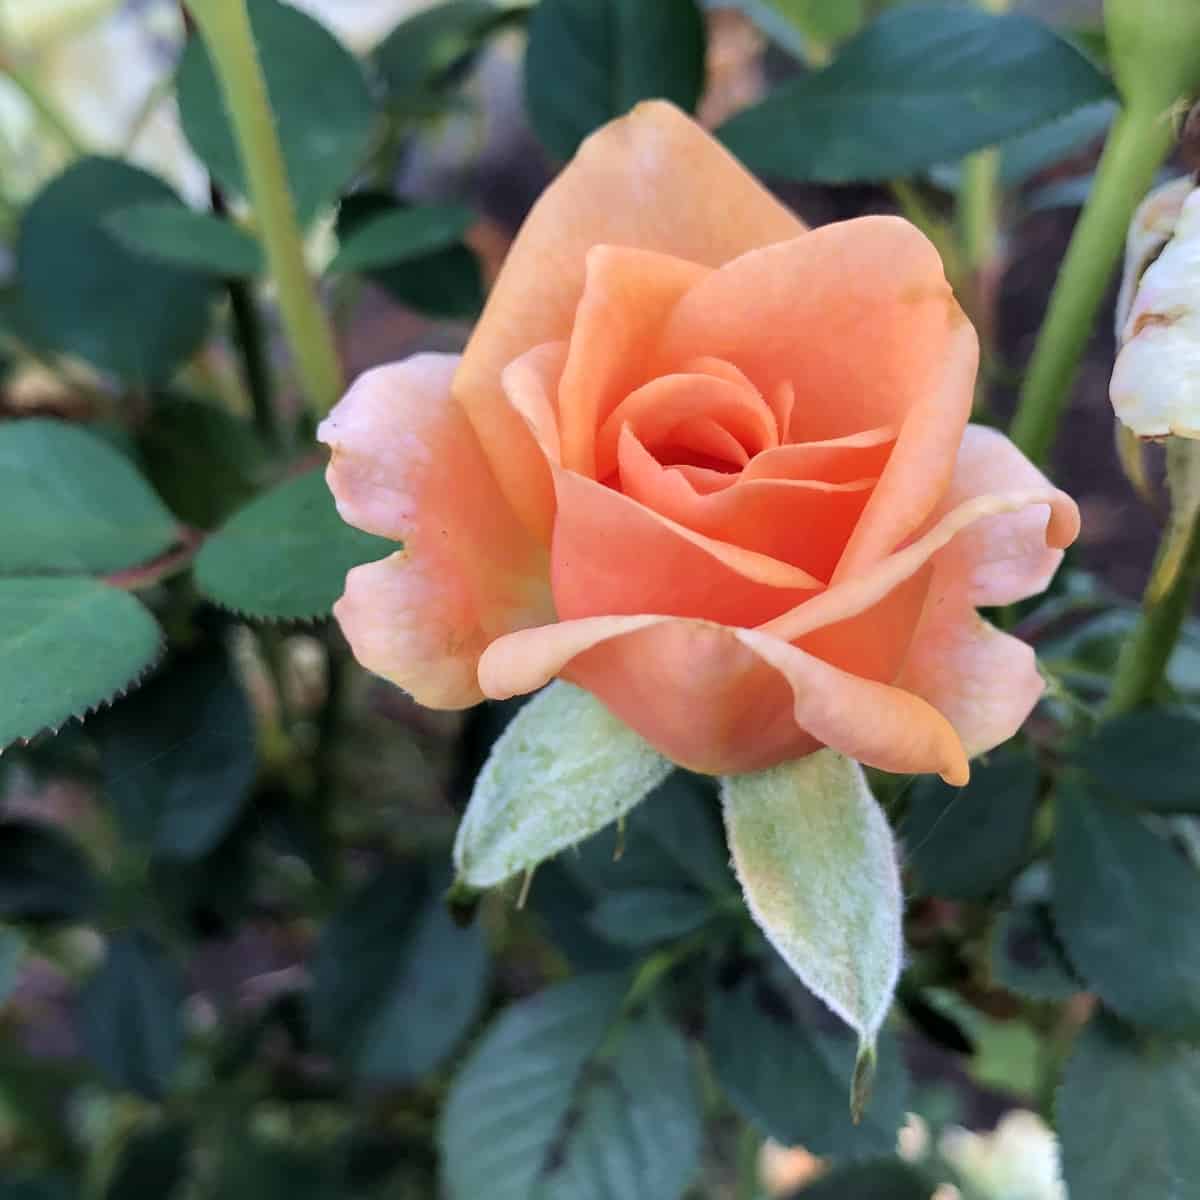
- Sketch in the petals starting at the center of the flower. The first petal will look like a backward “c”. Look at the photo I provided or look at a real rose for reference.
- The rest of the petals will fan out in a spiral getting larger as they move towards the outside of the rose.
- Each petal will start by touching the petal inside it, and go up and over. Finally, the petal will turn toward the center, usually touching the inner petals.
- Do not get too concerned about drawing each petal exactly as it appears. Petals and flowers shift and change so try to sketch the overall shapes.
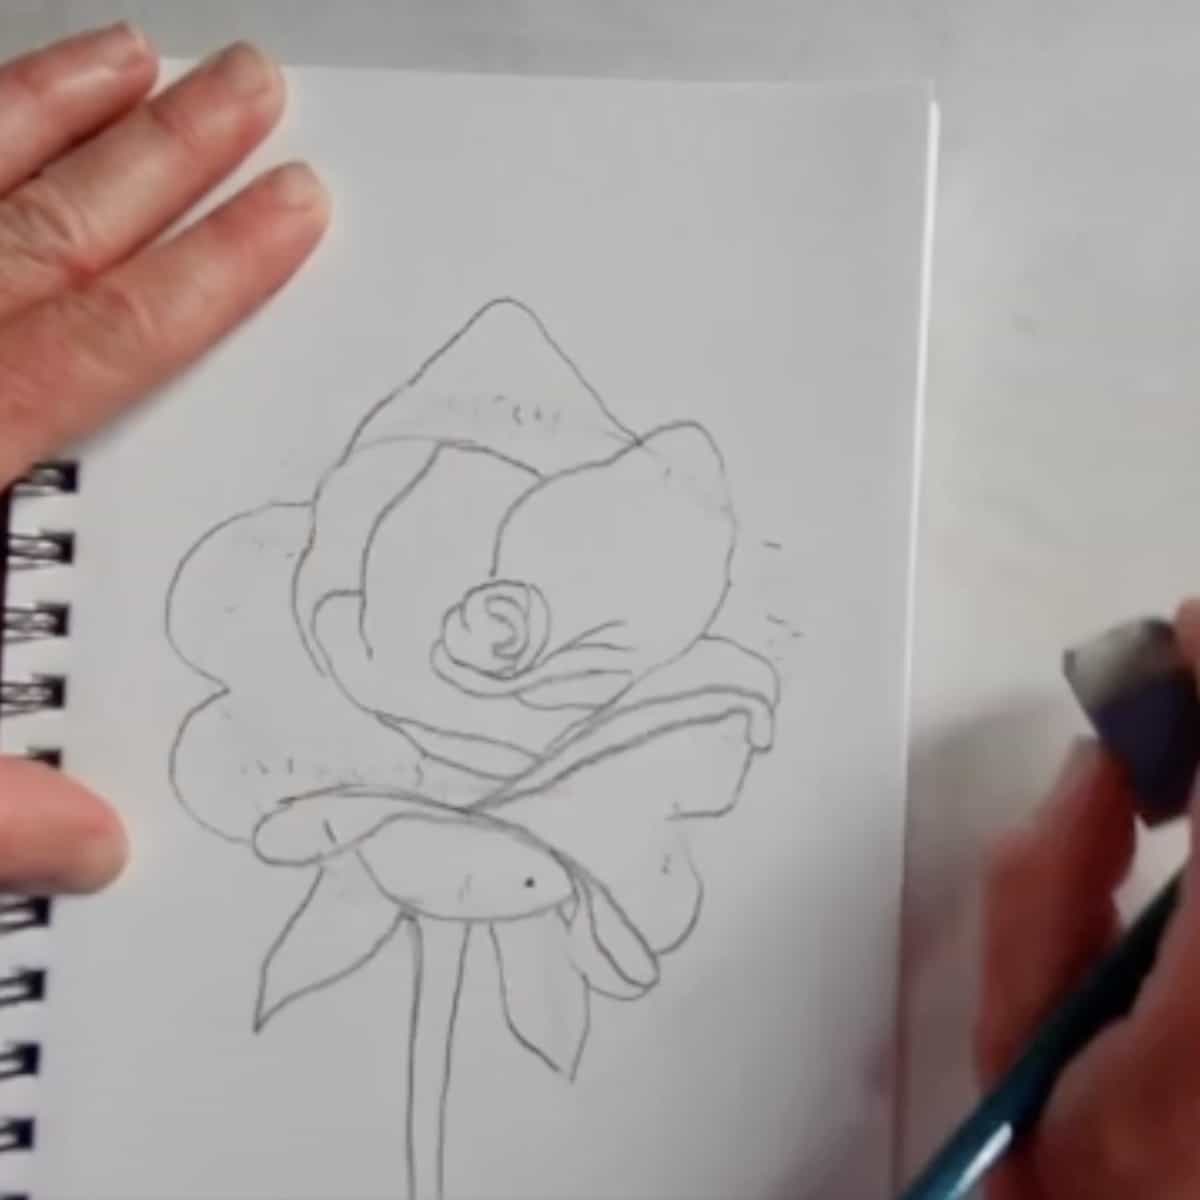
- Add parts of petals that fold over on themselves (these will usually be highlighted with shadows beneath them).
- Sketch in several leaves at the base of the flower. The sides of the leaves round outward and come together into a point. Think about a triangle shape with rounded edges. The back part of the leaf sits under the flower and is not visible.
- Draw a stem down from the bottom of the rose.
- Erase any of your guidelines that you don’t need anymore.
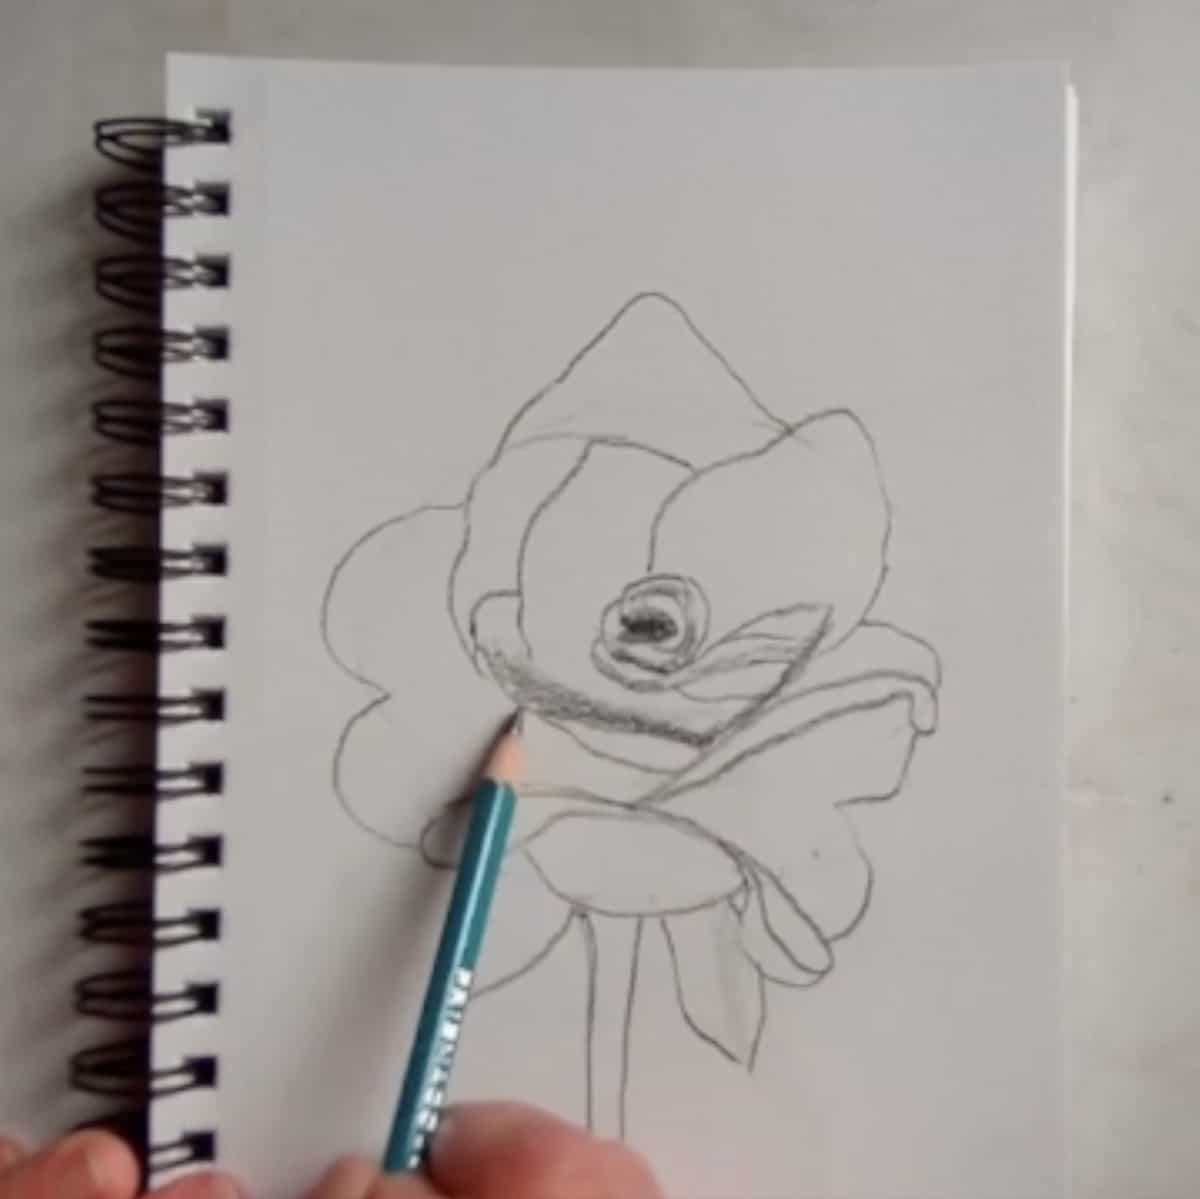
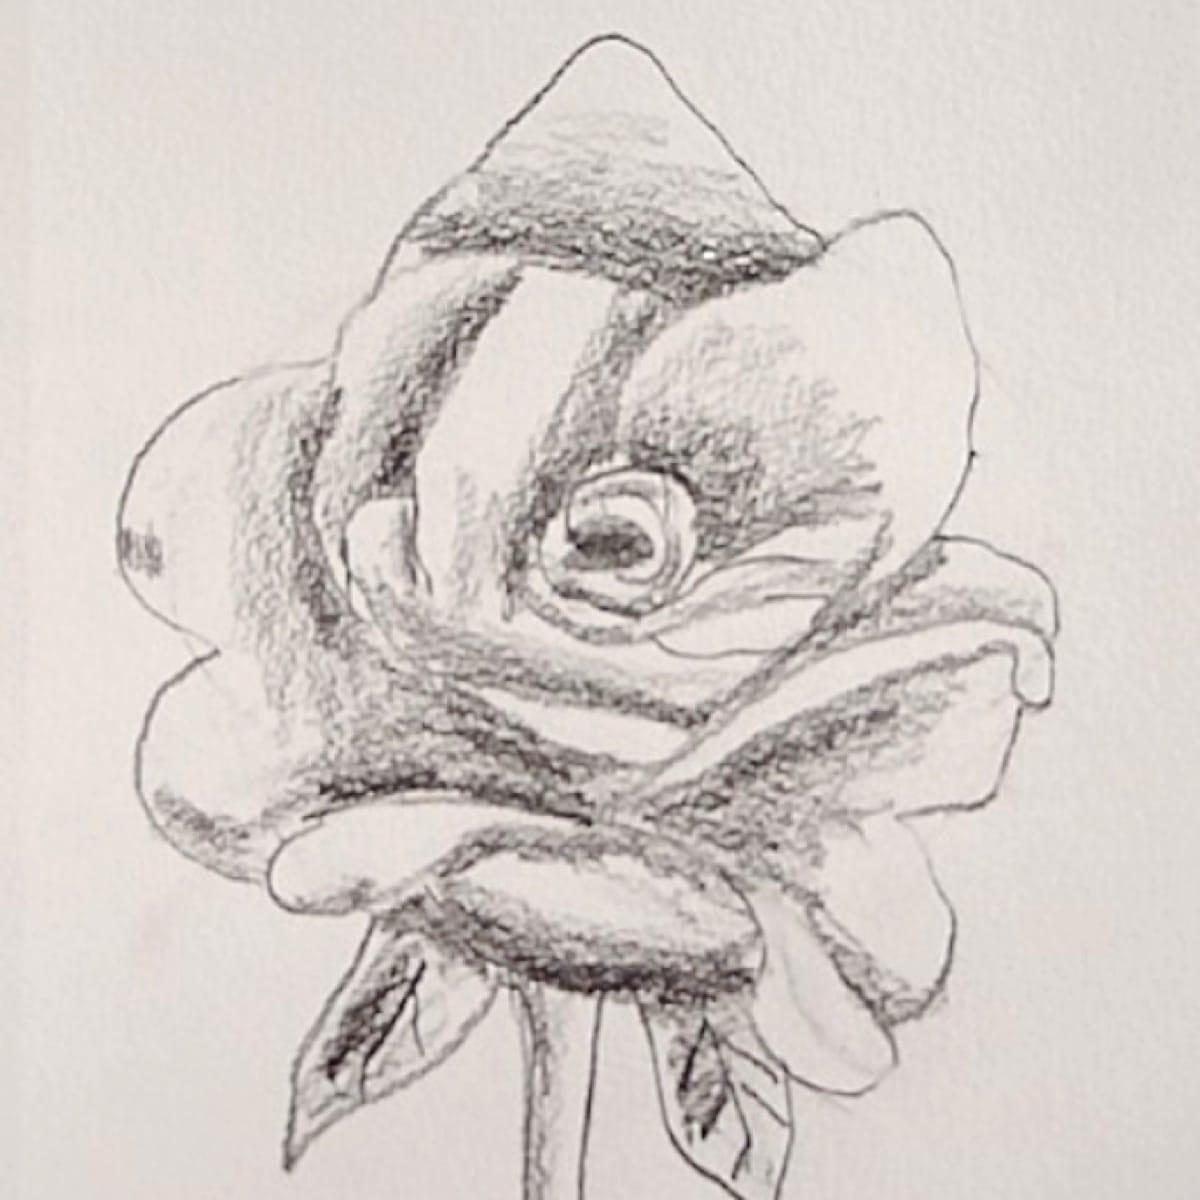
- Shade it in by starting at the center of the flower. The center will be fairly dark. You can turn your pencil on the side and push from the top to shade in large areas quickly.
- The areas where the petals meet will be shaded in darker. Look at a photo of a rose to determine where the lights and darks are.
- Darken the areas where the petals overlap and then shade out to the edge of the petals lighter and lighter. The shading will blend from dark, to medium, to white.
- Take your time shading to get a nice even transition between the lights and darks.
- Shade the leaves and stem.
- Go over the entire drawing and darken any areas that need more shading. Erase any lines or shading that need to be cleaned up or removed.
- Look at your overall drawing. Ensure it feels balanced and everything is the way you want it to appear.
- Add any other finishing touches or extra details. Draw in the background if you want.
Video Tutorial (How to Draw an Easy Rose)
Transcript
Read TranscriptTips and Tricks to Draw a Rose
- Turn your pencil on the side and push from the top to shade large areas more quickly.
- Turn the paper as you shade in your drawing to make it easier.
- Avoid rubbing the drawing as you are working to prevent smears.
- Don’t worry too much about the individual petals just go for the basic overall shapes and shading.
Variations
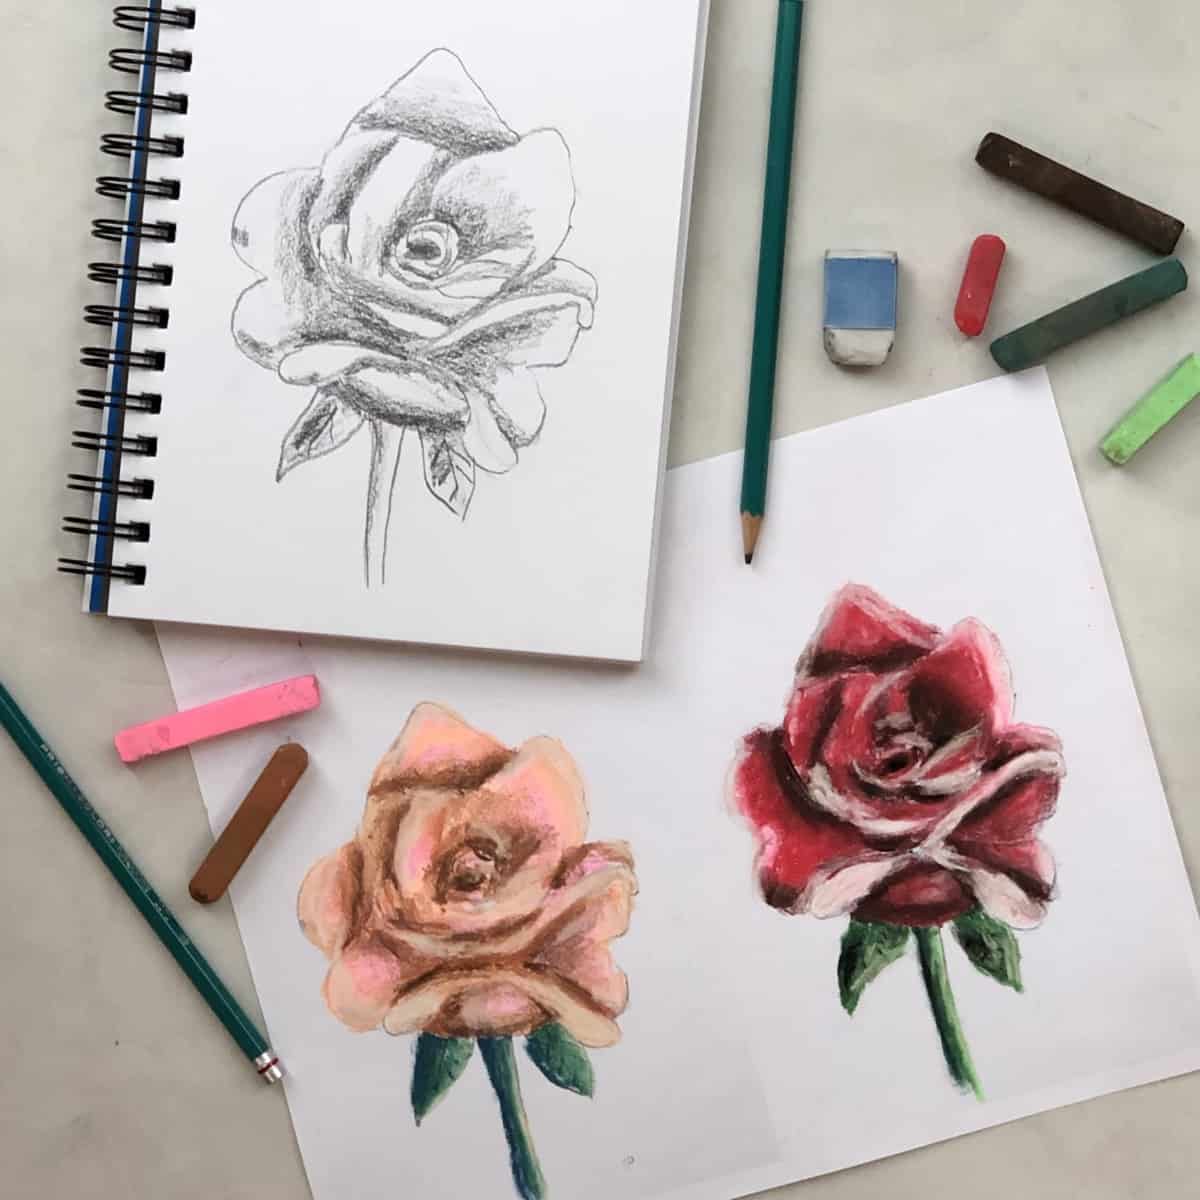
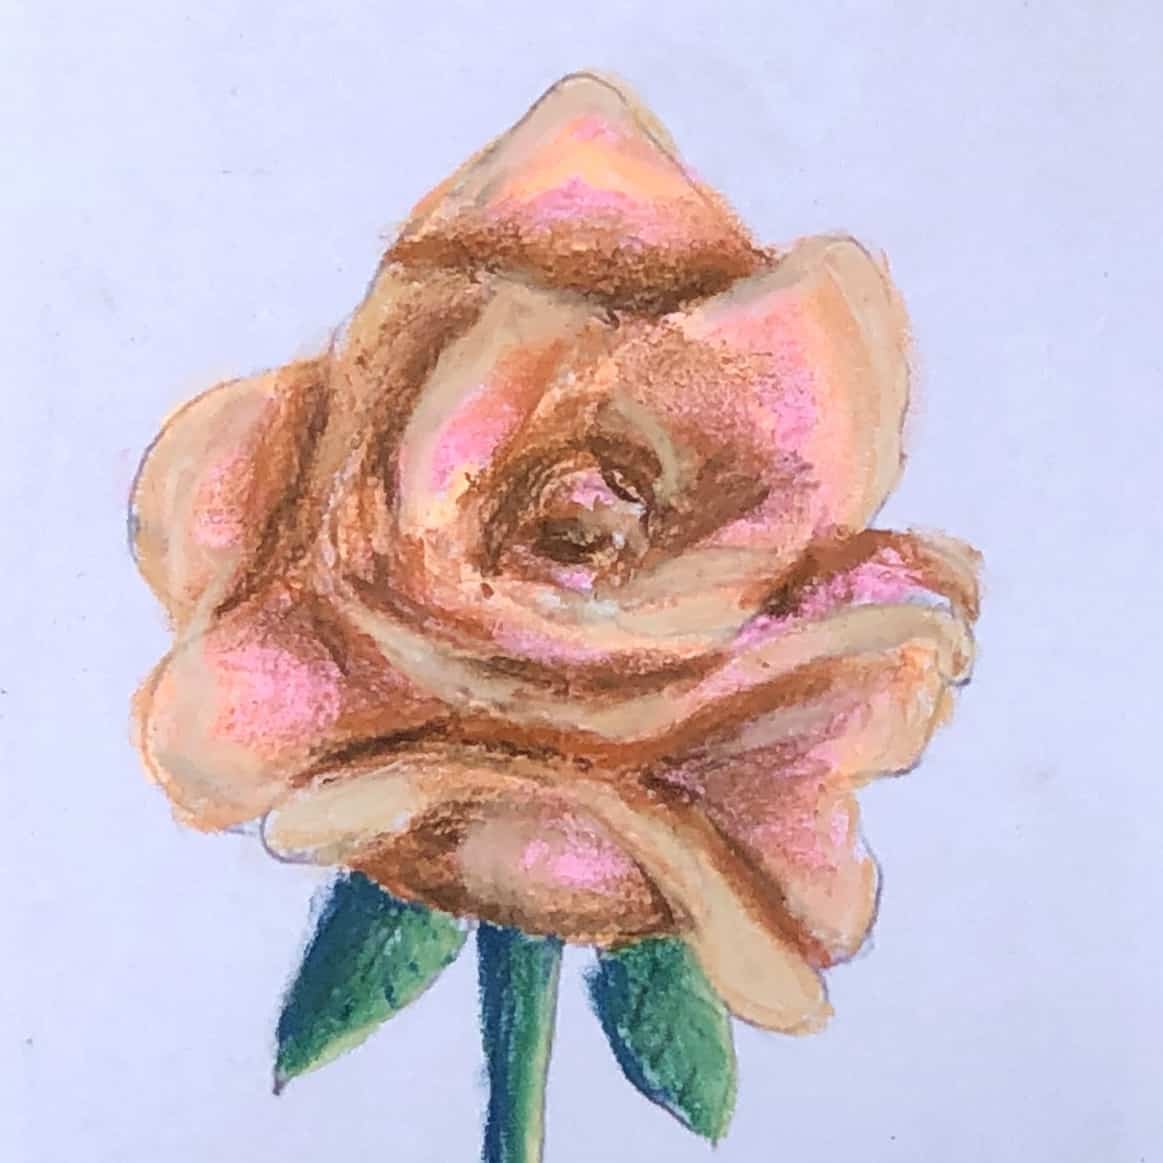
- It is fun to add color to your sketch. Try adding color with watercolor paints, soft pastels, colored pencils, or even markers.
- Practice drawing a rose from real life. For an extra challenge draw it from different points of view like looking down from the top, from a three-quarters angle, or directly from the front.
- Observe rose buds. They have the same structure as open roses but you would draw them with a tighter outward spiral.
- You could also go all out and draw a whole bouquet of roses!
What to Do With Your Sketch
Your sketch will make a lovely homemade gift for Mother’s Day, Valentine’s Day, a birthday, Christmas, Hanukkah, or any other special occasion. Who wouldn't love to receive such a thoughtful present?
You can frame your drawing and decorate your home. A hand-drawn rose is a stunning addition to any room.

How to Draw an Easy Rose Step-by-step
Equipment
- Pencil
- Paper (Drawing paper is best but you can use whatever you have available. I am using a 5.5 x 8.5 inch spiral bound multimedia sketchbook with 98lb paper)
Instructions
- Begin by sketching in some guidelines very lightly. Draw a circle or an oval. This will be the top of the rose. Then draw a semi-circle or bowl shape below that. This is the front of the rose.
- Sketch in the petals starting at the center of the flower. The first petal will look like a backward “c”. Look at the photo I provided or look at a real rose for reference. The rest of the petals will fan out in a spiral getting larger as they move towards the outside of the rose. Each petal will start by touching the petal inside it, and go up and over. Finally, the petal will turn toward the center, usually touching the inner petals. Do not get too concerned about drawing each petal exactly as it appears. Petals and flowers shift and change so try to sketch the overall shapes.
- Add parts of petals that fold over on themselves (these will usually be highlighted with shadows beneath them).
- Sketch in several leaves at the base of the flower. The sides of the leaves round outward and come together into a point. Think about a triangle shape with rounded edges. The back part of the leaf sits under the flower and is not visible.
- Draw a stem down from the bottom of the rose.
- Erase the guidelines that you don’t need anymore.
- Shade it in by starting at the center of the flower. The center will be fairly dark. You can turn your pencil on the side and push from the top to shade in large areas quickly.The areas where the petals meet will be shaded in darker. Look at a photo of a rose to determine where the lights and darks are.Darken the areas where the petals overlap and then shade out to the edge of the petals lighter and lighter. The shading will blend from dark, to medium, to white.Take your time shading to get a nice even transition between the lights and darks.Shade the leaves and stem as well.
- Go over the entire drawing and darken any areas that need more shading. Erase any lines or shading that need to be cleaned up or removed.Look at your overall drawing. Ensure it feels balanced and everything is the way you want it to appear. Add any other finishing touches or extra details. Draw in the background if you want.
Notes
- Turn your pencil on the side and push from the top to shade large areas more quickly.
- Turn the paper as you shade in your drawing to make it easier.
- Avoid rubbing the drawing as you are working to prevent smears.
- Don’t worry too much about the individual petals just go for the basic overall shapes and shading.
Lesson Downloads
Frequently Asked Questions
Sketch in some guidelines very lightly. Draw a circle or an oval. Then draw a semi-circle or bowl shape below that. Add petals starting at the center of the flower.
The rest of the petals will fan out in a spiral getting larger as they move towards the outside of the rose. Sketch in several leaves at the base of the flower. Finally, draw in a stem down from the bottom of the rose, if you want.
Shade the rose drawing by starting at the center of the flower. The center will be fairly dark. The areas where the petals meet will be shaded in darker.
Darken the areas where the petals overlap and then shade out to the edge of the petals lighter and lighter. The shading will blend gradually from dark, to medium, to white. Take your time shading to get an even transition between the lights and darks. Shade in your leaves and stem.
Add color to a rose drawing with watercolor paint, colored pencils, soft pastels, or markers.
The highlighted areas are white or a lighter version of the rose. The shadows will appear to be the main color of the flower with black or brown added in.
You also might like
- Drawing Paper (Everything You Need to Know)
- How to Draw a Cylinder
- How to Draw a Mountain Landscape
- How to Draw a Box
- Sketch an Easy Eye Step-by-step
Please leave your questions, comments, and reviews below!

MaryAnn says
So pretty. I followed right along and my rose turned out great!