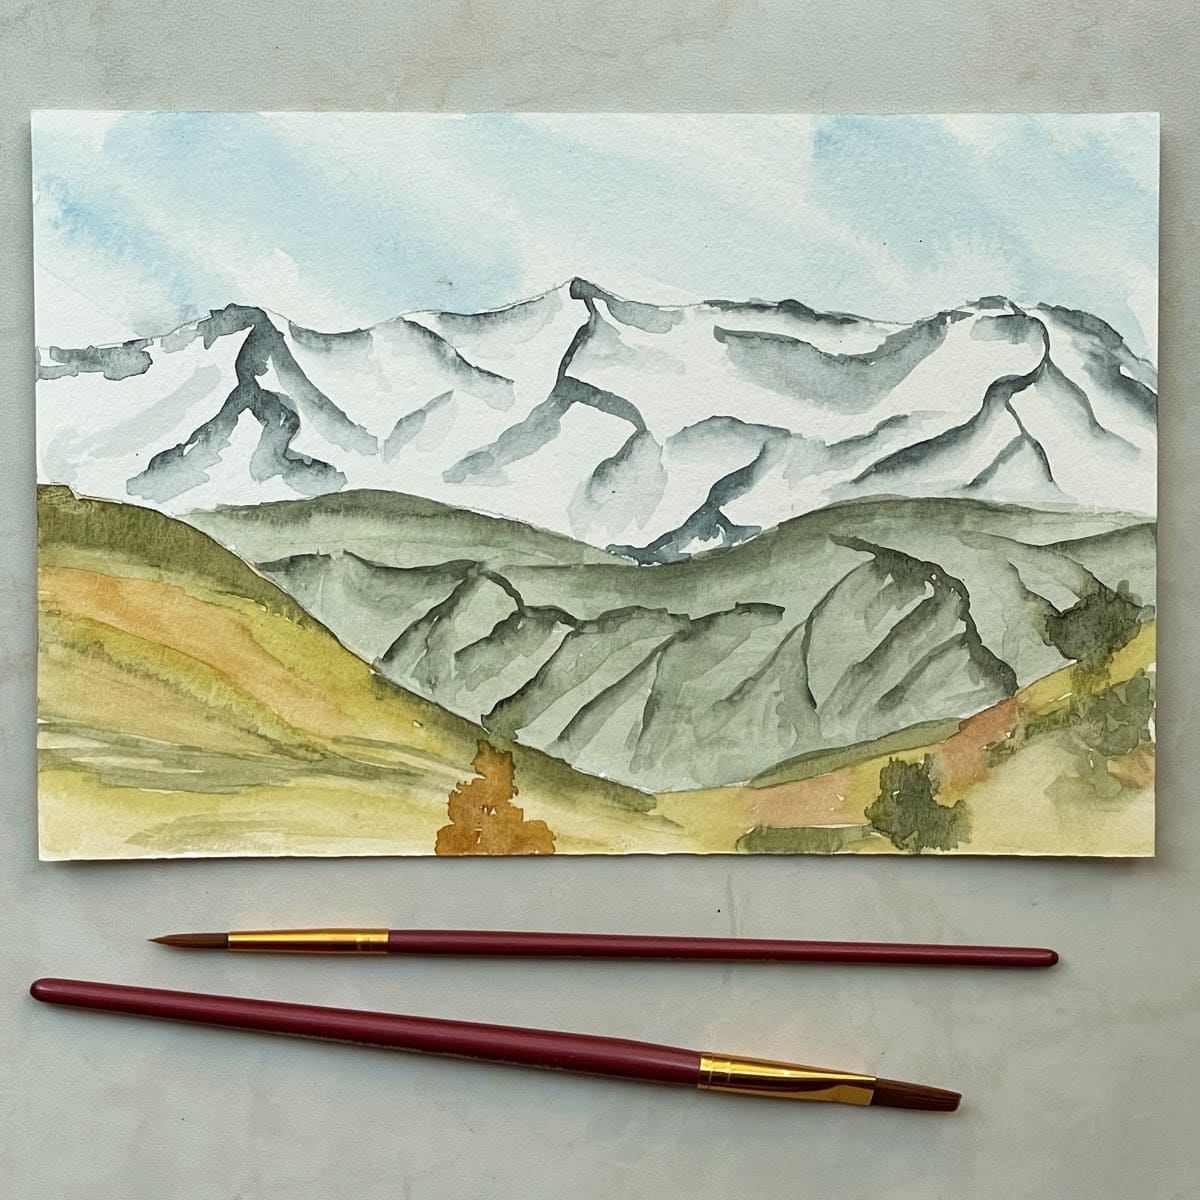
Paint an easy watercolor mountain landscape for beginners in this step-by-step tutorial. Learn the best way to paint mountain scenery in this simple online art lesson.
Practice painting a snow-capped mountain range and learn all the tips and tricks to making watercolor painting easier. Creating peaks in the distance has never been simpler.
Jump to:
Find out the proper brush strokes and techniques to use when painting this and other nature scenes. Learn about the best colors to help make your artwork look more realistic.
In this quick online video art class, practice basic line making, watercolor washes, and blending pigment. Discover the joy and solace you can find in taking the time to create a natural mountainscape.
Don’t worry if your painting is not perfect. It is all about trying new techniques and repeating your new skills over and over again.
Just keep practicing. And have fun doing it!
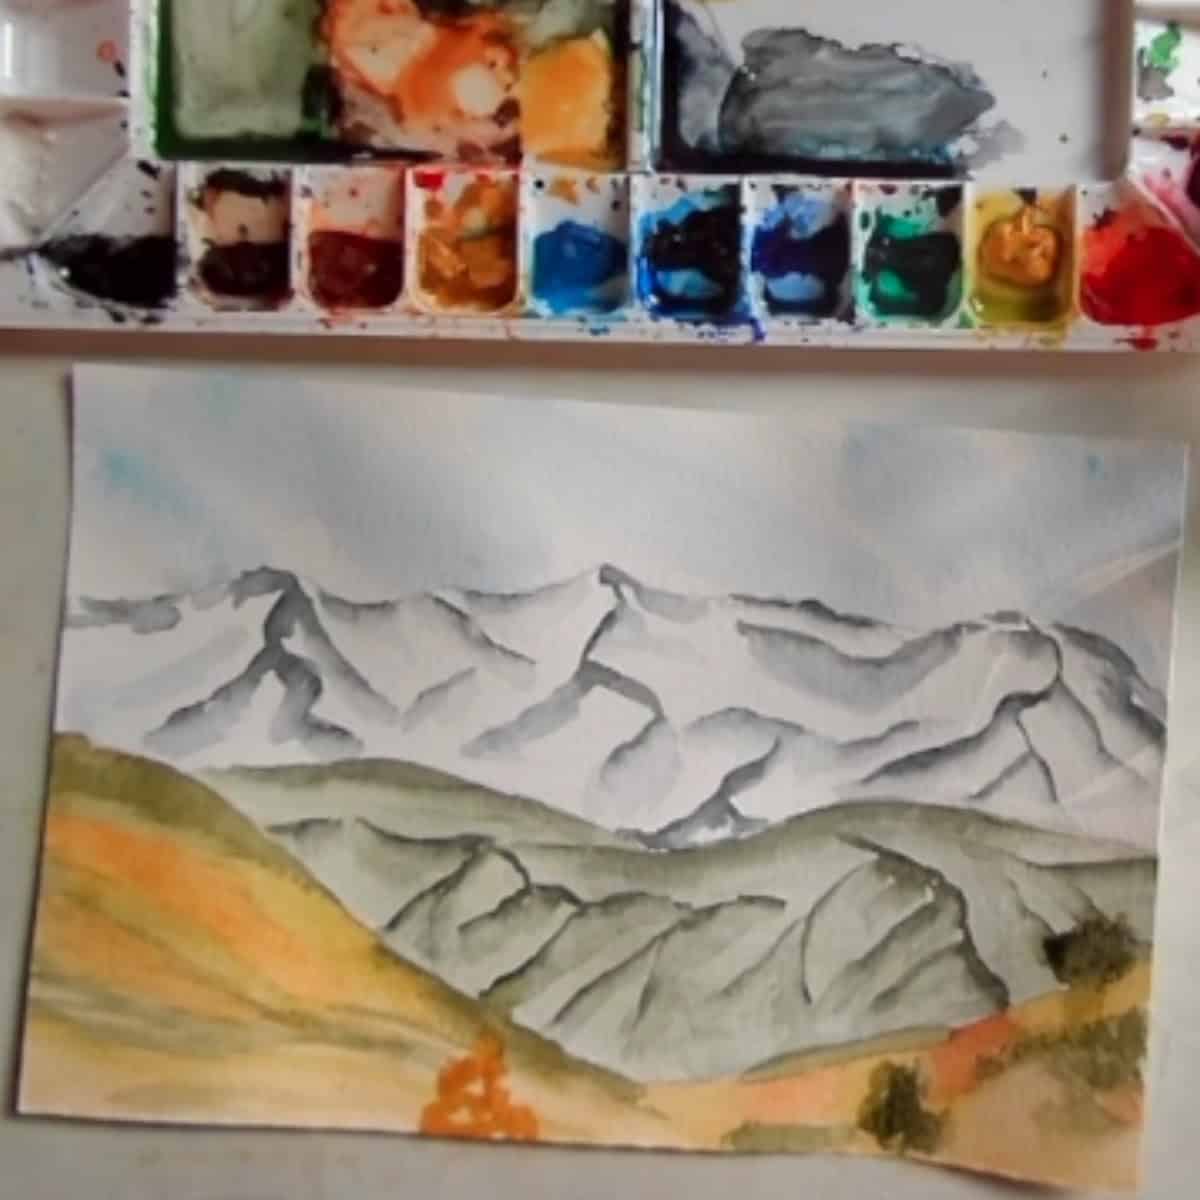
Materials
- Watercolor paper - I am using Strathmore 400 Series watercolor paper, 140 lb., cut down to 6 by 9 inches
- Watercolor paint - tube watercolor paint on a pallet or a box kit of watercolor paints.
- Paint brushes - I am using a #4 round and a flat 1/2” brush
- Water
- Paper towels
Video Tutorial
Transcript
Read TranscriptArt Lesson
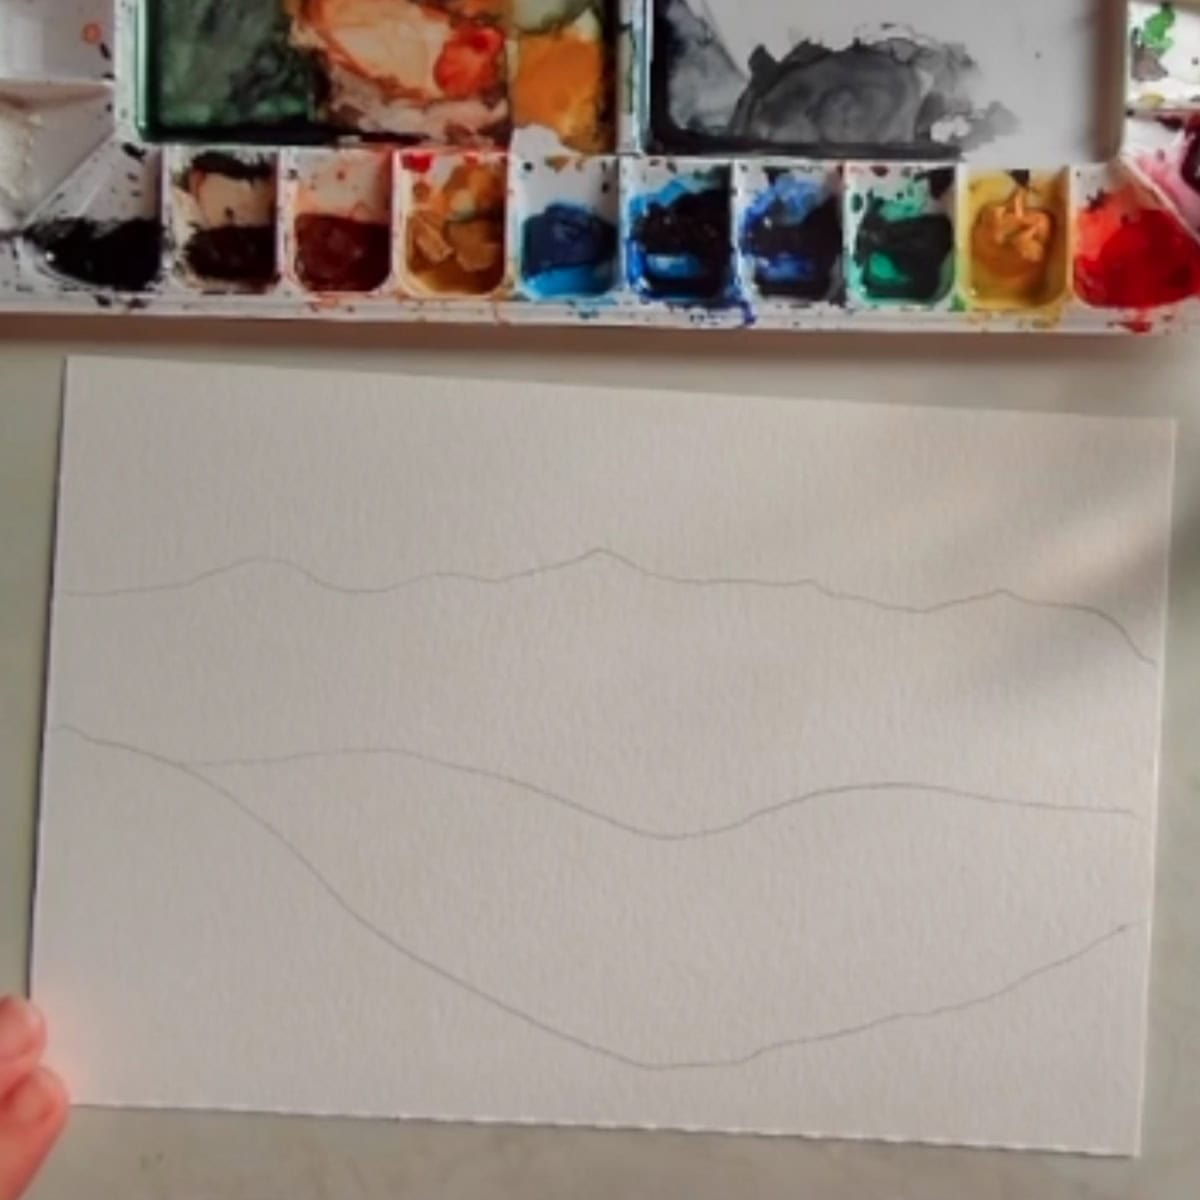
1. Getting Started
- Add a few drops of water to each of the colors. For this lesson I use cadmium red light, cadmium yellow, yellow ocher, burnt Sienna, Prussian blue, ultramarine blue, and black. You can use whatever similar colors that you have on hand.
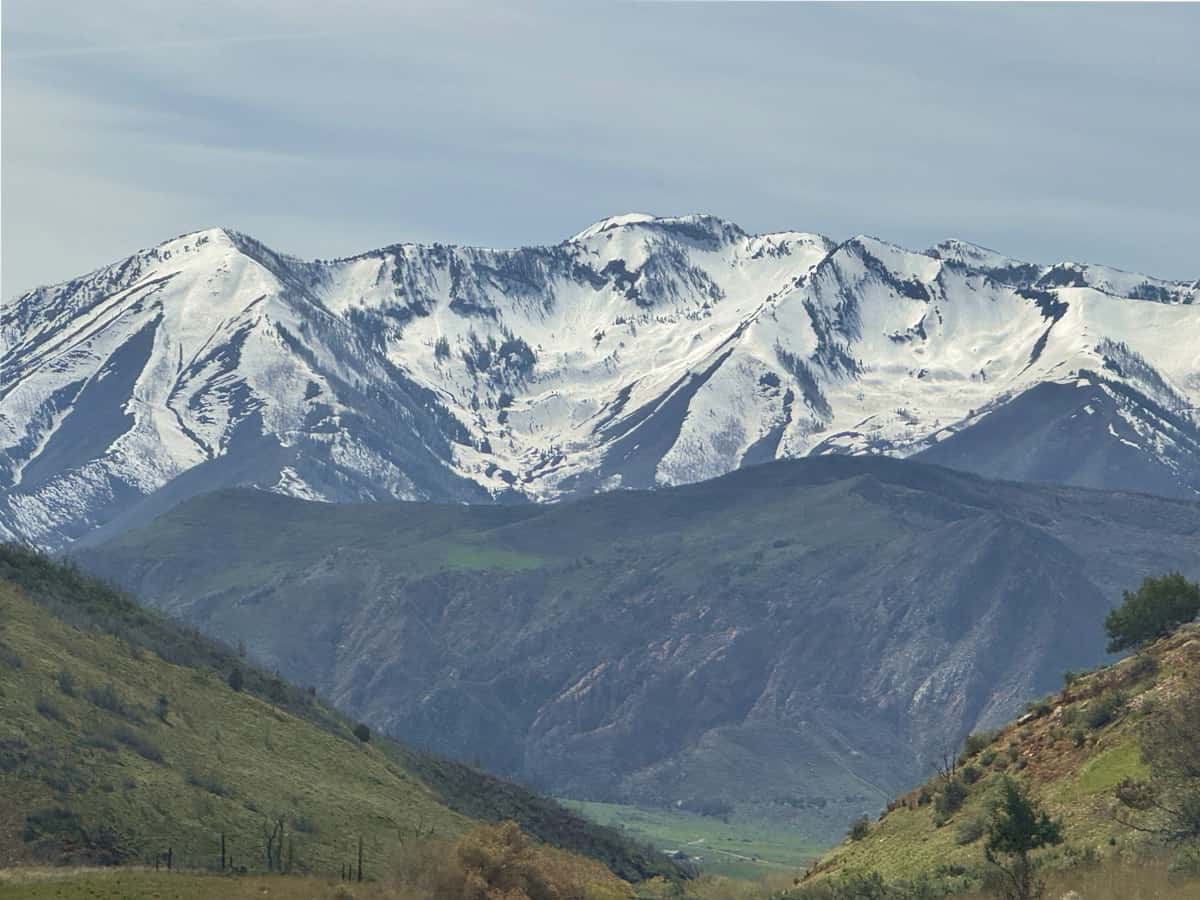
- Lightly sketch in the mountain scene. If you like, refer to the photo in the lesson downloads or follow along with the tutorial.
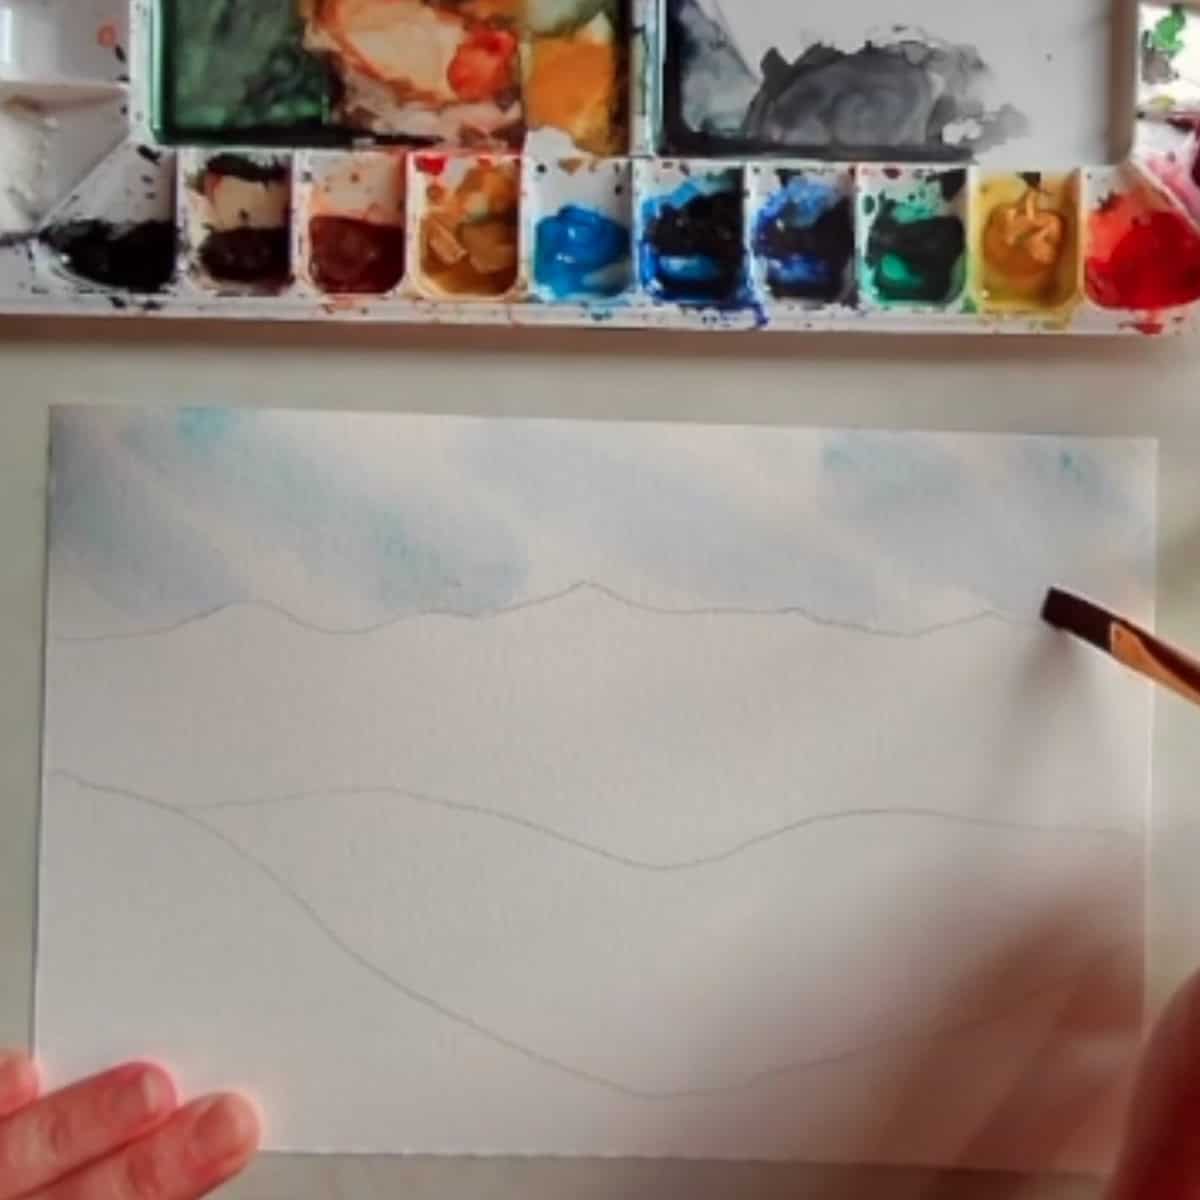
2. Paint the sky
- Apply clean water to the entire sky area for this wet-on-wet technique. Paint Cerulean blue streaks into the damp sky. Leave some streaks of white paper for the clouds.
- Gently blend the blue into the white for a smooth gradation between the sky and clouds.
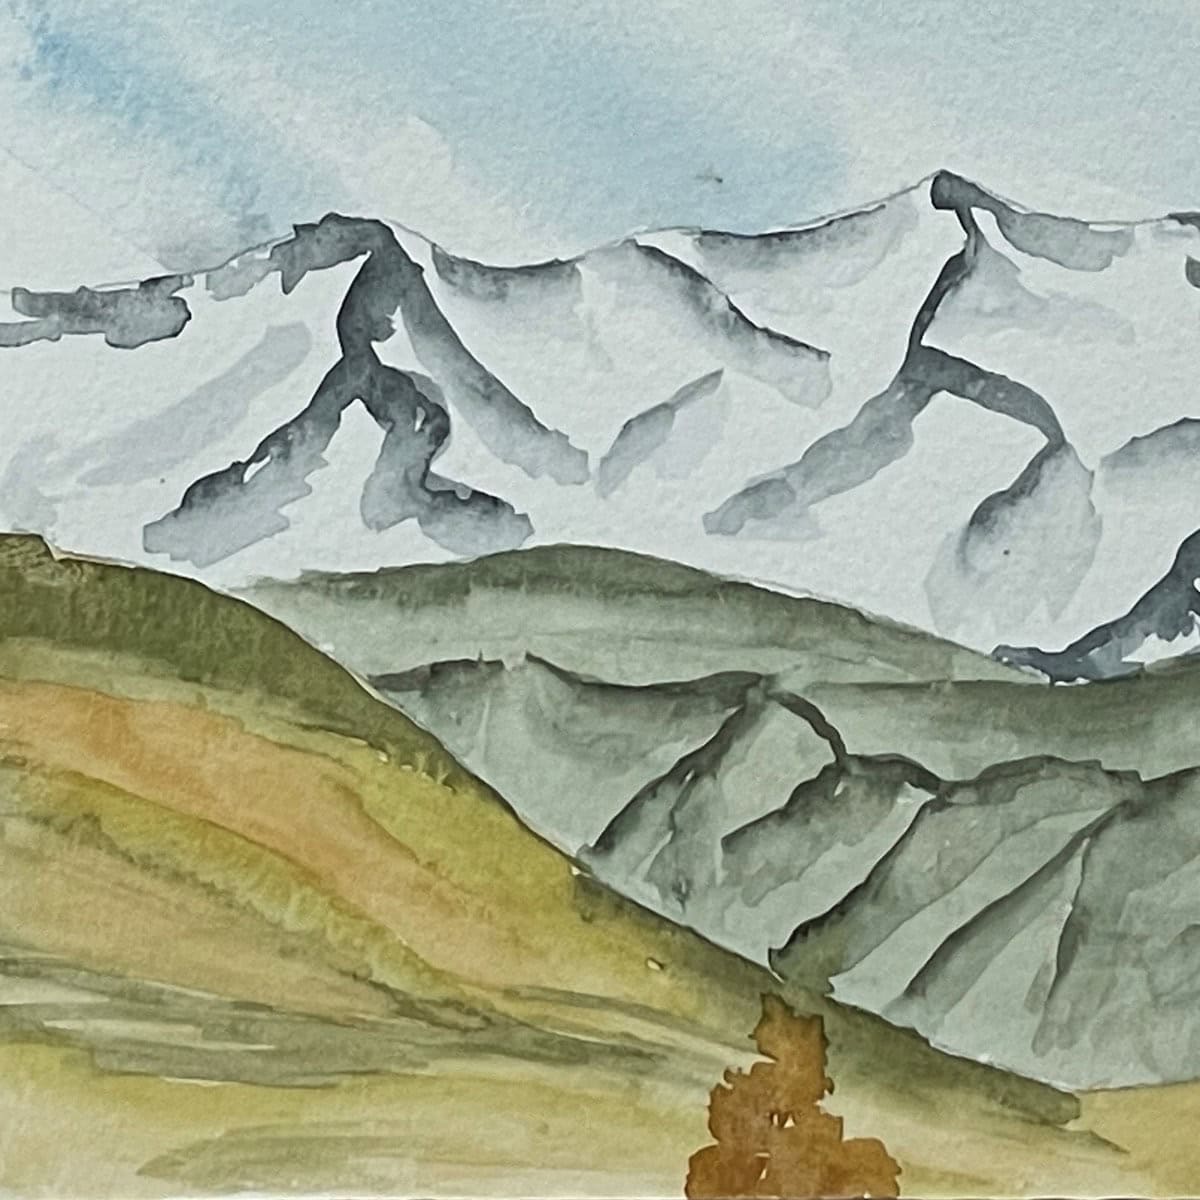
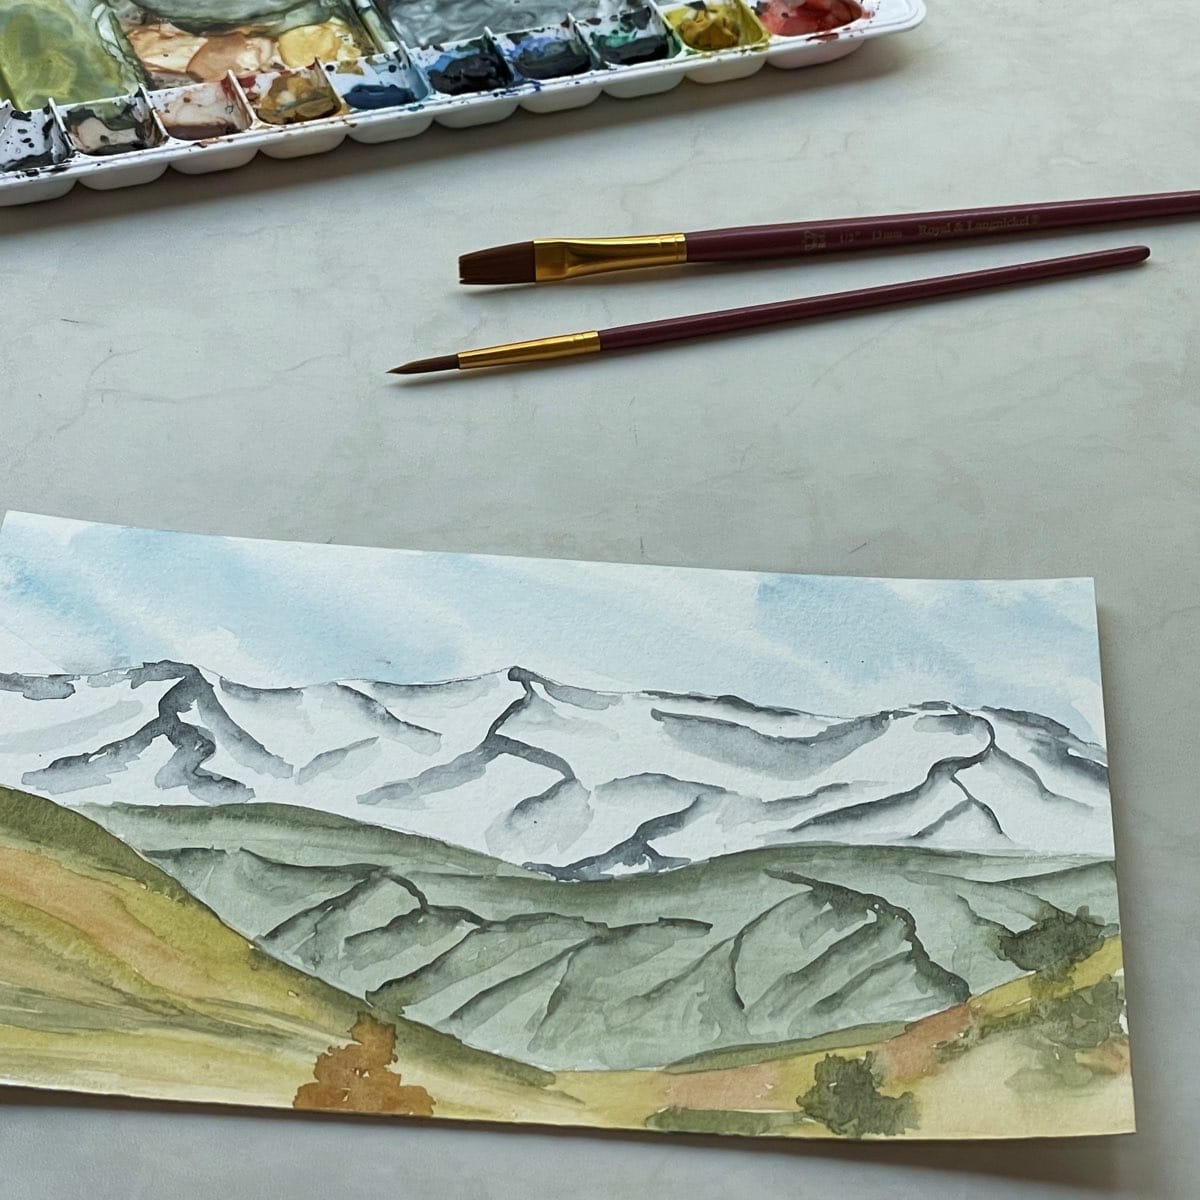
3. Paint the mountain peaks in the distance
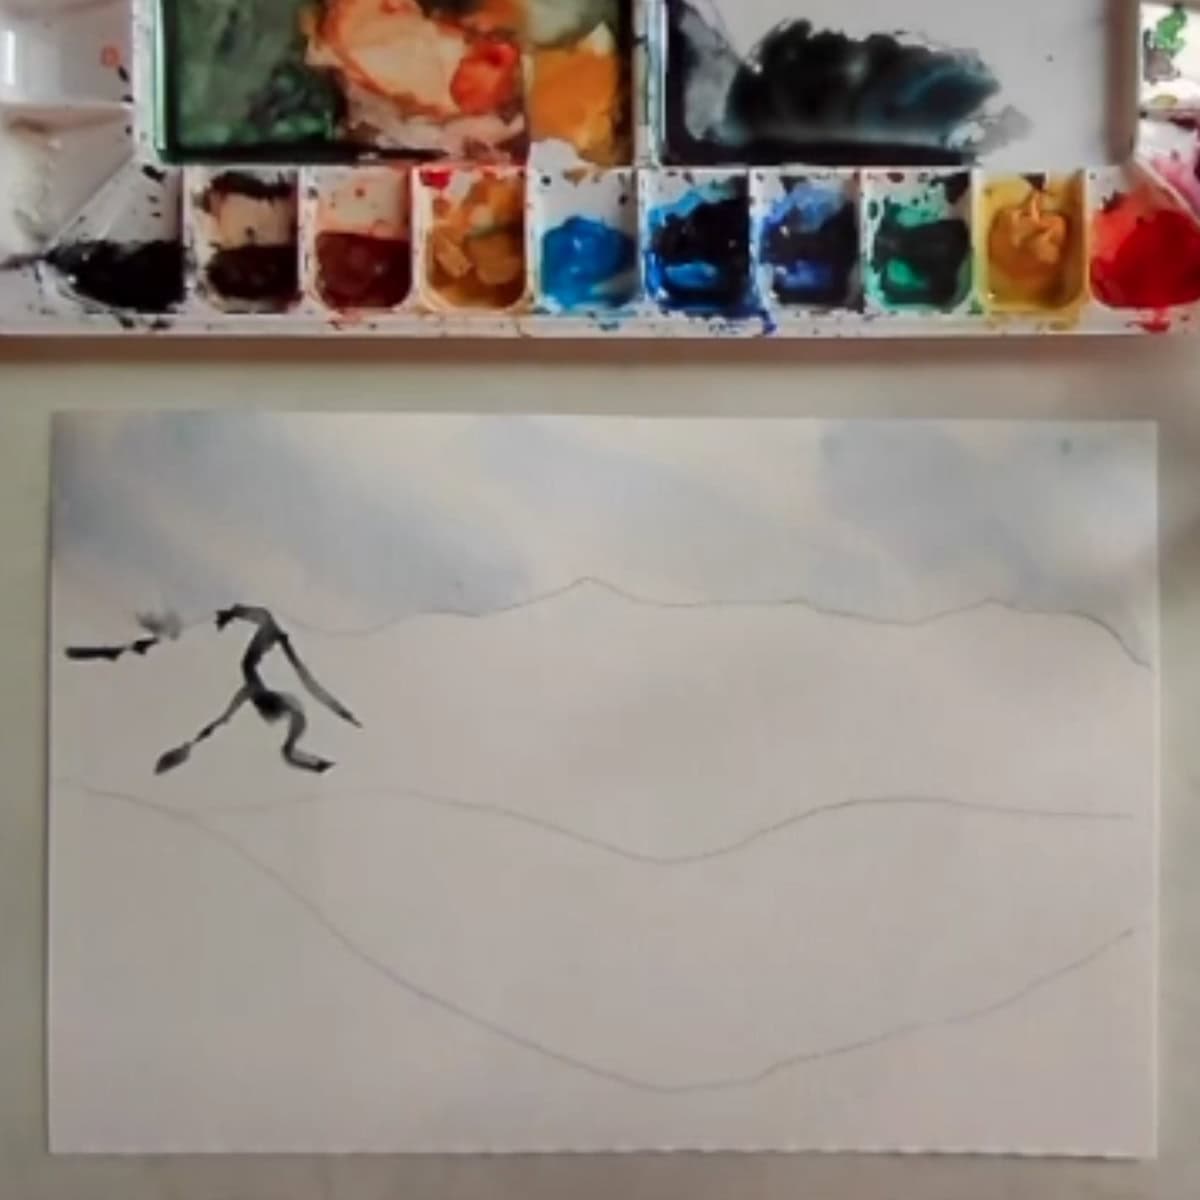
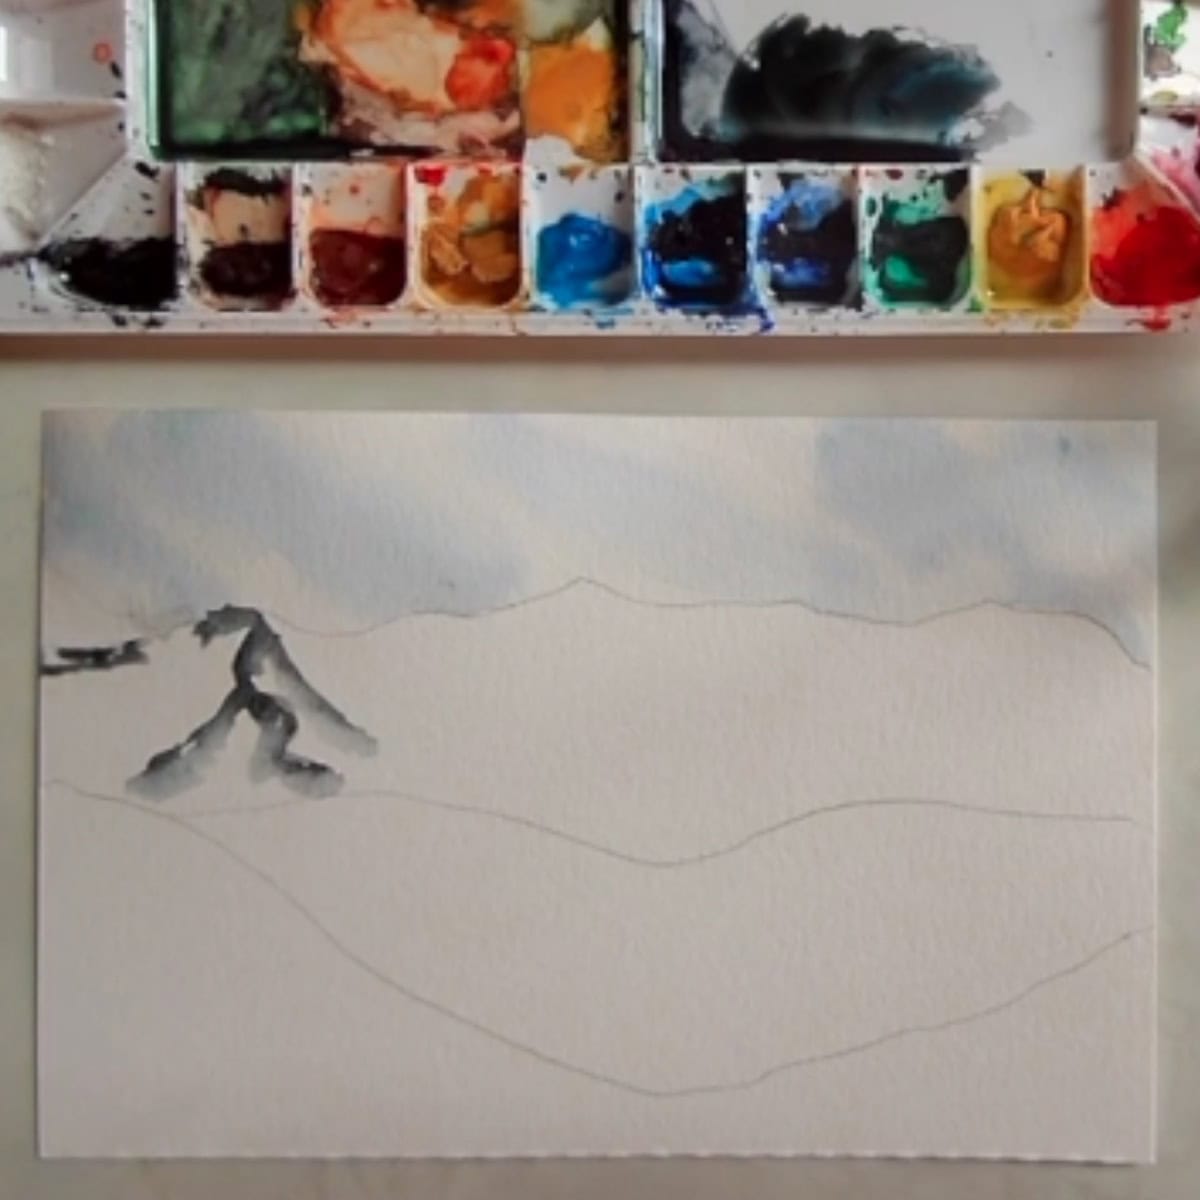
- Combine Prussian blue and black. Working one section of the mountain at a time, paint irregular squiggly lines on the tops of the mountain ranges. Add lines coming down from the top of the peak.
- Rinse out the paintbrush and use clean water to blend the paint out into a light wash. Leave a hard edge on one side of the line while pulling the pigment out into a light wash on the other side.
- Repeat this process for the rest of the ridges in the mountain range.
- Paint the blue-black mixture on the tops of the mountain peaks to indicate craggy rocks or trees peeking out from the snow-capped mountain.
4. Paint the green hilly mountain in the middle ground
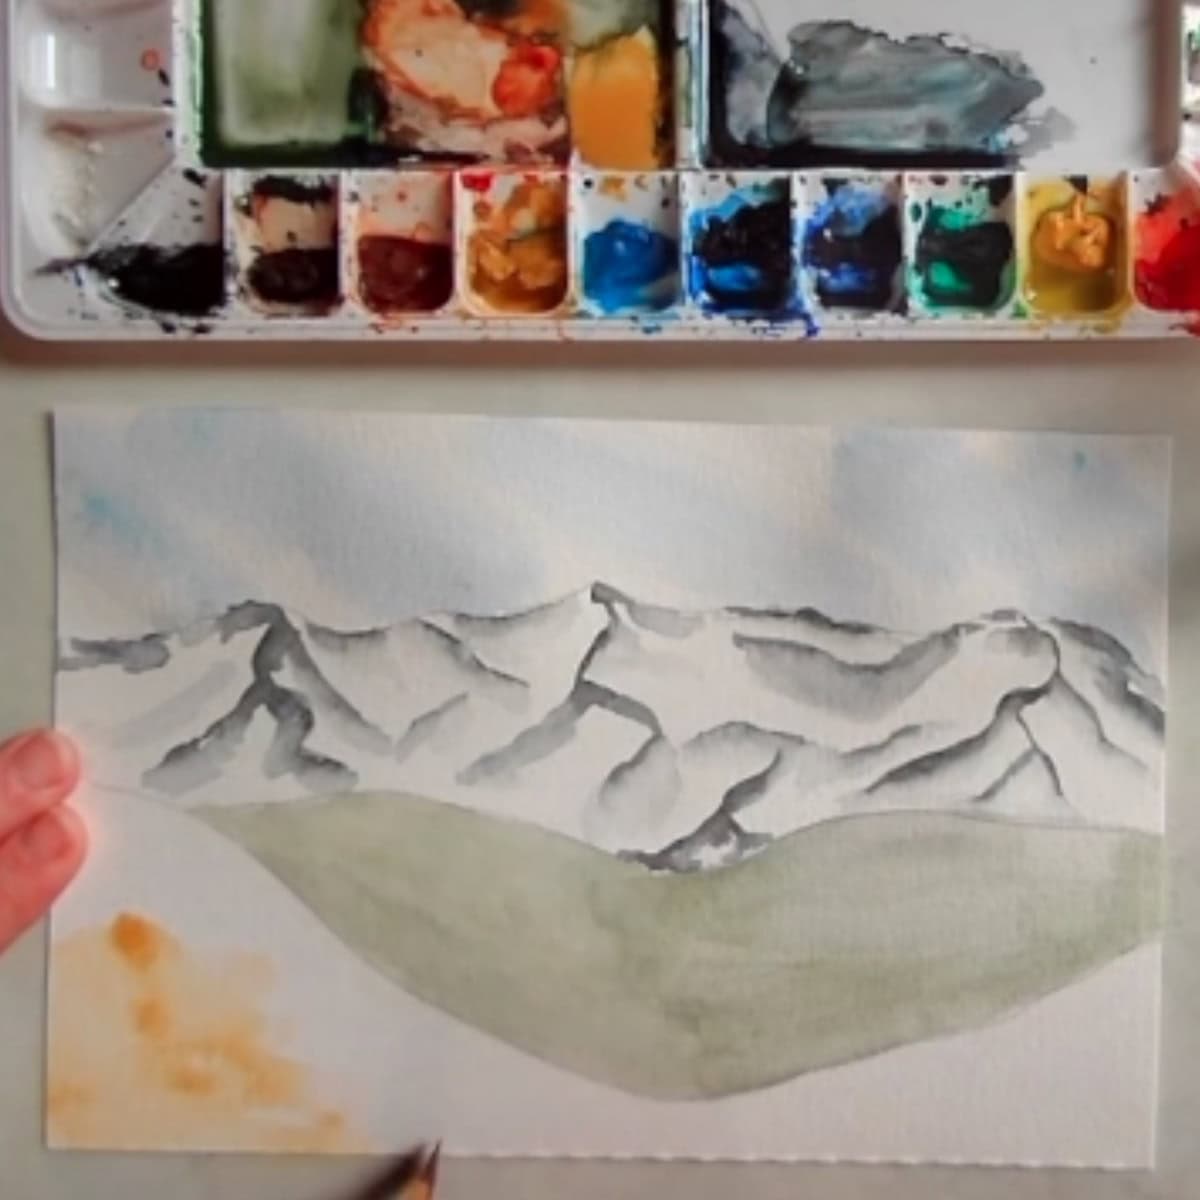
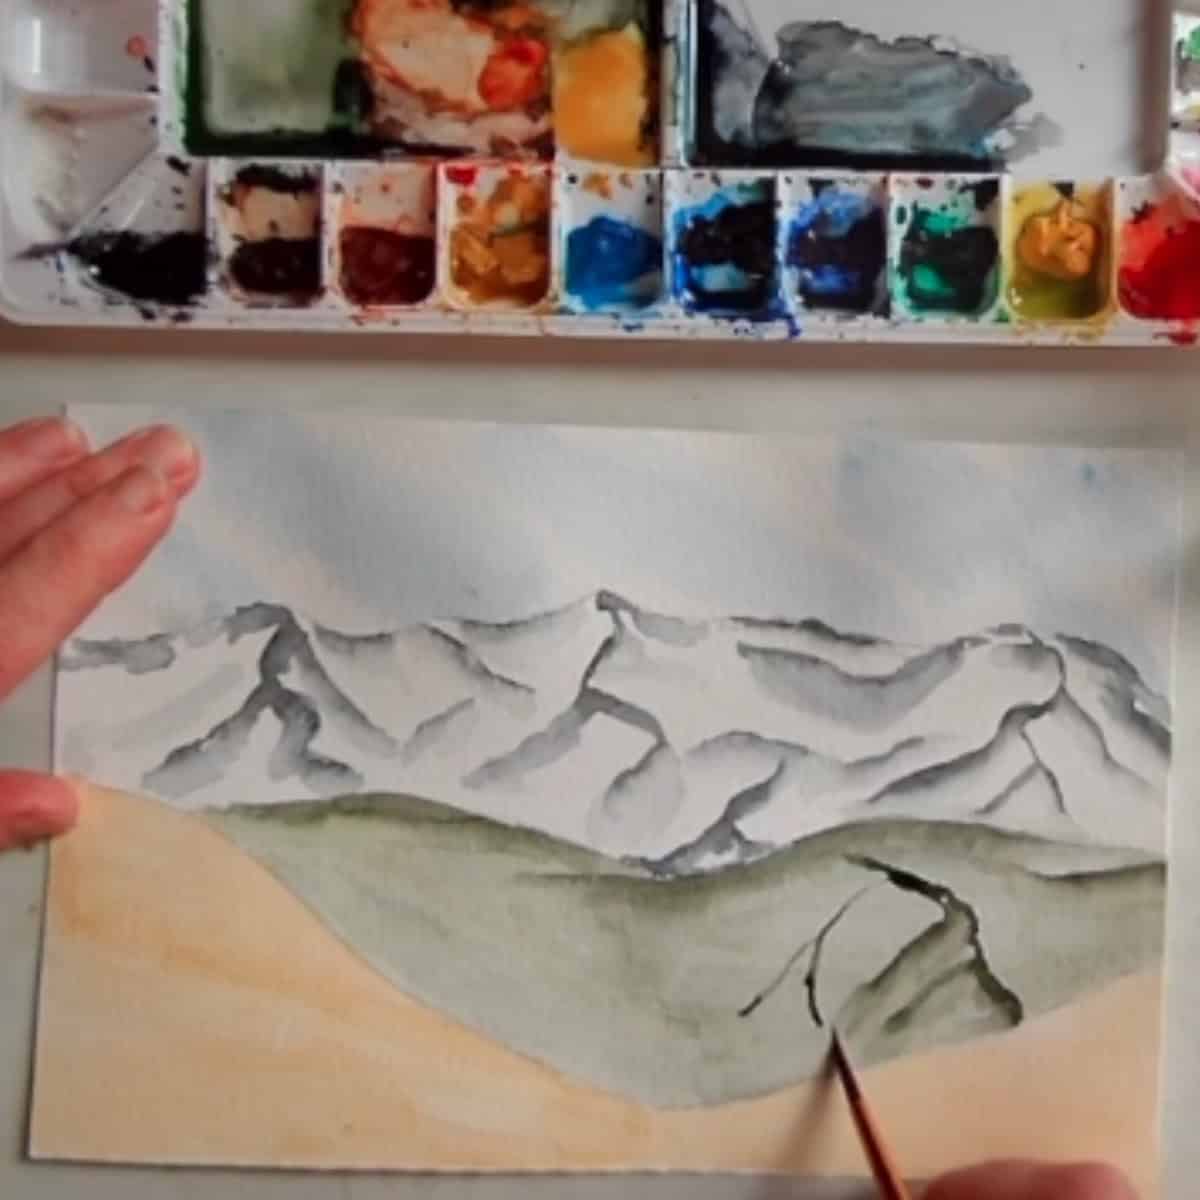
- Mix ultramarine blue, cadmium yellow, and black to make sage green. Dilute it with water and paint the entire middle ground mountain area. While this area dries, move to the painting in the foreground.
- Dilute yellow ocher paint with water and paint in the foreground.
- Add some details in the green middle ground area. Add a little more black paint to the sage-green mixture.
- Add several strips of dark green paint to the tops of the green mountain. With a clean damp brush, blend the color out toward the bottom of the painting.
- Using the same technique as in the snowy mountains in the distance, paint irregular squiggly lines on the tops of the mountain ranges.
- Add lines coming down from the top of the peak. Rinse the paintbrush and use clean water to blend the paint out into a wash.
5. Paint the grassy hills in the foreground
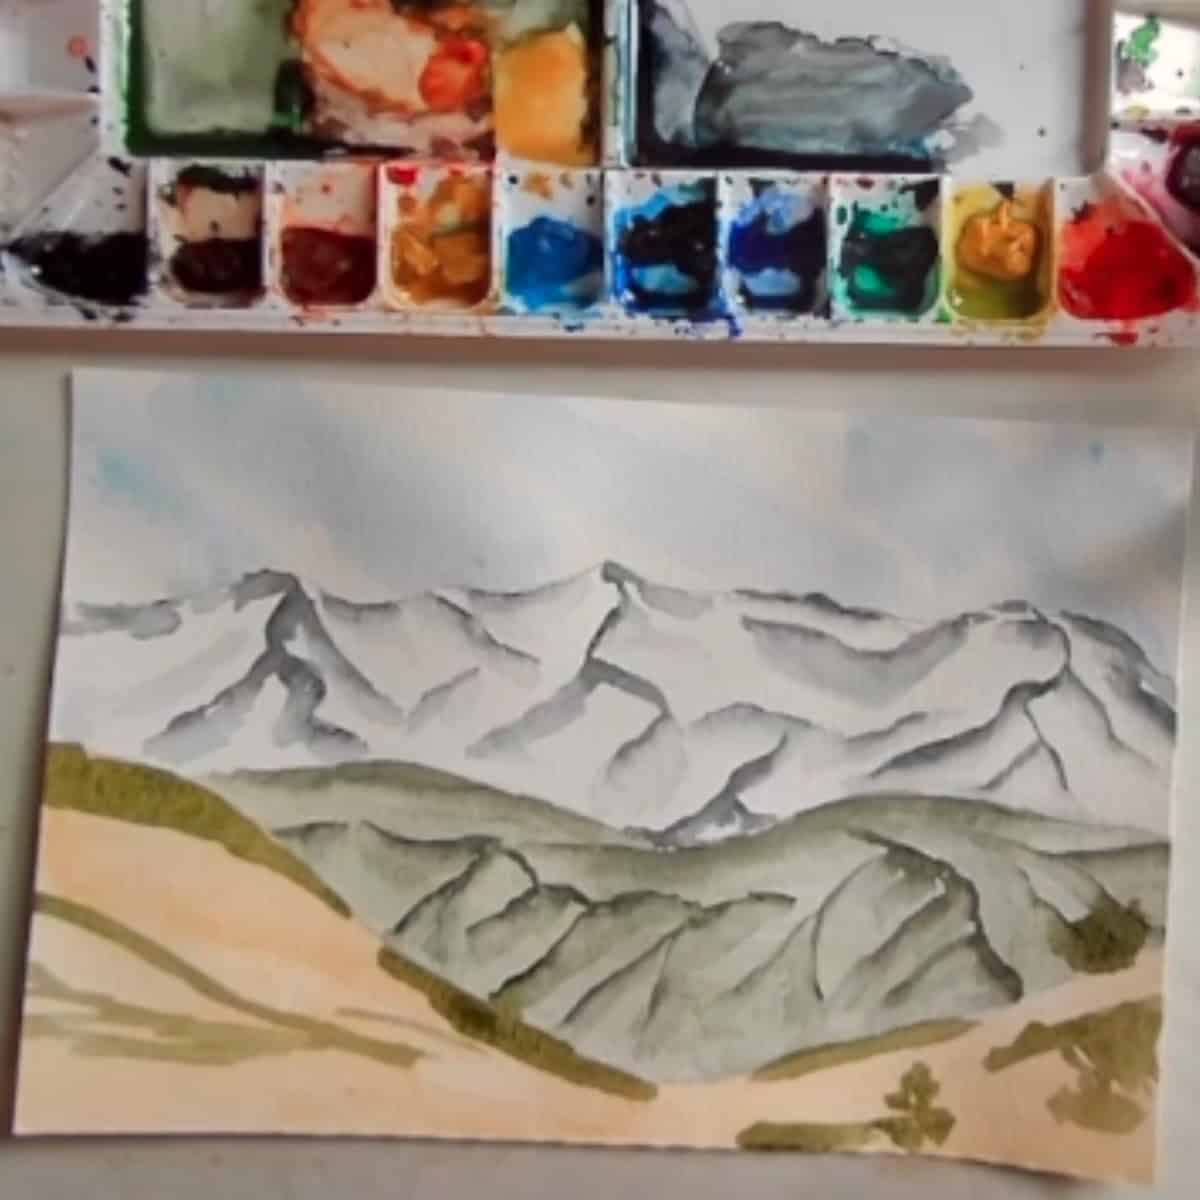
- Brighten up the sage green paint by adding more yellow and blue. Add a few strips of this green in the foreground. Then add several strips of yellow paint mixed with just a touch of green.
- Gently blend out the edges of the yellow and blend the green and yellow edges where they meet. Make sure not to over-blend the colors.
- Mix cadmium red light and cadmium yellow to make orange and paint this in several areas on the right side.
- Use green paint to daub in several trees and a bush on the right side.
- Paint in a tree using yellow ocher on the left-hand side. Paint several areas with the same color on the hill on the left side of the painting.
- Add a few daubs of dark green into the trees and bush. Drop in several spots of burnt Sienna to the orange tree to complete the low lights.
Tips and tricks
- Do not over-blend the colors. This could result in a muddy painting or washed-out colors.
- Let the washes in the middle ground (the greenish peak) and the foreground (the grassy hill) dry slightly before you add more detail.
- Use large paint brushes for large areas and small brushes for smaller areas or details.
- Lift off any mistakes or excess paint with a clean paintbrush or paper towel wrapped o a point around your finger.
- Paint lighter colors in the distance and darker colors in the foreground to create a greater sense of dimension in the painting.
- Use both sides of your watercolor paper when practicing new skills and techniques.
Paint an Easy Watercolor Mountain Landscape for Beginners
Equipment
- Watercolor paper - I am using Strathmore 400 Series watercolor paper, 140 lb., cut down to 6 by 9 inches
- Watercolor paint - tube watercolor paint on a pallet or a box kit of watercolor paints.
- Paint brushes - I am using a #4 round and a flat 1/2” brush
- Water
- Paper towels
Instructions
Getting Started
- Add a few drops of water to each of the colors. For this lesson I use cadmium red light, cadmium yellow, yellow ocher, burnt Sienna, Prussian blue, ultramarine blue, and black. You can use whatever similar colors that you have on hand.
- Lightly sketch in the mountain scene. If you like, refer to the photo in the lesson downloads or follow along with the tutorial.
Paint the sky
- Apply clean water to the entire sky area for this wet-on-wet technique. Paint Cerulean blue streaks into the damp sky. Leave some streaks of white paper for the clouds.
- Gently blend the blue into the white for a smooth gradation between the sky and clouds.
Paint the mountain peaks in the distance
- Combine Prussian blue and black. Working one section of the mountain at a time, paint irregular squiggly lines on the tops of the mountain ranges. Add lines coming down from the top of the peak.
- Rinse out the paintbrush and use clean water to blend the paint out into a light wash. Leave a hard edge on one side of the line while pulling the pigment out into a light wash on the other side.
- Repeat this process for the rest of the ridges in the mountain range.
- Paint the blue-black mixture on the tops of the mountain peaks to indicate craggy rocks or trees peeking out from the snow-capped mountain.
Paint the green hilly mountain in the middle ground
- Mix ultramarine blue, cadmium yellow, and black to make sage green. Dilute it with water and paint the entire middle ground mountain area. While this area dries, move to the painting in the foreground.
- Dilute yellow ocher paint with water and paint in the foreground.
- Add some details in the green middle ground area. Add a little more black paint to the sage-green mixture.
- Add several strips of dark green paint to the tops of the green mountain. With a clean damp brush, blend the color out toward the bottom of the painting.
- Using the same technique as in the snowy mountains in the distance, paint irregular squiggly lines on the tops of the mountain ranges.
- Add lines coming down from the top of the peak. Rinse the paintbrush and use clean water to blend the paint out into a wash.
Paint the grassy hills in the foreground
- Brighten up the sage green paint by adding more yellow and blue. Add a few strips of this green in the foreground. Then add several strips of yellow paint mixed with just a touch of green.
- Gently blend out the edges of the yellow and blend the green and yellow edges where they meet. Make sure not to over-blend the colors.
- Mix cadmium red light and cadmium yellow to make orange and paint this in several areas on the right side.
- Use green paint to daub in several trees and a bush on the right side.
- Paint in a tree using yellow ocher on the left-hand side. Paint several areas with the same color on the hill on the left side of the painting.
- Add a few daubs of dark green into the trees and bush. Drop in several spots of burnt Sienna to the orange tree to complete the low lights.
Notes
Lesson Downloads
For More Practice
- Use different brush techniques to paint mountains, see the complete lesson.
- Practice painting a different mountain scene from life or a photo.
- Imagine this landscape during a different season. What would be different in the winter or spring? Try painting bright spring leaves and grasses or bare winter branches.
- Try painting the same image in a different style such as cubism, minimalism, or surrealism.
What to Do with Your Painting
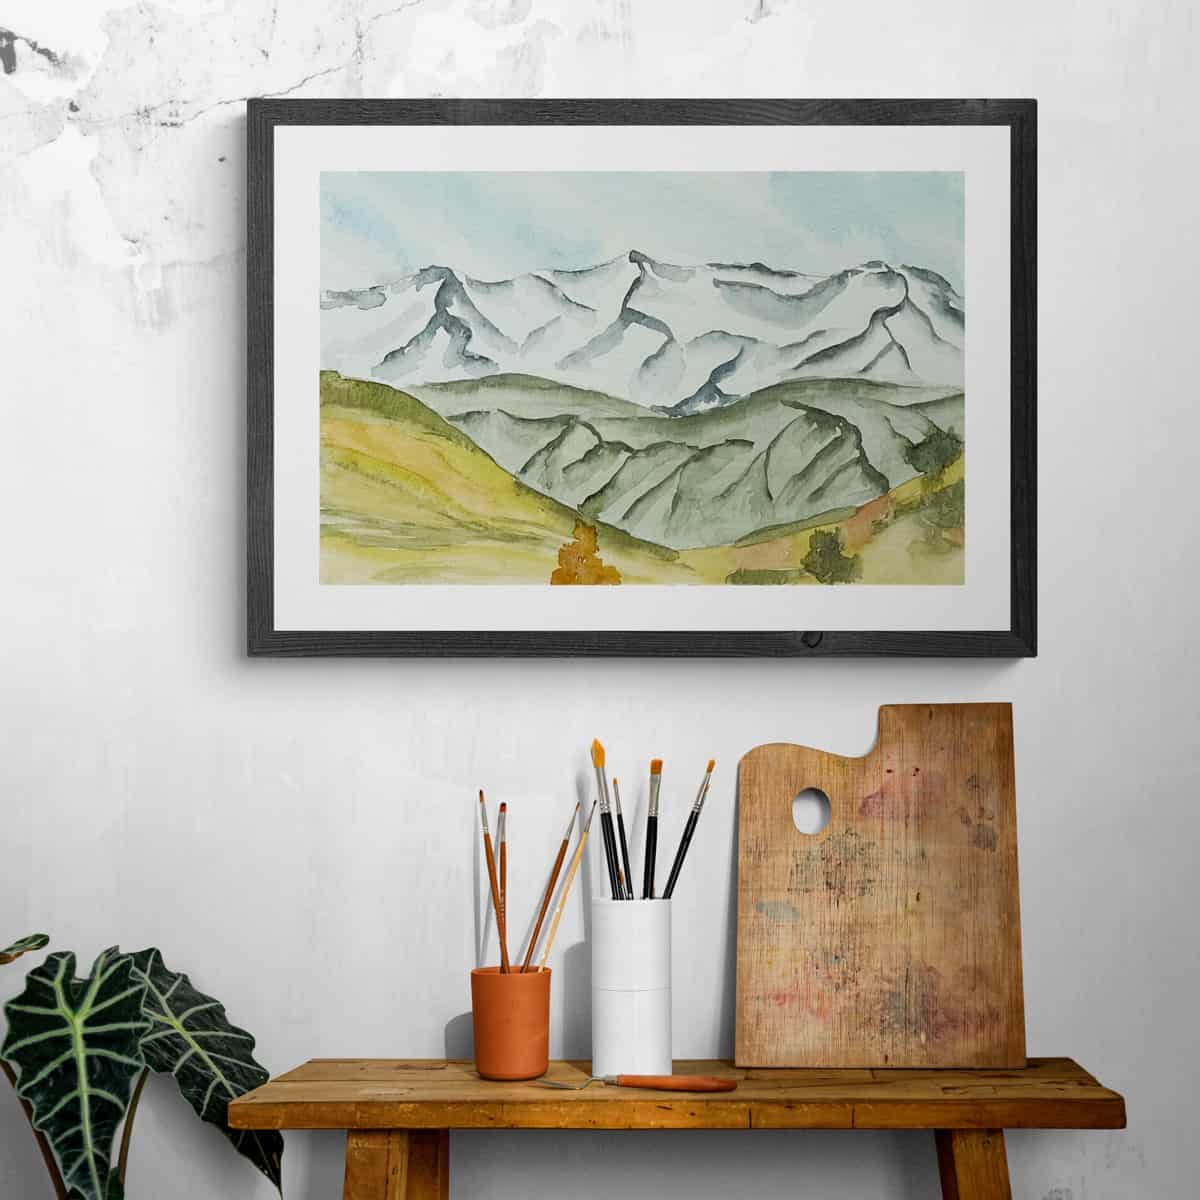
This is a perfect painting to frame and display on your wall. It would also make a wonderful gift for any holiday or special occasion.
Another option is to add this mountain landscape painting to your portfolio. It is a good idea to save completed paintings, drawings, and sketches. This helps you clearly see your progression as an artist.
Frequently Asked Questions
Combine Prussian blue and black. Working one section of the mountain at a time, paint irregular squiggly lines on the tops of the mountain ranges. Add lines coming down from the top of the peak.
Rinse out the paintbrush and use clean water to blend the paint out into a light wash. Leave a hard edge on one side of the line while pulling the pigment out into a light wash on the other side. Repeat this process for the rest of the ridges in the mountain range.
Paint in the mountain area with a diluted sage green watercolor paint. Let it dry. Then add several strips of dark green paint to the tops of the green mountain. With a clean damp brush, blend the color out toward the bottom of the painting.
Paint irregular squiggly lines on the tops of the mountain ranges. Add lines coming down from the top of the peak. Rinse the paintbrush and use clean water to blend the bottom part of the line out into a wash.
Apply clean water to the entire sky area for this wet-on-wet technique. Paint Cerulean blue streaks into the damp sky. Leave some streaks of white paper for the clouds.
Gently blend the blue into the white for a smooth gradation between the sky and clouds.
You also might like
- Different Ways to Paint Mountains (8 Simple Techniques)
- Paint an Easy Lake Scene Step-by-Step
- How to Watercolor and Easy Beach Scene
- Watercolor Techniques for Beginners
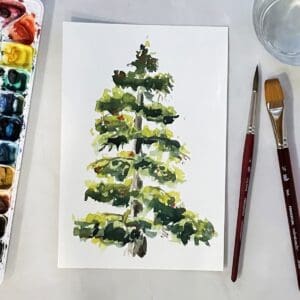
- How to Paint a Pine Tree in Watercolor
Please leave your questions, comments, and ratings below!


OGGardenGuru says
Is it possible to capture the true essence and beauty of a mountain landscape through a simple watercolor painting? Can the complexity and majesty of nature be accurately portrayed using such a delicate and transparent medium?