Learn how to paint a pine tree easy in watercolor with this art lesson. Discover the simplest technique to paint a beautiful evergreen tree quickly.
Practice painting pine trees and find out tips and tricks to making watercolor painting easy and fun! This step-by-step tutorial will lead you through everything you need to know.
Jump to:
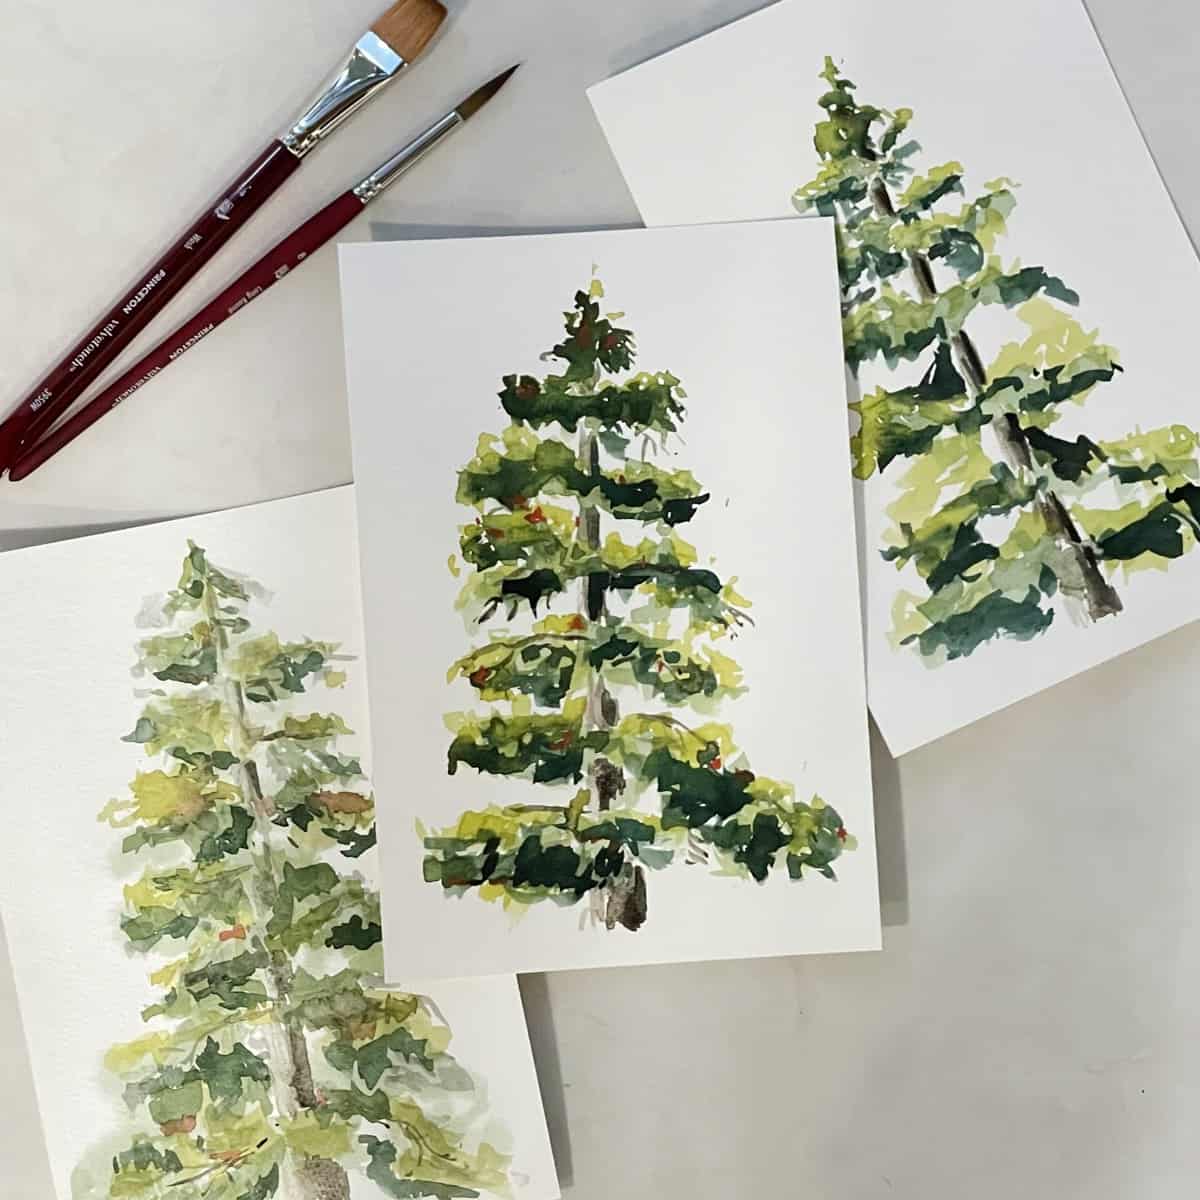
In this quick online video art class, practice how to paint a pine tree. You will learn the basic skill of layering multiple colors to make your tree look more realistic without painting every single branch.
Painting pine trees is a great way to practice brushstroke techniques for beginners and more experienced artists. Seeing and painting values and hues in nature or within a still life will help you become a better artist.
Whether you want to paint a Monterey pine, a cedar tree, or a fir tree (which are not actually pine trees), these techniques are adaptable to painting any kind of evergreen tree.
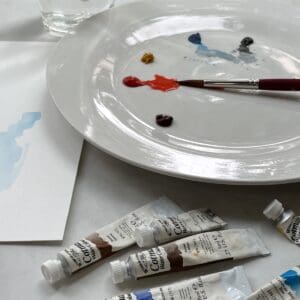
Materials
- Watercolor paper - I am using Strathmore 400 Series, cold press, watercolor paper, 140 lb., cut down to 9 by 6 inches
- Watercolor paint - tube watercolor paint on a pallet or a box kit of watercolor paints. You can use whatever colors that you have on hand. For this lesson I use: Cadmium Yellow,
- Prussian Blue, Black, Burnt Umber, and Cadmium Red Light
- Paint brushes - I am using a #8 round brush.
- Water
- Paper towels
Paint a Pine Tree Video Tutorial
Transcript
Read TranscriptHow to Paint a Pine Tree Art Lesson
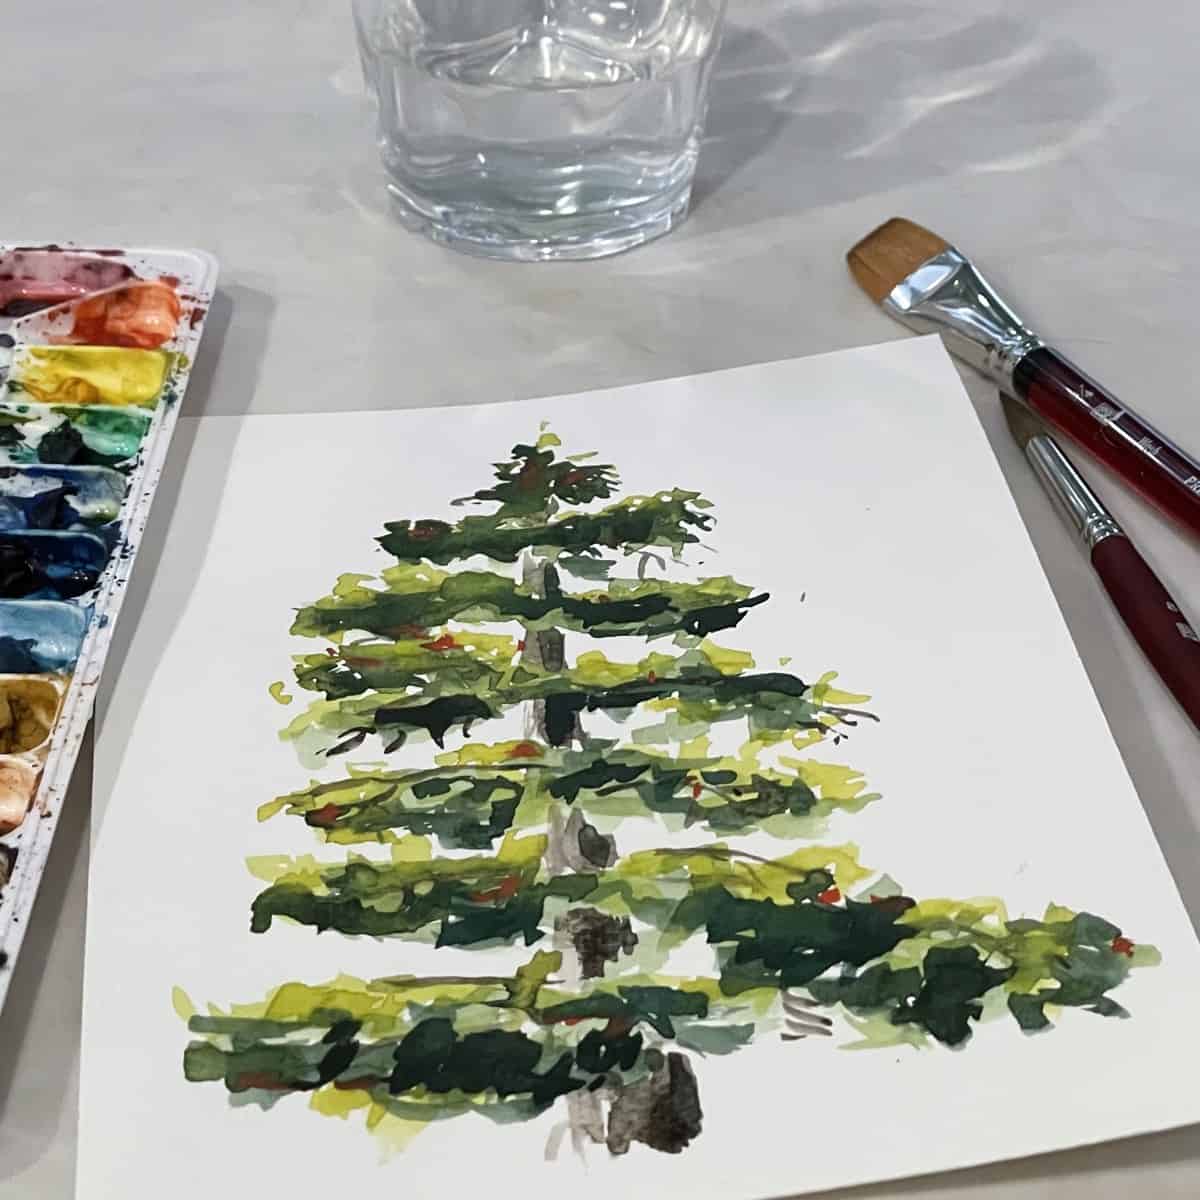
- Keep the paint strokes loose and irregular when practicing painting this tree.
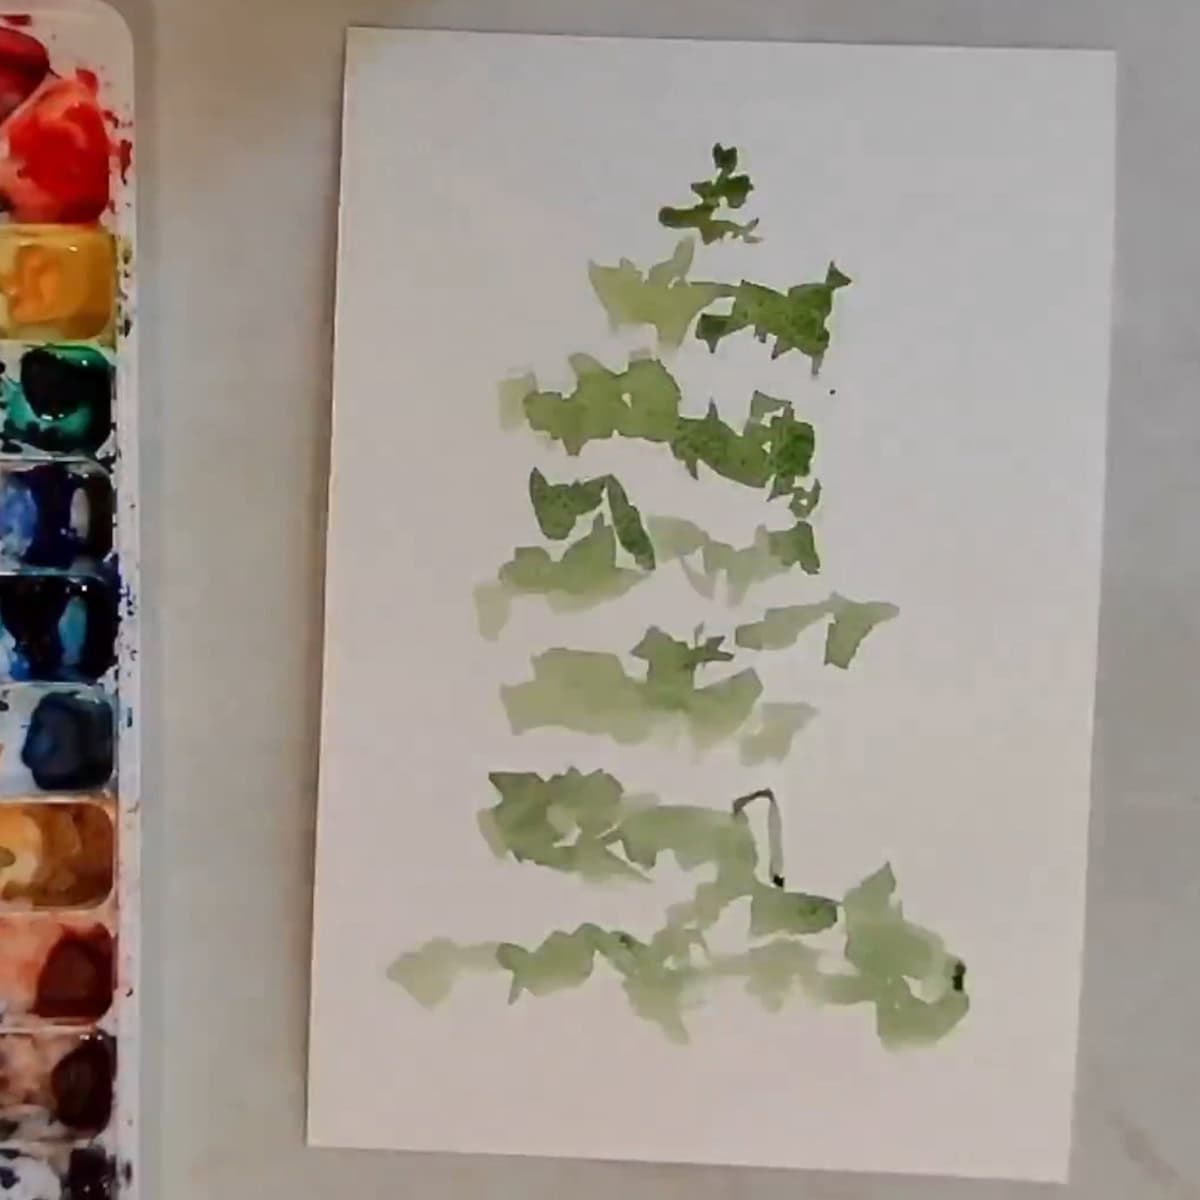
- Mix cadmium yellow, Prussian blue, and a little bit of black paint. Paint the basic structure of the pine tree. Paint with me, look at a real tree, or a photo of a tree to get a sense of where the lights and darks are.
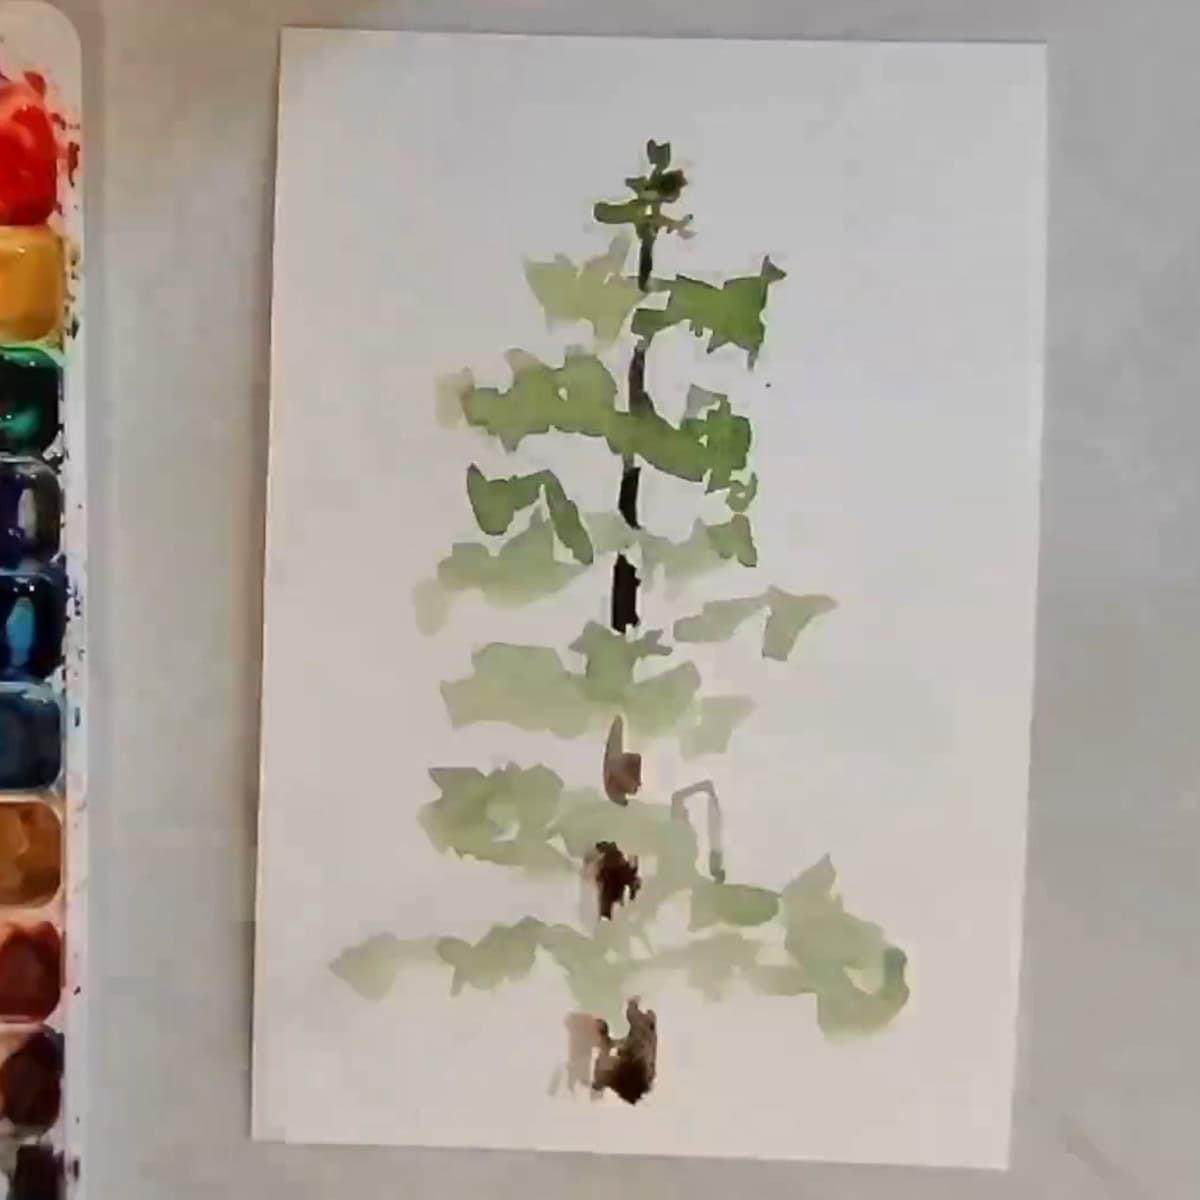
- Use black and burnt umber to create the trunk. Paint the right side of the trunk in between the branch clusters. Rinse out the brush and then drag the paint from the right across to the left side of the trunk to create a highlighted effect.
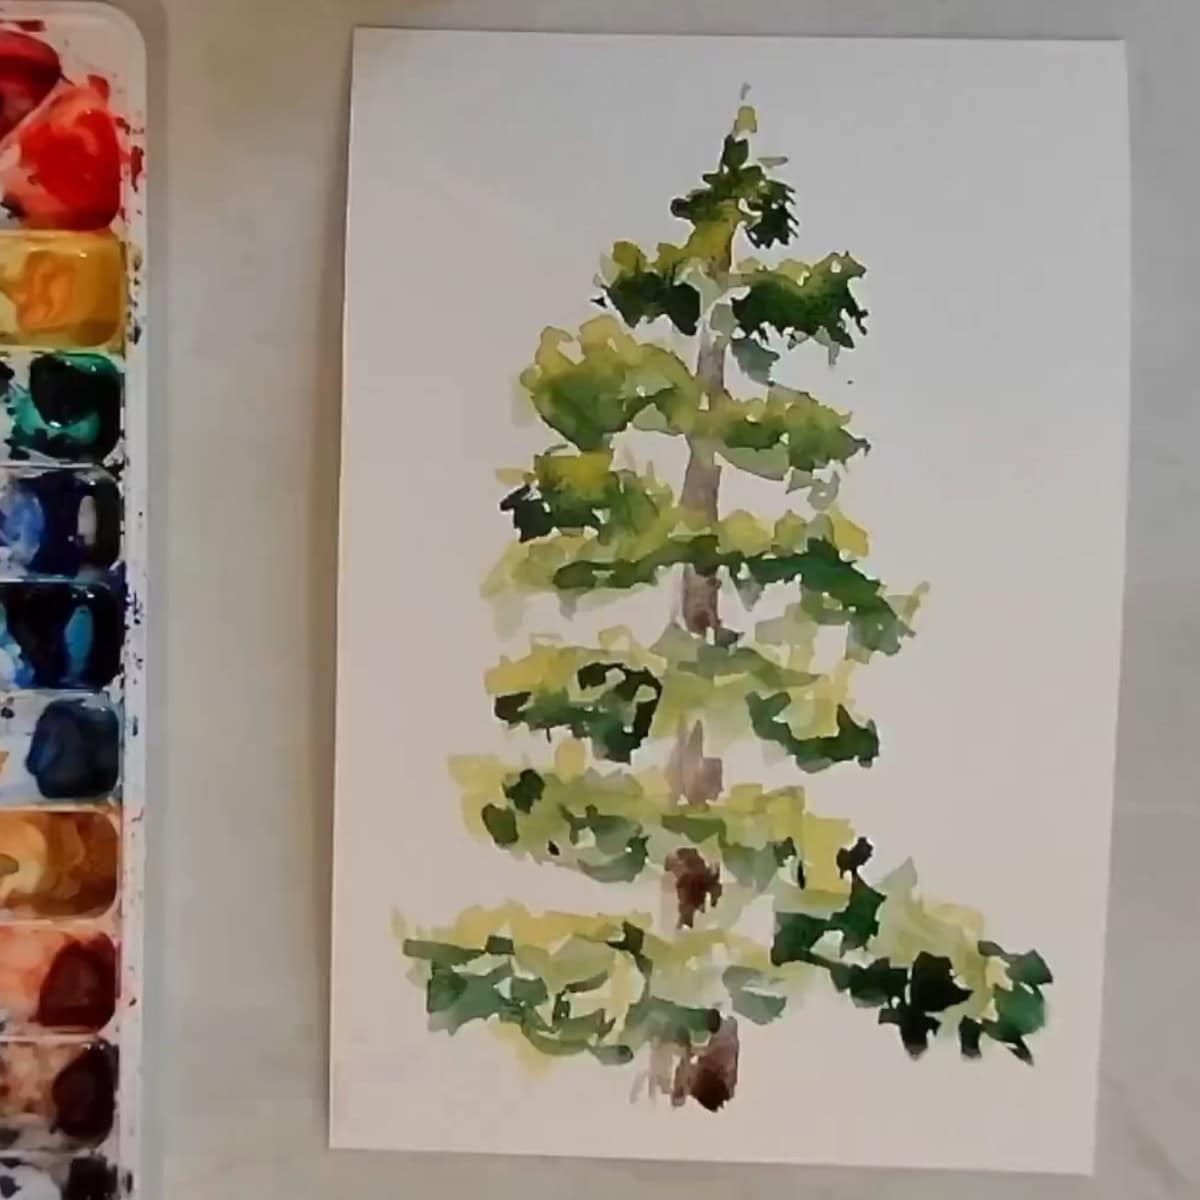
- Combine a small amount of Prussian blue with cadmium yellow to make a very light green. Use this to paint in some highlights, concentrating mostly on the top part of the branches.
- Then mix a little cadmium yellow, Prussian blue, and black paint to make dark green. Paint in some shadows, concentrating mostly on the underside of branches.
- Add a black shadow on the right side of the trunk. Slightly blend it into the brown already on the trunk.
- Slightly water down some of the brown-black paint mixture and use it to paint in a few branches and twigs. Do not paint in every single branch, just a few hints of them here and there.
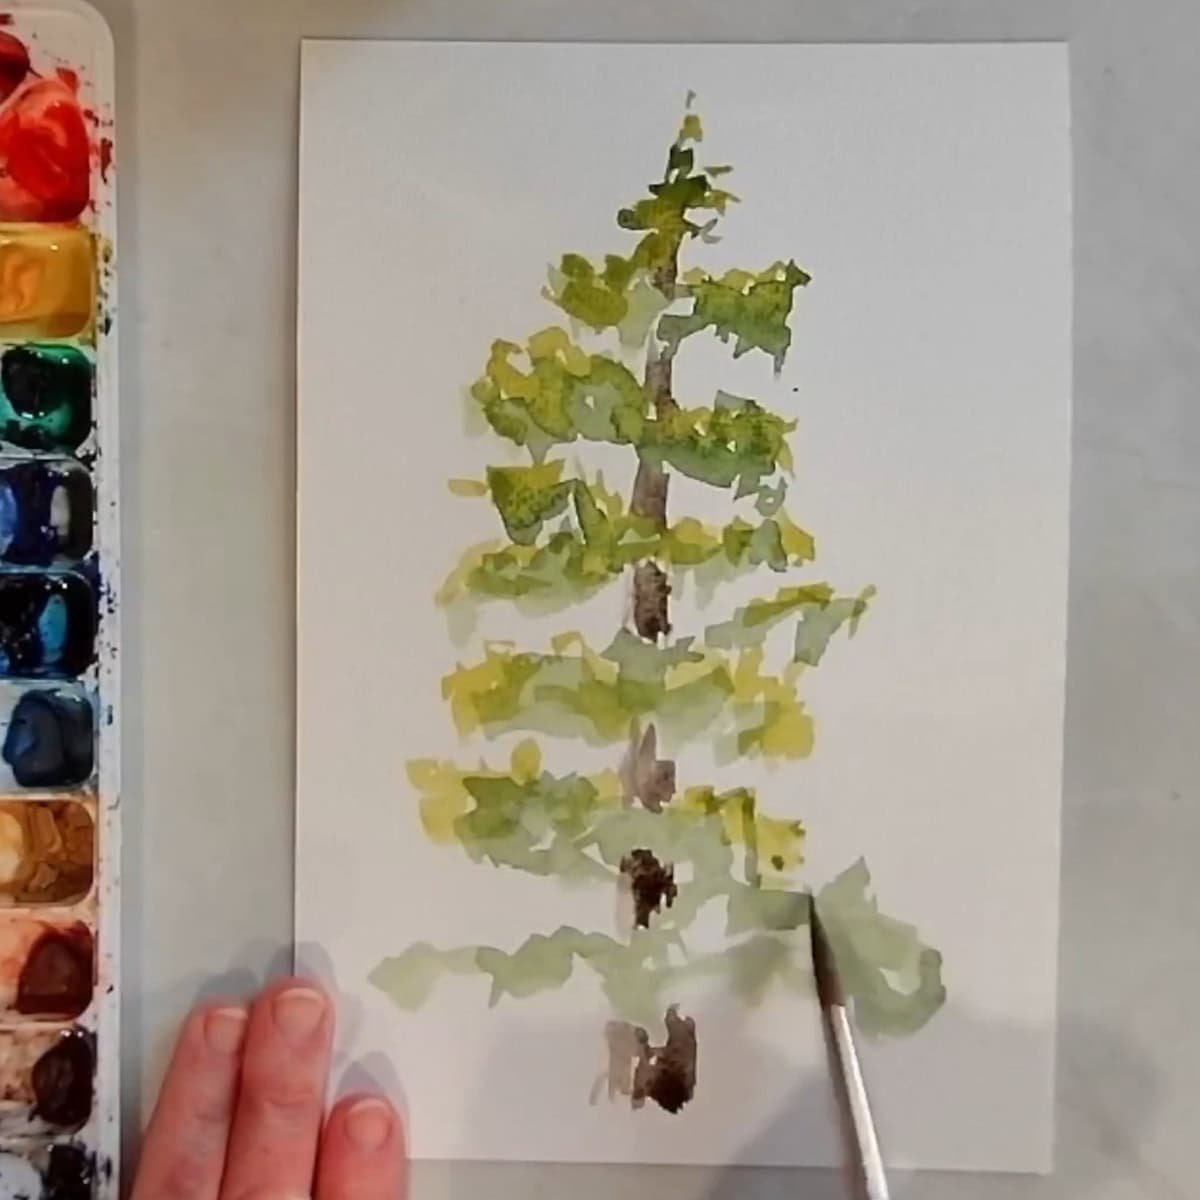
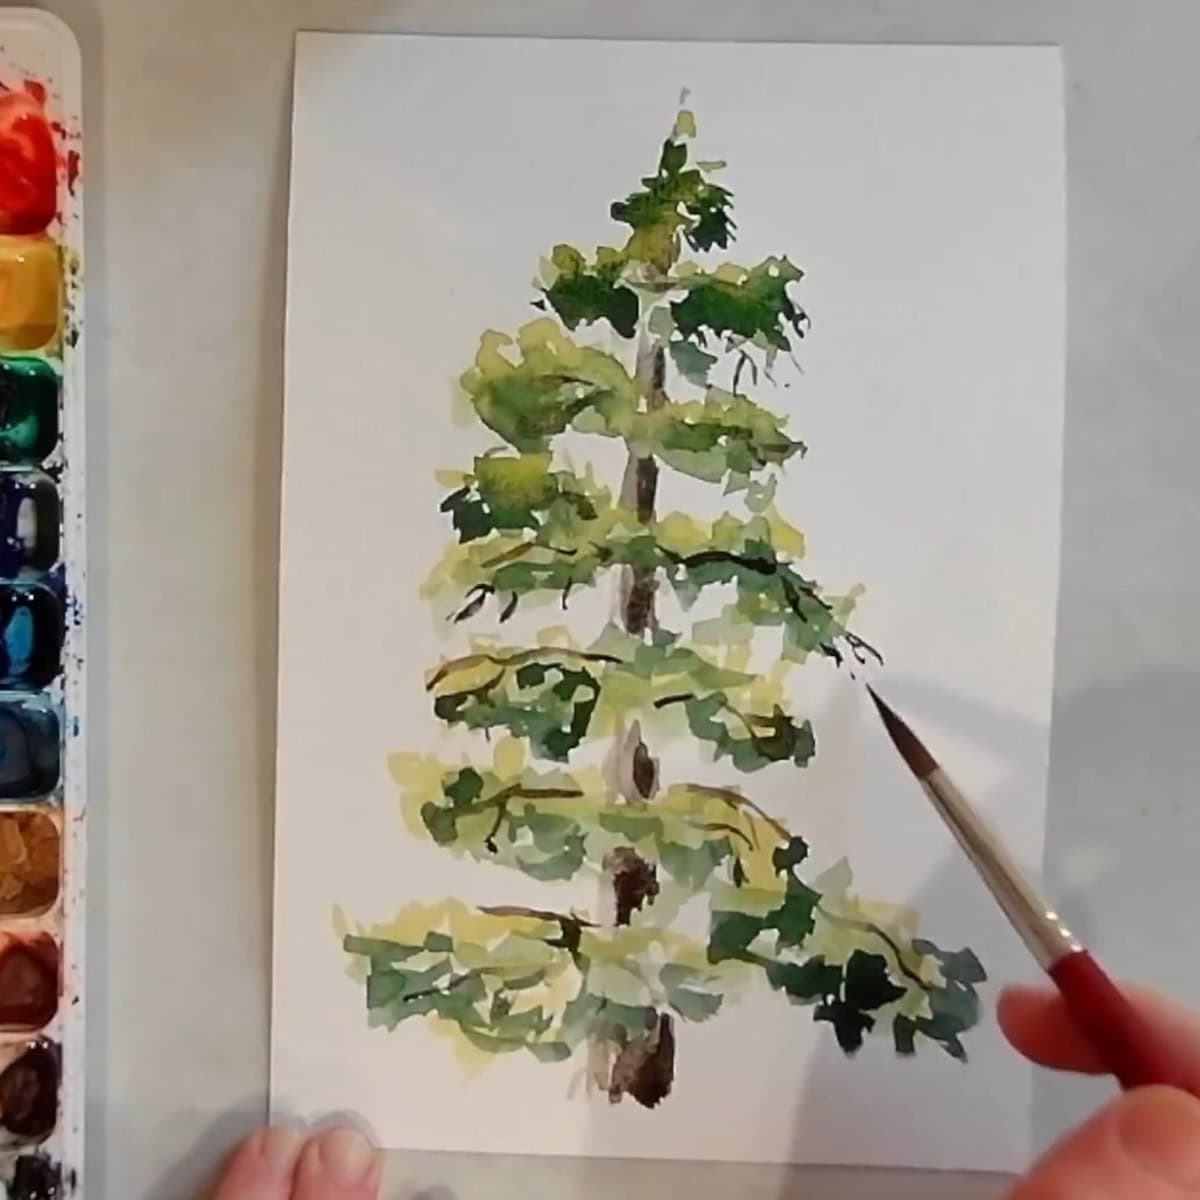
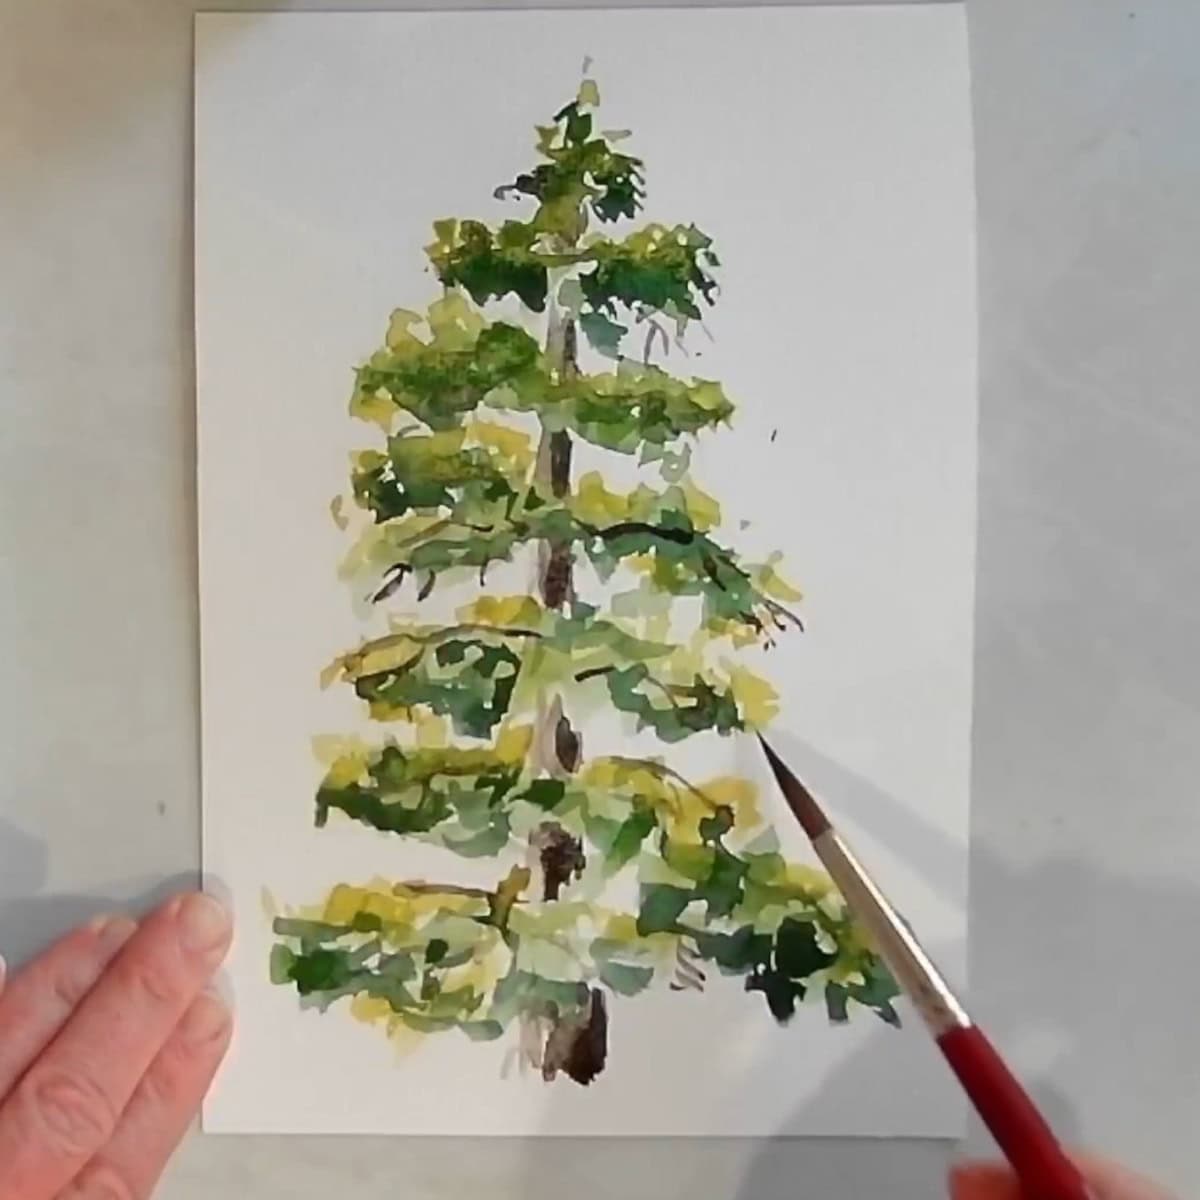
- If you like, leave your tree like this. To add more texture, value and contrast you can add another round light, middle and dark paint.
- Use the light green to add a few more overlapping highlights.
- Add some more middle green in several areas around the tree.
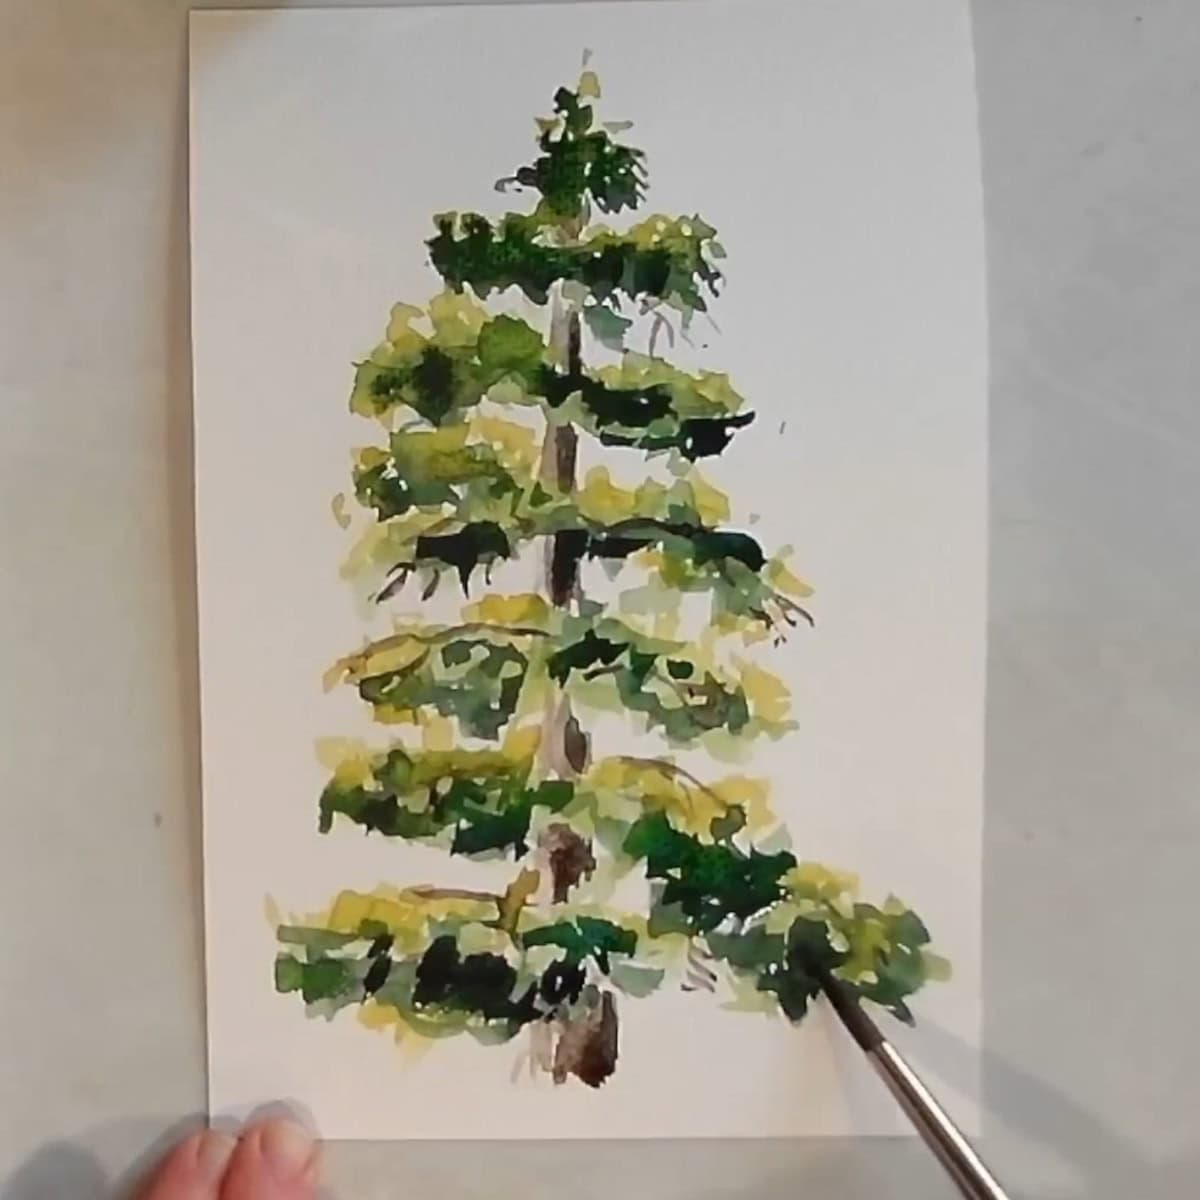
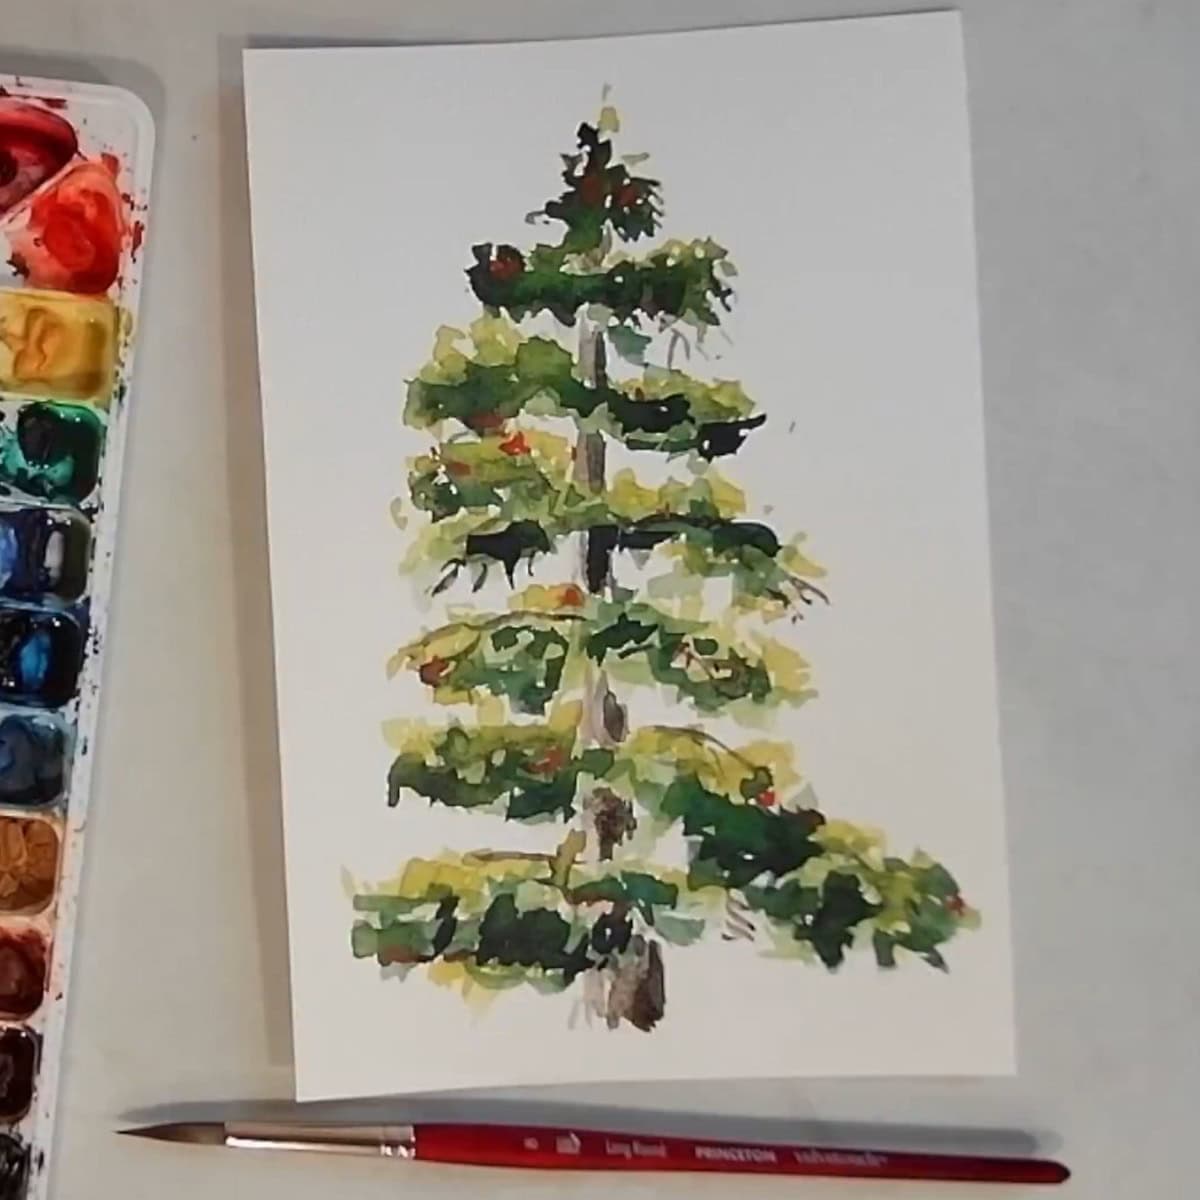
- Paint in some shadows around the branches, concentrating on larger dark areas.
- Lastly, a few small dabs of red paint in a few areas. When we see objects, such as trees, they are composed of many different colors, all working together. Try squinting the next time you look at a tree. Identify how many different colors you can see.
Variations
- Paint a group of several evergreen trees together.
- Paint a background of your choice around and behind the tree.
- Paint a pine tree using nontraditional colors such as purple, red, or orange.
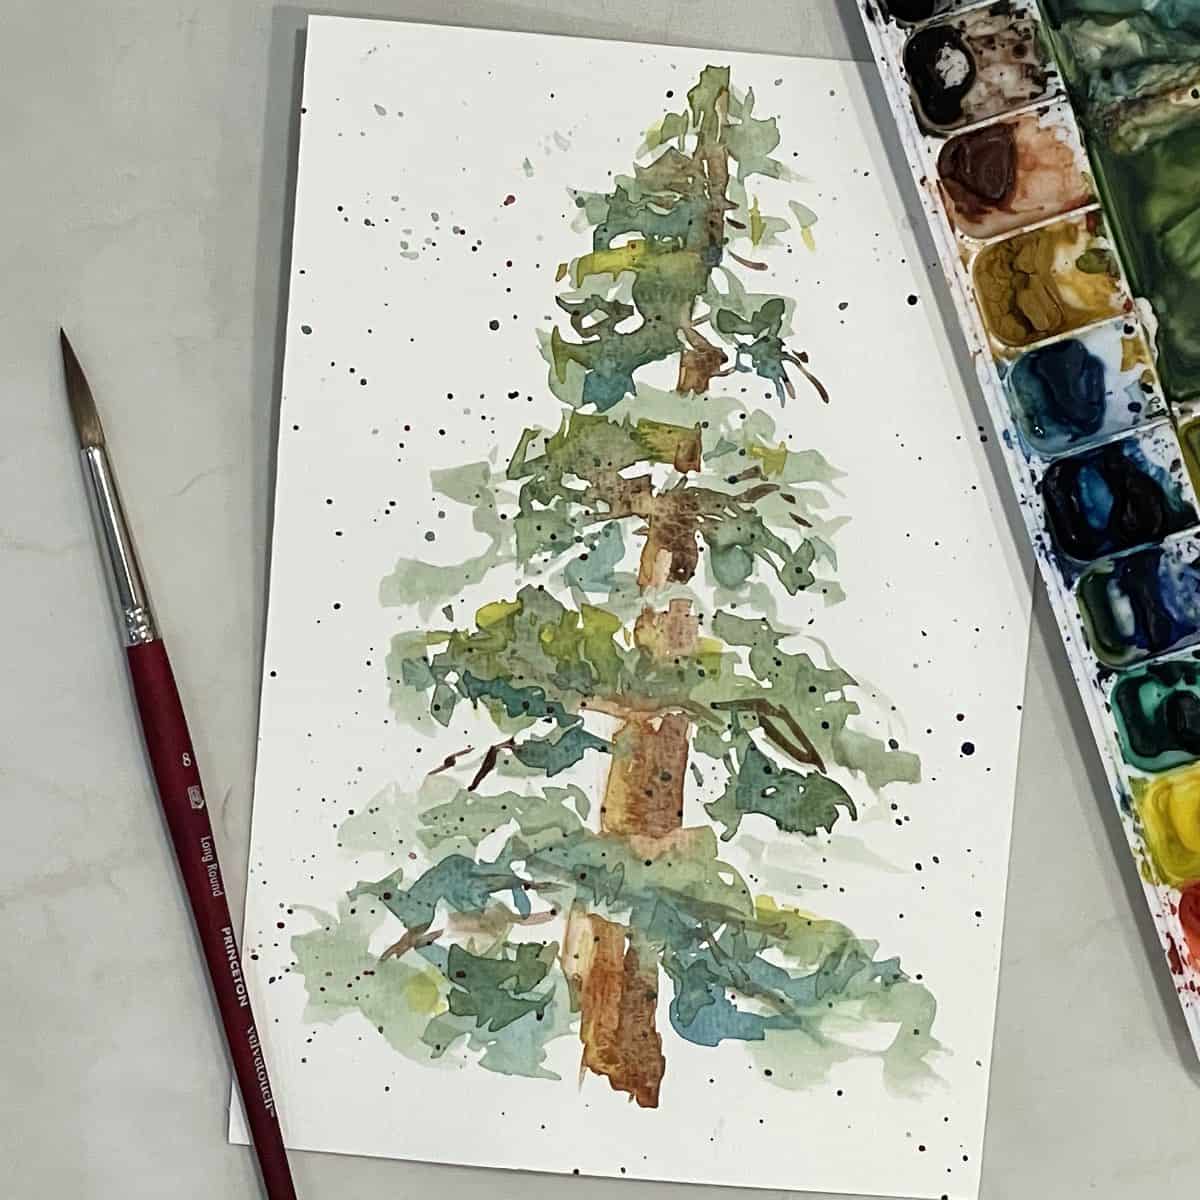
- Load up some paint onto a stiff brush and splatter it over the tree painting for some extra fun.
- This is a great watercolor painting that you could add to a greeting card, or gift tag, or pop into a frame to display around the house.
Tips and tricks
- Keep the paint strokes loose and irregular.
- Avoid painting the branches in a pattern.
- The paint will dry lighter than when it is wet.
- Trees are usually not perfect triangles in nature. They are often lopsided and with more branches in some areas and twigs sticking out here and there. Let your painting reflect the irregularities.
- When we see objects, they are composed of many different colors, coming together to give the impression of a solid object. Try squinting the next time you see a tree. How many different colors can you identify?
Painting a Pine Tree Instruction Card
How to Paint a Pine Tree Easy in Watercolor
Equipment
- Watercolor paper - I am using Strathmore 400 Series, cold press, watercolor paper, 140 lb., cut down to 9 by 6 inches
- Watercolor paint - tube watercolor paint on a pallet or a box kit of watercolor paints. You can use whatever colors that you have on hand. For this lesson I use: Cadmium Yellow,
- Prussian Blue, Black, Burnt Umber, and Cadmium Red Light
- Paint brushes - I am using a #8 round brush.
- Water
- Paper towels
Instructions
- Mix cadmium yellow, Prussian blue, and a little bit of black paint. Paint the basic structure of the pine tree. Paint with me, look at a real tree, or a photo of a tree to get a sense of where the lights and darks are.
- Use black and burnt umber to create the trunk. Paint the right side of the trunk in between the branch clusters. Rinse out the brush and then drag the paint from the right across to the left side of the trunk to create a highlighted effect.
- Combine a small amount of Prussian blue with cadmium yellow to make a very light green. Use this to paint in some highlights, concentrating mostly on the top part of the branches.
- Then mix a little cadmium yellow, Prussian blue, and black paint to make dark green. Paint in some shadows, concentrating mostly on the underside of branches.
- Add a black shadow on the right side of the trunk. Slightly blend it into the brown already on the trunk.
- Slightly water down some of the brown-black paint mixture and use it to paint in a few branches and twigs. Do not paint in every single branch, just a few hints of them here and there.
- If you like, leave your tree like this. To add more texture, value and contrast you can add another round light, middle and dark paint.
- Use the light green to add a few more overlapping highlights.
- Add some more middle green in several areas around the tree.
- Paint in some shadows around the branches, concentrating on larger dark areas.
- Lastly, a few small dabs of red paint in a few areas. When we see objects, such as trees, they are composed of many different colors, all working together. Try squinting the next time you look at a tree. Identify how many different colors you can see.
Notes
- Keep the paint strokes loose and irregular.
- Avoid painting the branches in a pattern.
- The paint will dry lighter than when it is wet.
- Trees are usually not perfect triangles in nature. They are often lopsided and with more branches in some areas and twigs sticking out here and there. Let your painting reflect the irregularities.
- When we see objects, they are composed of many different colors, coming together to give the impression of a solid object. Try squinting the next time you see a tree. How many different colors can you identify?
Frequently Asked Questions
The easiest way to paint a pine tree in watercolor is to loosely paint the structure of the tree, add the trunk, and then build up thin layers of color and texture to fill in the branches.
There are many different techniques for painting trees using many different types of brushes. Some people like fan brushes, flat brushes, or filberts. In this tree lesson I use a number 8 round brush for all of the strokes. I recommend trying out a few different brushes and seeing what you like the most.
When painting with watercolor paint it is usually best to start with the lights and then move to the darks. In this pine tree painting tutorial, the basic tree structure is added with middle tones, and then the light-to-dark method is used.
You also might like
- How to Paint Trees Reflected on Water
- Paint a Watercolor Mountain Landscape Easy
- Learn Easy Watercolor Techniques for Beginners
Please leave your questions, comments, and ratings below!


Leave a Reply