Learn how to use ten easy watercolor techniques for beginners in this easy to follow tutorial. Explore the basic methods such as glazing, wet on dry, wet on wet, and dry brush, to name a few.
Explore essential methods of watercolor painting that will improve your painting skills. These techniques, in this quick online art video, are simple to learn and incorporate into your artwork.
Jump to:
- Is Painting with Watercolor Difficult?
- Materials for this Watercolor Lesson
- Video Tutorial of Watercolor Techniques
- Transcript
- Ten Simple Watercolor Techniques Everyone Should Know
- The Golden Rule of Watercolor
- Tips and Tricks for Beginning Watercolor
- Watercolor Techniques How to Instructions
- For More Practice
- Frequently Asked Questions
- You also might like
The best way to get started in watercolor is to dive right in and practice different ways of applying paint. Begin with these easy techniques for watercolor painting to gain skill and confidence in your artistic journey.
Watercolor painting can be both relaxing and fun, making it a great choice for beginners. Practicing and using these watercolor techniques can make the learning process easier and more enjoyable.
Is Painting with Watercolor Difficult?
Watercolor paint is often considered the most difficult type of paint to learn. However, it can also be one of the most rewarding.
Painting with watercolor becomes easier when understanding the characteristics of the medium. Basically, watercolor paint moves whenever water is introduced.
Many factors can change the quality of the paint and how it will react. Some of these factors include:
- The ratio of water to pigment
- The amount of water on the paper
- How much paint is loaded on the brush
- How much paint is added to the paper at a time
- The temperature of the air
- The humidity of the air
Learning to observe and account for all of these factors will help you control the paint. The reality is, that it takes practice.
On the bright side watercolor painting is very fun and rewarding. Watercolor paint is affordable, easy to find, portable, and lasts a long time. Paintings on paper are also easy to store.
Flexible, with so many stylistic options, watercolor offers an incredible creative outlet. Watercolor paintings are remarkable, with vivid luminosity, luscious layers, and striking texture.
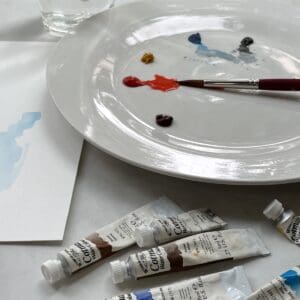
Materials for this Watercolor Lesson
- Water
- Paper towels
- Paint brushes - I am using a #8 round brush
- Watercolor paper - I am using Strathmore Vision cold press watercolor paper, 140 lb., cut down to 6 by 9 inches
- Watercolor paint - tube watercolor paint on a pallet or a box kit of watercolor paints. You can use whatever colors that you have on hand, for this lesson I used: Ultramarine Blue, Alizarin Crimson, Yellow Ocher
Video Tutorial of Watercolor Techniques
Transcript
Read TranscriptTen Simple Watercolor Techniques Everyone Should Know
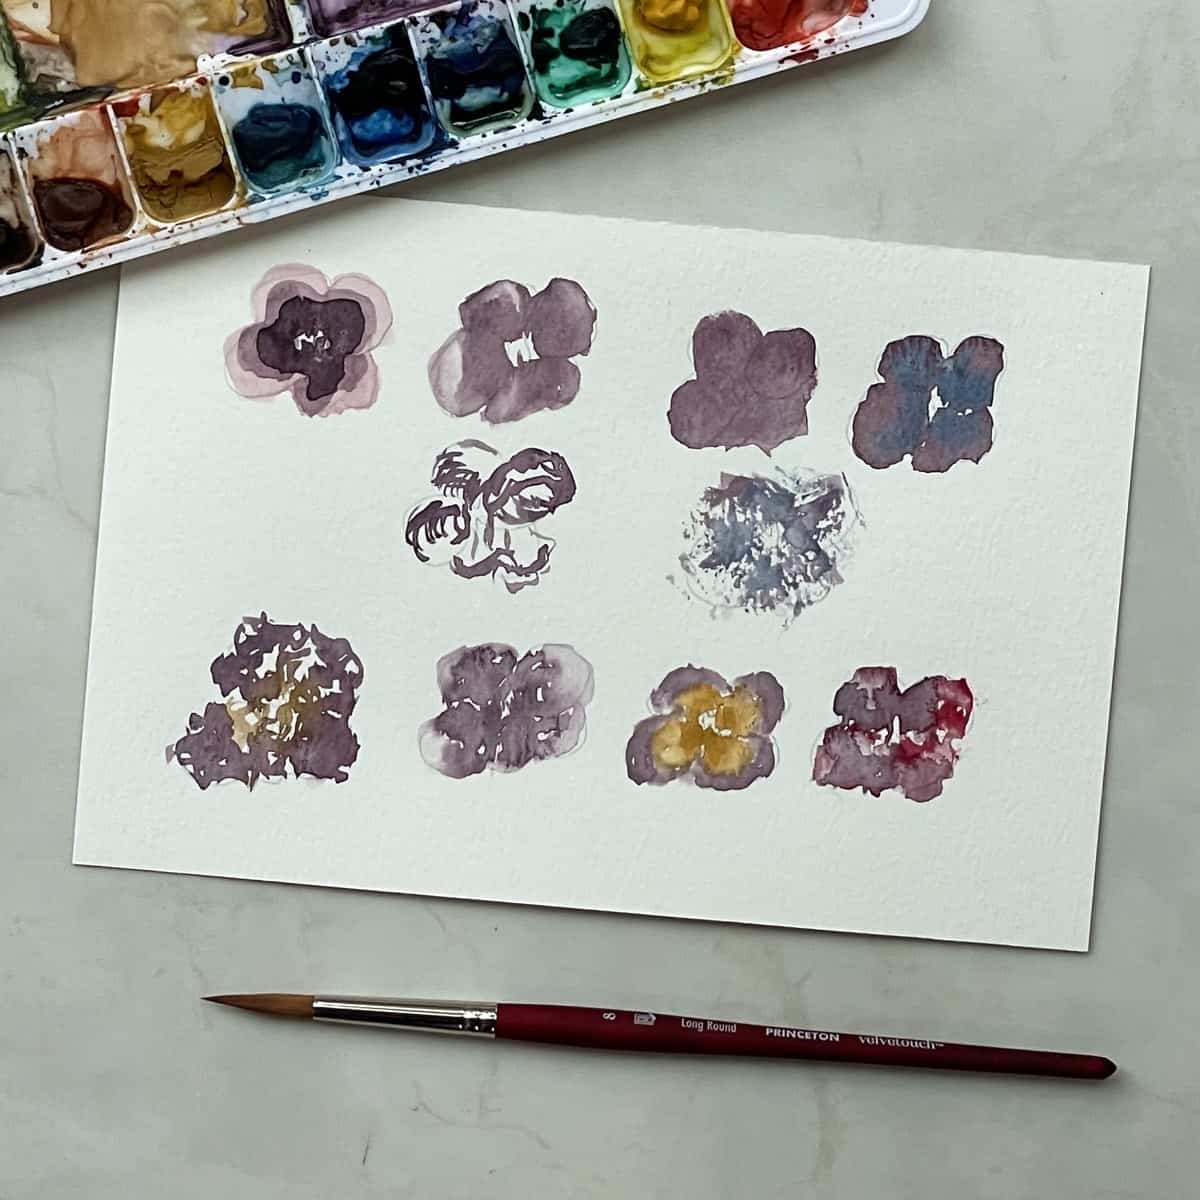
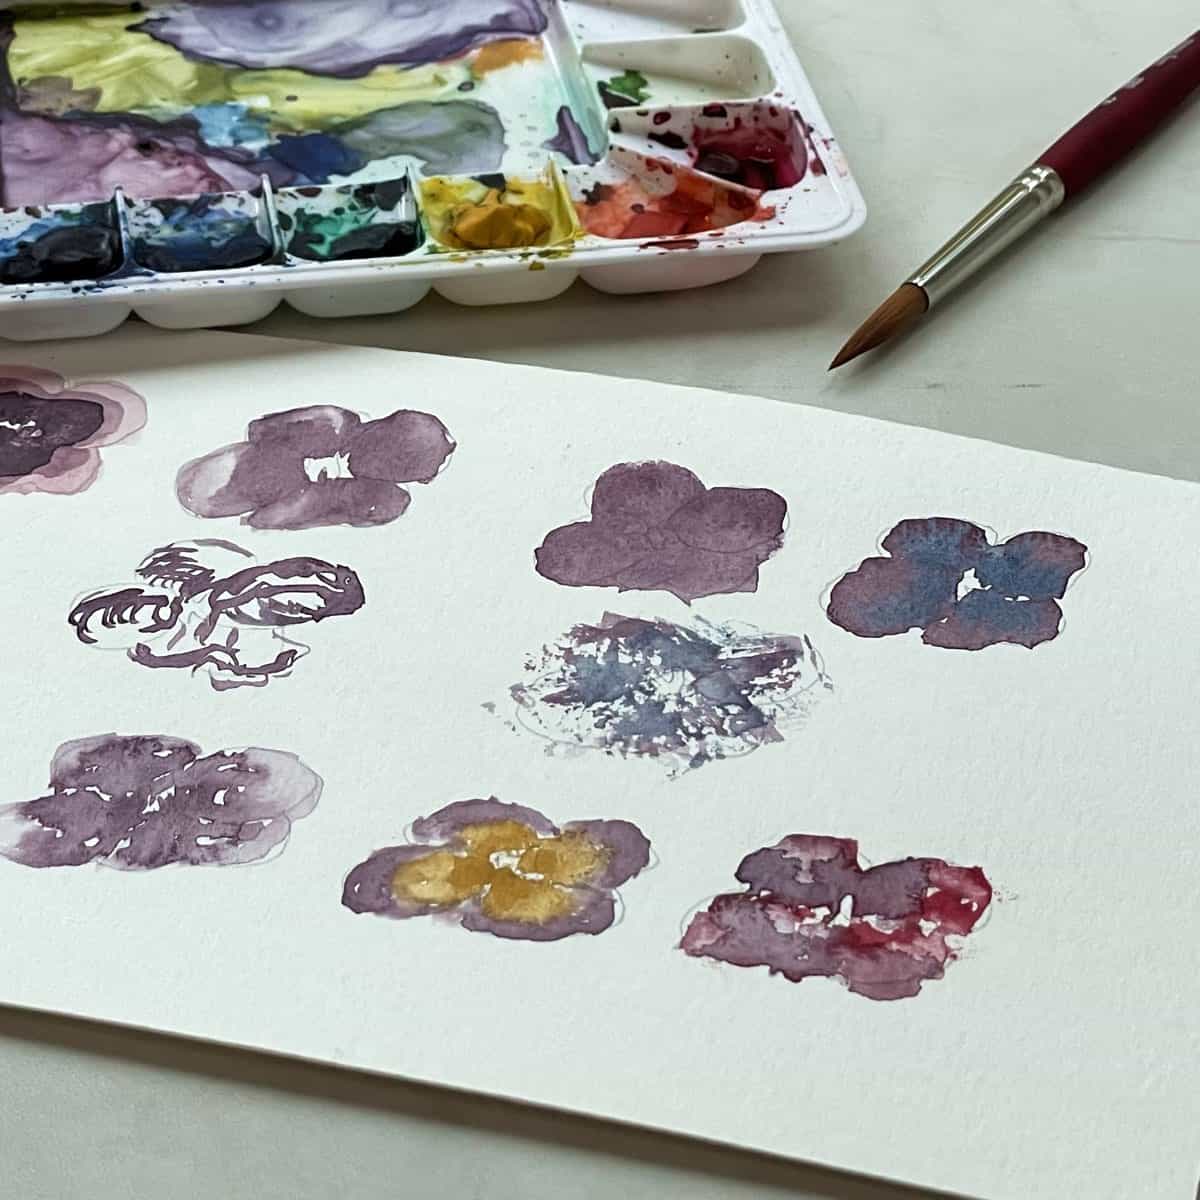
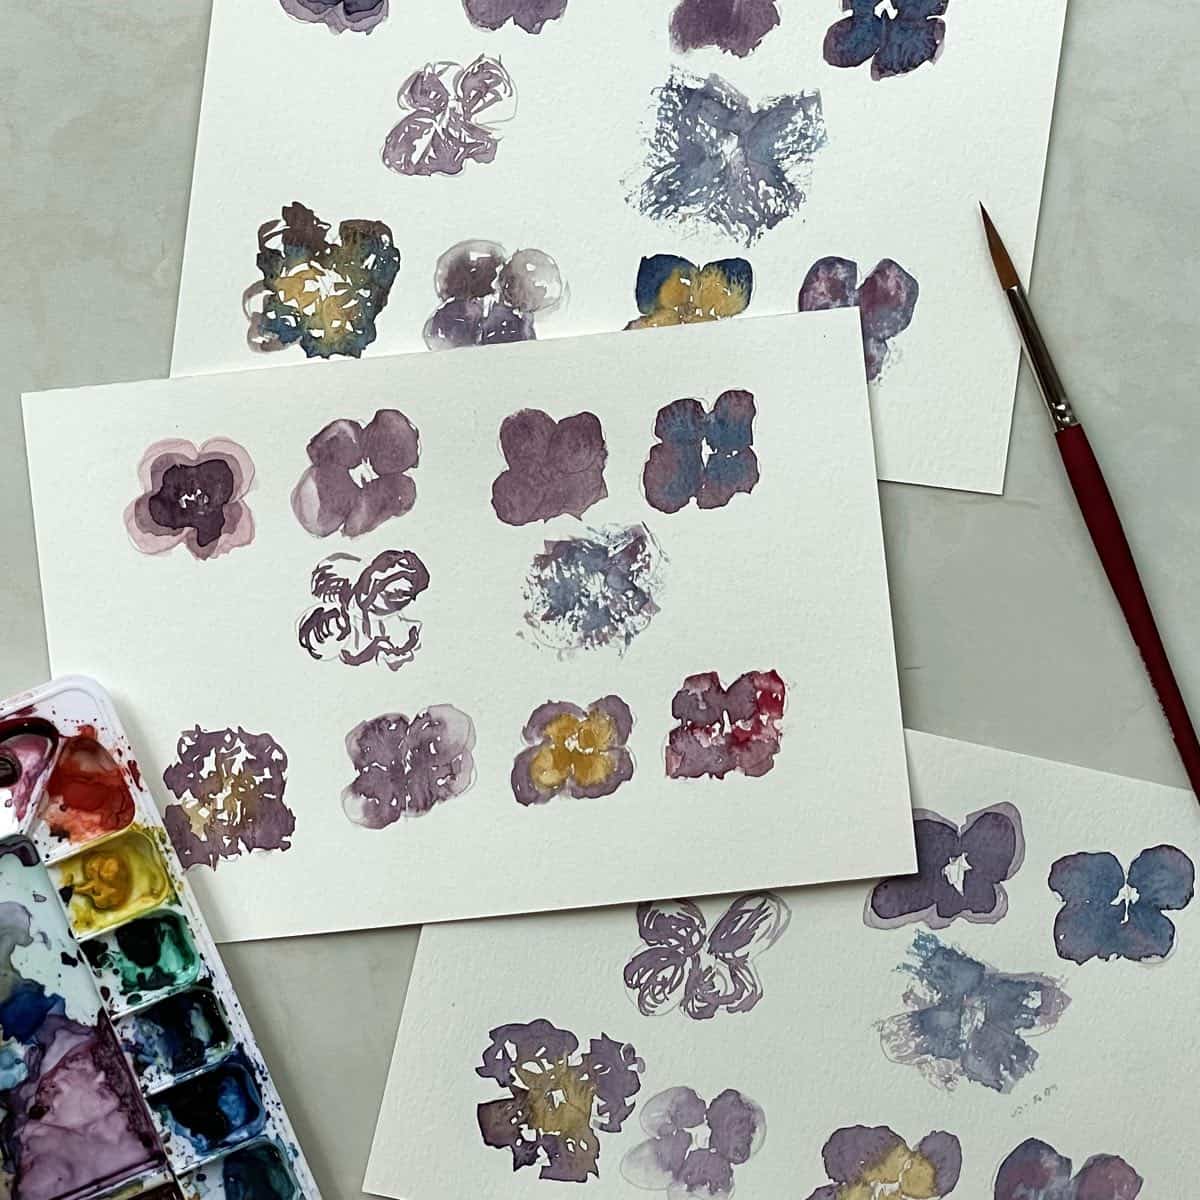
For these watercolor techniques, I paint these simple purple pansies. When you practice, you can paint these flowers, a rectangle, a blob, or any other shape you want.
1. Glazing
Paint a thin layer of paint on the petals. Let it dry completely. Paint another layer of color over the top of the first color. Let some of the first color show through. Repeat with as many layers as you want. Make sure to let each layer dry completely between glazes. This is a technique to build up value with hard edges. Experiment with different colors.

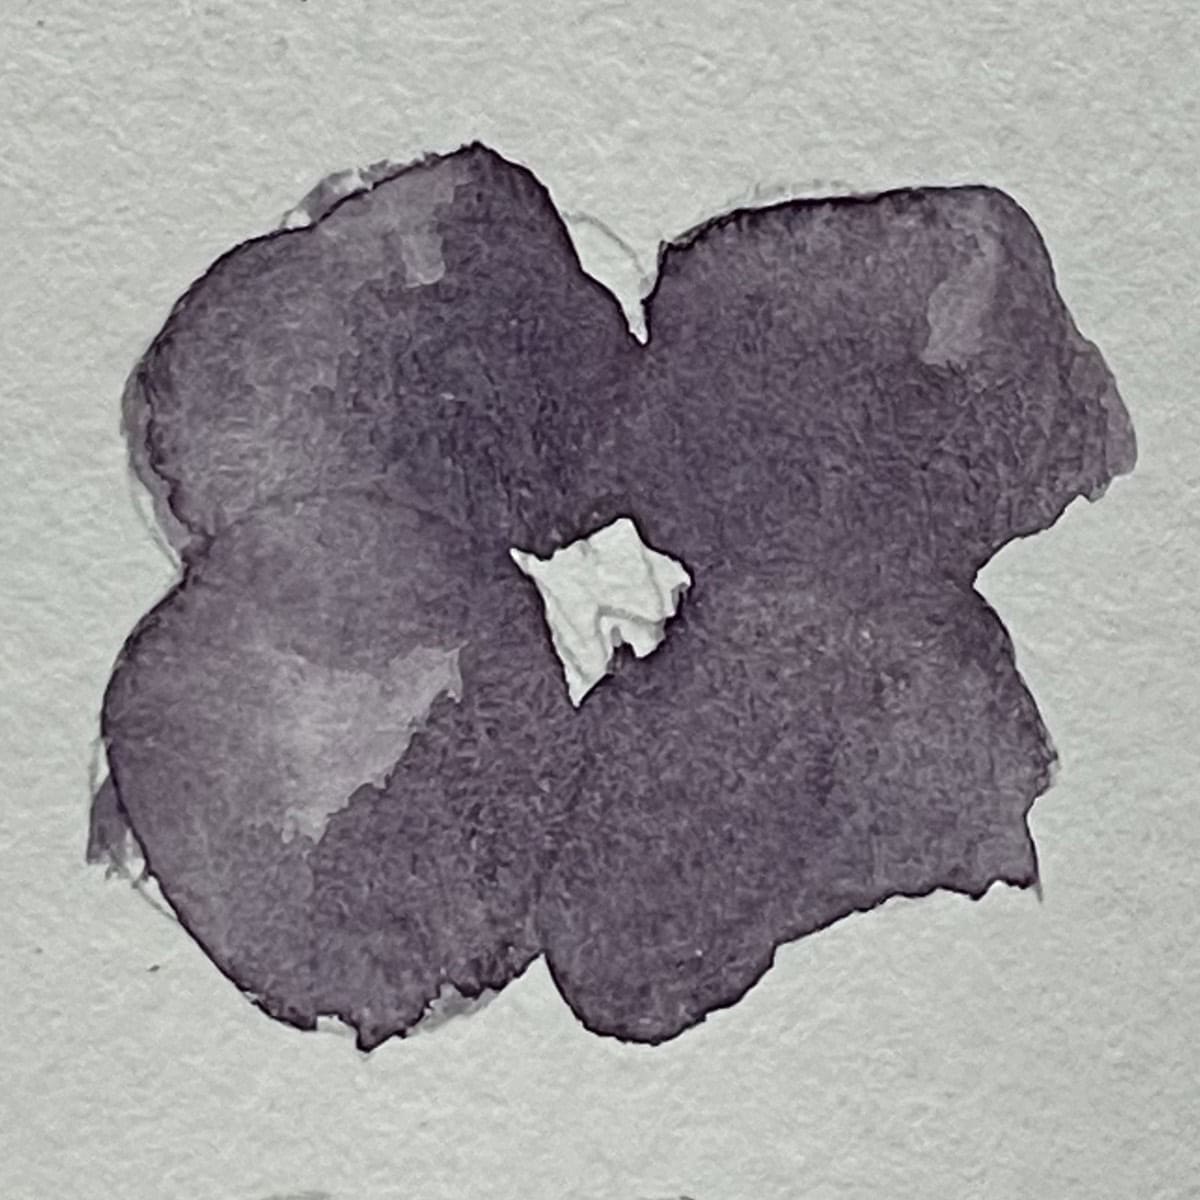
2. Wet on Dry
Paint with a brush loaded with paint on dry paper. Fill in the petals, leaving some white in the center of the flower. Letting each petal dry slightly before continuing to the next, may achieve soft overlapping edges. If desired, drop in some extra pigment in the center of the flower. Rinse out the brush and then lift off some of the paint on the outside of the petals for highlights.
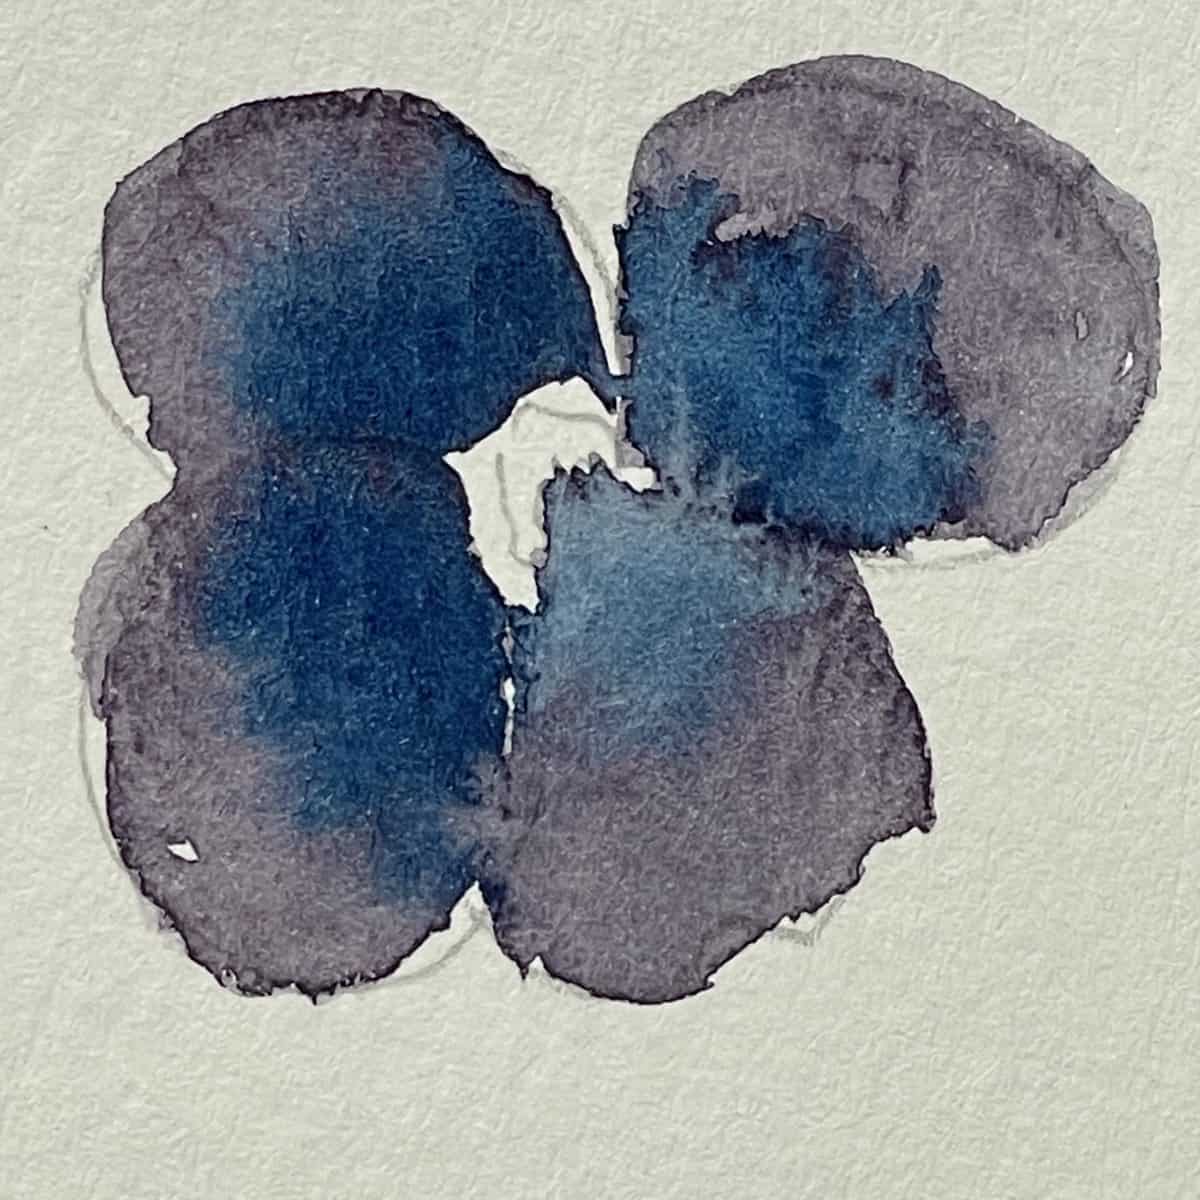
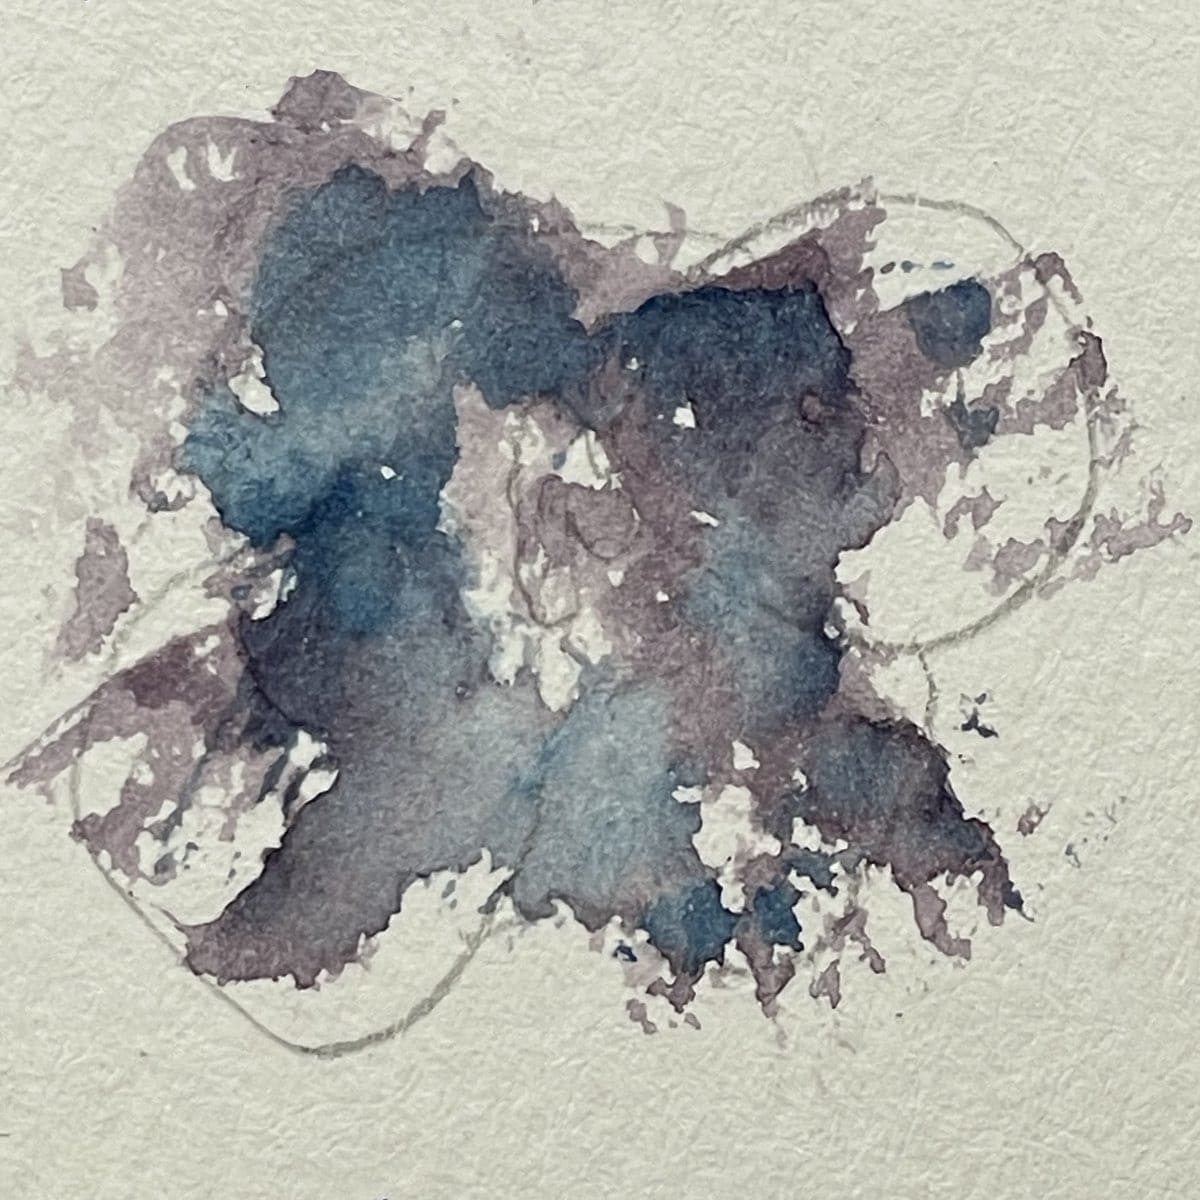
3. Wet on Wet
With a clean brush, paint water on the flower petals. Wait a moment or two for the water to soak into the paper. It should be damp but not shiny with a lot of water. Add paint and watch it move over the flower. This is a great method for a soft or blurry effect, like painting things in the distance, foggy, misty scenes, or subtly blended paintings.
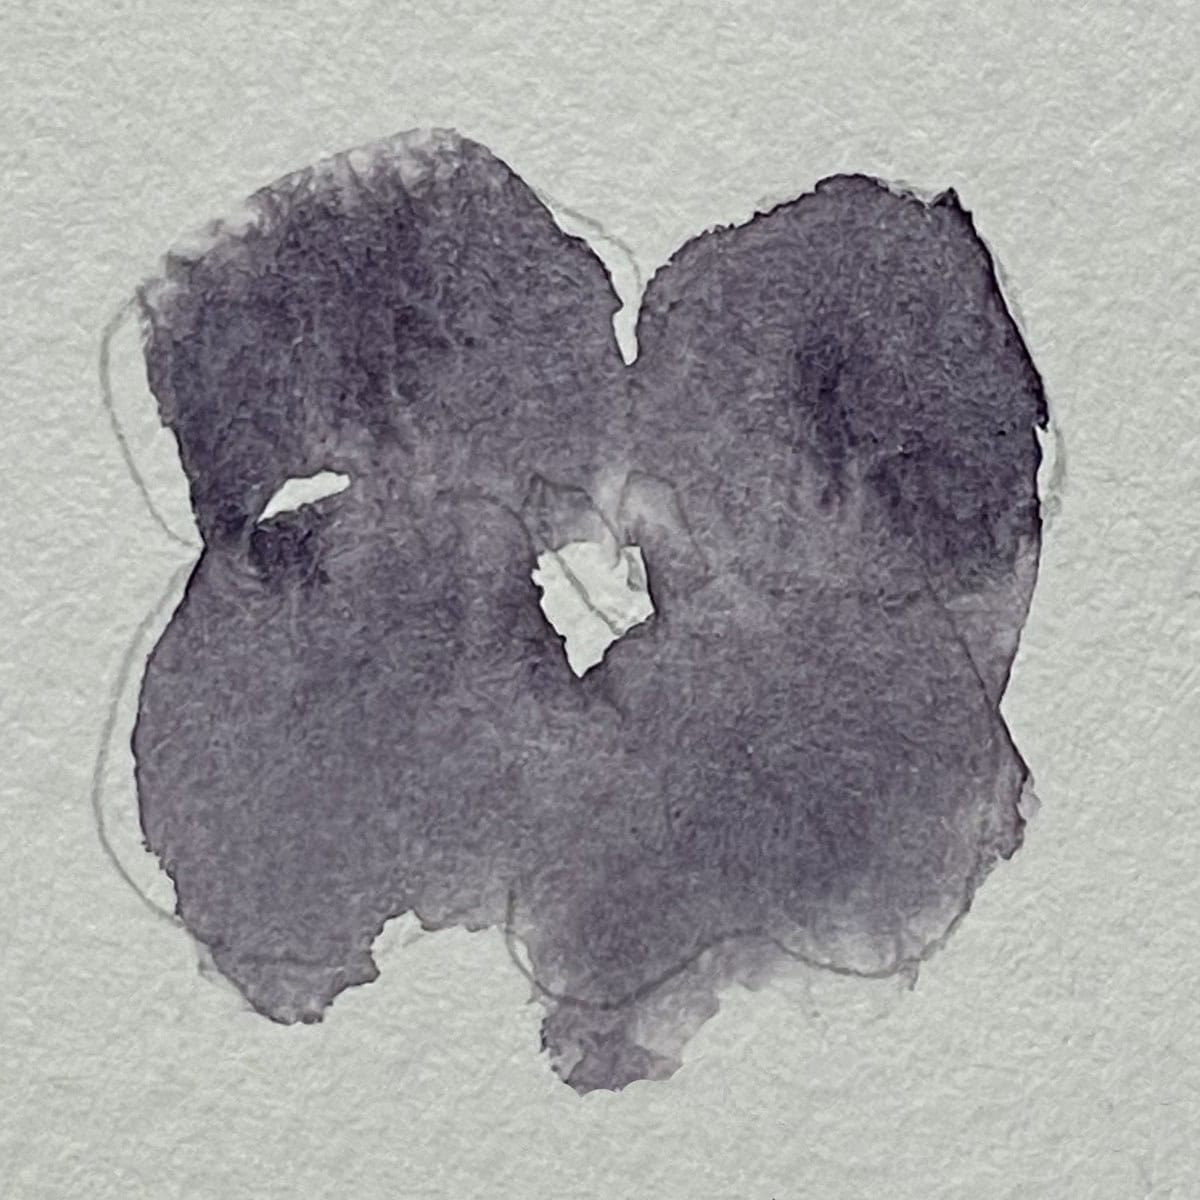
4. Charging
Start with dry paper and paint it with an even coat of wet paint. Dab or drop in some paint onto one spot. It can be the same color or a different color. The added color will spread slightly and then dry with a nice transition between the colors.
5. Lines
Painting lines is a wonderful tactic to add to your watercolor painting arsenal. Use your paintbrush like a drawing tool to paint lines, hatching, cross-hatching, zig zags, squiggles, flamboyant swirls, flourishes, and more.
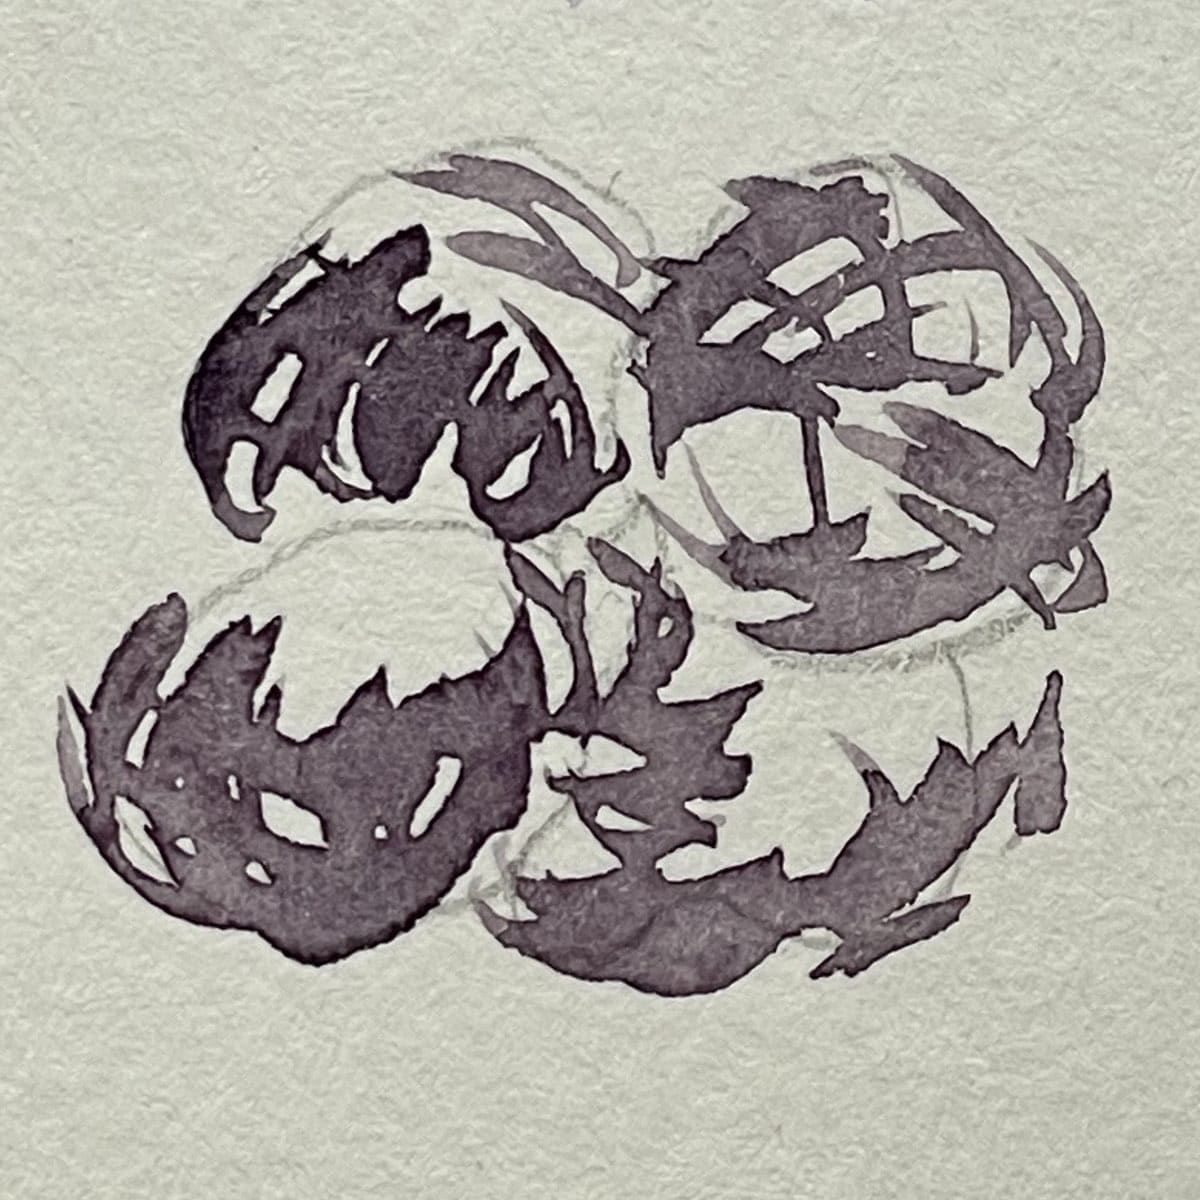
6. Dry Brush
Squeeze as much water out of the paintbrush as possible, so it is barely damp. Dip it in just a small amount of paint. This works well with a flat brush or use the side of a round brush. Drag the brush across the paper for an irregular, scratchy texture. You can layer the dry brush strokes for more depth and texture.
7. Scumbling
Using loose irregular strokes gently scrub the paint onto the paper. Make sure to leave bits of white paper between the paint strokes. Scumbling usually works best when using two or more colors. This is a great technique when you want to create a lot of texture and color quickly. It is perfect for trees, grass, fruit, animals, hair, any object with texture, abstractions, or even people and portraits.

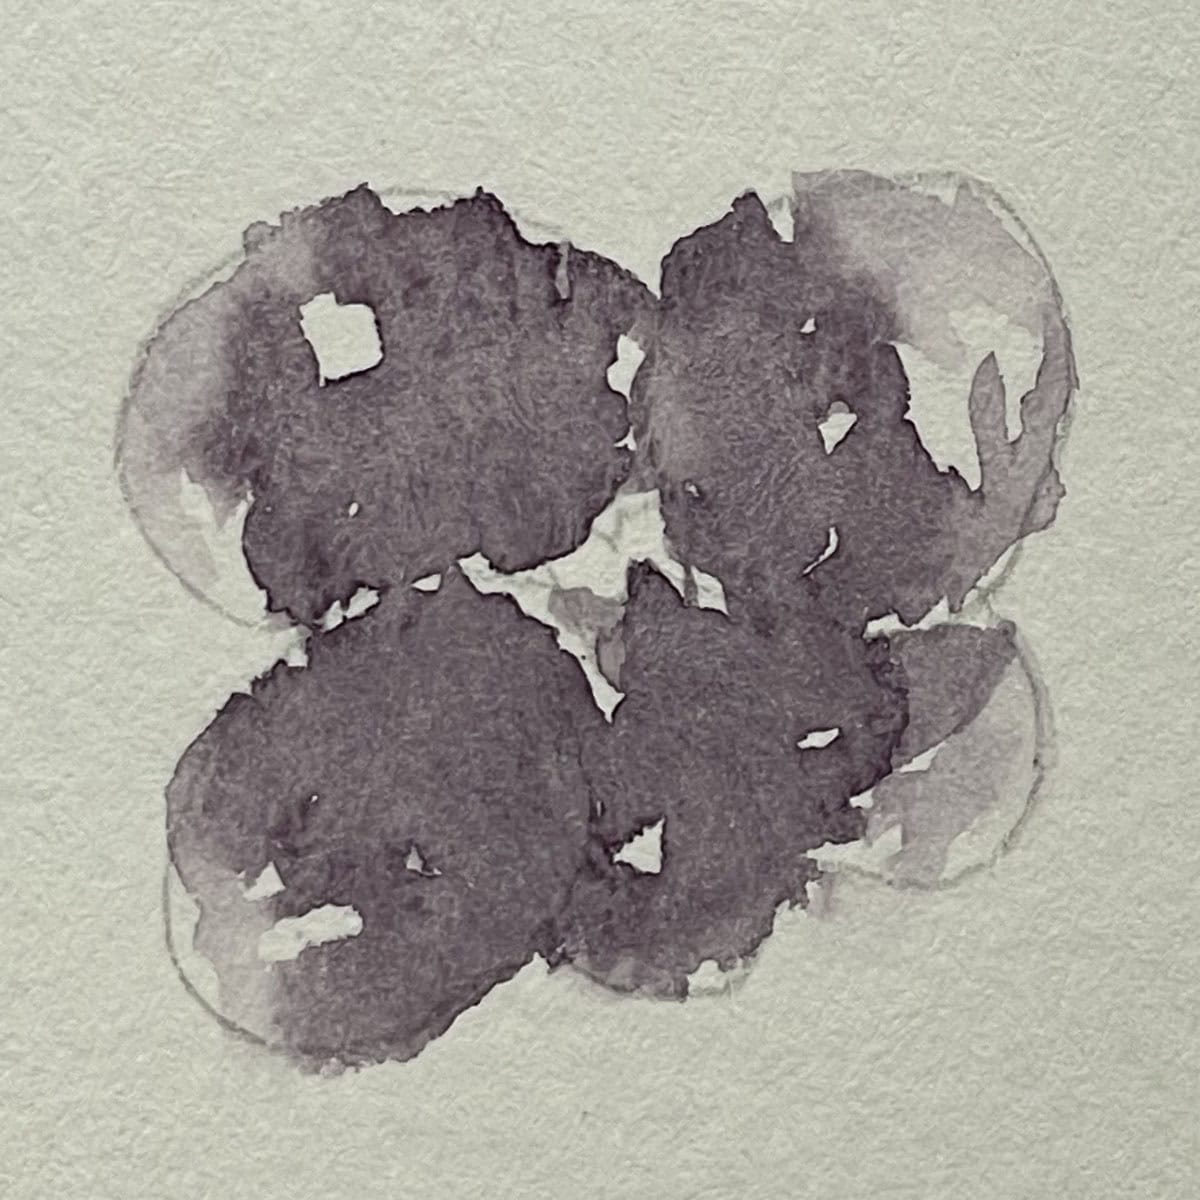
8. Dragging
Add a little bit of paint to one of the petal areas. Rinse out the brush and then drag the paint out a little bit at a time. Rinse out the brush again and repeat until there is a soft transition between the darker paint and the washed-out tint.
9. Gradient
This method is similar to dragging but uses more than one color. Drop some yellow ocher in the center of the petal. Rinse out the brush and then drag the color out toward the outside of the petal. Add some purple to the outside of the petal. Rinse the brush and then drag the paint toward the yellow paint. Bring the two colors together and then soften the edge between them. Practice controlling the paint and be careful not to allow large blobs of color swirl together
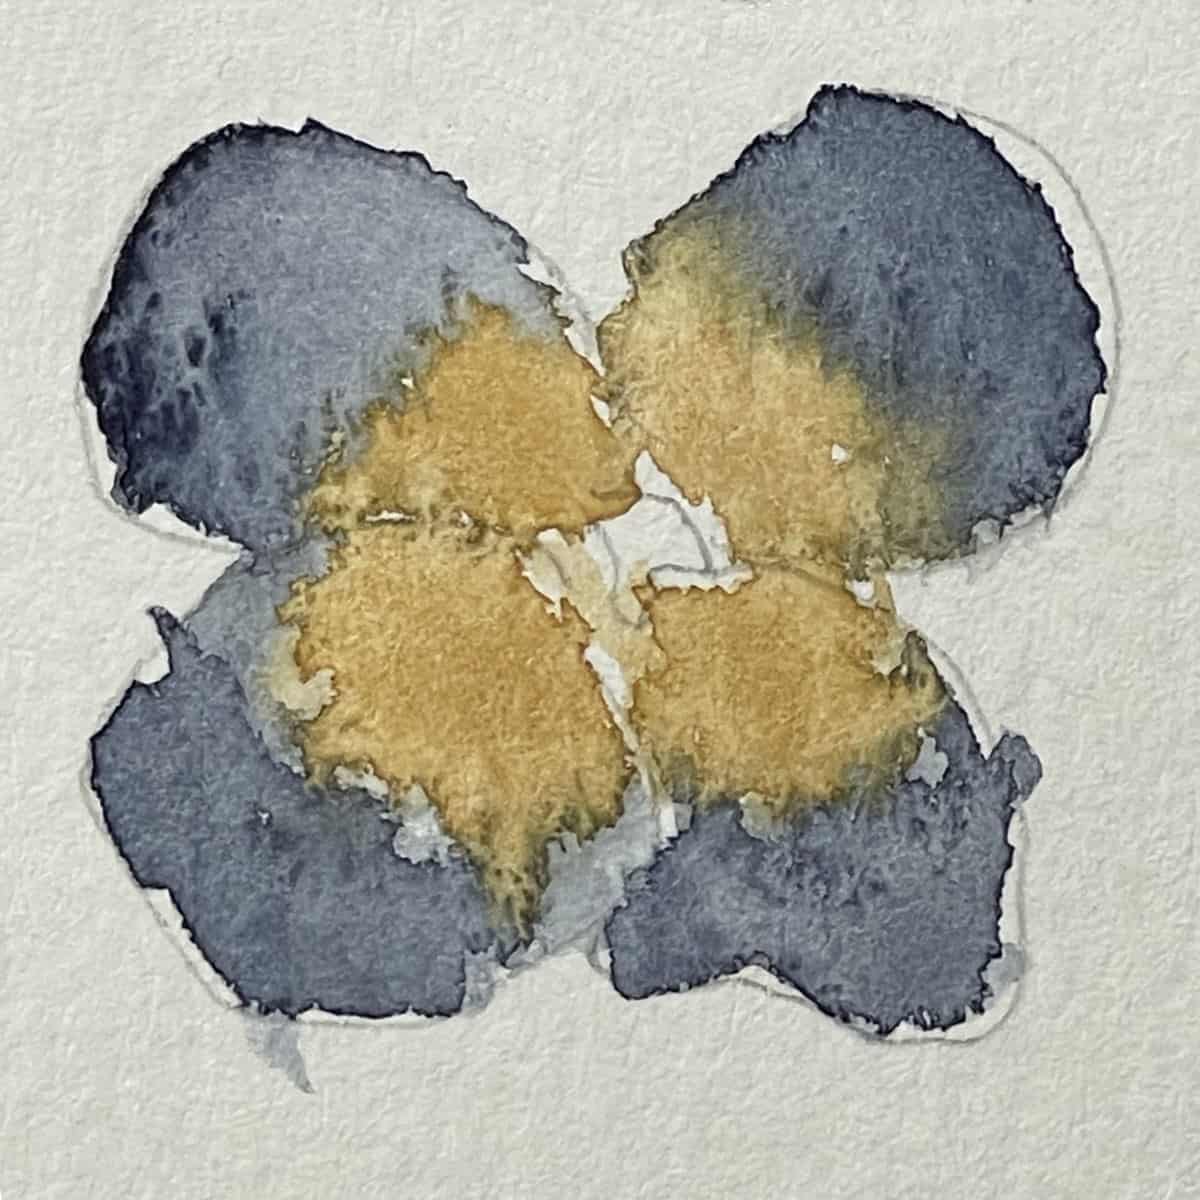
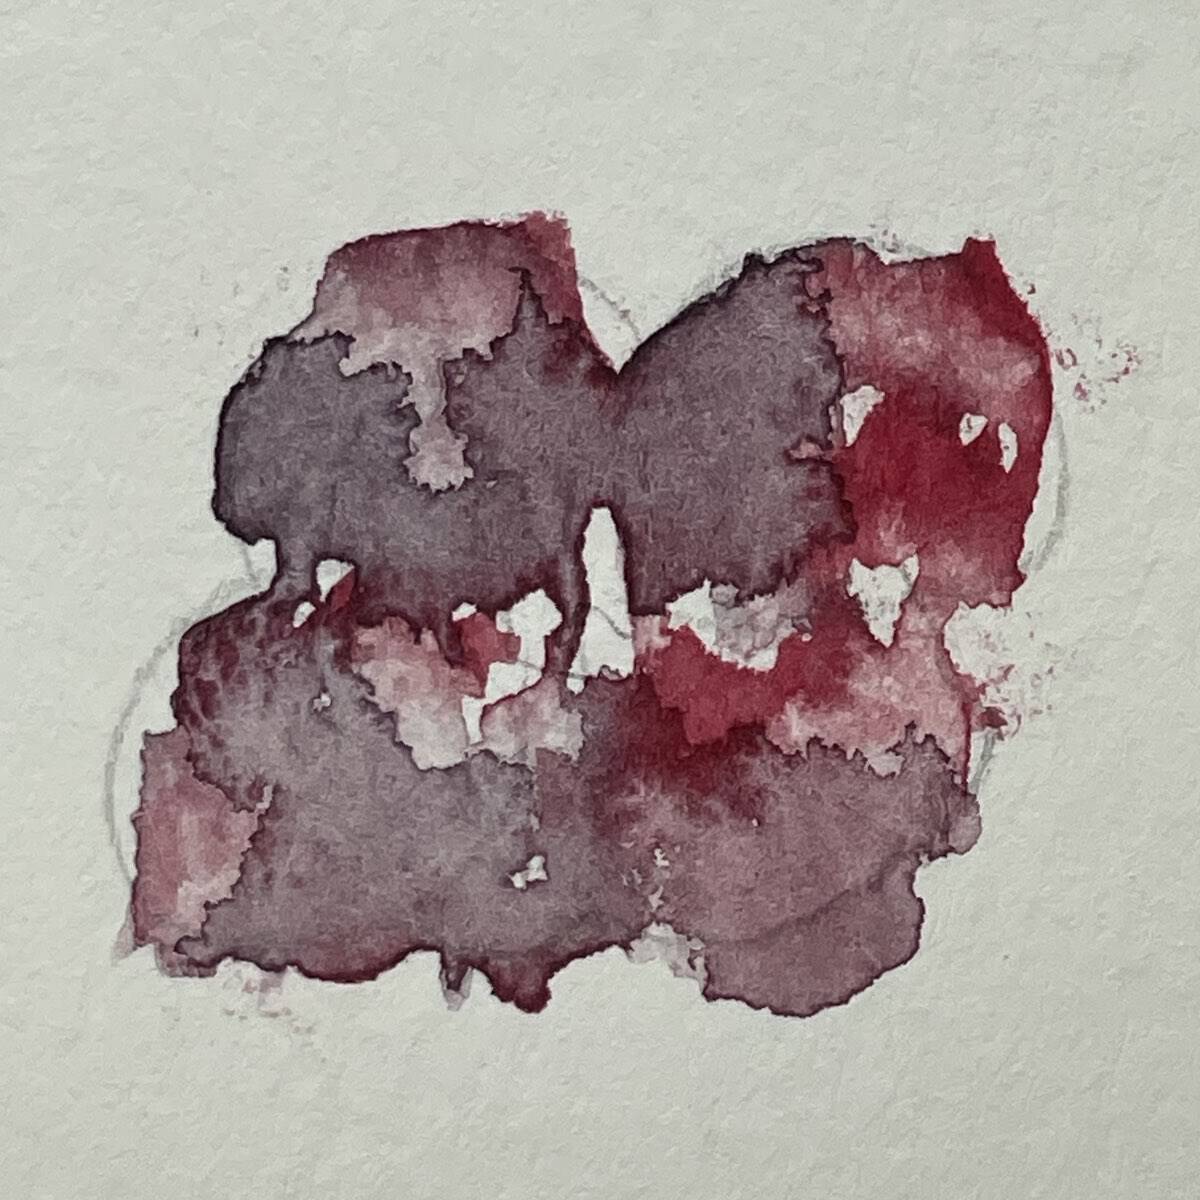
10. Blotting
Paint some color onto the flower petals. This technique will work with one color of paint or with more than one. Twist a paper towel, tissue, or rag into a point and then blot the paint. The tissue will lift some of the paint off, leaving a highlight and texture.
The Golden Rule of Watercolor
The golden rule in watercolor paint is to paint from light to dark.
That means painting the lightest colors first, then the mid-tones, and finally the darker colors. The idea is that the artist builds up the layers of color, value, and texture little by little.
Keep in mind that it is a rule that is made to be broken. Many of these ten basic watercolor techniques mentioned here do not directly work from light to dark.
While it is not always applicable, it is a good concept to remember when painting with watercolor.
It can be helpful to remember the golden rule when you are planning an overall composition. Where will the lights be? Where will the darks be?
If some areas will be white, a certain amount of planning should be done. After a vivid or dark color is placed on the paper it is almost impossible to make it white again.
When painting with oil or acrylic paint, one usually paints from dark to light.
Tips and Tricks for Beginning Watercolor
- Mix, match, and overlap these painting techniques for a wide array of techniques to create with.
- Keep in mind, that watercolor paint will dry slightly lighter in tone than when it is wet.
- Don’t forget to use both sides of your watercolor paper when you are learning new techniques.
- For watercolor projects for kids, use white construction paper or card stock if watercolor paper is not in the budget.
- Practice, practice, practice! Watercolor painting is not easy. Believe me, I know. Just don’t give up. Enjoy the process of learning and don’t worry about the finished product.
Watercolor Techniques How to Instructions
Easy Watercolor Techniques for Beginners
Equipment
- Water
- Paper towels
- Paint brushes - I am using a #8 round brush.
- Watercolor paper - I am using Strathmore Vision cold press watercolor paper, 140 lb., cut down to 6 by 9 inches
- Watercolor paint - tube watercolor paint on a pallet or a box kit of watercolor paints. You can use whatever colors that you have on hand, for this lesson I used: Ultramarine Blue, Alizarin Crimson, Yellow Ocher
Instructions
- GlazingPaint a thin layer of paint on the petals. Let it dry completely. Paint another layer of color over the top of the first color. Let some of the first color show through. Repeat with as many layers as you want. Make sure to let each layer dry completely between glazes. This is a technique to build up value with hard edges. Experiment with different colors.
- Wet on DryPaint with a brush loaded with paint on dry paper. Fill in the petals, leaving some white in the center of the flower. Letting each petal dry slightly before continuing to the next, may achieve soft overlapping edges. If desired, drop in some extra pigment in the center of the flower. Rinse out the brush and then lift off some of the paint on the outside of the petals for highlights.
- Wet on WetWith a clean brush, paint water on the flower petals. Wait a moment or two for the water to soak into the paper. It should be damp but not shiny with a lot of water. Add paint and watch it move over the flower. This is a great method for a soft or blurry effect, like painting things in the distance, foggy, misty scenes, or subtly blended paintings.
- ChargingStart with dry paper and paint it with an even coat of wet paint. Dab or drop in some paint onto one spot. It can be the same color or a different color. The added color will spread slightly and then dry with a nice transition between the colors.
- LinesPainting lines is a wonderful tactic to add to your watercolor painting arsenal. Use your paintbrush like a drawing tool to paint lines, hatching, cross-hatching, zig zags, squiggles, flamboyant swirls, flourishes, and more.
- Dry BrushSqueeze as much water out of the paintbrush as possible, so it is barely damp. Dip it in just a small amount of paint. This works well with a flat brush or use the side of a round brush. Drag the brush across the paper for an irregular, scratchy texture. You can layer the dry brush strokes for more depth and texture.
- ScumblingUsing loose irregular strokes gently scrub the paint onto the paper. Make sure to leave bits of white paper between the paint strokes. Scumbling usually works best when using two or more colors. This is a great technique when you want to create a lot of texture and color quickly. It is perfect for trees, grass, fruit, animals, hair, any object with texture, abstractions, or even people and portraits.
- DraggingAdd a little bit of paint to one of the petal areas. Rinse out the brush and then drag the paint out a little bit at a time. Rinse out the brush again and repeat until there is a soft transition between the darker paint and the washed-out tint.
- GradientThis method is similar to dragging but uses more than one color. Drop some yellow ocher in the center of the petal. Rinse out the brush and then drag the color out toward the outside of the petal. Add some purple to the outside of the petal. Rinse the brush and then drag the paint toward the yellow paint. Bring the two colors together and then soften the edge between them. Practice controlling the paint and be careful not to allow large blobs of color swirl together
- BlottingPaint some color onto the flower petals. This technique will work with one color of paint or with more than one. Twist a paper towel, tissue, or rag into a point and then blot the paint. The tissue will lift some of the paint off, leaving a highlight and texture.
Notes
For More Practice
- Use the line technique to paint squiggles and scribbles to break up the paper into separate sections. Fill in each area with a different watercolor technique.
- Select two or three techniques and use them in a still-life painting.
- Practice painting a self-portrait. Start with lines and then add some texture of your choice. Or concentrate on areas of lights and darks. It could even be abstract.
- Choose a scenic photo from a magazine or online. How does it make you feel? Using several techniques, paint your thoughts and feelings about the photo. Do not copy the picture, create a reaction to it.
Frequently Asked Questions
The golden rule in watercolor paint is that you paint from light to dark. That means painting the lightest colors first, then the mid-tones, and finally the darker colors. The idea is that the artist builds up the layers of color, value, and texture little by little.
The most basic watercolor technique is wet on dry. Paint with a brush loaded with paint onto dry paper. If desired, add extra pigment in some areas for more contrast. Or lift off some of the paint with a clean brush to create highlights.
Paint a thin layer of paint and let it dry completely. Paint another layer of color over the top. Allow some of the first color to show through. Repeat with as many layers as you want. This is a great way to build value with hard edges between the colors.
Watercolor paint is often considered the most difficult type of paint to learn. Watercolor paint moves whenever water is introduced and can be difficult to control. Mistakes are sometimes hard to disguise or remove.
However, it is an affordable type of paint and is easy to find. It can also be rewarding, with vivid luminosity and striking texture.
You also might like
- How to Watercolor a Mountain Scene
- Learn to Paint a Simple Beach Sunset
- Cross-hatching & Drawing Other Lines
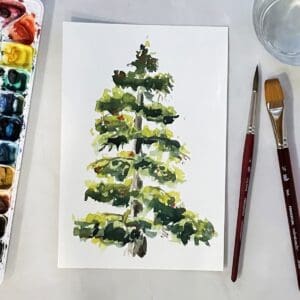
- How to Paint an Easy Pine Tree
Please leave your questions, comments, and ratings below!

Leave a Reply