Learn how to watercolor paint mountains step-by-step using 8 easy techniques in this art lesson. This beginning watercolor painting lesson will help you understand different ways of painting a mountain.
Practice painting a mountain and learn all the tips and tricks to make painting easier. This step-by-step tutorial will teach you how to paint a mountain in simple steps.
Jump to:
In this quick online video art class, practice the basic skill of sketching a mountain and painting it in. While painting these peaks you will also learn some basic watercolor stroke techniques.
Because theses easy mountain watercolors are so simple, they are a fun way to try out new approaches to using watercolor paint.
These exercises will help you train your hand and mind to work together and become a better artist.
Don’t worry if your paintings are not perfect. Just keep practicing. And have fun doing it!
Video Tutorial
Transcript
Read TranscriptMaterials
- Watercolor paper - I am using 9 by 12 inch Strathmore Vision cold press 140 lb. watercolor paper
- Watercolor paint - tube watercolor paint on a pallet or a box kit of watercolor paints.
- Paint brushes - I am using a #8 round and #4 round
- Water
- Paper towels
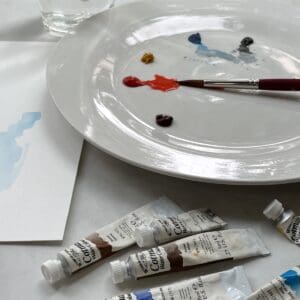
Colors
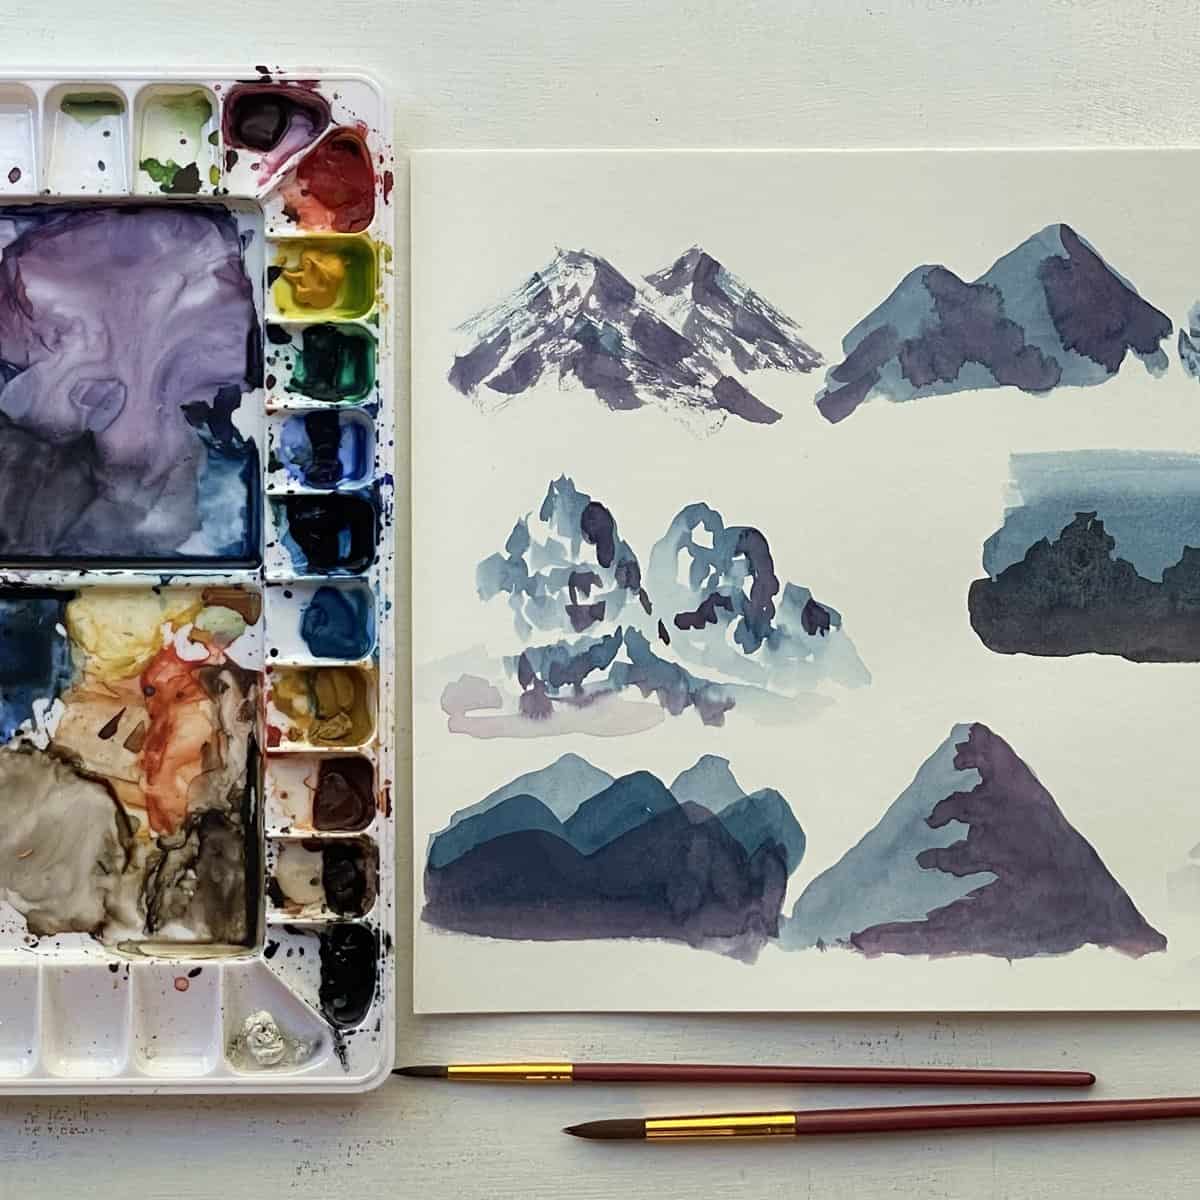
I am using Prussian blue (phthalo blue also works), black, and alizarin crimson to show these techniques. Don’t worry if you don’t have the same paint colors, you can use whatever you have on hand.
Mix a little black into the Prussian blue for a soft, natural middle-toned blue.
Combine Prussian blue with alizarin crimson to create a dark purple to use for the shadows.
For these exercises, you could use any color combination that you like. Use the darker of the colors for the shadow areas.
I chose to use adjacent colors. Adjacent colors are those which are next to each other on the color wheel. You could try red and orange or blue and green.
Alternately, you could choose one color and then mix in black for the shadows. For example, use red as the main color. Then mix a little black into the red to make a dark red for the shadows.
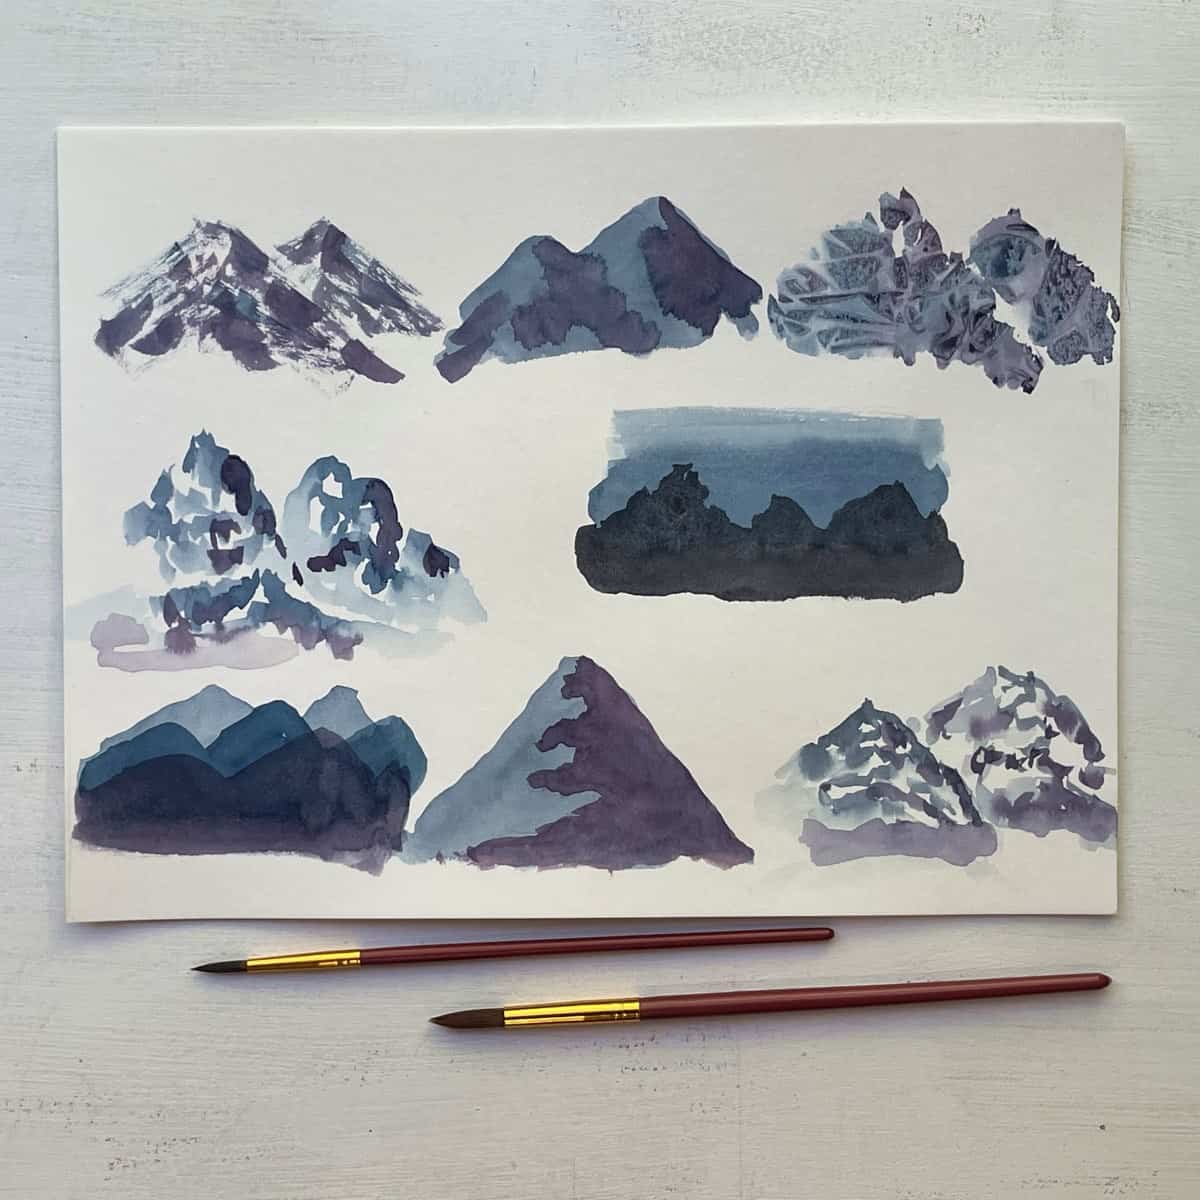
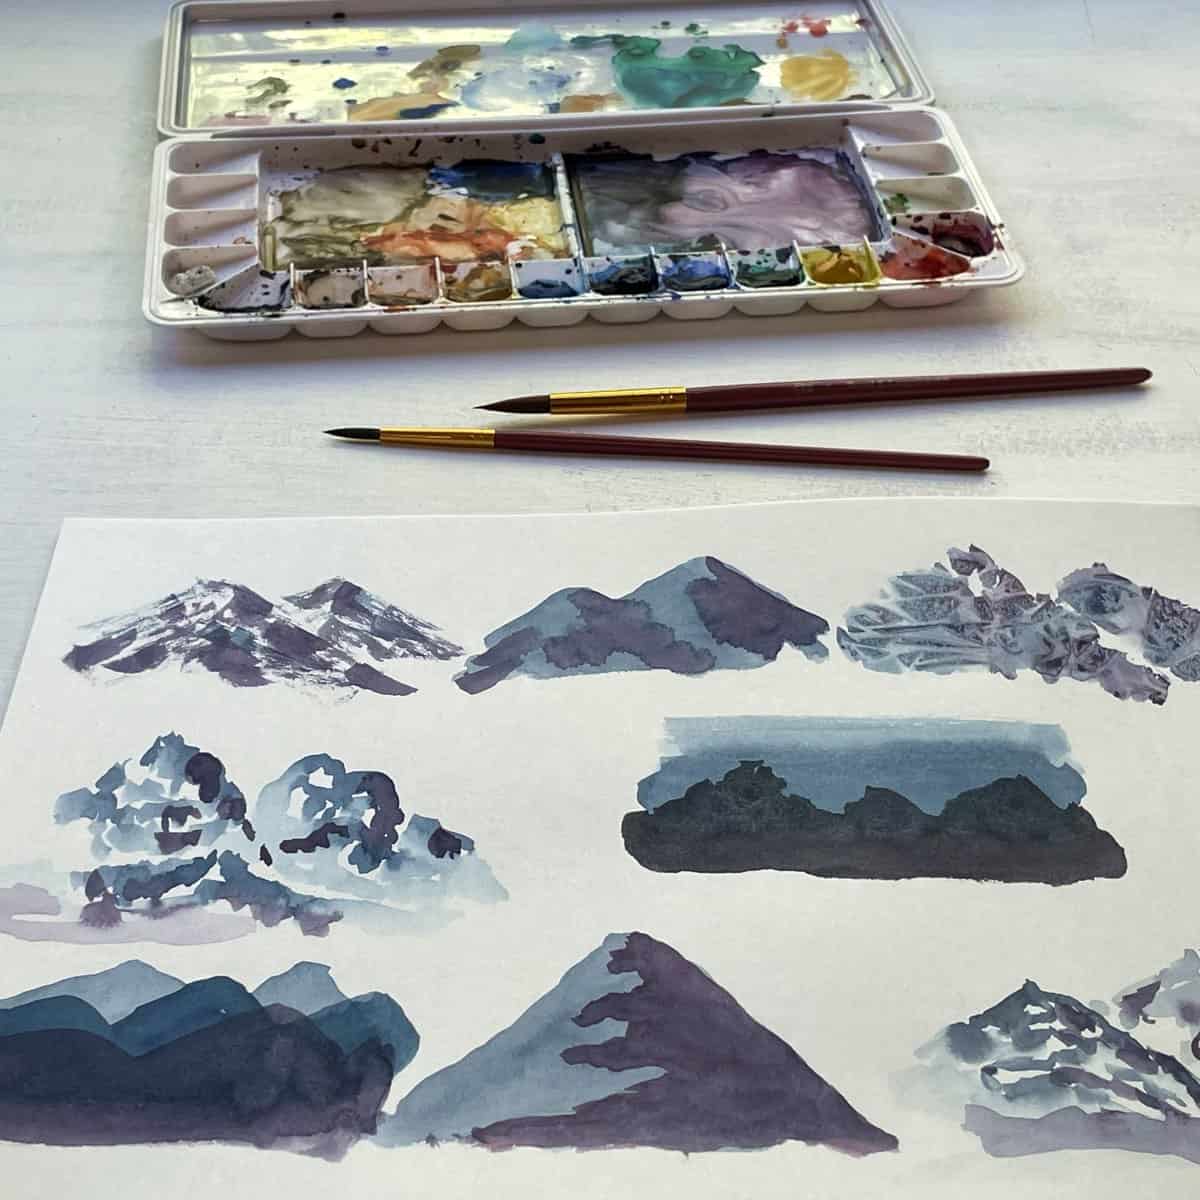
8 different techniques for painting mountains
- Dry Brush
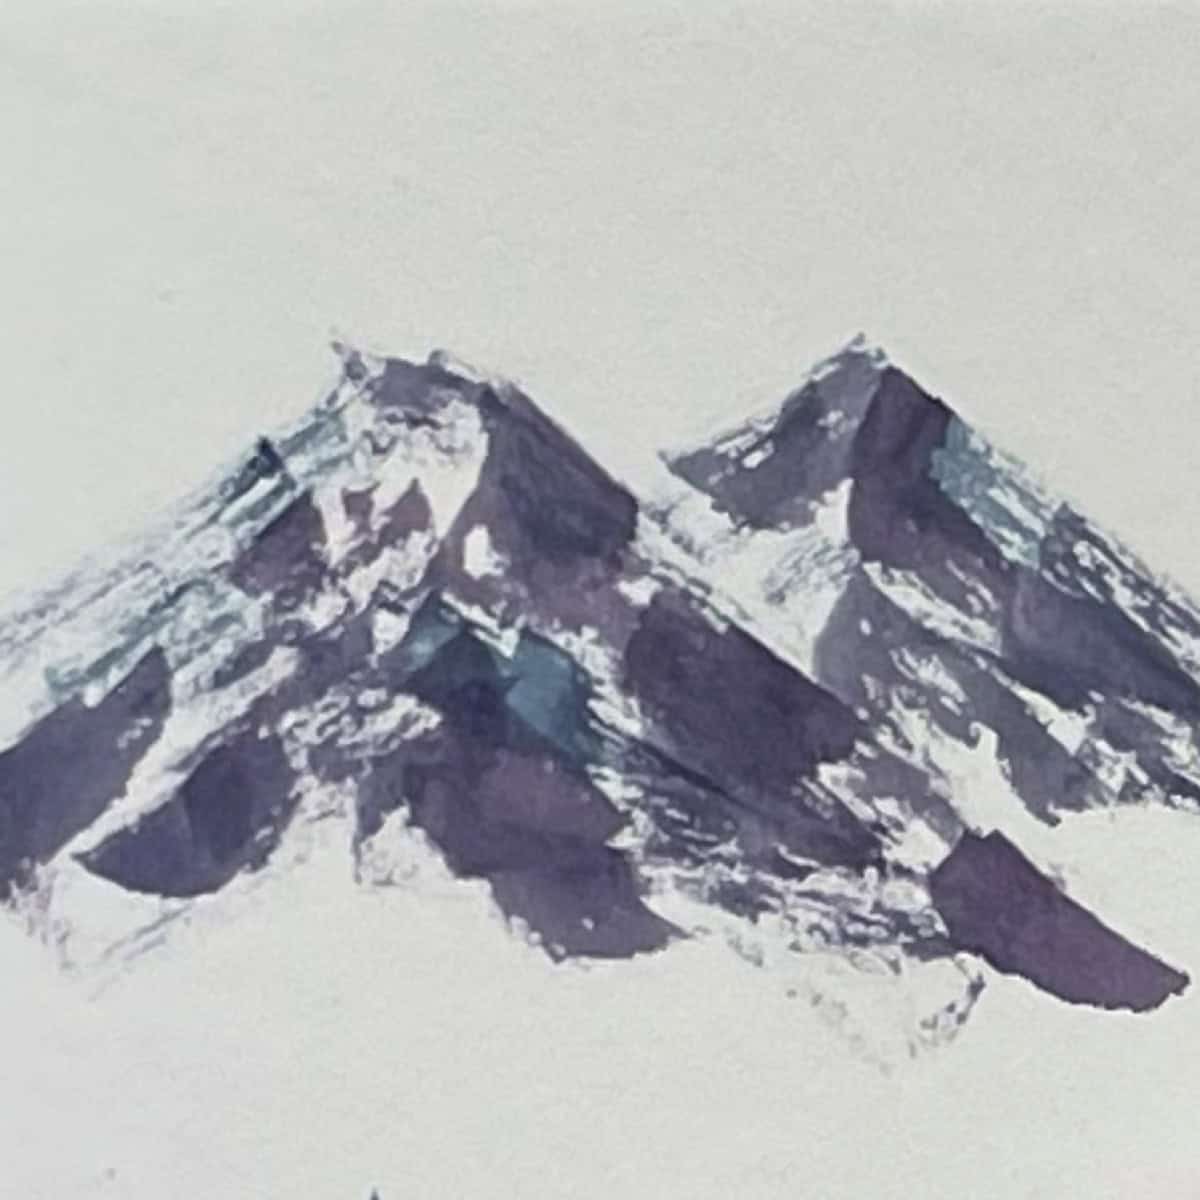
Lightly sketch in a mountain shape. Use a dry brush and pick up a small amount of blue paint at a time. Use the side of the paintbrush to lightly brush the paint onto the mountain. Allow some white to show through the paint.
Pick up a small amount of purple or darker-colored paint and use the same technique on one side of the mountain to indicate shadows. When it is dry, erase the pencil lines.
- Wet on Wet
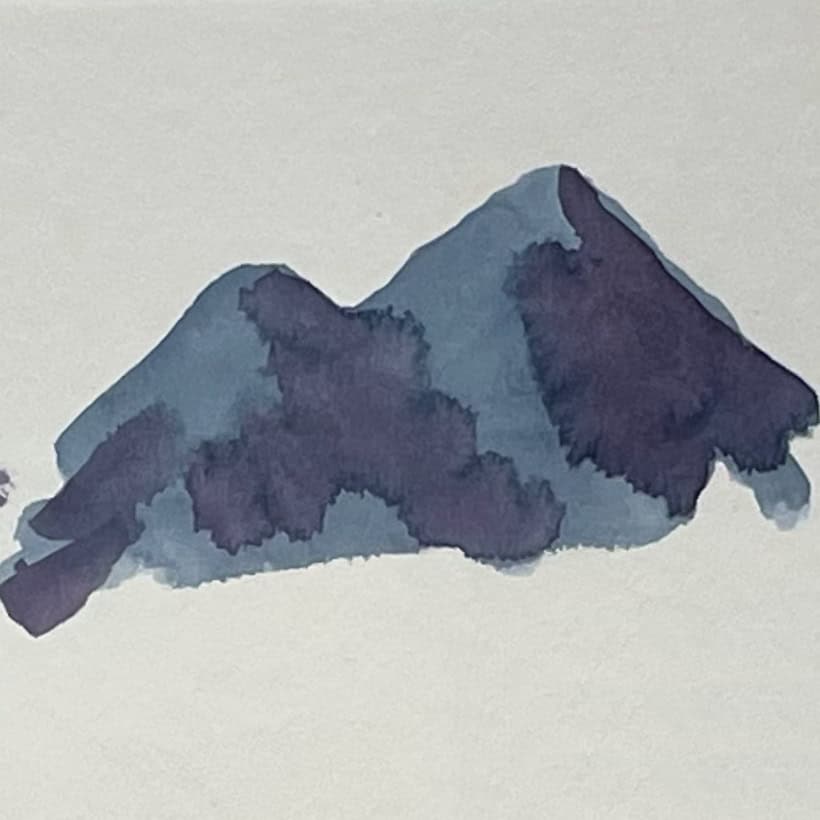
Load up the brush with blue paint and paint in several mountains. While the paint is still damp add some purple paint on one side of the mountains for the shadows. When it dries the colors will blend together slightly for a misty effect.
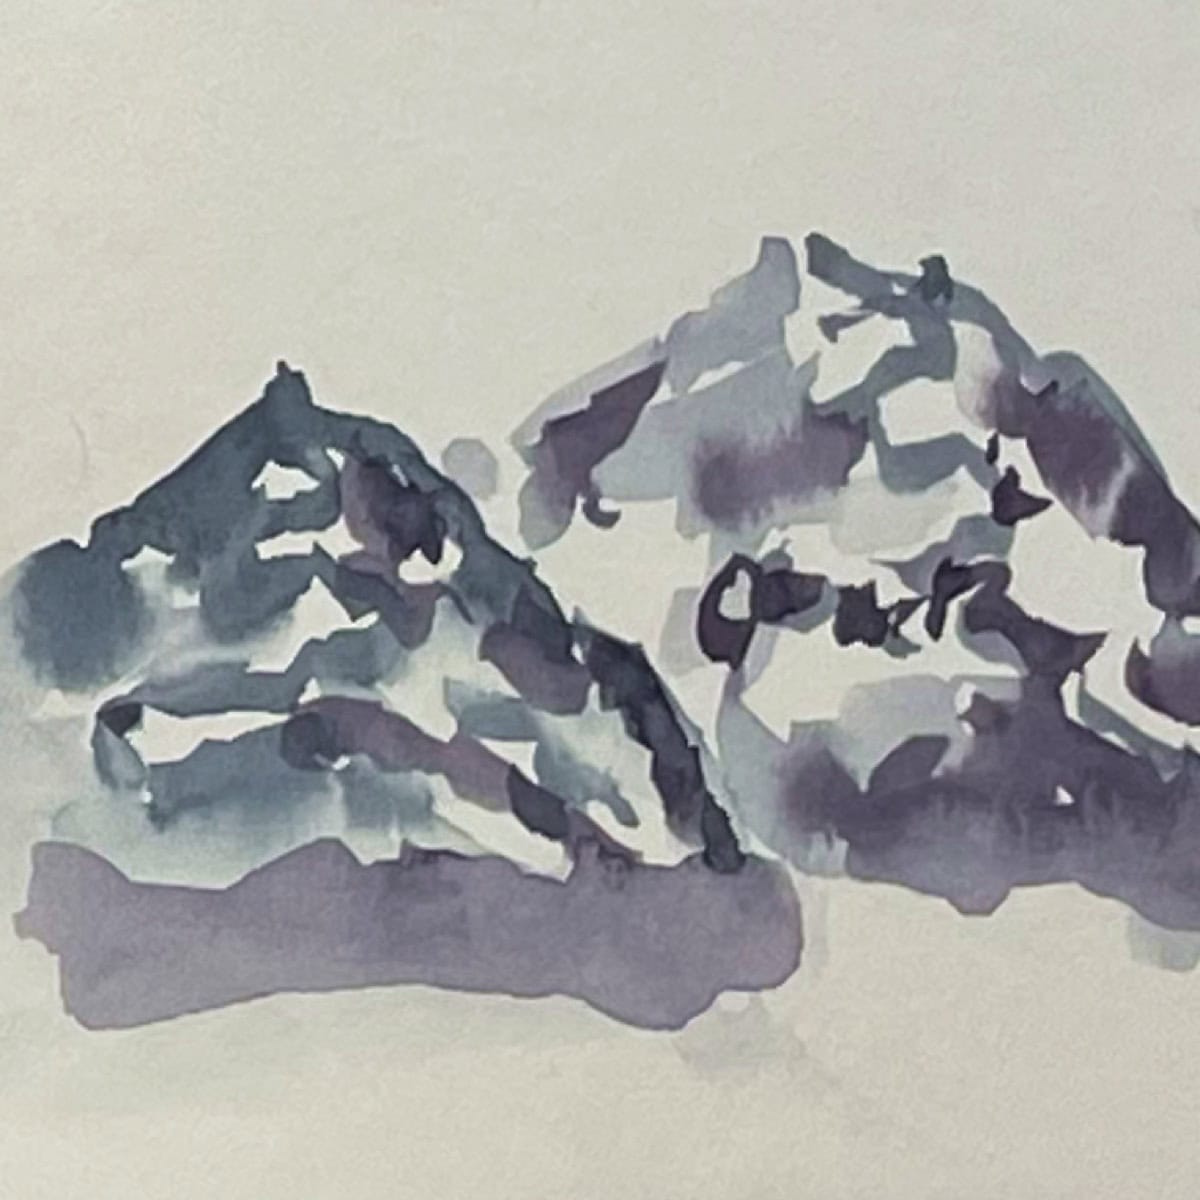
- Daubs and Saran Wrap
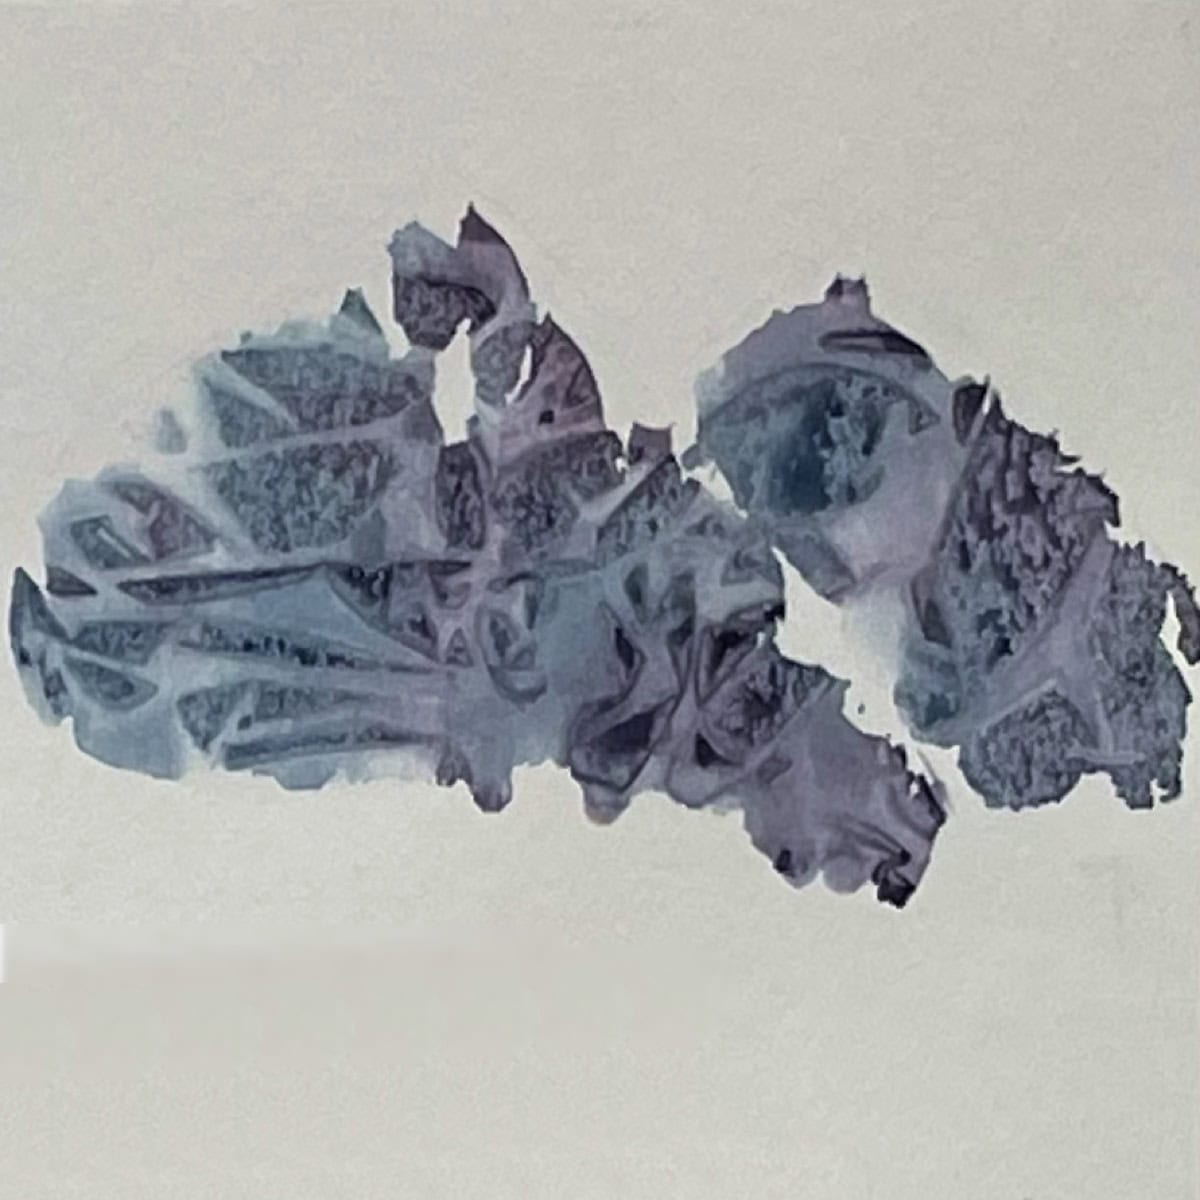
Lightly sketch in a mountain shape. Use clean water to dampen each section of the mountain separately. Paint daubs of blue paint over both areas. Add daubs of dark purple paint on one side of each peak for shadows.
Crumple up a piece of saran wrap, large enough to fit over your mountain. Carefully place it over the area, making sure it has contact with the paint.
When it is dry remove the saran wrap and erase the pencil lines. This will give you a unique rocky texture, resembling jagged edges. This technique also works well with a variety of different colors.
- Layering
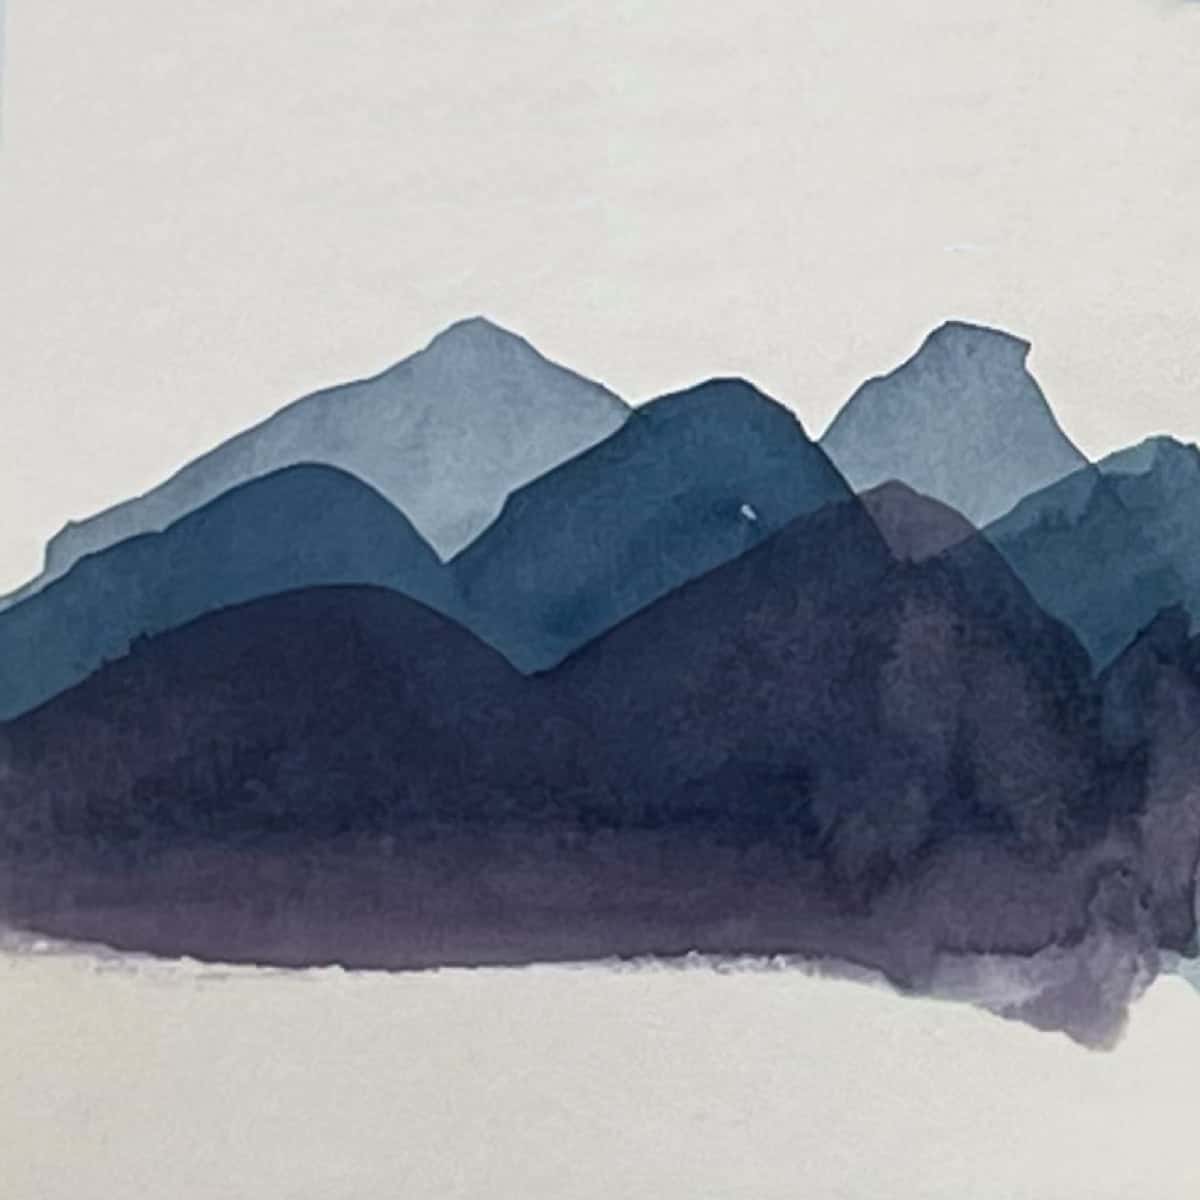
Water down some of the blue paint. Use this to paint in several mountain and valley shapes. Let it dry.
Use the middle tone blue paint to paint another layer of mountains in front of the first layer. Let this layer dry as well.
Finally, paint some dark purple mountains in the foreground.
Using this technique, add as many different layers as you want. Just make sure to place the lighter colors I the background and darker ones in the foreground.
You can also experiment with leaving some of the layers a little damp when painting in the next layer. This can give you some interesting texture and blending.
- Two-Tone Triangle
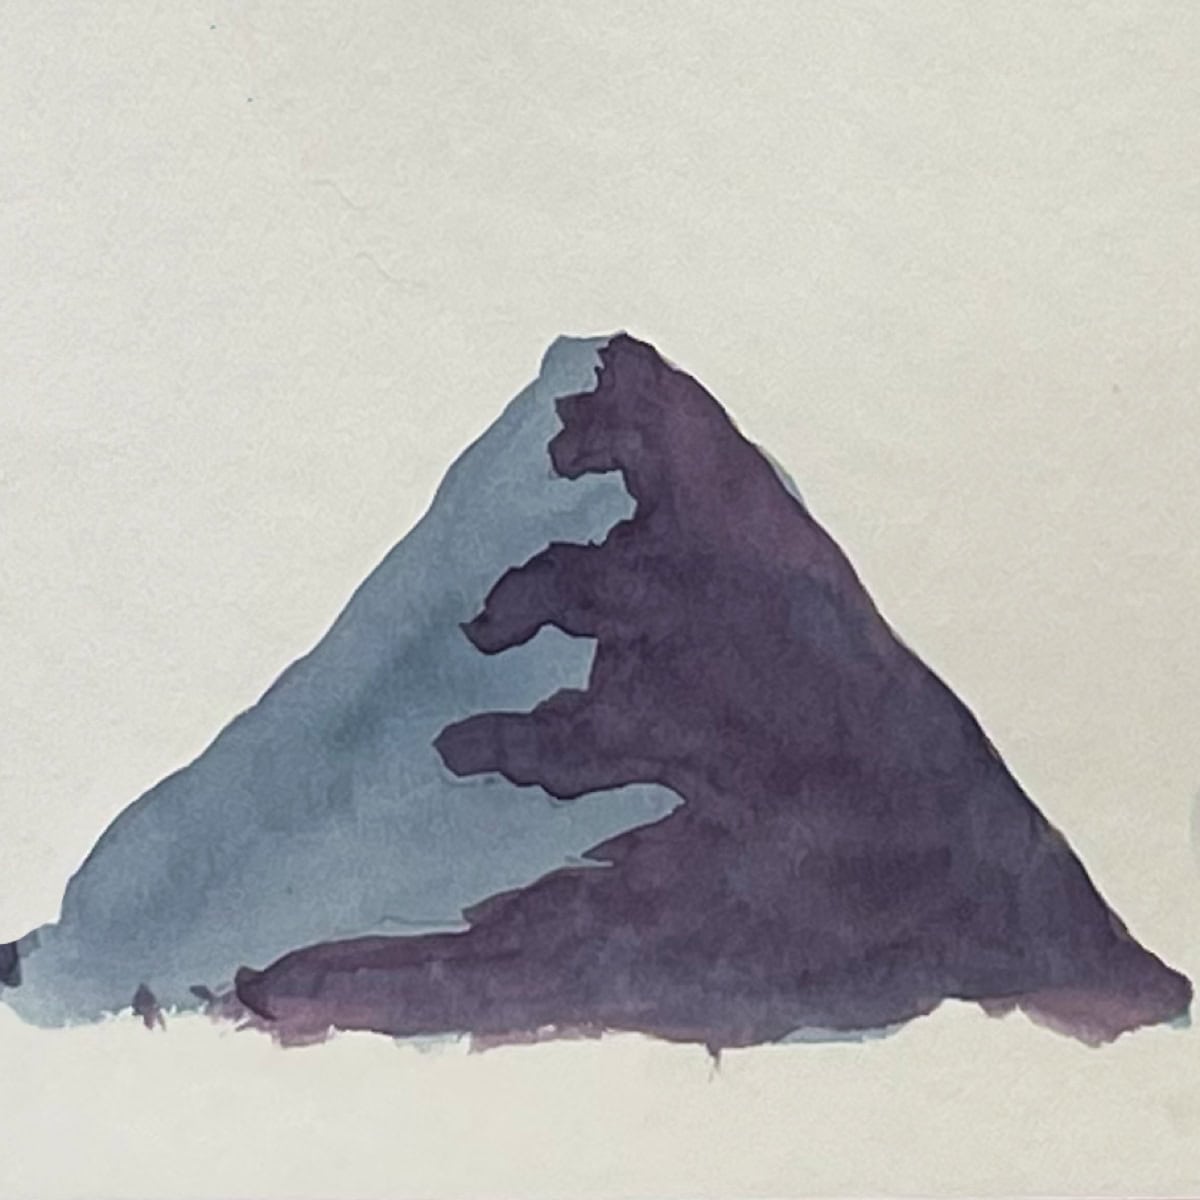
Lightly sketch in a triangle-shaped mountain peak. Then sketch in a squiggly line that zig-zags down the mountain and then swoops off to one side.
Paint the entire mountain with the middle tone blue. After it dries, paint dark purple on one side of the mountain, following the zig-zag line. Erase any pencil lines showing when it is dry.
- Lines and Washes
Using loose strokes, paint a triangle-shaped mountain peak using the tip of the brush. Paint a loose squiggly line zig-zagging down from the top. These can be irregular strokes with breaks in between the lines.
Rinse out your brush. Then using the pigment that is already on the paper, draw out the paint into transparent washes. Repeat the process by adding some lines in dark purple, cleaning the brush, and then creating washes.
Paint each mountain peak separately using lines and washes.
- Silhouette
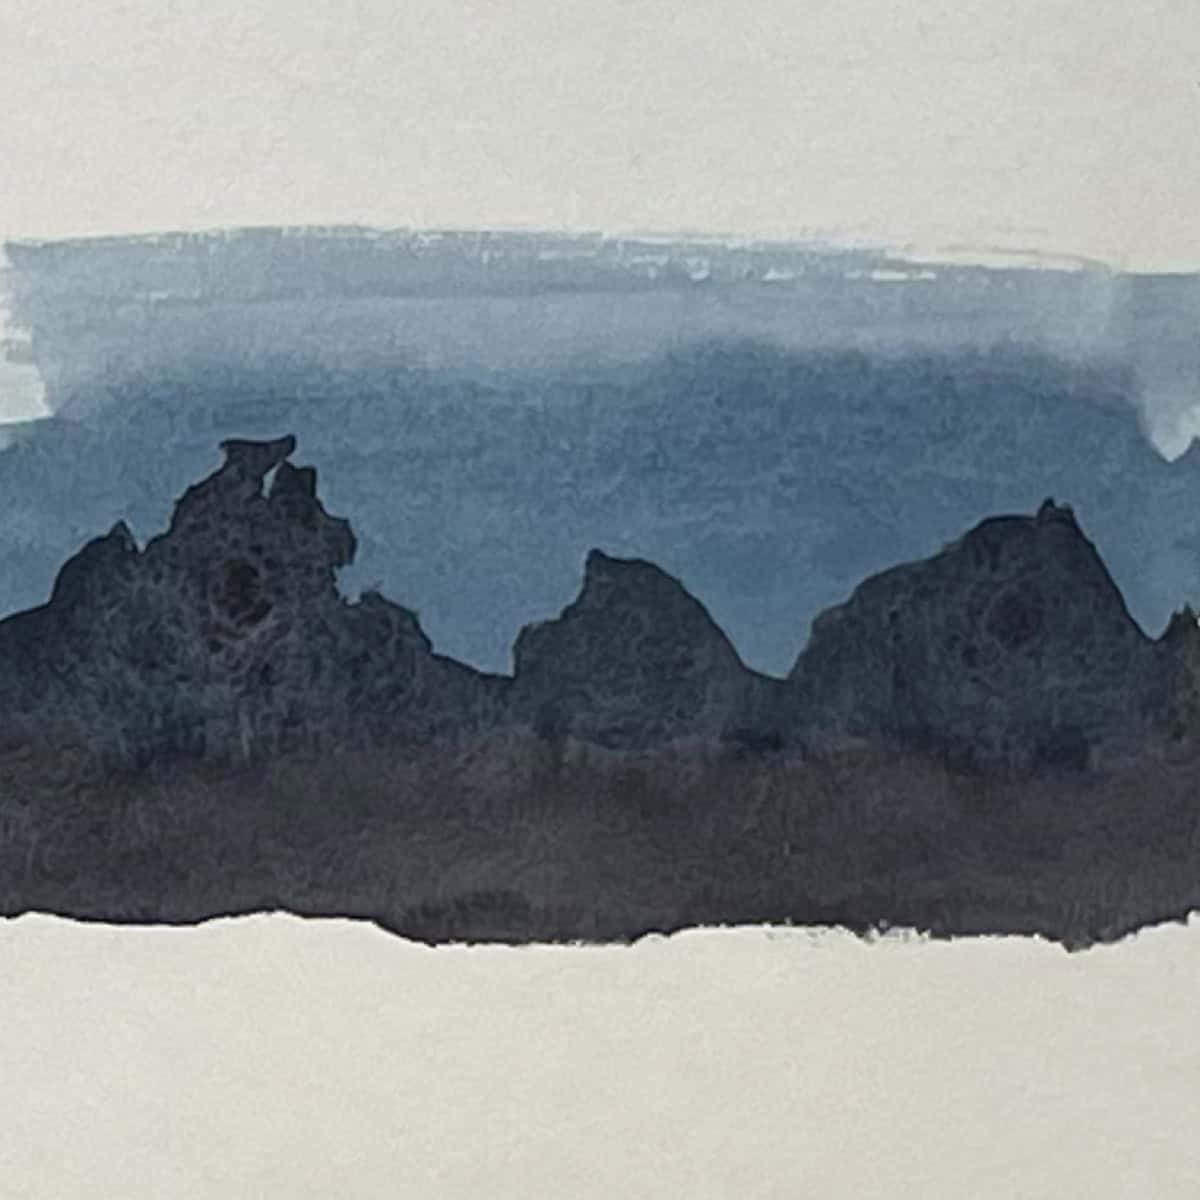
Use the blue paint to paint the sky. The sky is usually lighter near the horizon line and darker higher in the sky. (Oops! In the demo, I painted the gradient in the opposite direction. Lol. Good thing it did not affect the mountain silhouette.) Blend out the paint toward the horizon line.
After the sky is dry, use a very dark mixture of black blue and crimson to paint in a silhouette of a mountain range. Make the edges slightly squiggly to indicate trees or rocks, or just make them straight.
- Free Form Mountain Range
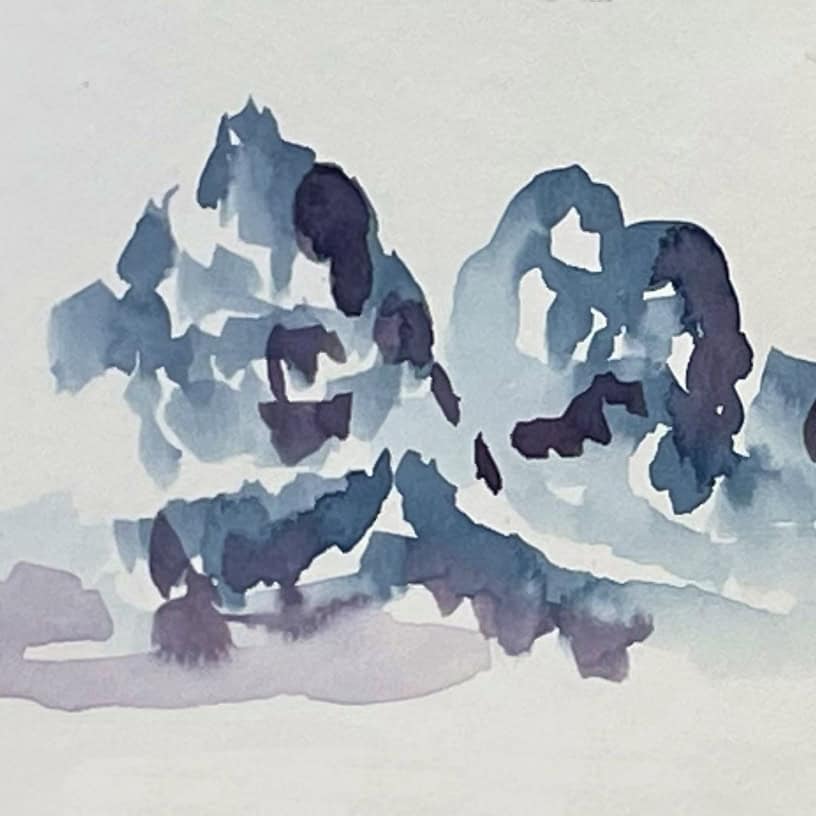
Paint in the darker shapes on the mountain. Clean the brush and then use some of the paint on the paper to pull out the paint into thinner washes. Make sure to leave some areas of white.
Add in some areas of dark purple on one side of the peak for shadows. Pull out some of the purple paint into transparent washes. Paint each peak or section of the mountain separately.
This is a great technique to use if you are looking at a mountain or a photo of one. Concentrate on depicting the areas of lights and darks.
Tips and tricks
Imagine the light source hitting the mountain in a certain direction. If the sun is shining in from the left side, the shadows will primarily be on the right side of each mountain peak.
Be aware of how much water you are using. The techniques can vary greatly depending on how wet or dry the paper is or how much pigment is concentrated in the paint mixture.
Use lighter colors in the distance and darker colors in the foreground to create a greater sense of dimension in the painting.
Play around with these different approaches. Don’t be afraid to combine the techniques in new ways. Building up layers and textures can add whole new dimensions to your paintings.
Since you are practicing, don’t forget that you can use both sides of your watercolor paper.
Instructions
Watercolor Paint Mountains Step By Step (8 Easy Techniques)
Equipment
- Watercolor paper - I am using 9 by 12 inch Strathmore Vision cold press 140 lb. watercolor paper
- Watercolor paint - tube watercolor paint on a pallet or a box kit of watercolor paints.
- Paint brushes - I am using a #8 round and #4 round
- Water
- Paper towels
Instructions
Dry Brush
- Lightly sketch in a mountain shape. Use a dry brush and pick up a small amount of blue paint at a time. Use the side of the paintbrush to lightly brush the paint onto the mountain. Allow some white to show through the paint.
- Pick up a small amount of purple or darker-colored paint and use the same technique on one side of the mountain to indicate shadows. When it is dry, erase the pencil lines.
Wet on Wet
- Load up the brush with blue paint and paint in several mountains. While the paint is still damp add some purple paint on one side of the mountains for the shadows. When it dries the colors will blend together slightly for a misty effect.
Daubs and Saran Wrap
- Lightly sketch in a mountain shape. Use clean water to dampen each section of the mountain separately. Paint daubs of blue paint over both areas. Add daubs of dark purple paint on one side of each peak for shadows.
- Crumple up a piece of saran wrap, large enough to fit over your mountain. Carefully place it over the area, making sure it has contact with the paint.
- When it is dry remove the saran wrap and erase the pencil lines. This will give you a unique rocky texture, resembling jagged edges. This technique also works well with a variety of different colors.
Layering
- Water down some of the blue paint. Use this to paint in several mountain and valley shapes. Let it dry.
- Use the middle tone blue paint to paint another layer of mountains in front of the first layer. Let this layer dry as well.
- Finally, paint some dark purple mountains in the foreground.
- Using this technique, add as many different layers as you want. Just make sure to place the lighter colors I the background and darker ones in the foreground.
Two-Tone Triangle
- Lightly sketch in a triangle-shaped mountain peak. Then sketch in a squiggly line that zig-zags down the mountain and then swoops off to one side.
- Paint the entire mountain with the middle tone blue. After it dries, paint dark purple on one side of the mountain, following the zig-zag line. Erase any pencil lines showing when it is dry.
Lines and Washes
- Using loose strokes, paint a triangle-shaped mountain peak using the tip of the brush. Paint a loose squiggly line zig-zagging down from the top. These can be irregular strokes with breaks in between the lines.
- Rinse out your brush. Then using the pigment that is already on the paper, draw out the paint into transparent washes. Repeat the process by adding some lines in dark purple, cleaning the brush, and then creating washes.
- Paint each mountain peak separately using lines and washes.
Silhouette
- Use the blue paint to paint the sky. The sky is usually lighter near the horizon line and darker higher in the sky. (Oops! In the demo, I painted the gradient in the opposite direction. Lol. Good thing it did not affect the mountain silhouette.) Blend out the paint toward the horizon line.
- After the sky is dry, use a very dark mixture of black blue and crimson to paint in a silhouette of a mountain range. Make the edges slightly squiggly to indicate trees or rocks, or just make them straight.
Free Form Mountain Range
- Paint in the darker shapes on the mountain. Clean the brush and then use some of the paint on the paper to pull out the paint into thinner washes. Make sure to leave some areas of white.
- Add in some areas of dark purple on one side of the peak for shadows. Pull out some of the purple paint into transparent washes. Paint each peak or section of the mountain separately.
- This is a great technique to use if you are looking at a mountain or a photo of one. Concentrate on depicting the areas of lights and darks.
Notes
You can also experiment with leaving some of the layers a little damp when painting in the next layer. This can give you some interesting texture and blending.
Frequently Asked Questions
There are many ways to paint mountains. One simple way is to use a dry brush technique.
Lightly sketch in a mountain shape. Use a dry brush and pick up a small amount of blue paint at a time. Use the side of the paintbrush to lightly brush the paint onto the mountain. Allow some white to show through the paint.
You can use any color to paint mountains. Snow-capped mountains often appear in blue or grey tones. Tree-covered mountains are often green. Desert mountains are usually warm tones of orange, red, and yellow.
If painting in a realistic style it can be helpful to look at a real mountain or a photo of one to accurately paint the colors you see.
Let plenty of white paper show through your watercolor paint to indicate a snowy mountain in a painting. A dry brush technique, lines and washes, and simply painting in darks and lights where they appear are great methods for painting snow.
You also might like
- Paint an Easy Watercolor Mountain Scene for Beginners
- How to Paint Tree Reflections
- Watercolor Paint an Easy Lake Scene
- Create a Beach Sunset Painting
- Easy Watercolor Techniques for Beginners
Please leave your questions, comments, and ratings below!


Leave a Reply