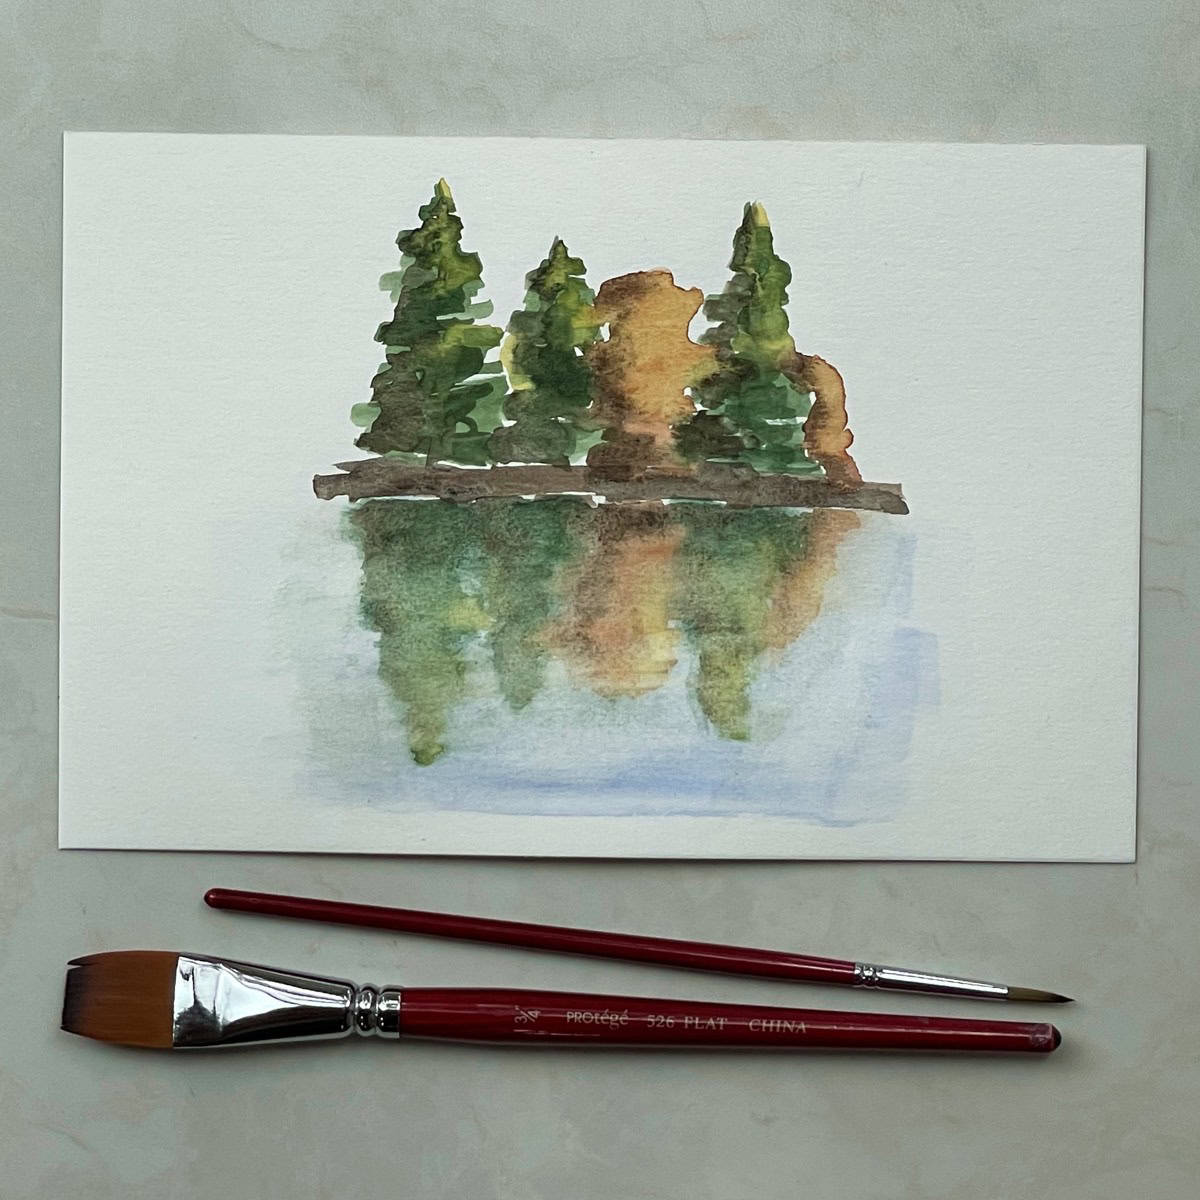
Learn how to paint tree reflections in water in this simple watercolor tutorial. Painting reflections on a body of water is fun with this easy-to-follow online art lesson!
Seeing reflections on a lake, ocean or river is often an amazing gift from nature. Capturing these scenes in watercolor might seem like a challenge for beginning painters but can be very simple when using the correct techniques.
Jump to:
Focusing on the surface of the water, you can create a perfectly smooth reflection or add some small ripples to the water. Adding more details, such as trunks or branches, to the trees, is optional, or just keep the forms very straightforward.
Follow along in this video art class to paint simple watercolor trees and then discover how to paint their reflections in water. Using simple materials, just watercolor paint and brushes, anyone can turn a blank piece of paper into a stunning work of art.
Materials
- Watercolor paper - I am using 140 lb. Strathmore Vision cold press watercolor paper cut down into a 6 x 9-inch piece.
- Watercolor paint - tube watercolor paint on a pallet or a box kit of watercolor paints. Don’t worry if you don’t have the same colors, you can use whatever you have on hand. I use:
- Black
- Burnt umber
- Ultramarine blue
- Viridian green
- Cadmium yellow
- Cadmium red light
- Paint brushes - I am using #4 round, 3/4 inch flat
- Water - 2 cups (optional) one for cleaning the brush and one for clean water
- Paper towels
Video Tutorial Painting Reflections
Transcript
Read TranscriptArt Lesson
- Prepreation
- I have two cups of water for this tutorial. One is for rinsing my brush and the other is clean water for brushing on the paper in the wet-on-wet technique.
- Add a few drops of water to each of the colors you will use.
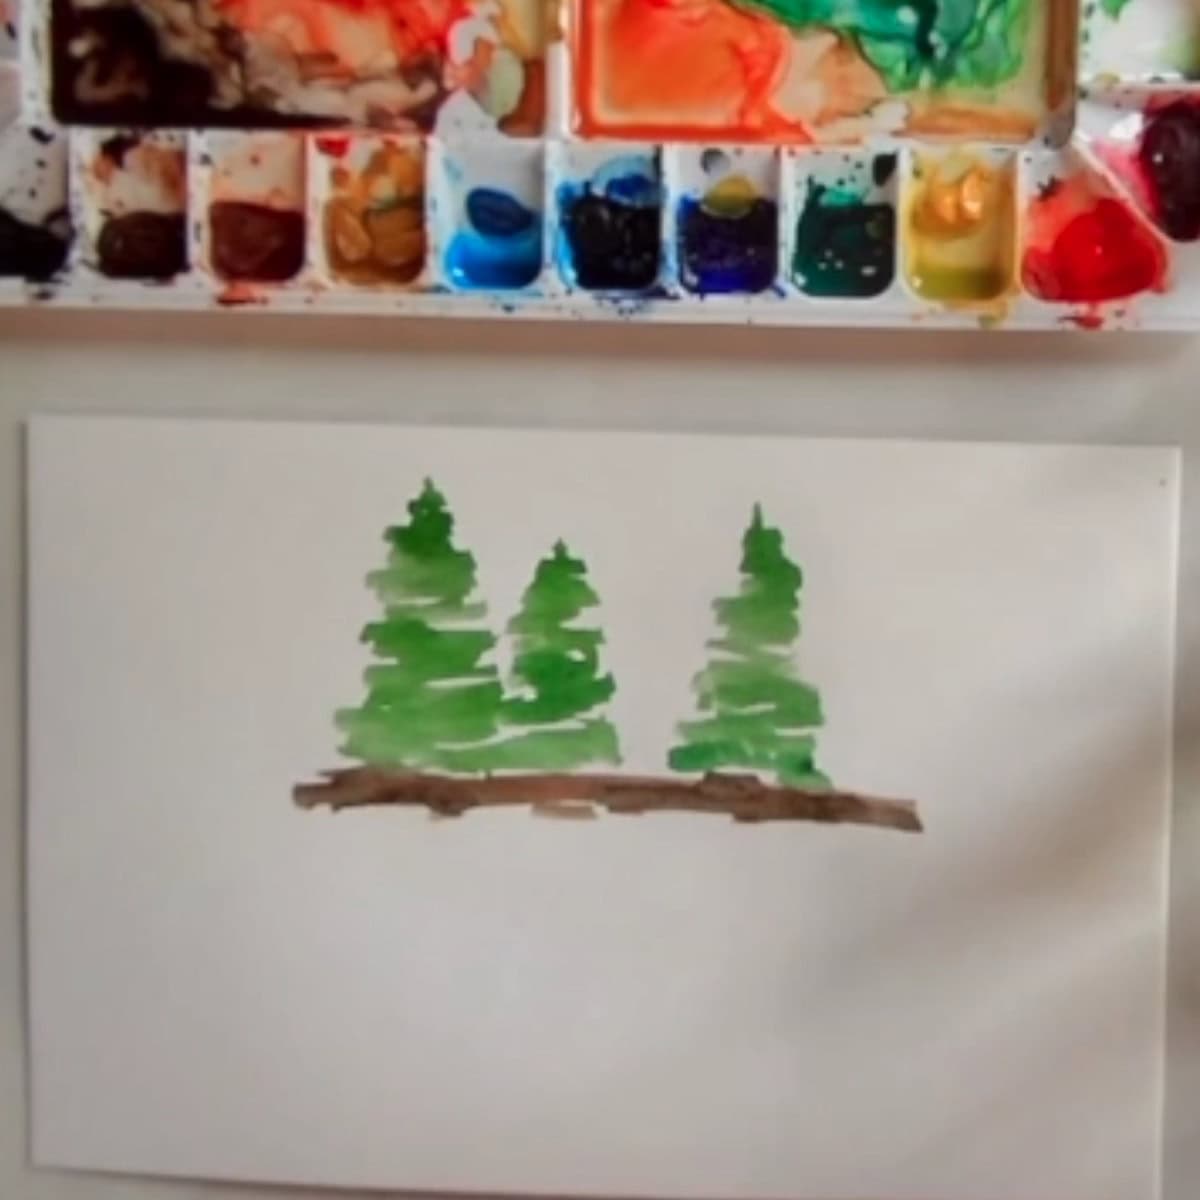
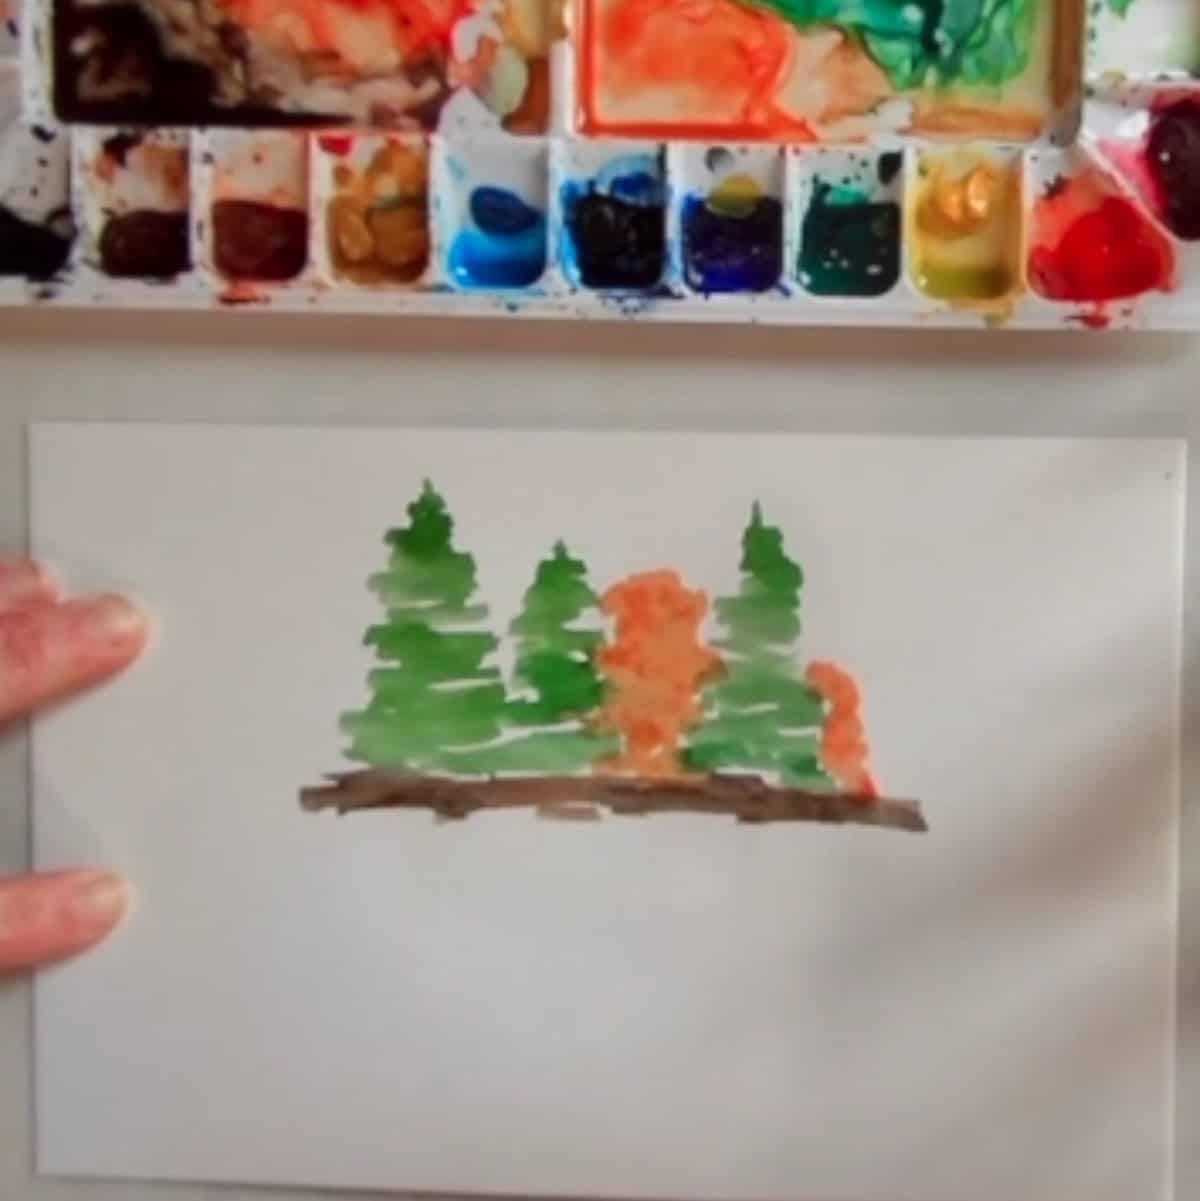
- Paint the land and trees
- Mix brown and black and paint in the horizon line. Add a little bit more black on the lower part of the land.
- Combine green, yellow, and black paint. Keeping the brush strokes nice and loose. Paint in several basic tree shapes, not worrying about too much detail.
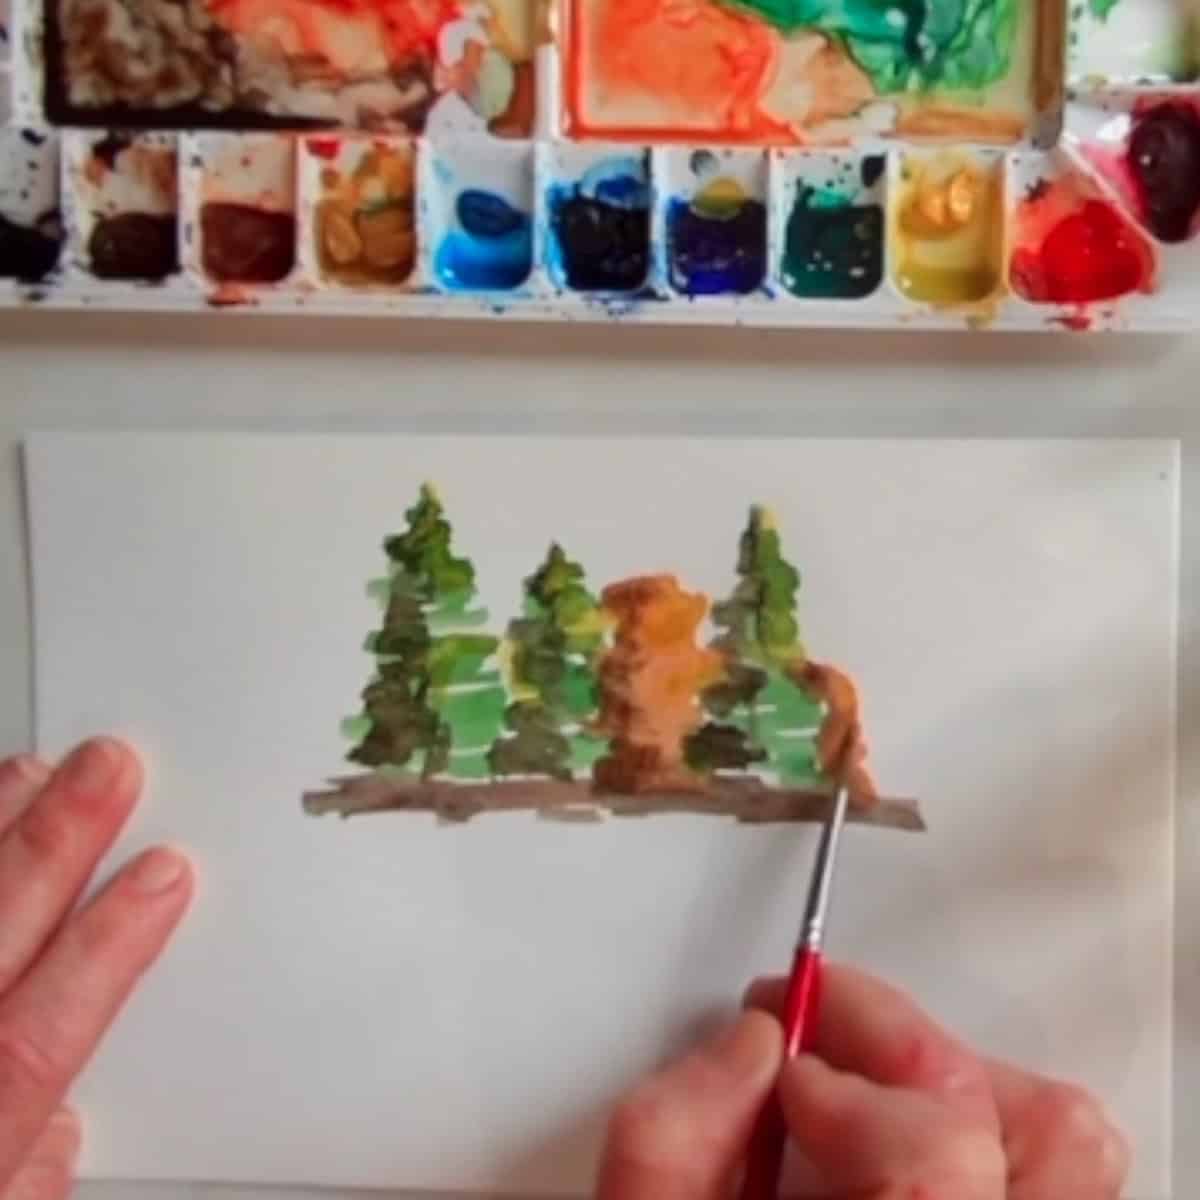
- Leave a gap between the second and third trees. Paint an orange tree in this area and another at the end of the cluster of trees Avoid overlapping the green and orange so the colors do not become muddy.
- Add some shadows to one side of all the trees and toward the bottoms using a brown-black mixture. Add in a few hints of branches or trunks, if desired.
- Paint some yellow highlights on the opposite side and the tops of the trees.
- Paint more green in the middle of the trees in loose strokes to add more color and texture.
- Paint the water and reflections
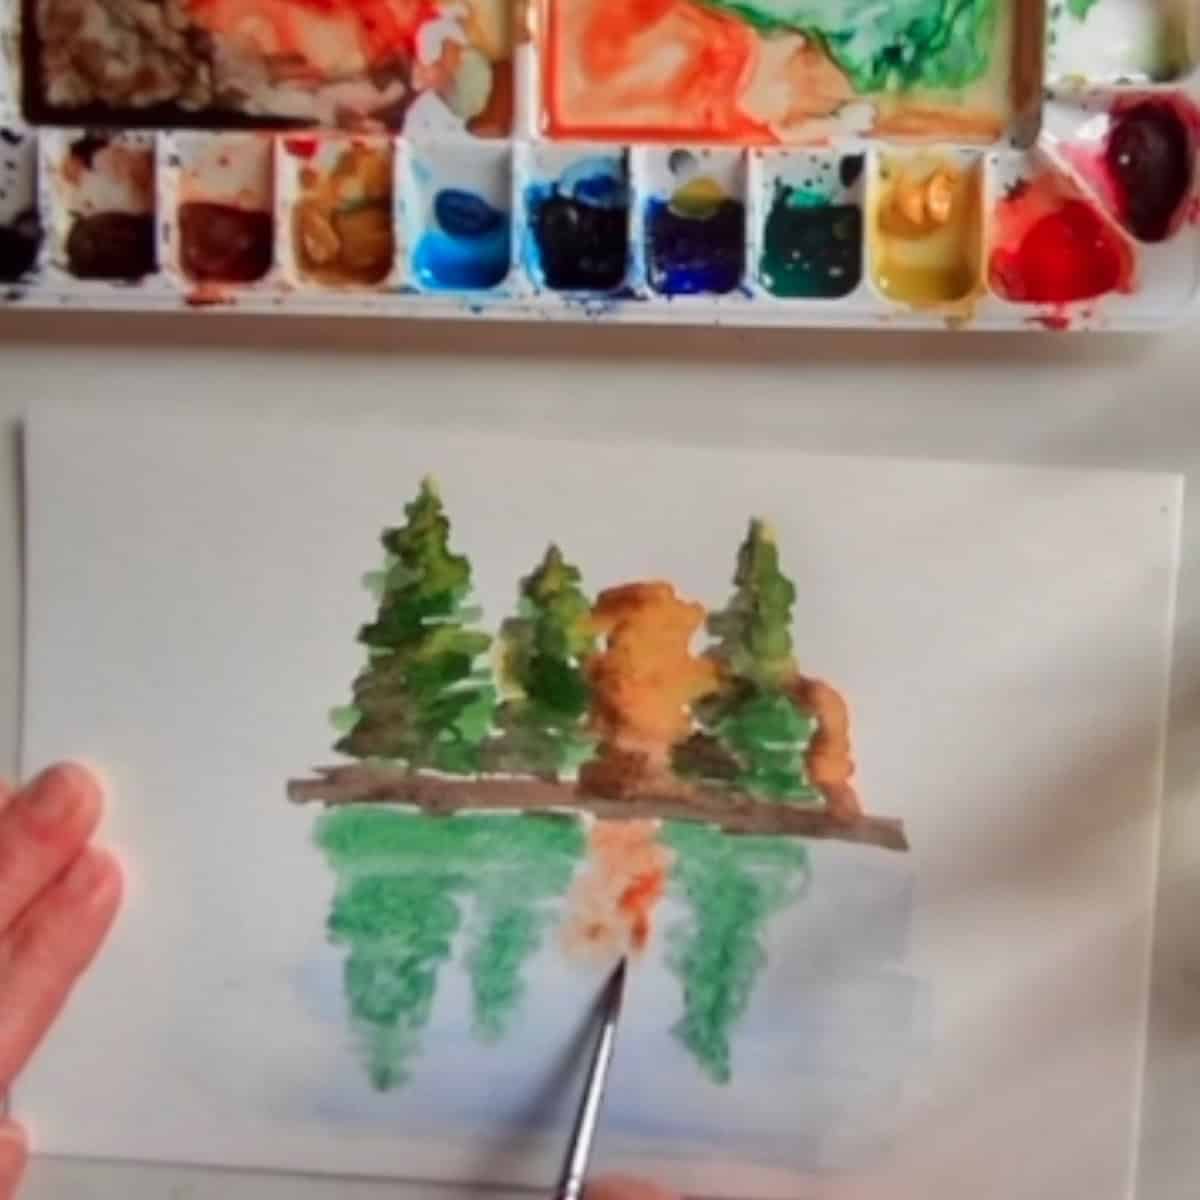
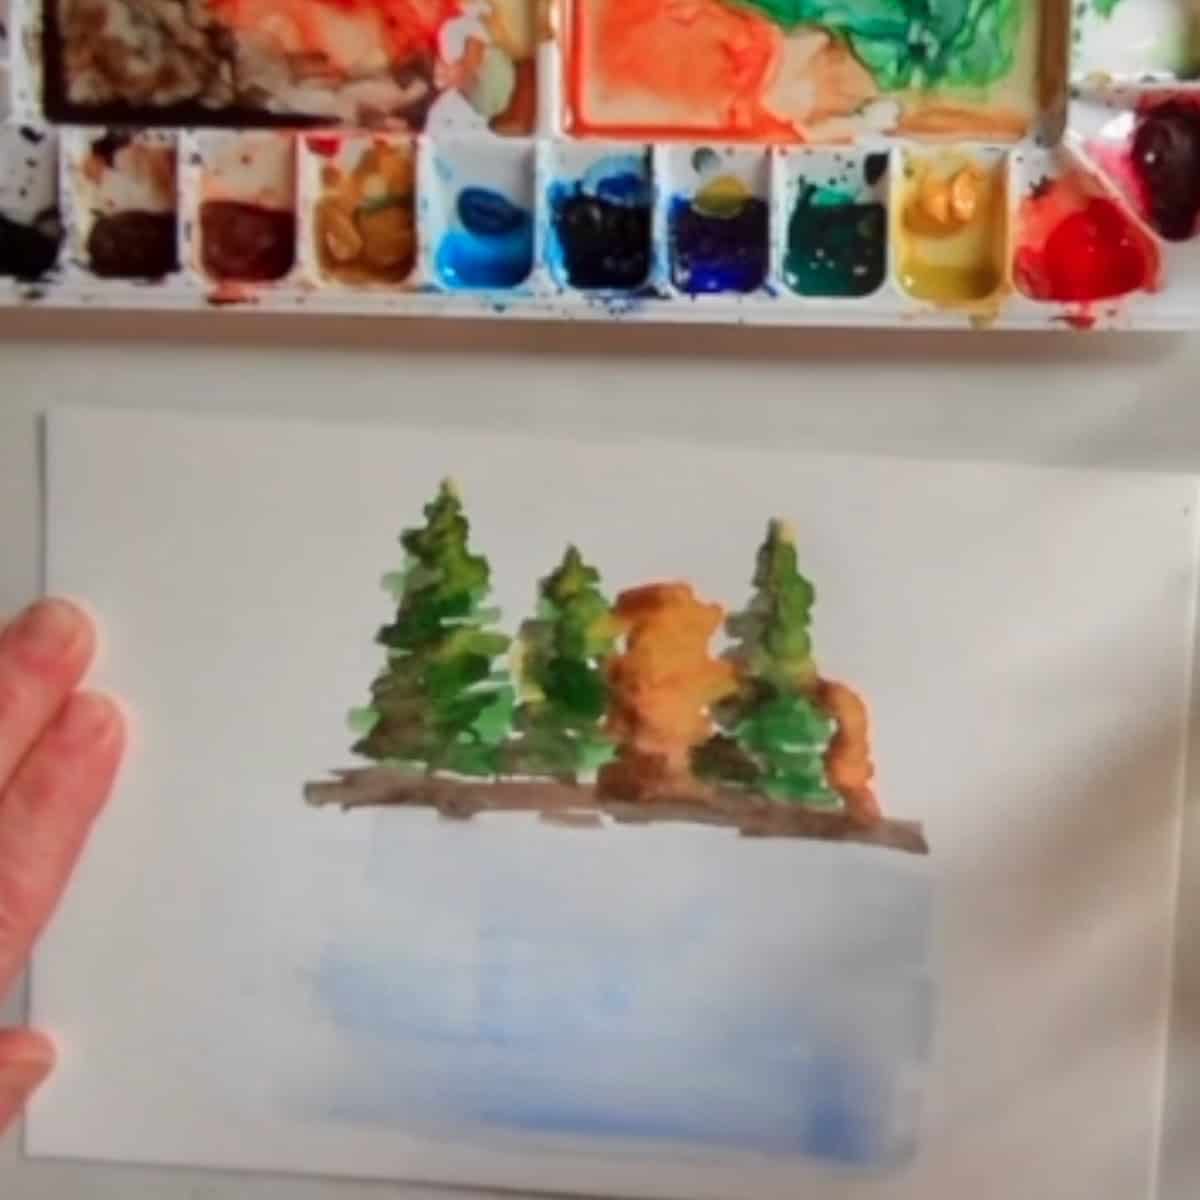
- Paint clean water on the bottom half of the painting for a wet-on-wet technique. Let it soak in so it is just damp. Make sure it is not too wet or too dry.
- Add some ultramarine blue, starting in the foreground and then blending it back towards the trees.
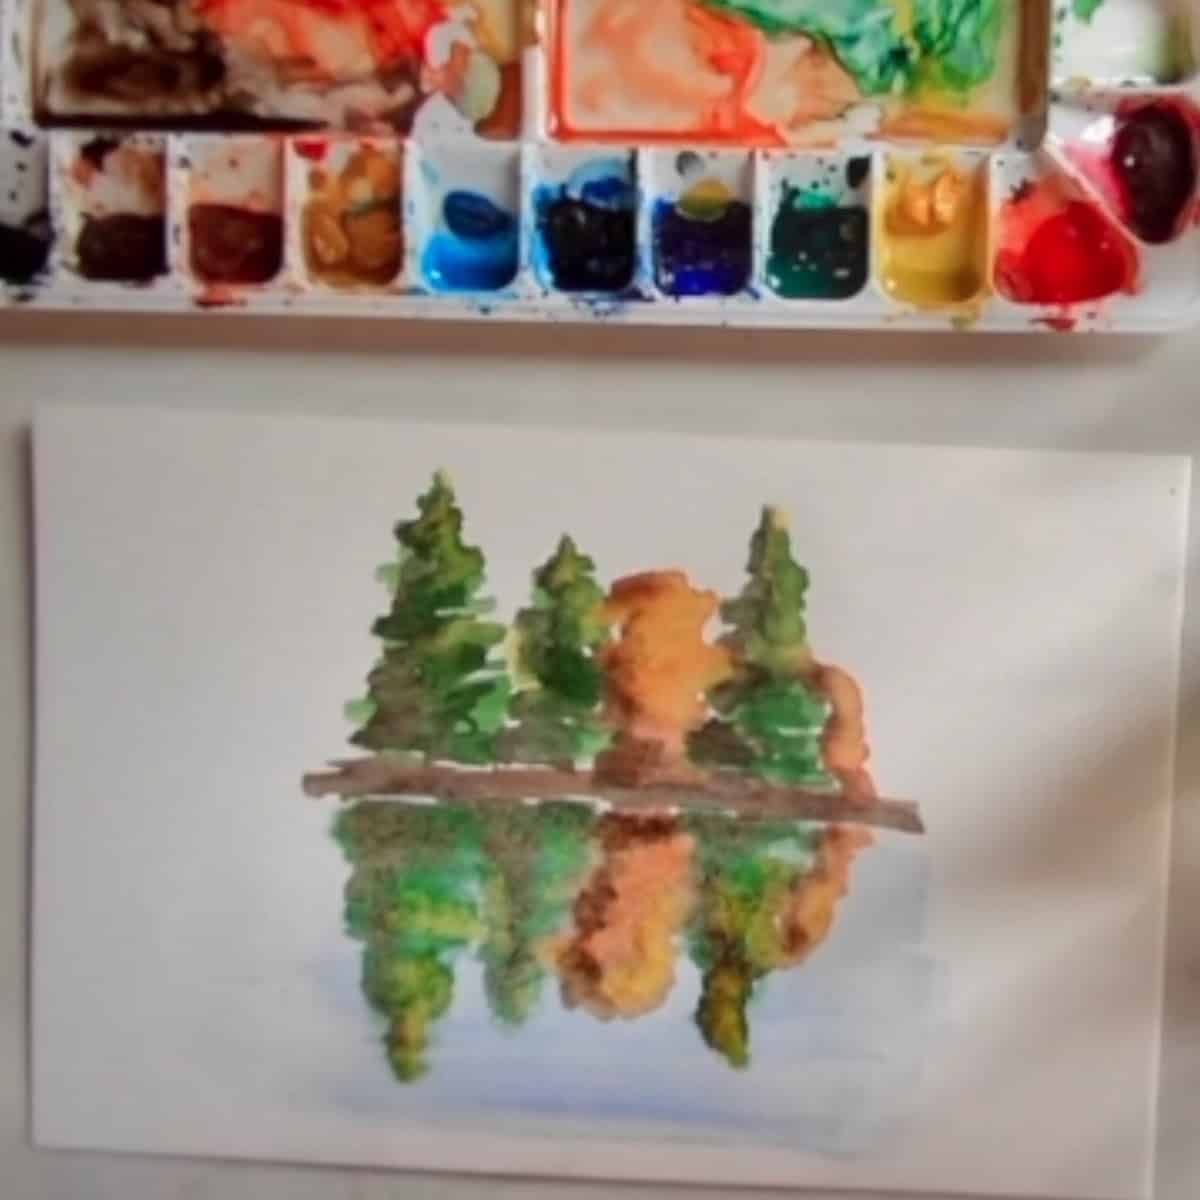
- While this blue area is still wet, paint a mirror image of the trees from up above. When it dries, the colors will blend and look like a reflection.
- If desired, leave a few horizontal gaps without color in the water to make it look like there are ripples in the water. Alternatively, when it is dry you can lift out little horizontal lines. Leaving the water smooth is fine too.
- Paint in the shadows and highlights in the reflection in the same manner as above.
- Using loose strokes, add green paint to the middle part of the tree reflections. Look at your painting and try to mirror the same darks and lights in the water.
- When your painting dries it should all blend into a nice soft reflection. If you want it to be a bit more blurry after it is completely dry, gently brush on some clean water and let it dry again.
Variations
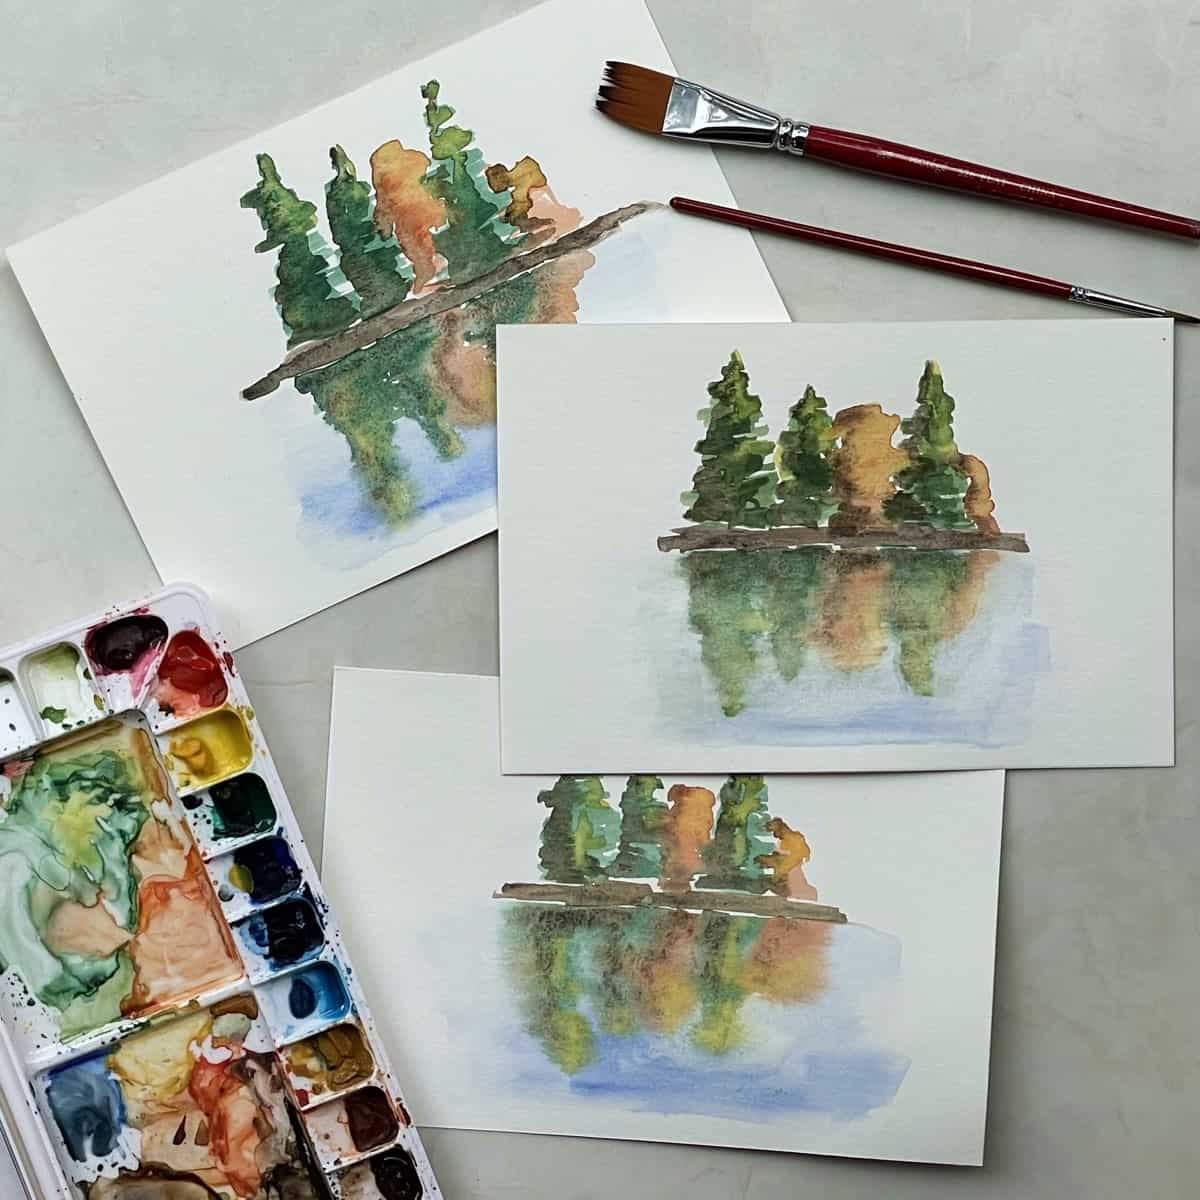
- Experiment with making the water perfectly smooth, slightly rippled, or very wavy. Do this by leaving horizontal strips of white within the blue paint of the water.
- Try adding some sky behind the row of trees.
- Make the water a different color. Perhaps is it more green than blue or maybe it is reflecting an orange or red sunset.
- Challenge yourself and add a boat or bird on the floating in the water in the distance.
Tips and tricks
- After you paint the clear water on the paper for the wet-on-wet water, work quickly to paint all the trees before the area becomes too dry. You will want the paper to be damp. There should not be water sitting on the surface.
- It can be tricky to use a wet-on-wet technique and may take some practice. If the paper is too wet the paint will spread out too much and become diluted. If the paper is too dry the trees will not blend and they will not look like a reflection.
- If you overwet your paper, simply wait several minutes until it dries to the right dampness. If your paper is too dry simply brush on more clean water.
- Paint the water closer to the bottom of the paper (in the foreground) darker. Darker colors appear to come toward the viewer and will help give the painting depth.
- Using watercolor paint can become easy with regular practice. Keep working on your skills!
Instructions
Paint Tree Reflections On Water (Simple Watercolor Tutorial)
Equipment
- Watercolor paper - I am using 140 lb. Strathmore Vision cold press watercolor paper cut down into a 6 x 9-inch piece.
- Watercolor paint - tube watercolor paint on a pallet or a box kit of watercolor paints. Don’t worry if you don’t have the same colors, you can use whatever you have on hand. I use: Black, Burnt umber, Ultramarine blue, Viridian green, Cad yellow, Cad red light
- Paint brushes - I am using #4 round, 3/4 inch flat
- Water - 2 cups (optional) one for cleaning the brush and one for clean water
- Paper towels
Instructions
Preparation
- Use two cups of water for this tutorial. One for rinsing the brush and the other for clean water for brushing on the paper in the wet-on-wet technique.
- Add a few drops of water to each of the colors you will use.
Paint the Land and Trees
- Mix brown and black and paint in the horizon line. Add a little bit more black on the lower part of the land.
- Combine green, yellow, and black paint. Keeping the brush strokes nice and loose. Paint in several basic tree shapes, not worrying about too much detail.
- Leave a gap between the second and third trees. Paint an orange tree in this area and another at the end of the cluster of trees Avoid overlapping the green and orange so the colors do not become muddy.
- Add some shadows to one side of all the trees and toward the bottoms using a brown-black mixture. Add in a few hints of branches or trunks, if desired.
- Paint some yellow highlights on the opposite side and the tops of the trees.
- Paint more green in the middle of the trees in loose strokes to add more color and texture.
Paint the Water and Reflections
- Paint clean water on the bottom half of the painting for a wet-on-wet technique. Let it soak in so it is just damp. Make sure it is not too wet or too dry.
- Add some ultramarine blue, starting in the foreground and then blending it back towards the trees.
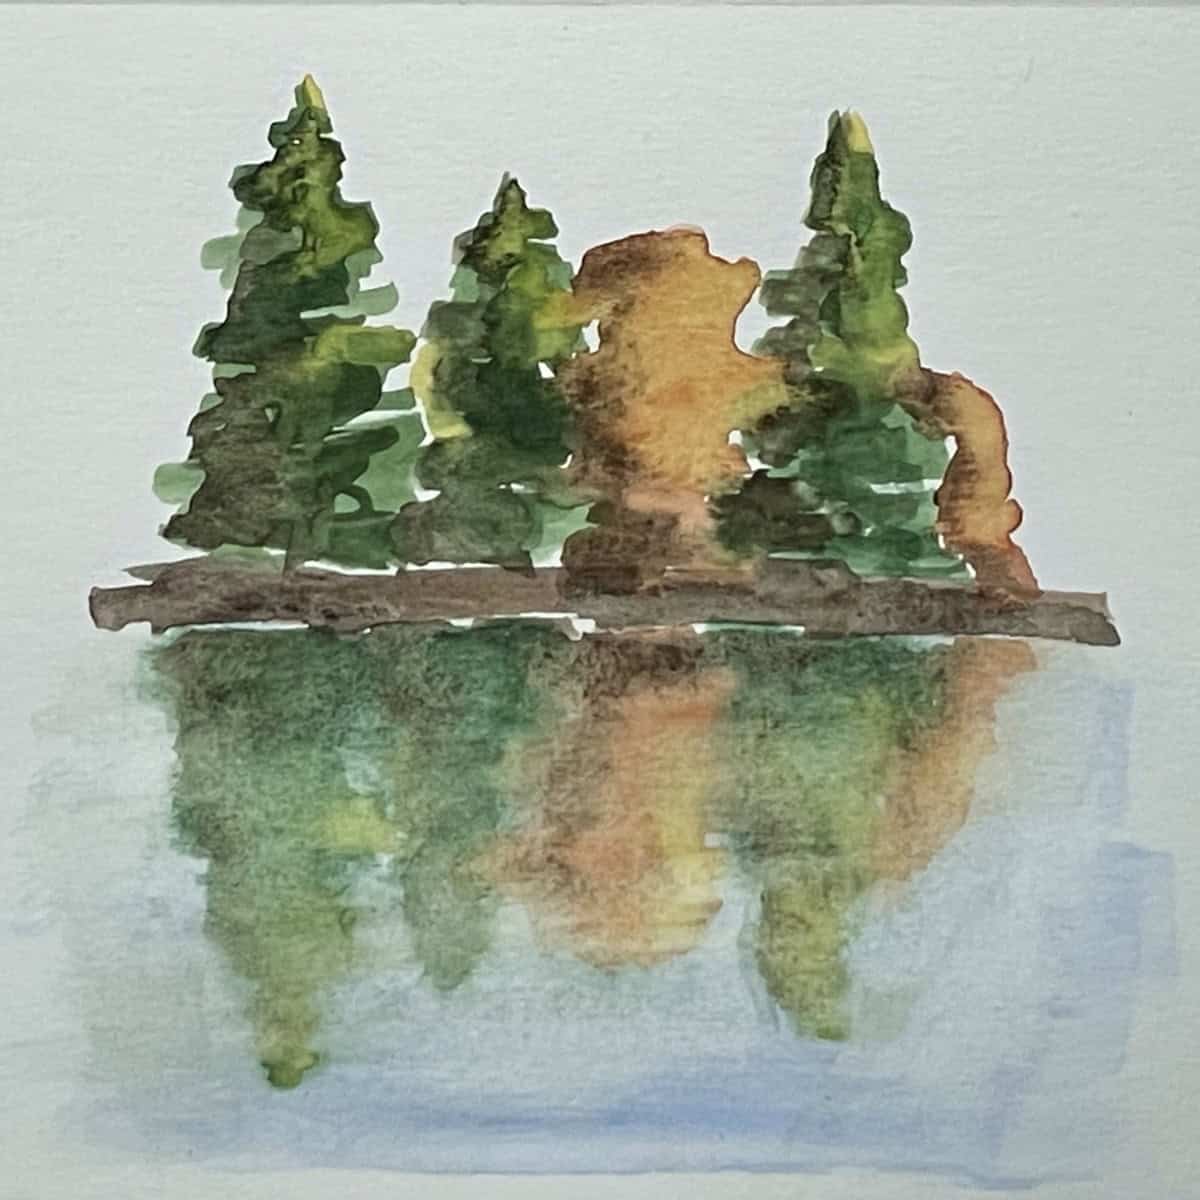
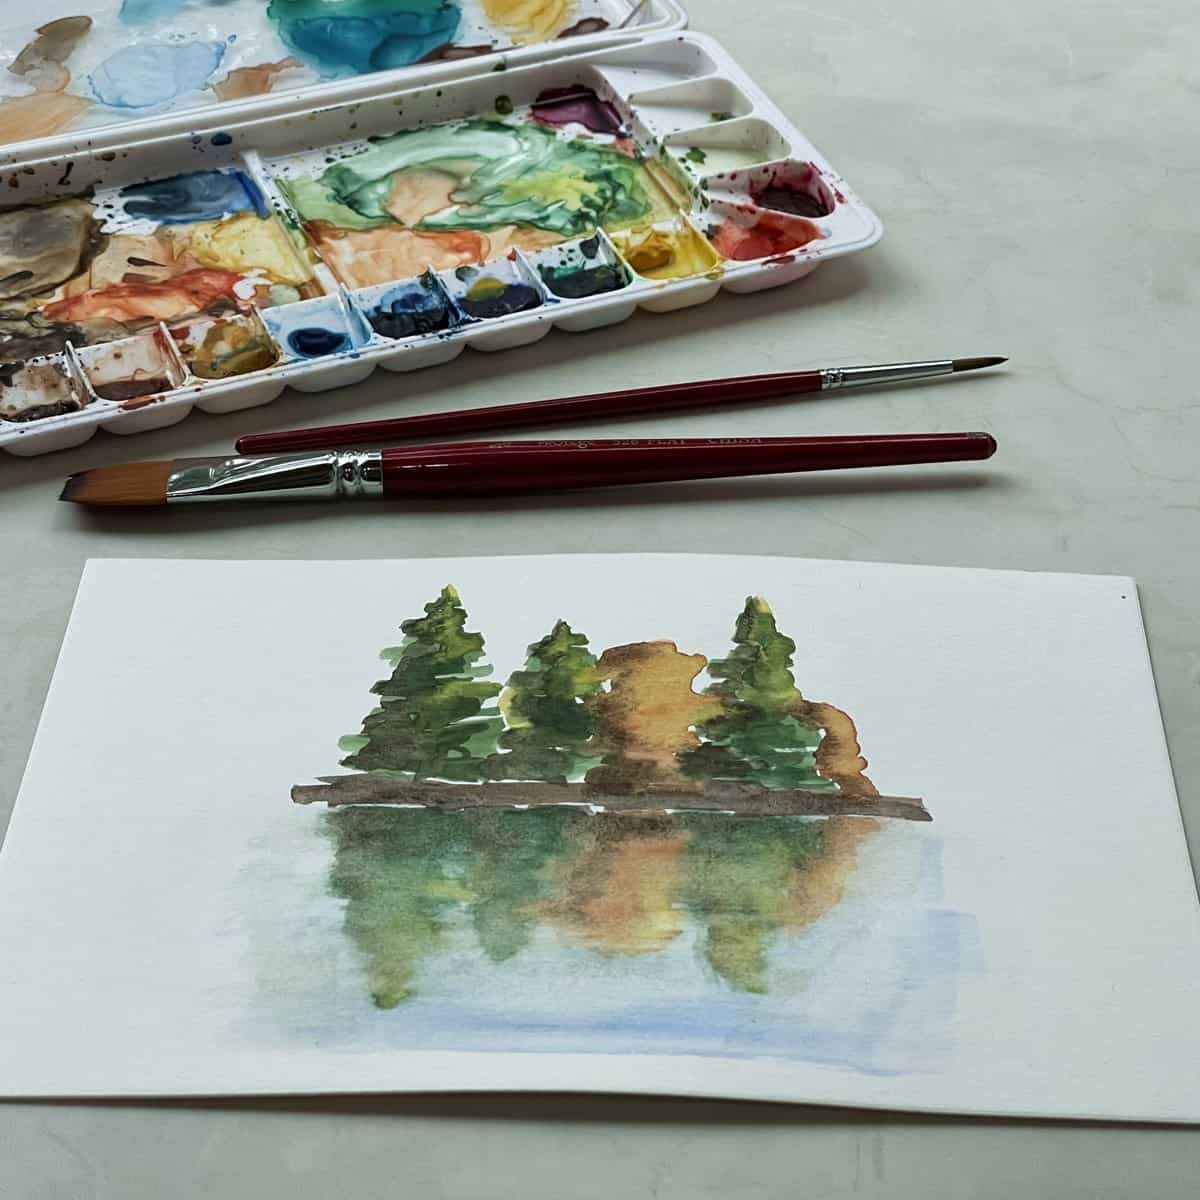
- While this blue area is still wet, paint a mirror image of the trees from up above. When it dries, the colors will blend and look like a reflection.
- If desired, leave a few horizontal gaps without color in the water to make it look like there are ripples in the water. Alternatively, when it is dry you can lift out little horizontal lines. Leaving the water smooth is fine too.
- Paint in the shadows and highlights in the reflection in the same manner as above.
- Using loose strokes, add green paint to the middle part of the tree reflections. Look at your painting and try to mirror the same darks and lights in the water.
- When your painting dries it should all blend into a nice soft reflection. If you want it to be a bit more blurry after it is completely dry, gently brush on some clean water and let it dry again.
Notes
Frequently Asked Questions
To paint reflections on water, first paint the unreflected subject, whether is trees, a landscape, a structure, or even a figure. Then, in the water area of your watercolor painting, dampen the paper with clean water. Paint an upside-down version (mirror Image) of the subject. When it dries, this wet-on-wet watercolor method will make the reflection appear soft and blurry.
First paint a horizon line and trees on top of the land. Then add clean water underneath the trees to use a wet-on-wet technique. Add blue for the water then paint a mirror image of each tree in the water. When it dries the area reflected in the water will be soft and slightly blurry.
Dampen the watercolor paper with clean water and then paint your subject. When it dries it will have a soft blurred effect. It can be used over an entire painting or just in some areas.
Wet-on-wet techniques are great for making soft edges within a watercolor painting. It is helpful when you want to give the effect of soft reflections on water, fluffy clouds, or velvety trees. It can also be used to unify an underpainting or create a mood or atmospheric effect, such as mist.
You also might like
- Paint an Easy Lake Scene Step-by-step
- Watercolor Paint an Easy Mountain Landscape Step-by-Step
- Watercolor Paint an Easy Beach Sunset
- How to Paint Mountains Step by Step
- Draw a Simple Seascape Ocean Scene
- Paint an Evergreen Tree in Watercolor
Please leave your questions, comments, and ratings below!
Please subscribe to my YouTube Channel.


Leave a Reply