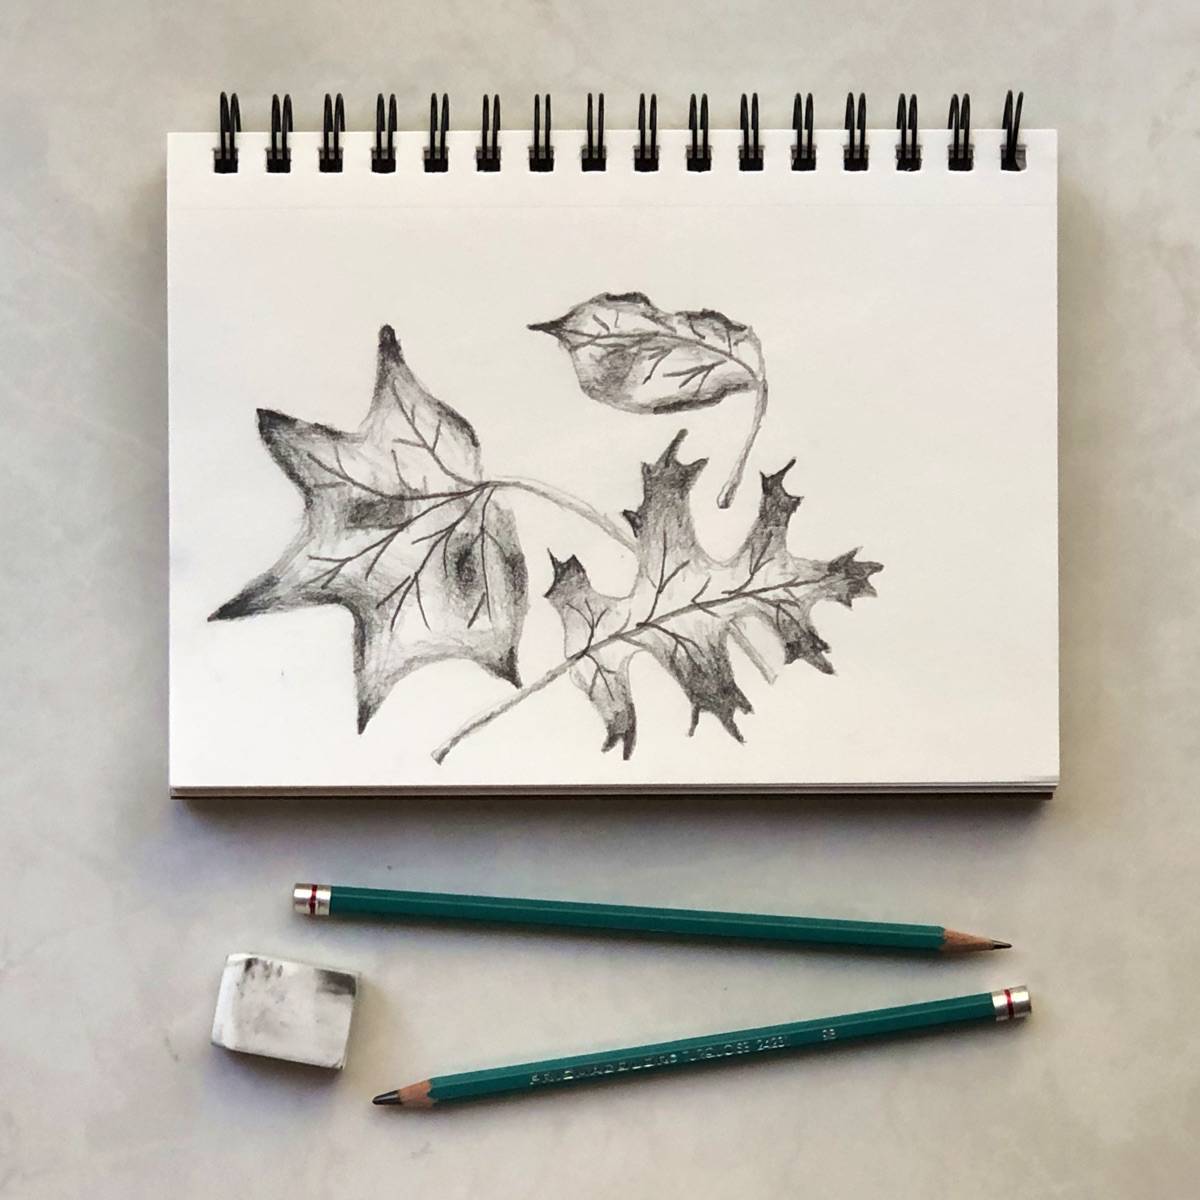
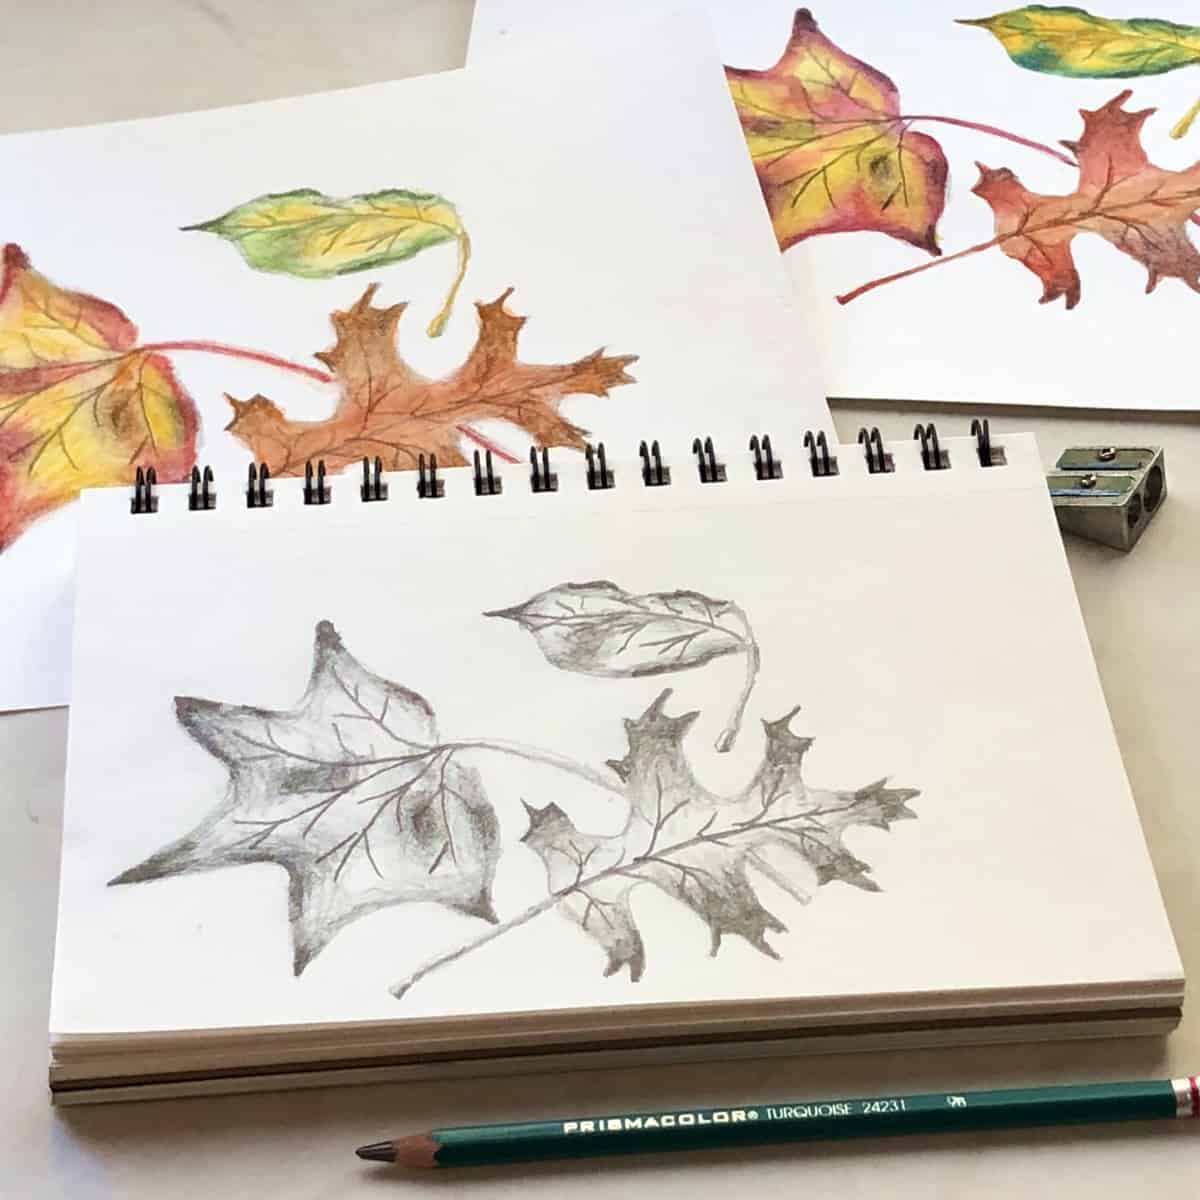
Learn how to draw easy fall leaves step-by-step (realistic autumn leaf sketch) in this simple art lesson. Draw along with me as I sketch and shade in several different types of leaves in this online art tutorial.
Drawing leaves may seem complicated at first, but when broken down into simple steps it is simple and easy. Using only pencils and an eraser, learn and practice the best way to draw fall leaves.
Jump to:
When leaves change color and bare tree branches begin to show I know that autumn is here. It just happens that fall is also the perfect season for drawing, sketching, and painting those colorful, crispy fall leaves.
It can be challenging to draw a leaf, especially the first time. Just keep trying. This is a great exercise to learn how to draw better.
It is also helpful to just concentrate on sketching slowly and drawing what you see. The more you draw, the easier it will become!
Video Tutorial Draw Fall Leaves
Transcript
Read TranscriptMaterials
- Paper - (Drawing or sketching paper is best but you can use whatever you have available. I am using a 5.5 x 8.5-inch spiral-bound sketchbook with 60 lb paper.)
- Pencil - Use a hard pencil for the beginning sketching then use a soft pencil for the shading (I am using an HB and 9B) or just use whatever pencil you have. Most writing pencils are HB.
- Eraser - I am using a white vinyl eraser.
- Brush - (Optional) 2-inch chip brush or other soft paintbrush for brushing away eraser dust.
Art Lesson
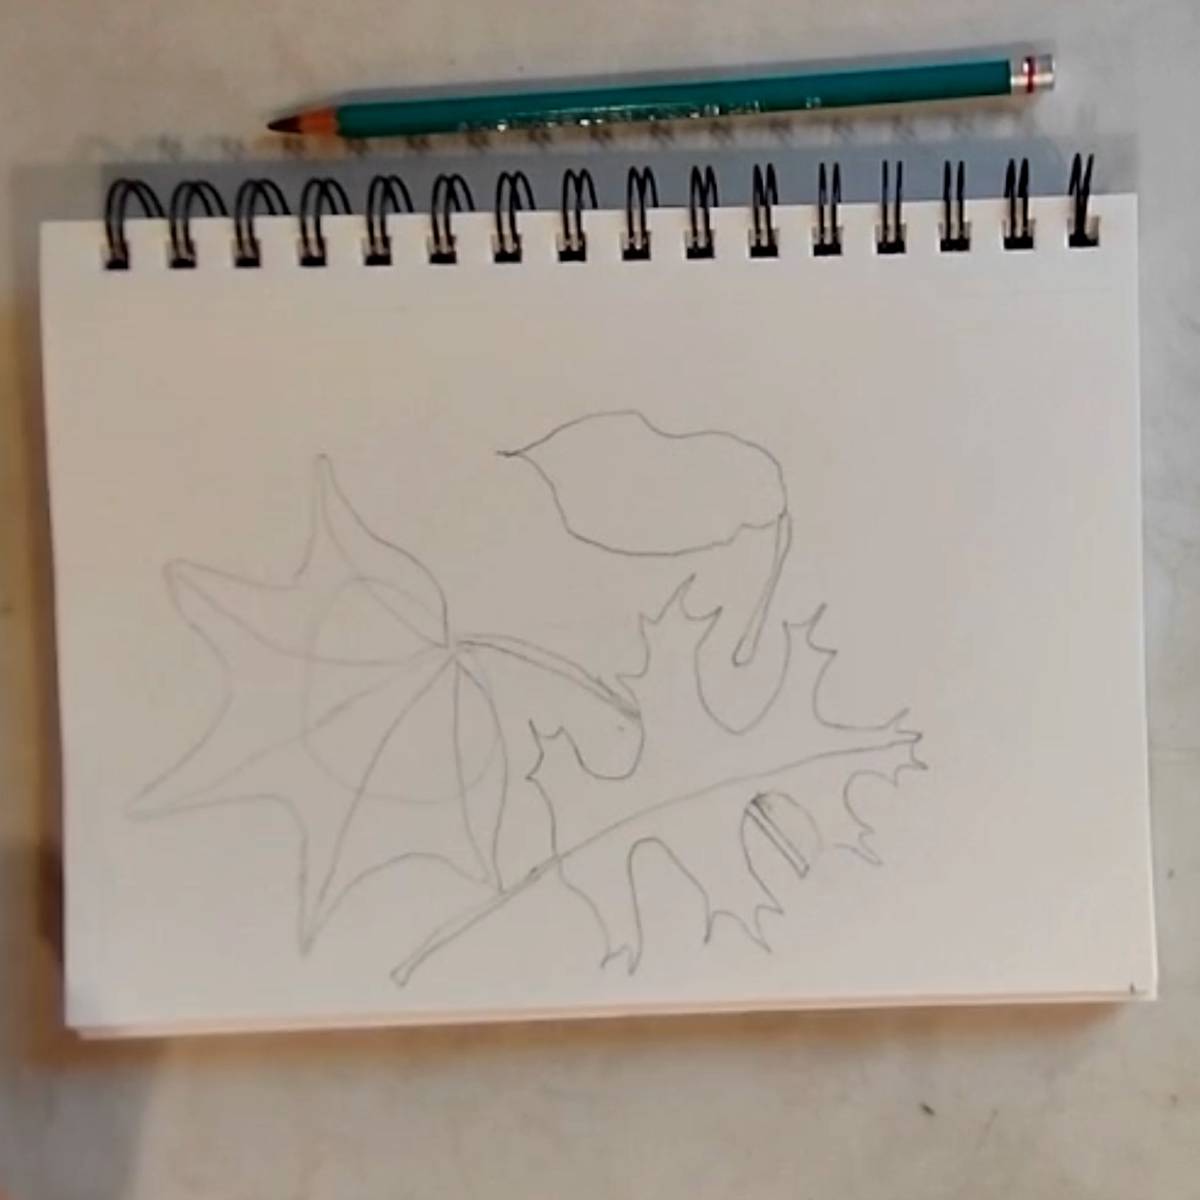
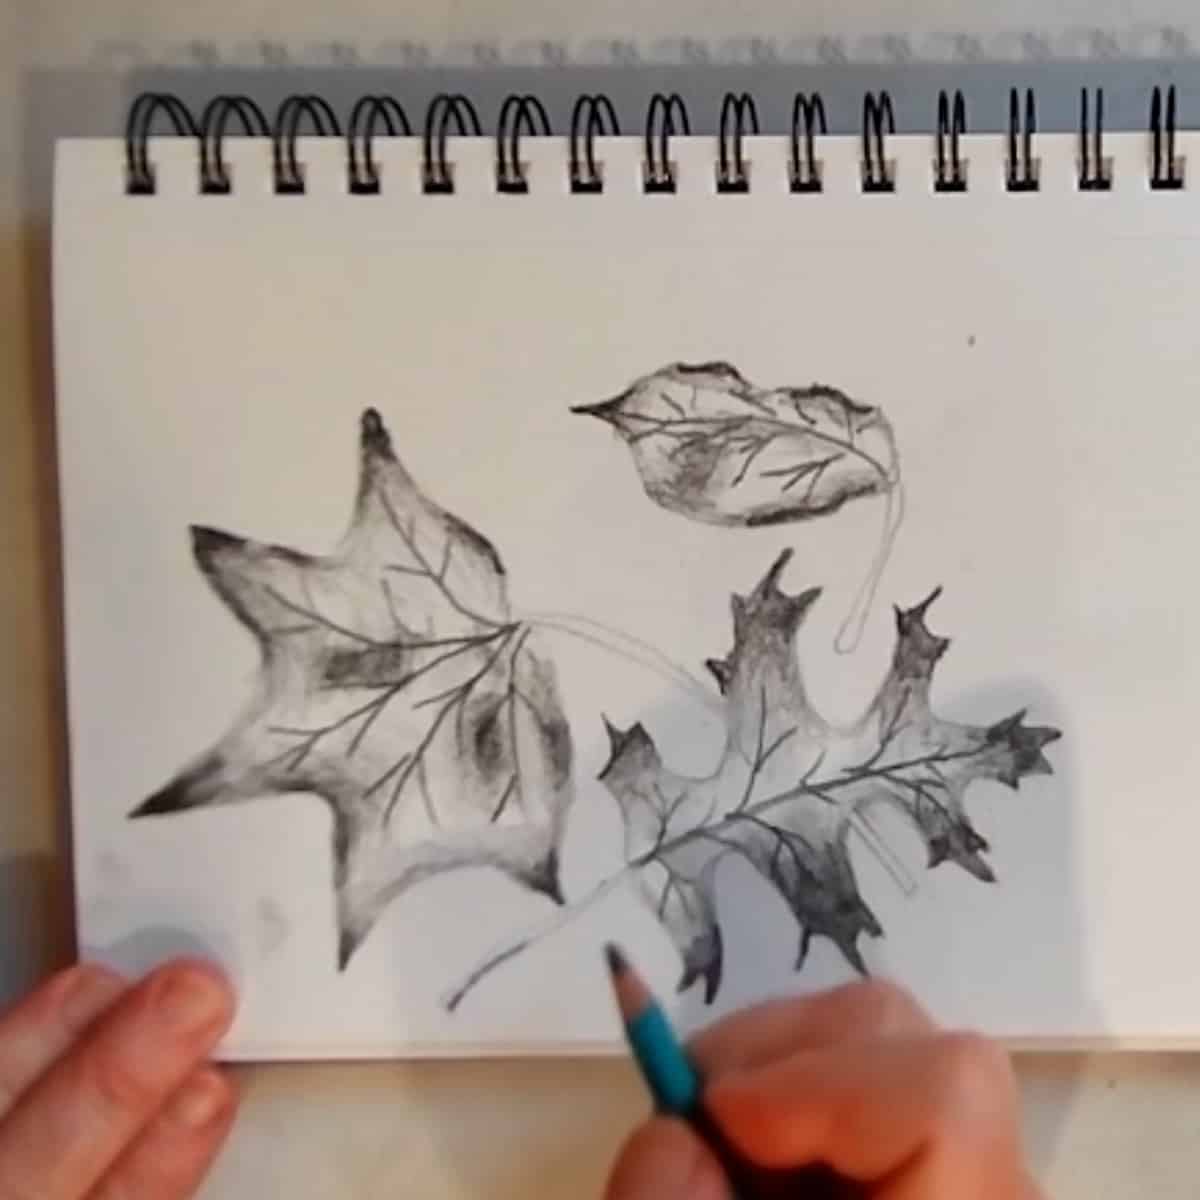
- Lightly sketch an oval to block in the shape of the maple leaf. Add 5 vein lines extending out beyond the oval.
- Connect the top of the vein lines with an inward sweeping arched line that touches the initial oval. Draw in the stem down and away from the leaf.
- To the right of the maple leaf, block in the oak tree leaf by drawing in the center vein. On each of the lobes draw in the curves and the points. Add the stem on the opposite side of the leaf.
- Sketch in the third oval-shaped leaf by following the shape of the actual object. Draw wavy lines where the leaf is wavy and crinkled. Draw in the center vein line. Add the stem toward the bottom of the leaf.
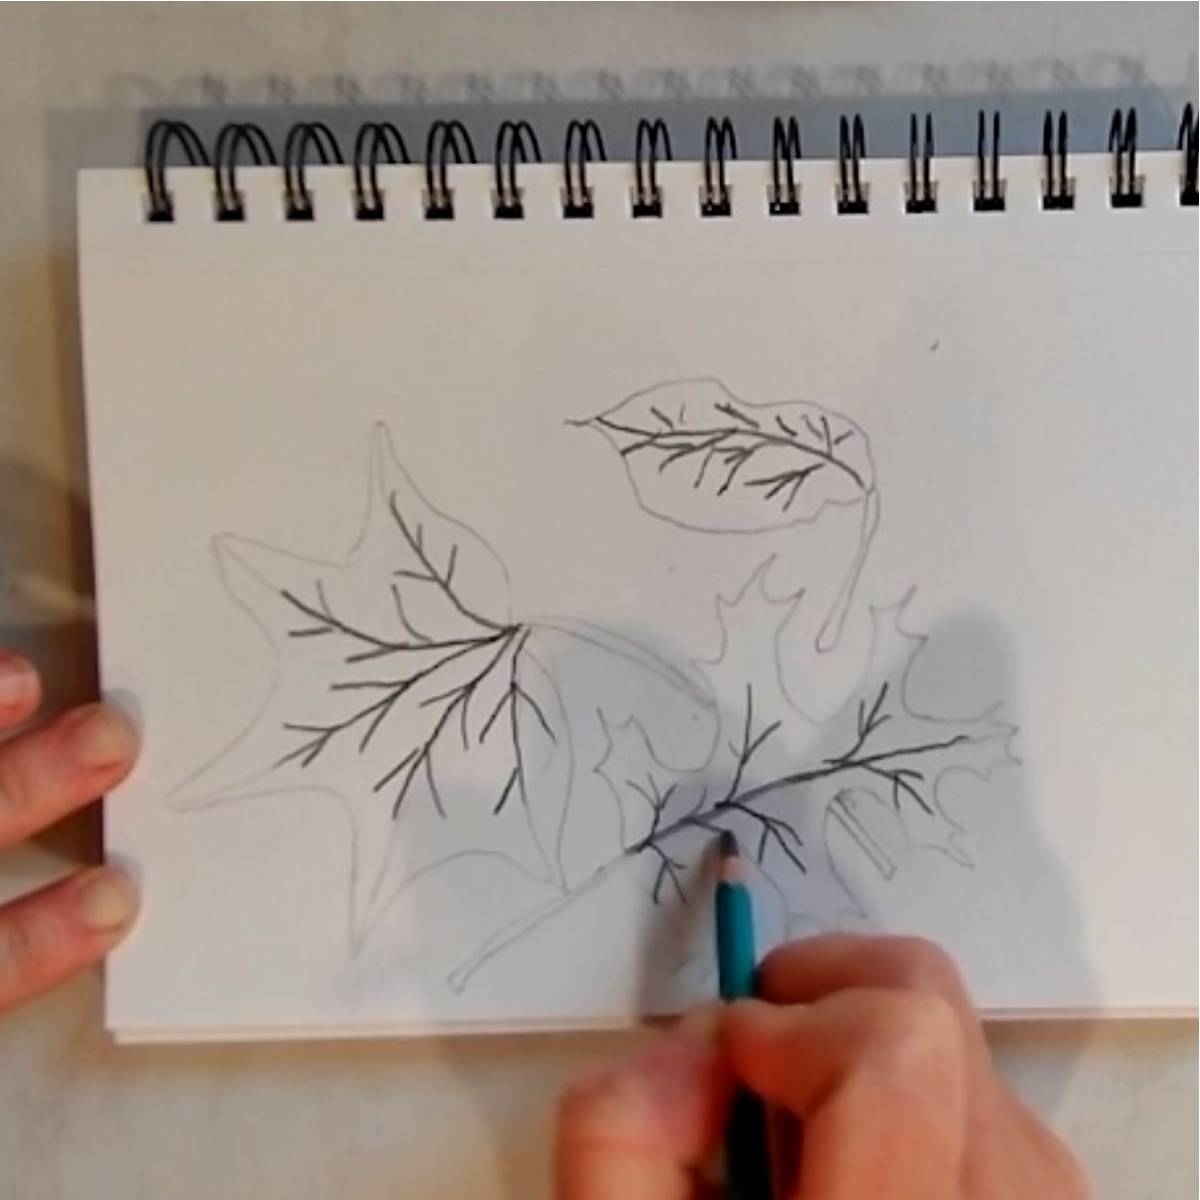
- Using a soft pencil, draw over the vein lines again on all three leaves making them more pronounced and adding several more vein lines which appear on the leaves.
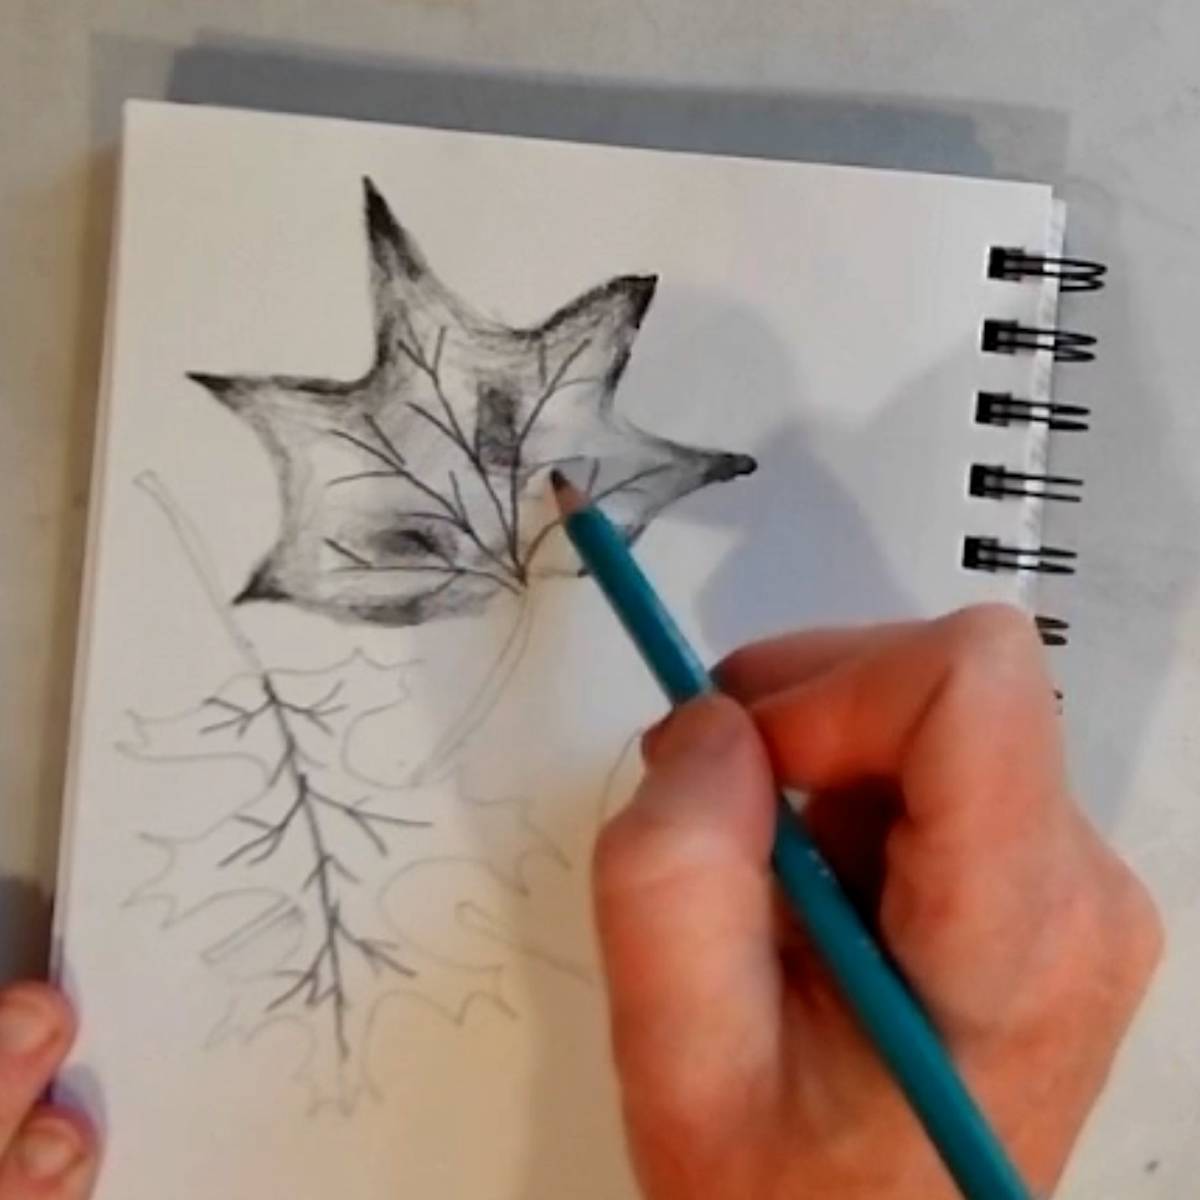
- Shade in the darker areas of the leaves, primarily around the edges and where there are bumps and dips. Push more lightly on your pencil while shading to gradually transition the value to light gray or white highlights.
- Shade in one side of the stems.
- Use an eraser to erase any pencil lines or shading outside the leaves.
Variations
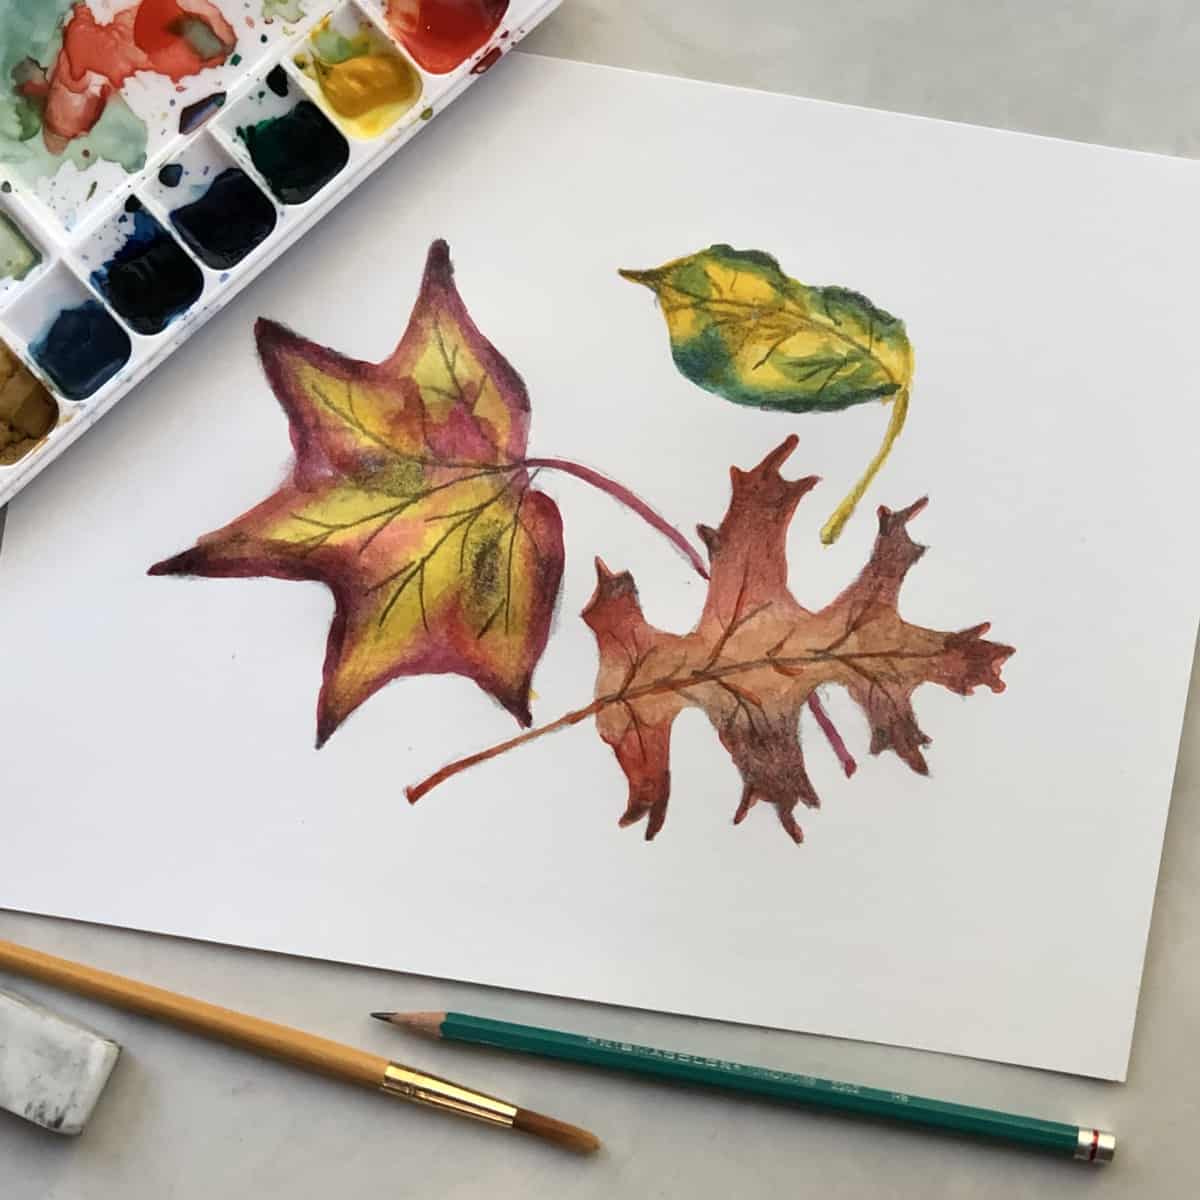
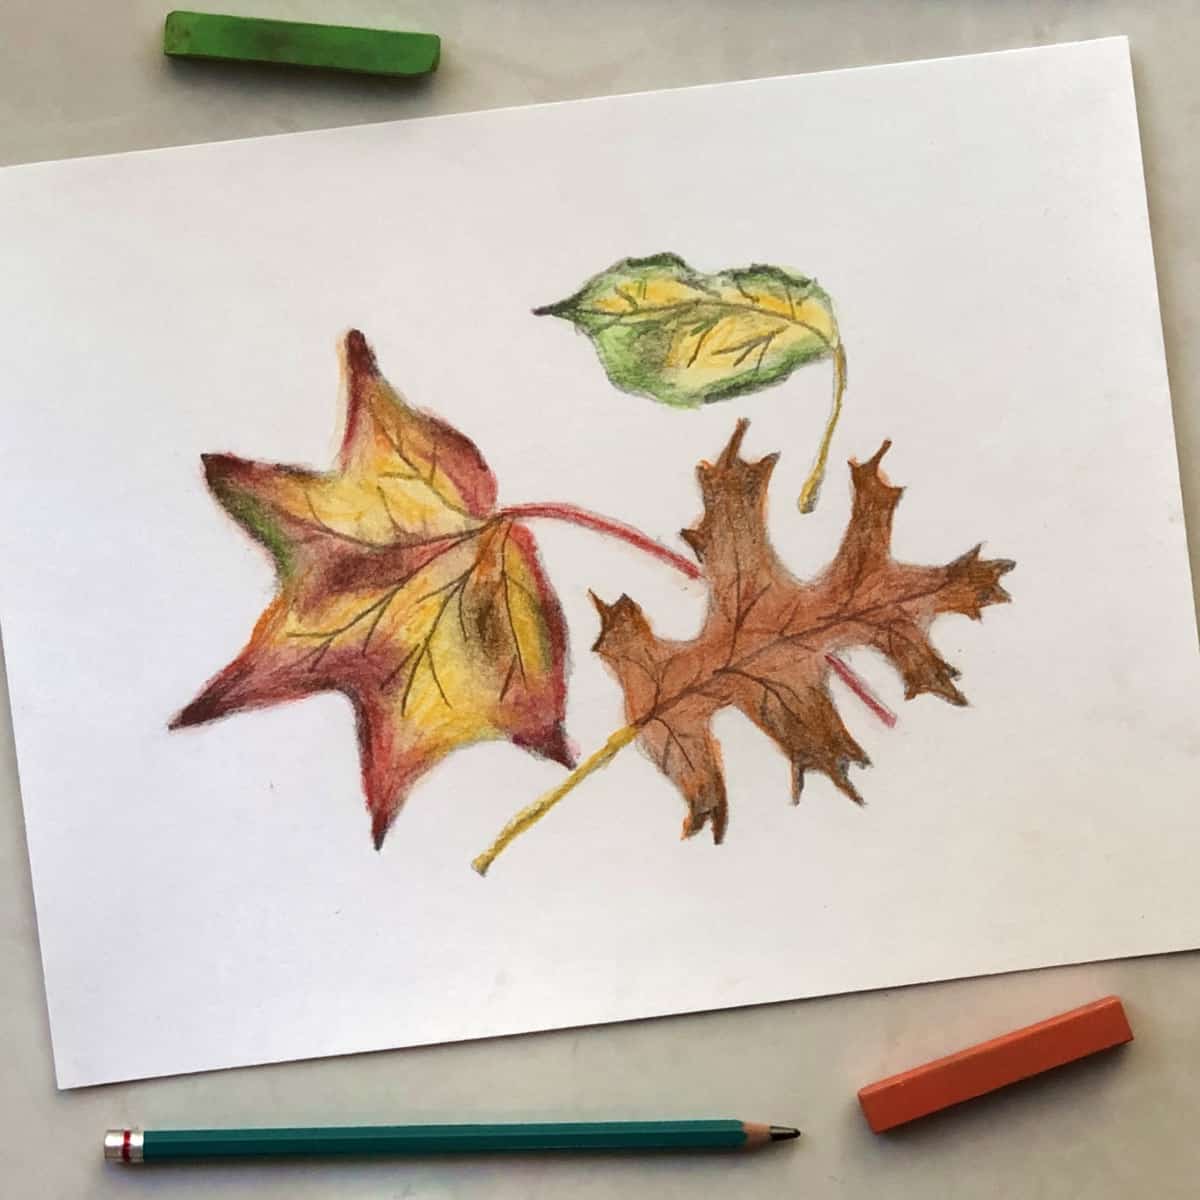
- Add color to your leaves by using soft pastels, watercolor paint, colored pencils, or markers.
- Try adding a few fall leaves to your favorite still life.
- Draw some fall leaves from different angles, from the top, right side, left side, foreshortened, etc.
- Add a unique background behind the leaves such as a sidewalk, grass, bricks, wooden planks, or a fabric tablecloth
Tips and tricks
- In the beginning, draw lightly, in case you need to erase.
- Push harder on your pencil to shade dark areas and more lightly to shade lighter.
- Turn your paper as needed to help make the shading easier.
- Brush away the eraser dust with a chip brush or soft paintbrush to avoid smudging the drawing with your hand.
Draw easy fall leaves step-by-step (realistic autumn leaf sketch)
Equipment
- Paper - (Drawing or sketching paper is best but you can use whatever you have available. I am using a 5.5 x 8.5-inch spiral-bound sketchbook with 60 lb paper)
- Pencil - use a hard pencil for the beginning sketching then use a soft pencil for the shading (I am using an HB and 9B) or just use whatever pencil you have. Most writing pencils are HB.
- Eraser - I am using a white vinyl eraser
- Brush - (Optional) 2-inch chip brush for brushing away eraser dust
Instructions
- Lightly sketch an oval to block in the shape of the maple leaf. Add 5 vein lines extending out beyond the oval.
- Connect the top of the vein lines with an inward sweeping arched line that touches the initial oval. Draw in the stem down and away from the leaf.
- To the right of the maple leaf, block in the oak tree leaf by drawing in the center vein. On each of the lobes draw in the curves and the points. Add the stem on the opposite side of the leaf.
- Sketch in the third oval-shaped leaf by following the shape of the actual object. Draw wavy lines where the leaf is wavy and crinkled. Draw in the center vein line. Add the stem toward the bottom of the leaf.
- Using a soft pencil, draw over the vein lines again on all three leaves making them more pronounced and adding several more vein lines which appear on the leaves.
- Shade in the darker areas of the leaves, primarily around the edges and where there are bumps and dips. Push more lightly on your pencil while shading to gradually transition the value to light gray or white highlights.
- Shade in one side of the stems.
- Use an eraser to erase any pencil lines or shading outside the leaves.
Notes
Lesson Downloads
For More Practice
- Collect your own fall leaves and practice drawing them from life.
- Sketch some leaves in lightly then paint them with watercolor paints.
- Try drawing leaves with charcoal, colored pencils, or pen and ink.
- Draw leaves that are overlapping over one another or that curl around and overlap on themselves.
Frequently Asked Questions
To draw realistic fall leaves look at real leaves or draw from a photograph. Sketch out the basic shape and outline of the leaf.
Then add defining vein lines and the stem. Shade in the darker areas while leaving the highlights white. Go slowly and practice drawing what you actually see.
To draw a simple leaf step-by-step:
1. Look at an actual leaf and sketch out the basic shape. The shape of the leaf will vary, depending on what kind it is.
2. Draw in vein lines and a stem.
3. Shade in the dark areas, gradually lighten the shading out to white areas where the highlights lie.
One of the best things to draw in the fall is an easy autumn leaf. Collect several different types of colorful leaves and try drawing them from life. This is a great exercise to learn how to draw better. It is also fun to add color to your leaf sketch with watercolor paint, soft pastels, colored pencils, or markers.
You also might like
- Draw an Easy Realistic Turkey
- Paint an Easy Watercolor Pumpkin
- How to Draw an Easy Skull
- How to Draw an Oak Tree
- How to Sketch an Easy Pear
Please leave your questions, comments, and ratings below!



Victor says
Thank you for the lesson. Very informative.