Learn how to paint colorful autumn leaves in this easy watercolor tutorial. In this simple online art class find out how to create three different types of leaves and the best way to color them
Painting fall leaves is fun for everyone, from kids to adults. Autumn leaf painting is great practice for beginners and those with more art experience.
Jump to:
Learn an easy trick for sketching a leaf on your paper and how to paint it. In this quick online video art class, practice the skill of painting simple autumn leaves with easy-to-follow instructions
When the leaves change color and start falling from the trees it is time to get in the fall spirit. Painting nature and what we see is a great way to celebrate autumn and the changing seasons.
Painting leaves can be challenging so keep practicing and have fun with the creative process.
Materials
- Watercolor paper - I am using Strathmore Vision cold press watercolor paper, 140 lb., cut down to 6 by 9 inches
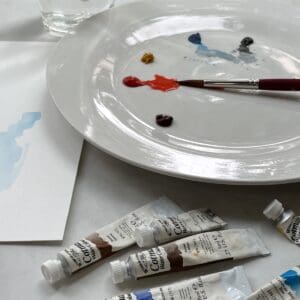
- Watercolor paint - tube watercolor paint on a pallet or a box kit of watercolor paints. You can use whatever colors that you have on hand, these are the colors that I use:
- Cadmium Yellow
- Cadmium Red Light
- Ultramarine Blue
- Alizarin Crimson
- Yellow Ocher
- Burnt Sienna
- Burnt Umber
- Black
- Paint brushes - I am using a #8 round brush.
- Water
- Paper towels
How to Paint Autumn Leaves Video Tutorial
Transcript
Read TranscriptArt Lesson
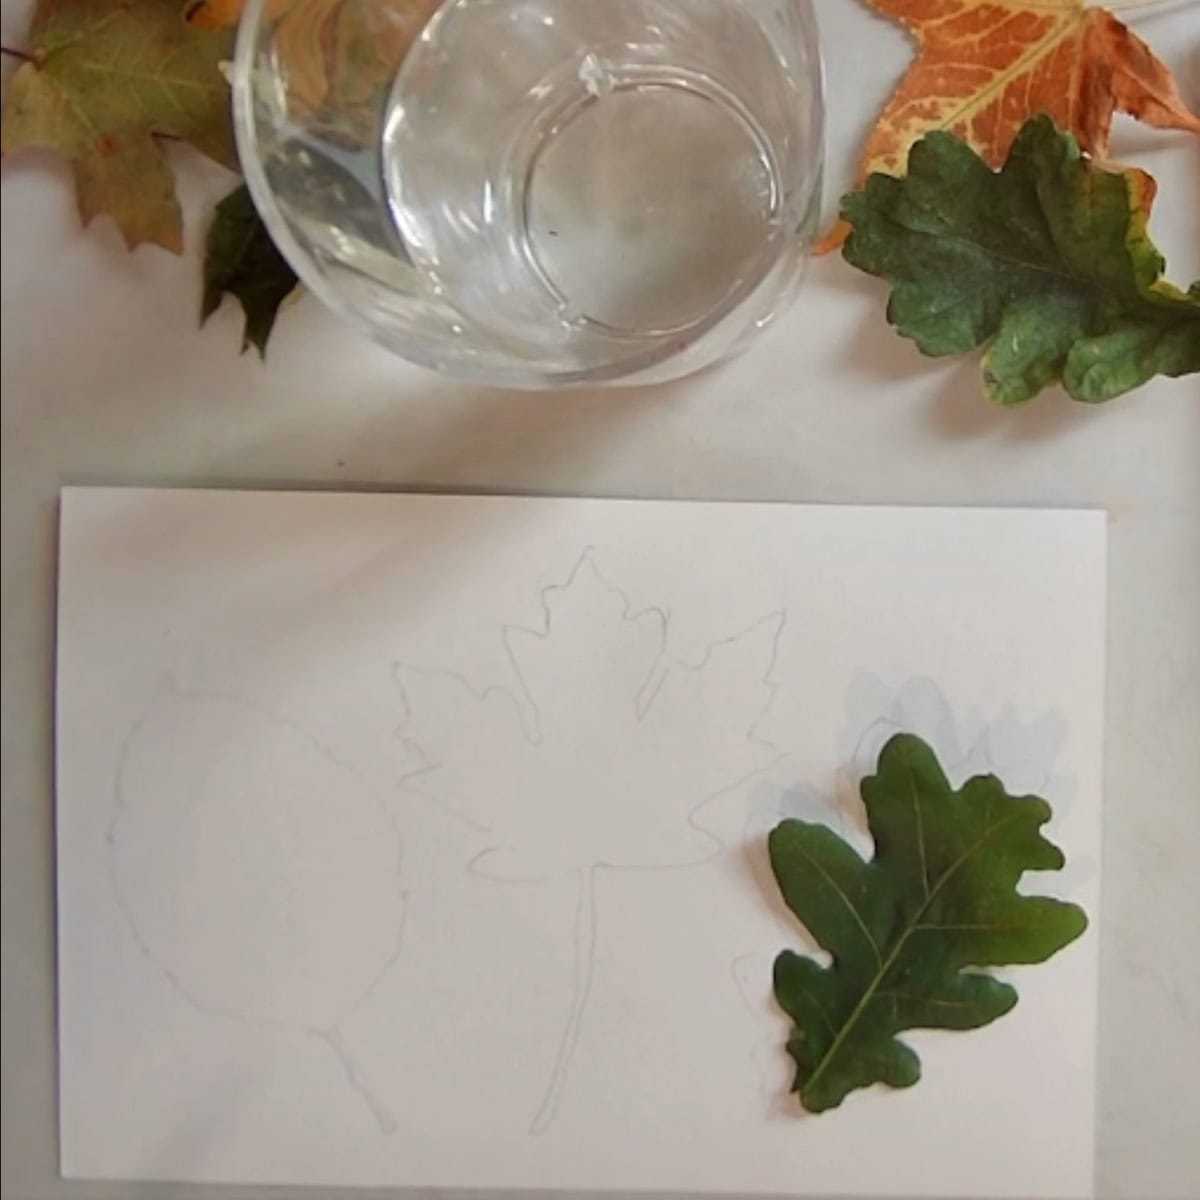
- Sketch the leaves
- Sketch in your leaves by looking at them or placing them on the paper and tracing around the outside. Only trace one side of the stem and then draw in the other side by hand or it will be too thick.
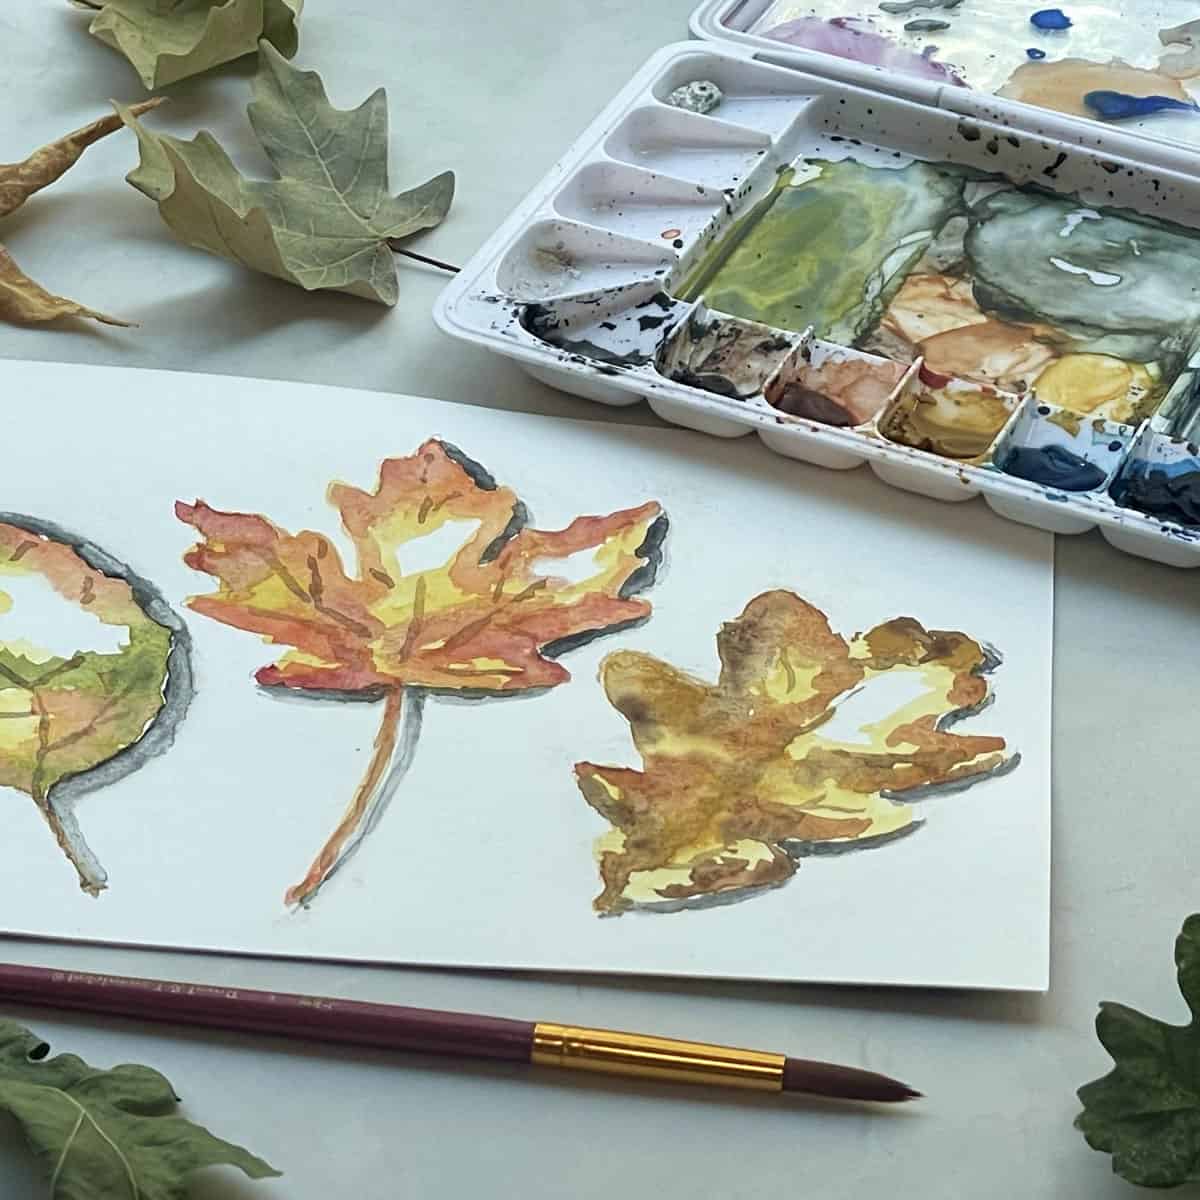
- Paint using the lightest colors first and then move on to the darker colors. Paint one leaf at a time, work quickly while the first layer of paint is still damp.
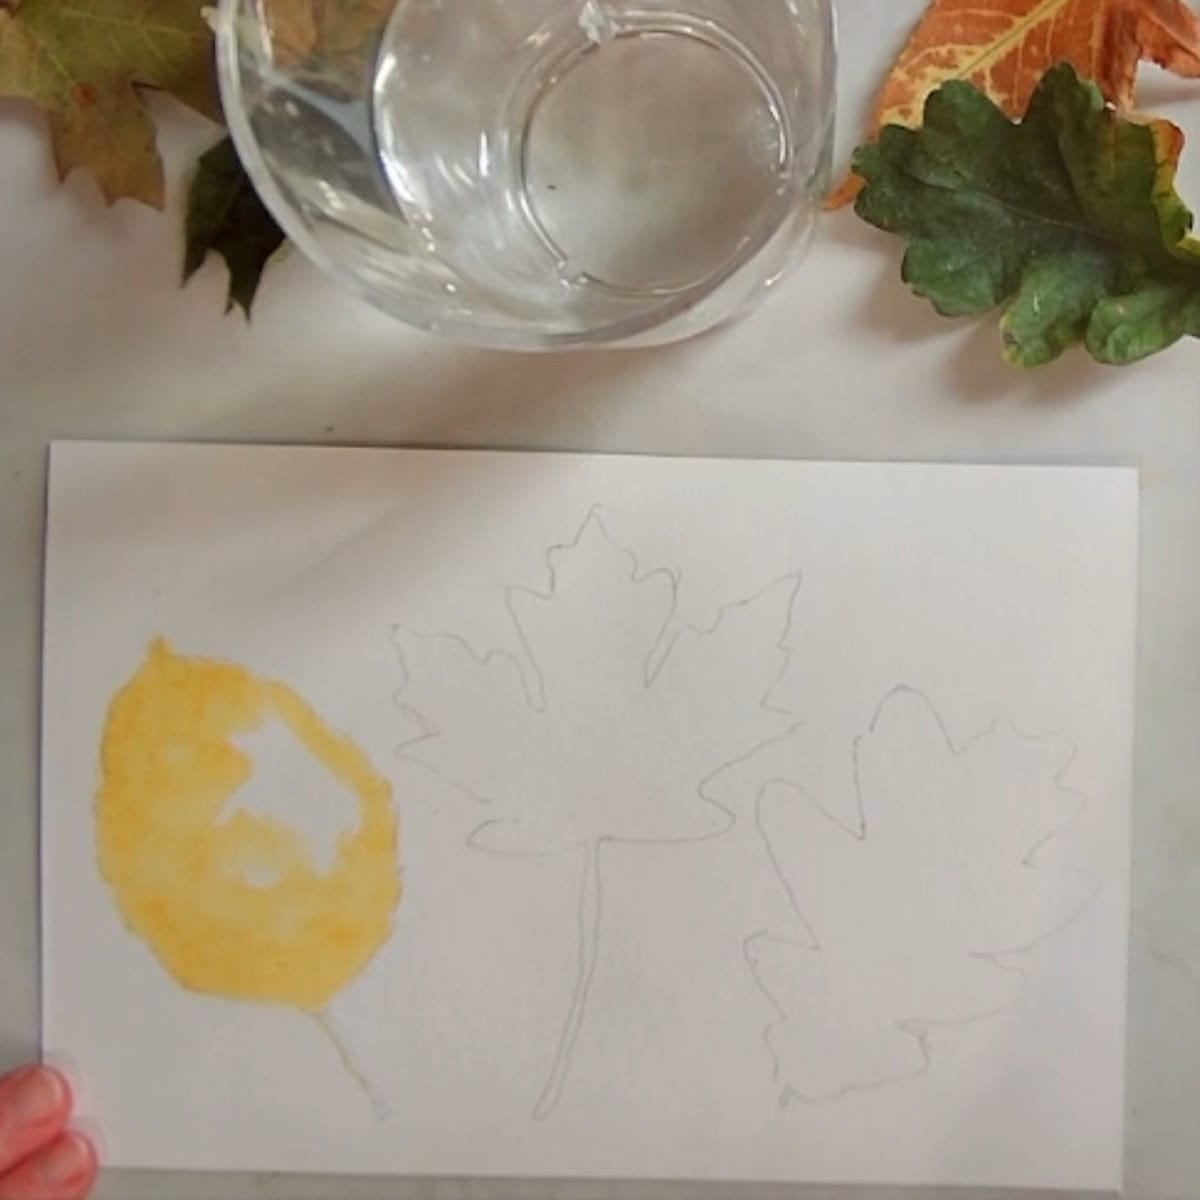
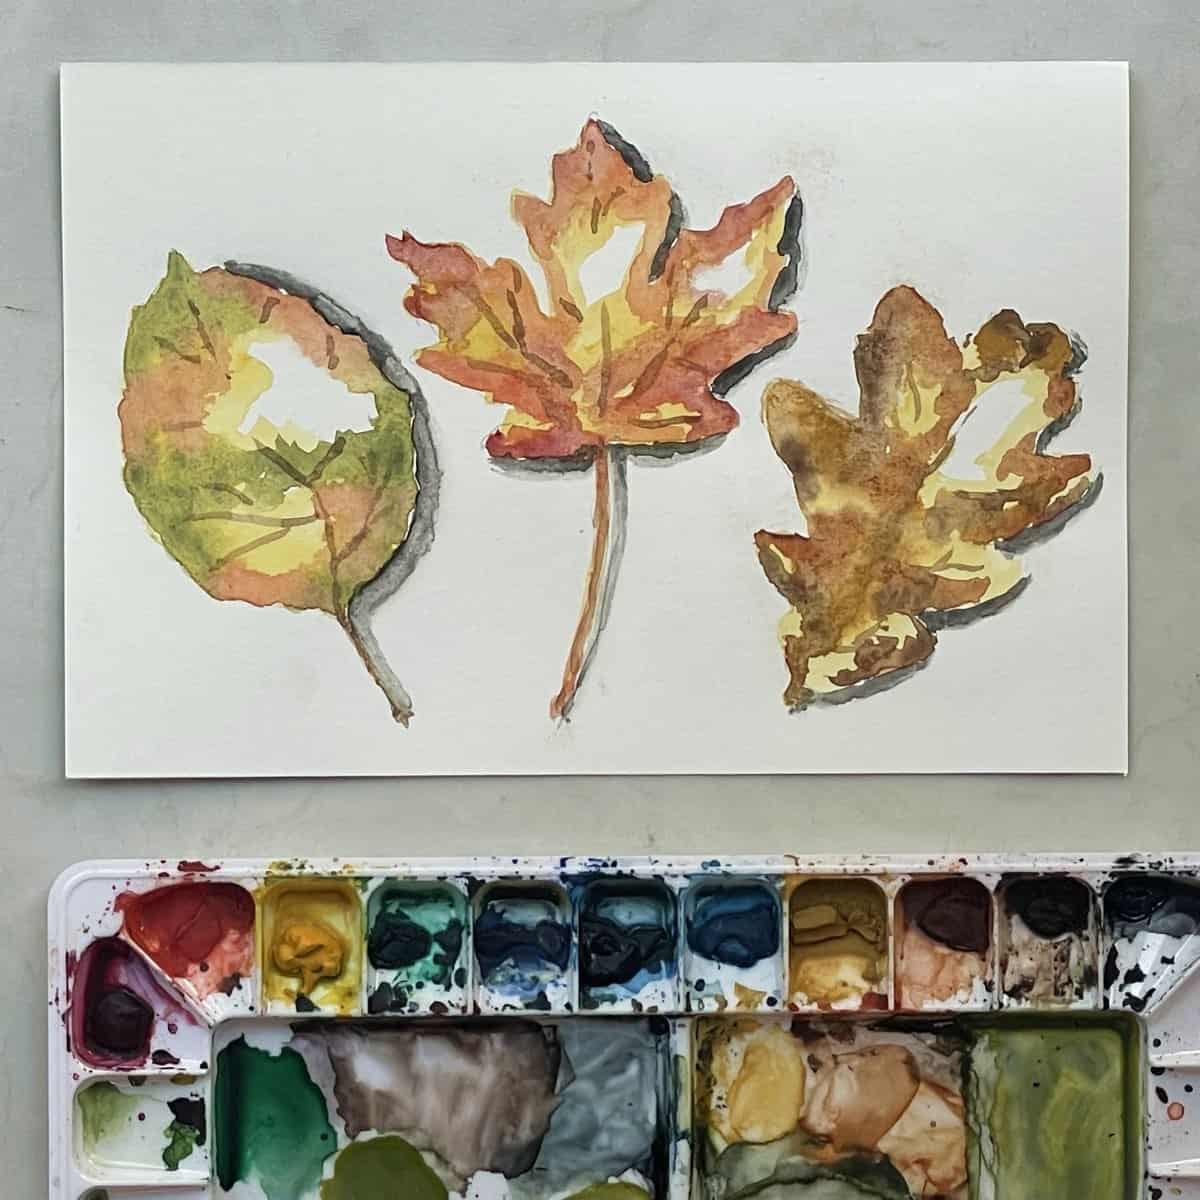
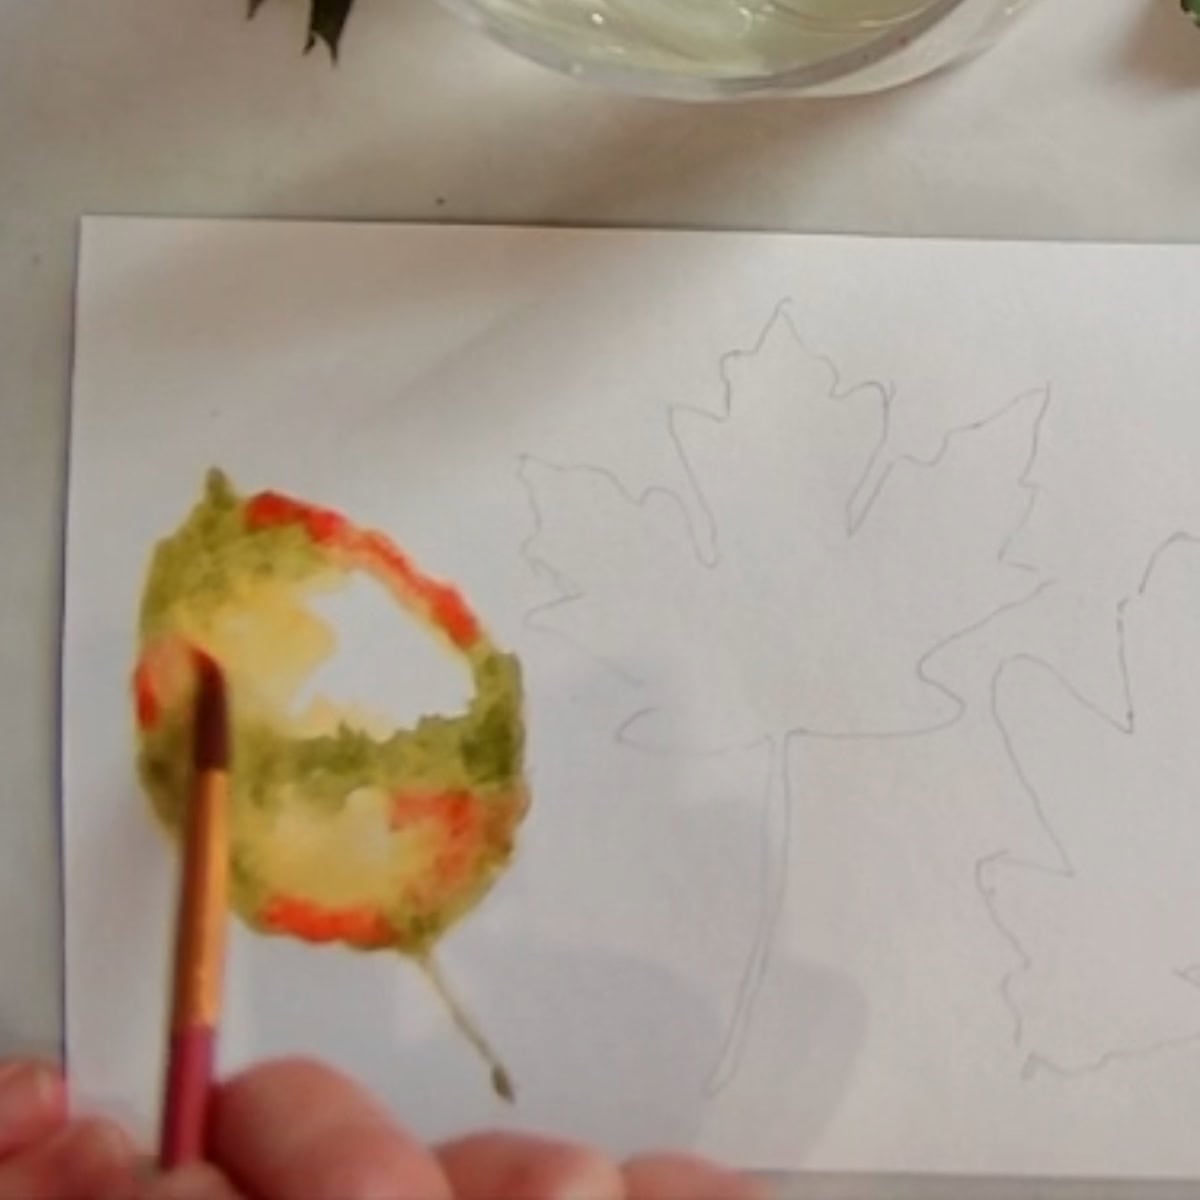
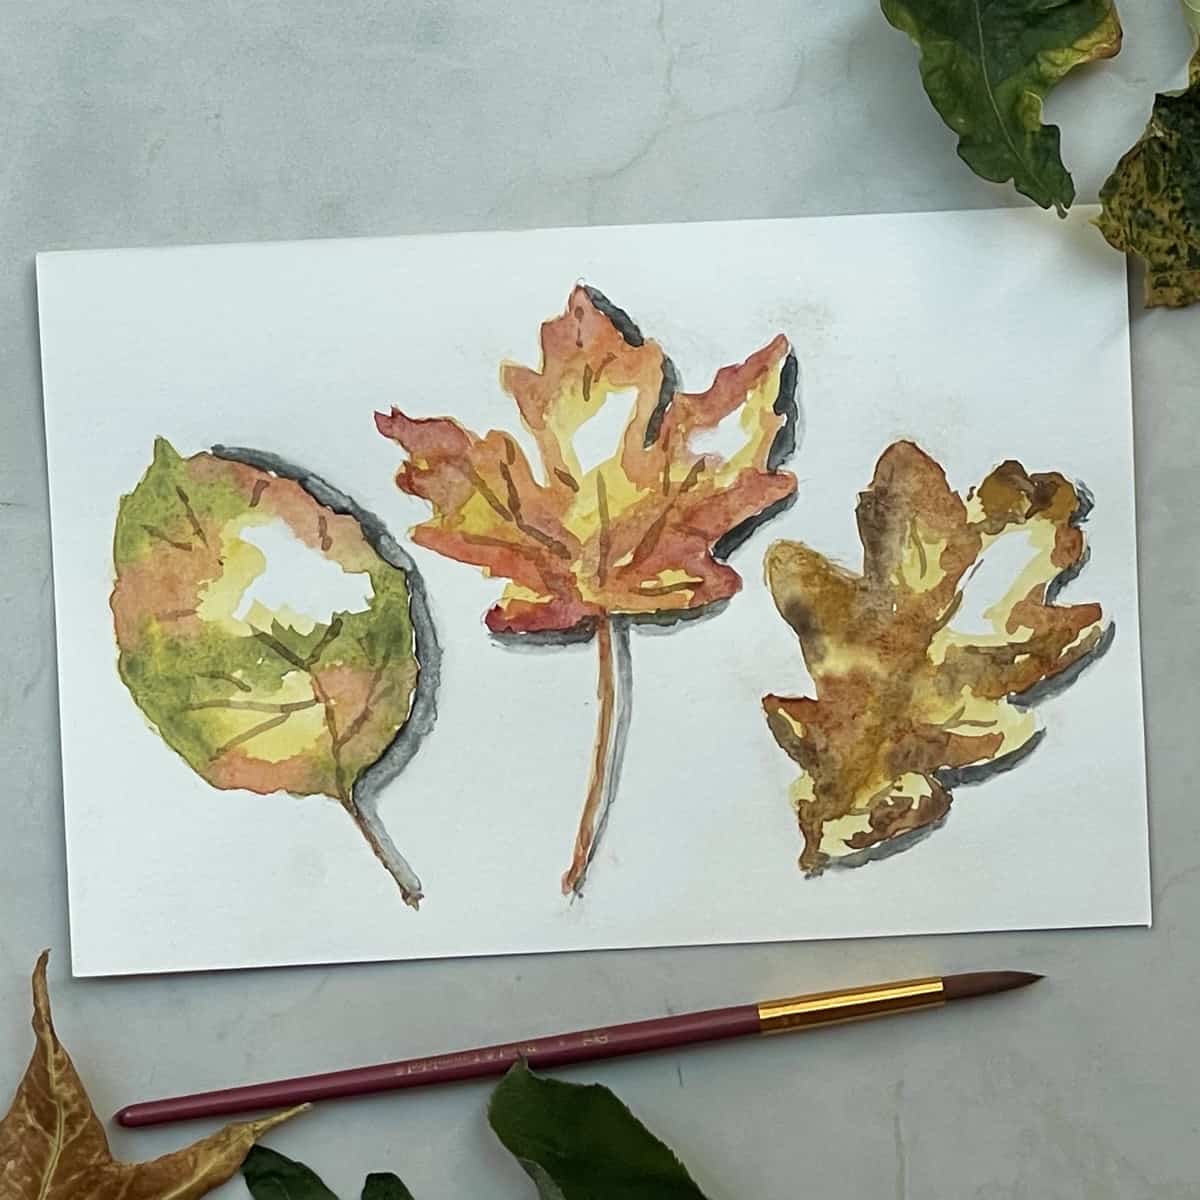
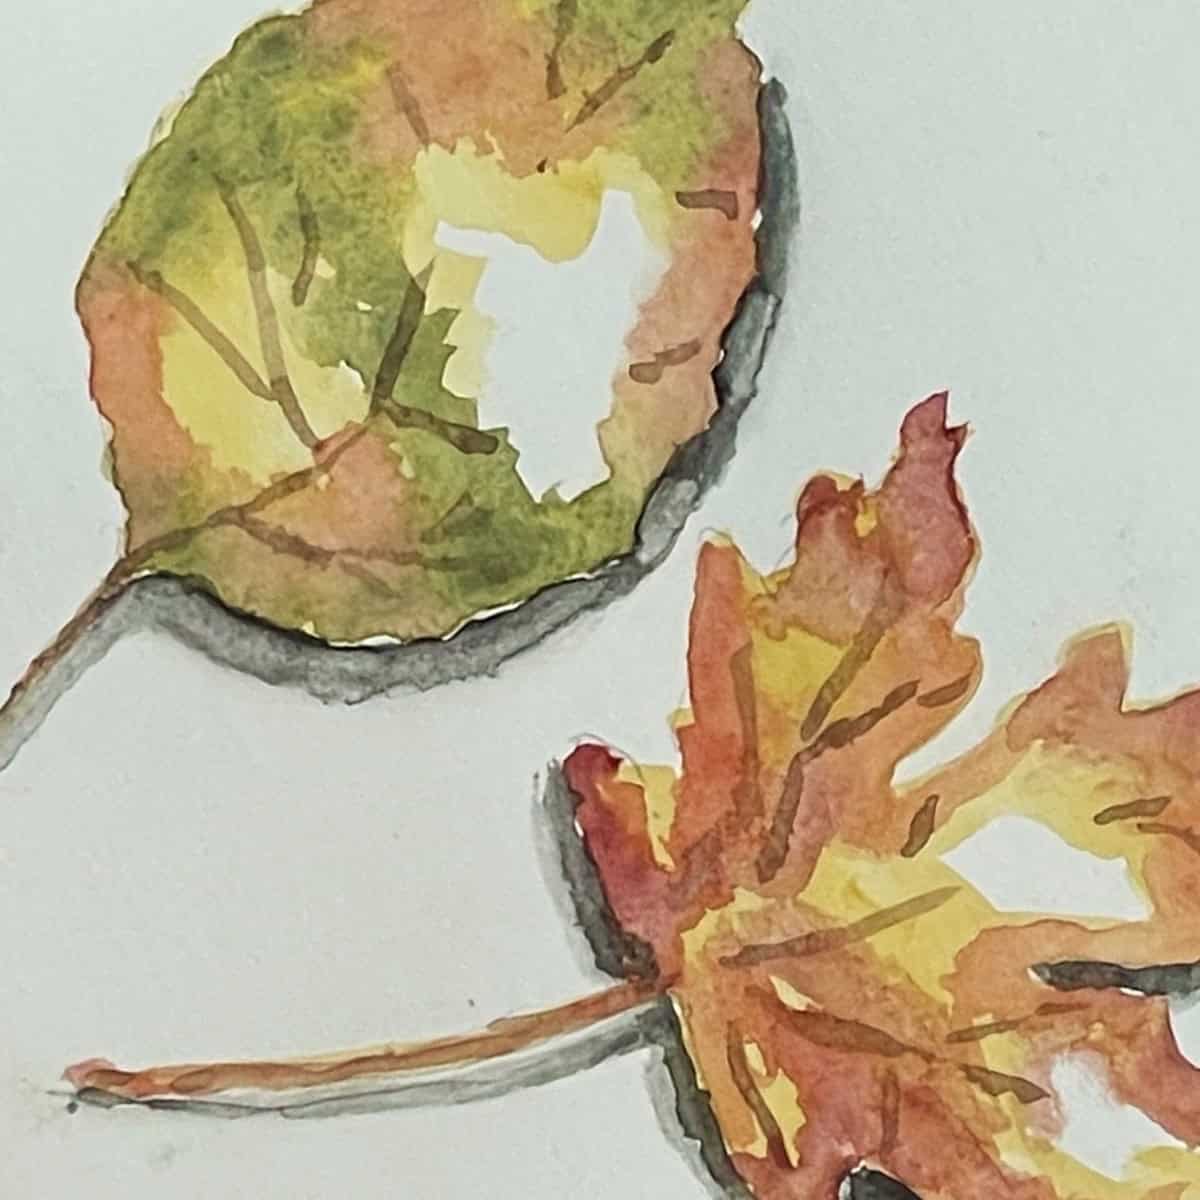
- Paint the first leaf.
- Fill in most of the leaf with light yellow paint. Leave a small area white where light is shining on it.
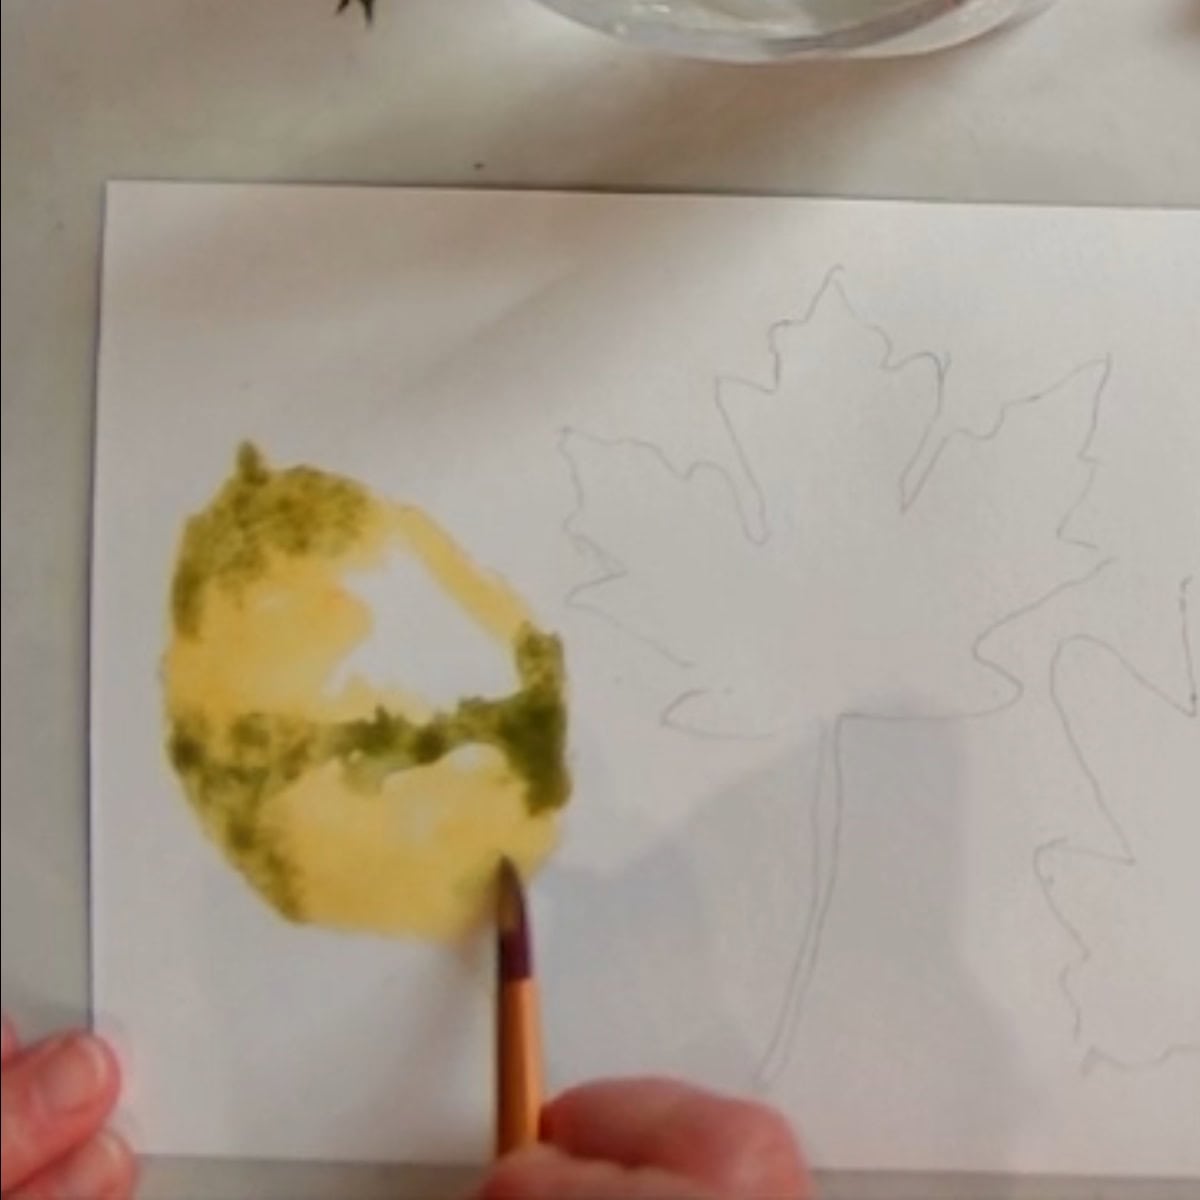
- Mix yellow and blue paint to make bright green. Add the green paint to several areas of the leaf, painting over the top of the yellow tone. Make sure to leave plenty of yellow showing.
- Rinse out the paintbrush and dry the excess on a rag or paper towel. With the clean damp brush soften the edges of the green paint where it meets the yellow.
- Make sure not to over-blend the colors, just soften the edges a little bit.
- Daub on a few areas of red and then soften the edges with a clean damp brush.
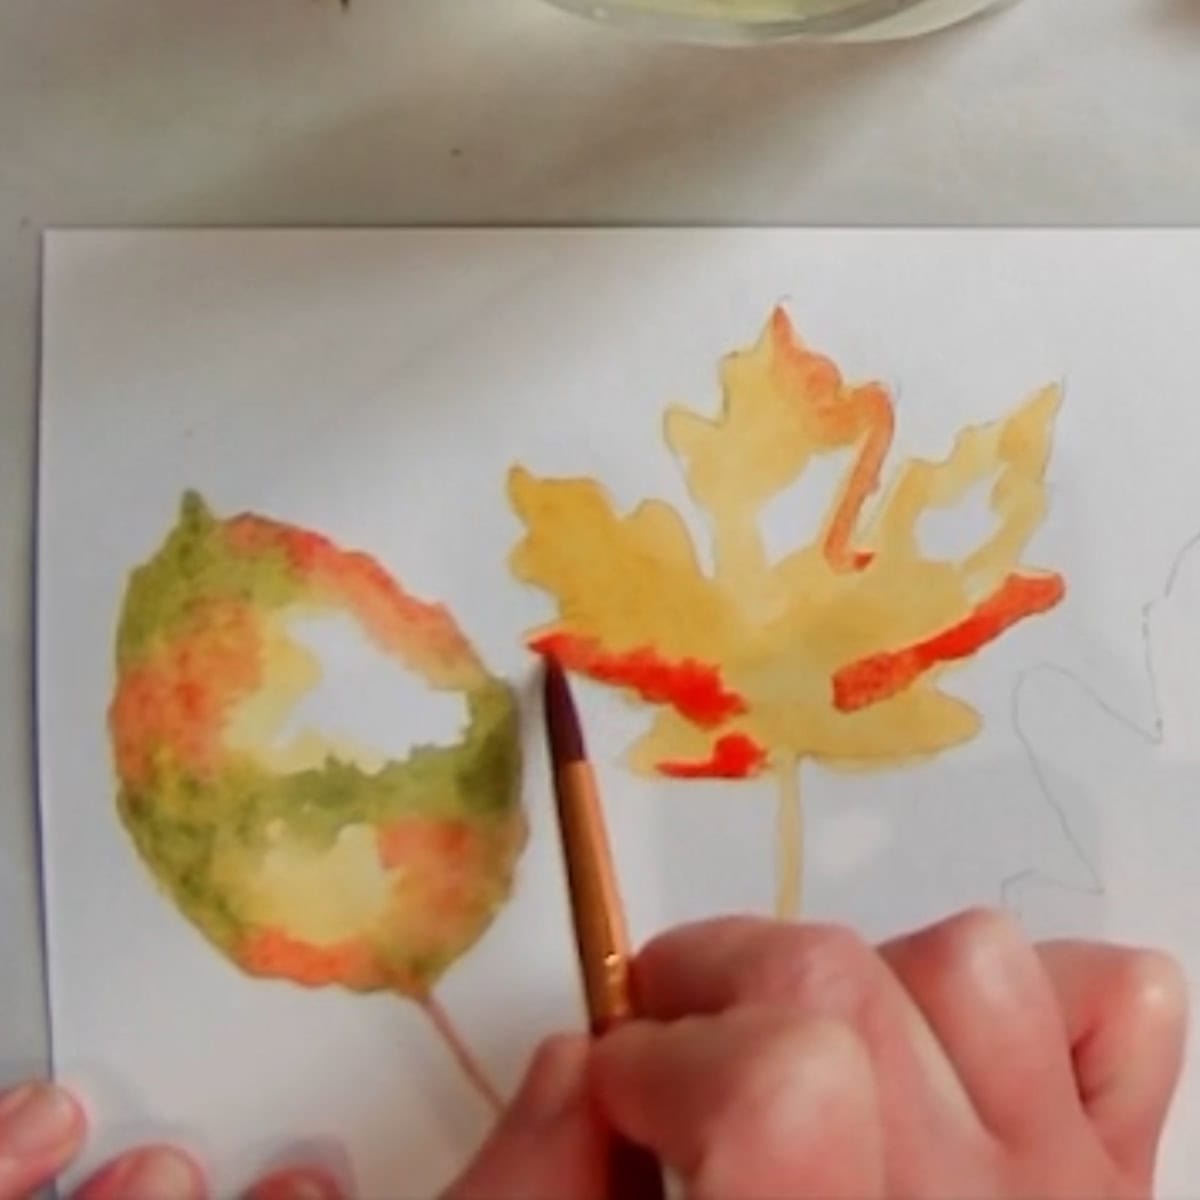
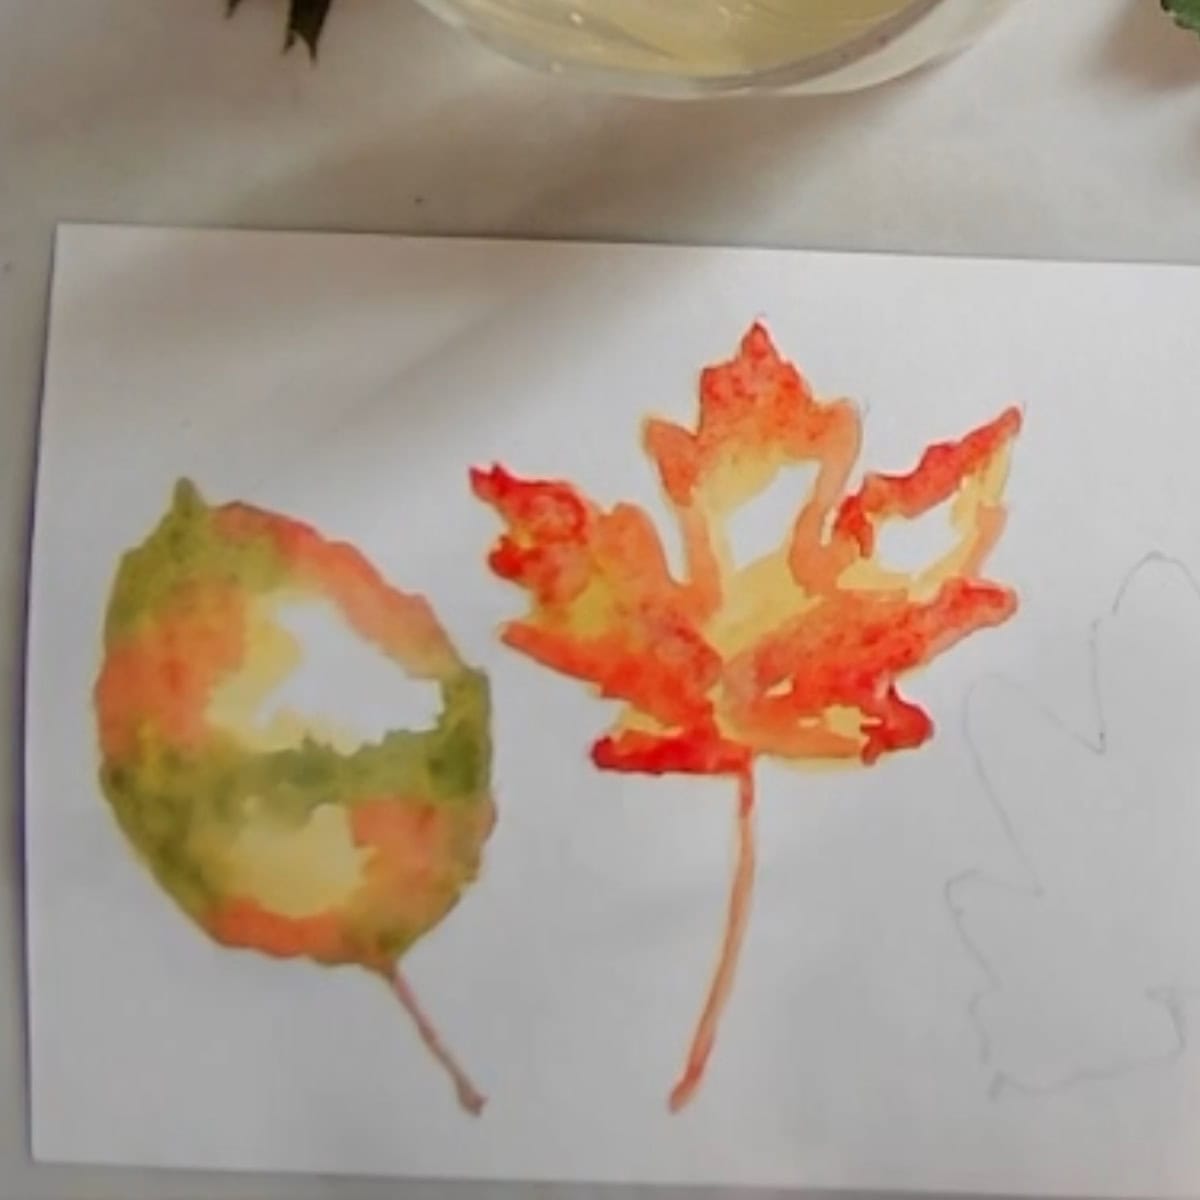
- Paint the second leaf.
- Paint the leaf with yellow paint, leaving several small white areas.
- Add a few areas of red paint to the maple leaf, concentrating mostly on the outside edges of the leaf.
- Then use crimson paint to add more bright color to the leaf in a few areas.
- Clean the paintbrush and soften the edges of the different colors where they meet.
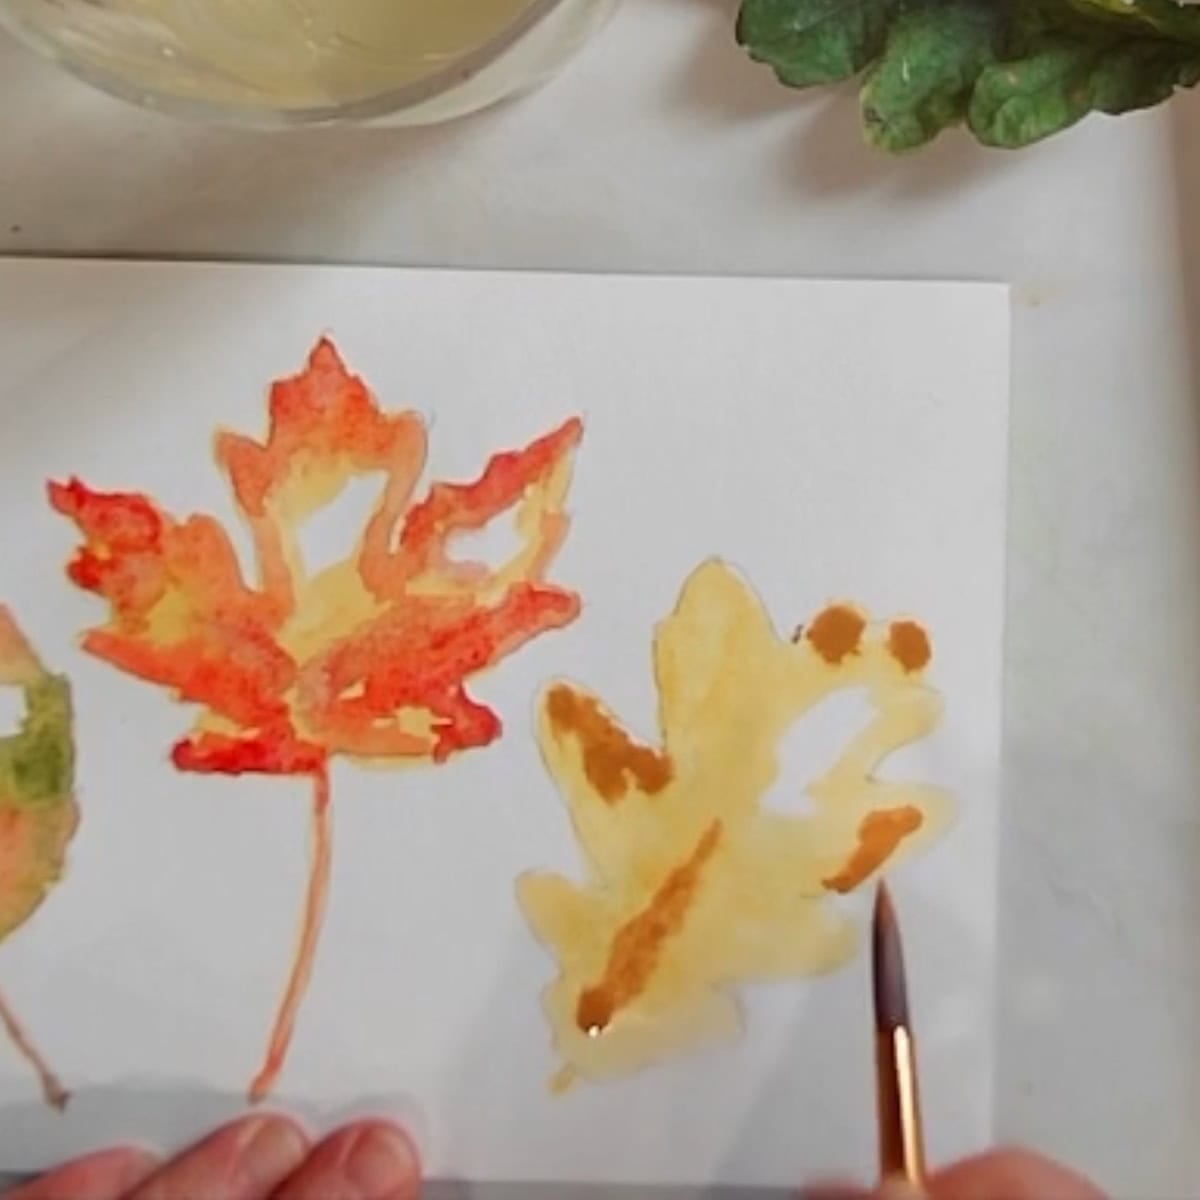
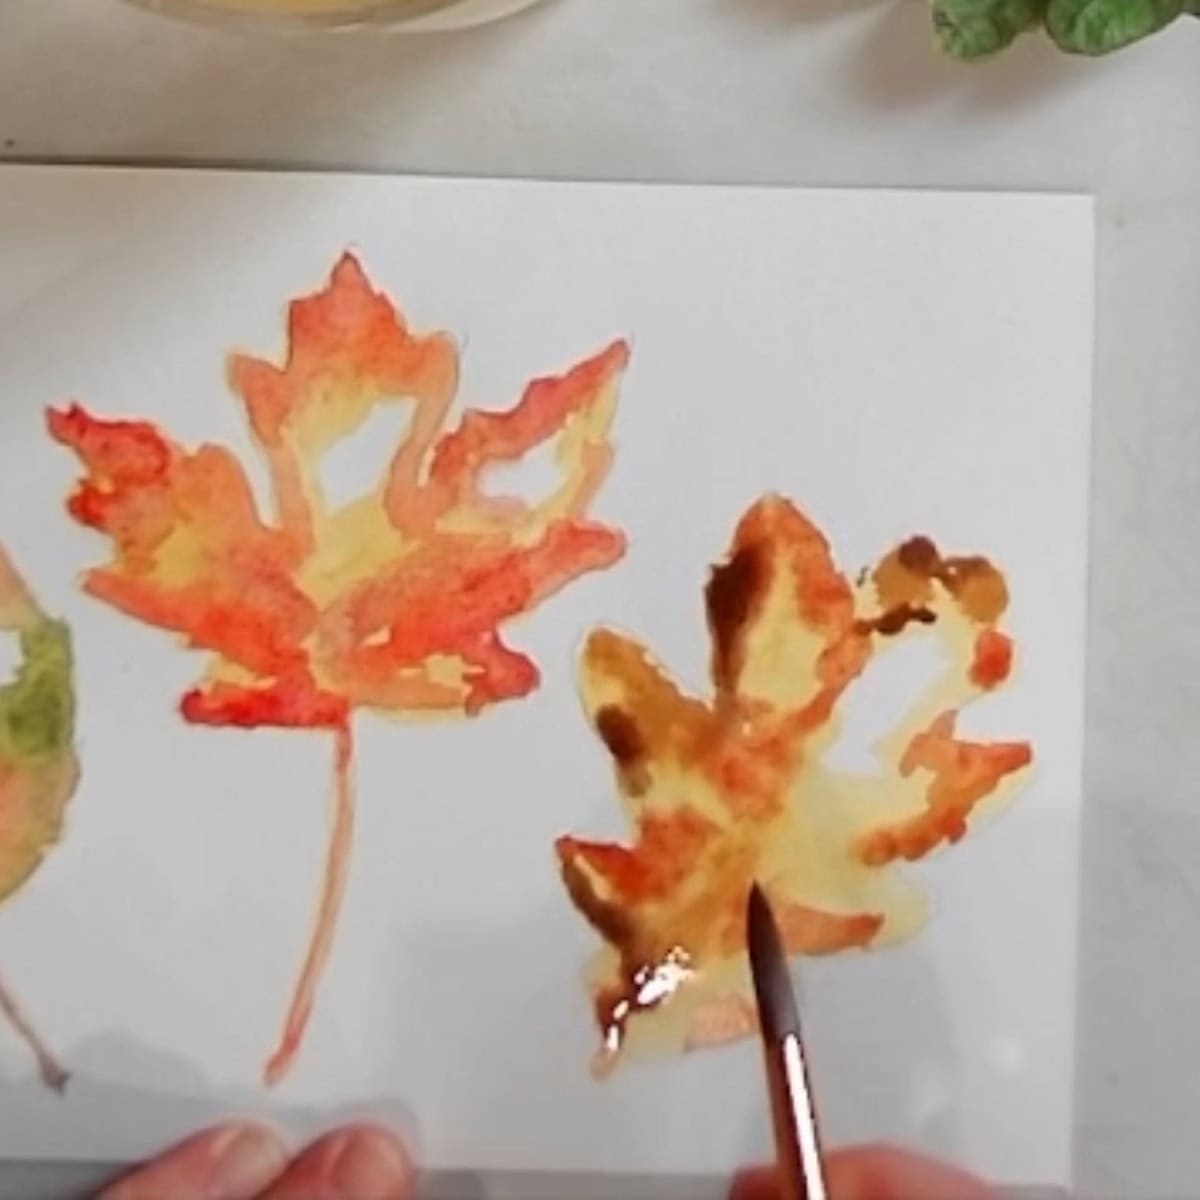
- Paint the third leaf.
- Fill in the last leaf with yellow paint except for a small white reflection area.
- Use yellow ocher to begin adding the layers of color. Follow this by adding daubs of burn Sienna and finally burnt umber.
- Where the colors join, gently soften the edges using a clean, damp paintbrush.
- Add the veins.
- Paint in a few veins in each leaf after they are slightly dry. Damp paper is ok but make sure there is no paint sitting on top of the surface.
- Using watered-down dark brown paint, push very lightly with the brush to just paint with the tip. Do not add too many veins, just a few lines give a nice impression.
- Twist the paintbrush slightly as you paint to create an irregular, organic-looking line. Do not add veins in the white reflected areas.
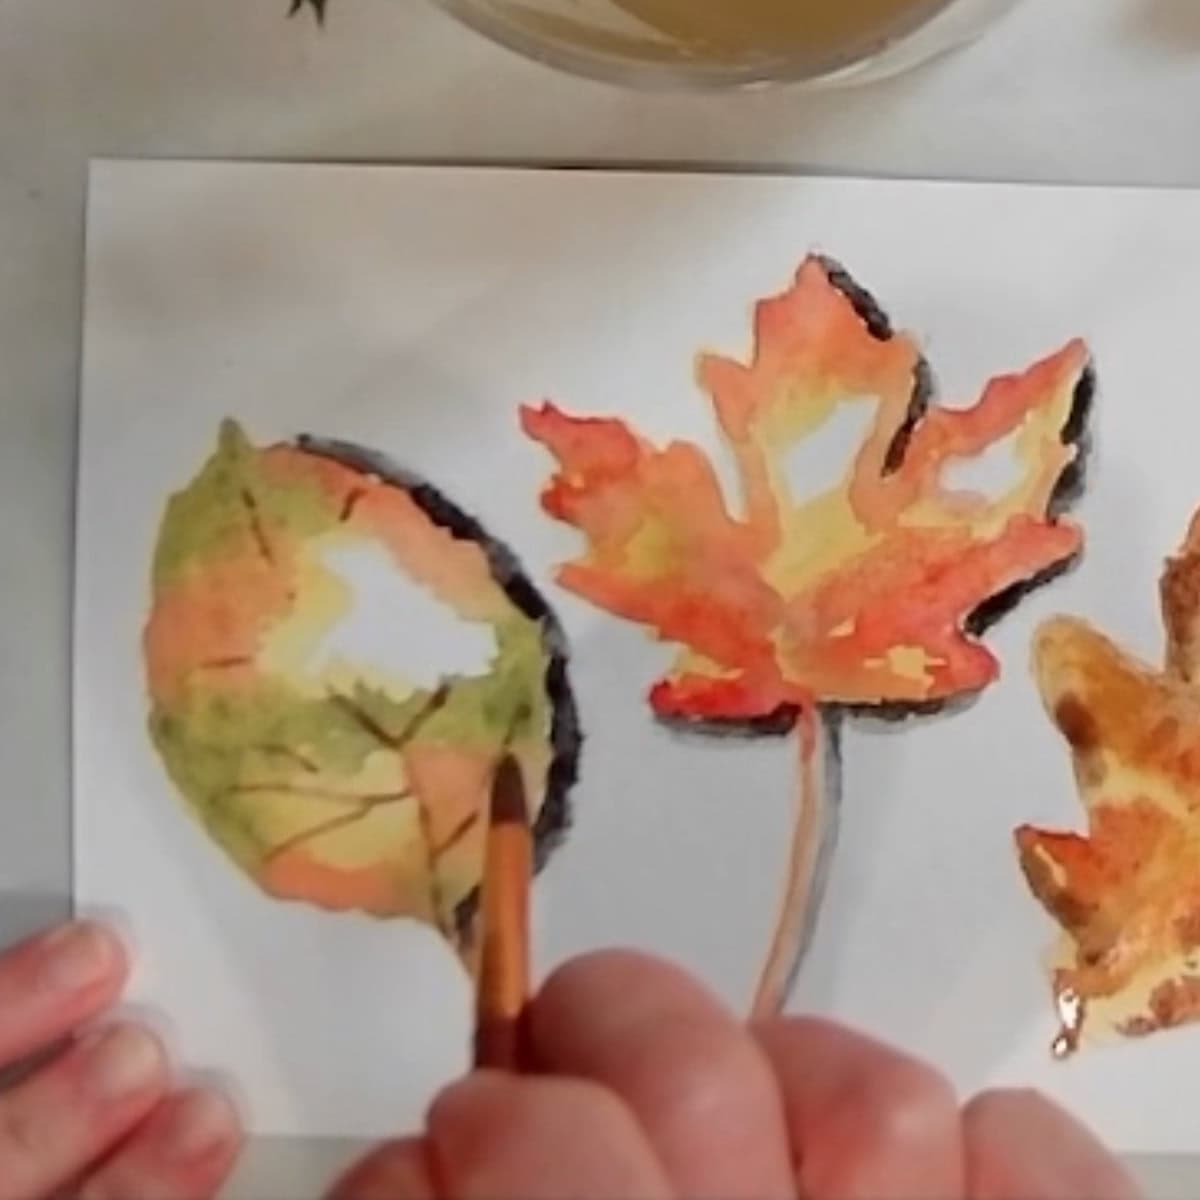

- Paint the shadows.
- Adding shadows is optional but I love the look of the shadow and it grounds the leaf within the space of the page.
- Add black paint to the right and bottom areas of the leaves. Rinse out the paintbrush and then blend the paint away from the leaf. Soften the edge of the shadow by gently painting over it again with a damp brush.
- When it is dry, erase any pencil lines that show through.
Tips and tricks
- Trace around the outside of the leaf for a quick sketch. Only trace one side of the stem and then draw in the other side by hand or it will be too thick.
- Paint the lightest colors first then move on to the darker colors.
- Paint one leaf at a time and work quickly while the first layer of paint is still damp.
- Make sure not to over-blend the different colors as you add them. Just soften the edges a little bit where they meet.
Paint Colorful Autumn leaves (Easy Watercolor Tutorial)
Equipment
- Watercolor paper I am using Strathmore Vision cold press watercolor paper, 140 lb., cut down to 6 by 9 inches
- Watercolor paint - tube watercolor paint on a pallet or a box kit of watercolor paints. You can use whatever colors that you have on hand, these are the colors that I use: Cadmium Yellow, Cadmium Red Light, Ultramarine Blue, Alizarin Crimson, Yellow Ocher, Burnt Sienna, Burnt Umber, Black
- Paint brushes - I am using a #8 round brush.
- Water
- Paper towels
Instructions
Sketch in the leaves
- Sketch in your leaves by looking at them or placing them on the paper and tracing around the outside. Only trace one side of the stem and then draw in the other side by hand or it will be too thick.
- Paint using the lightest colors first and then move on to the darker colors. Paint one leaf at a time, work quickly while the first layer of paint is still damp.
Paint the first leaf
- Fill in most of the leaf with light yellow paint. Leave a small area white where light is shining on it.
- Mix yellow and blue paint to make bright green. Add the green paint to several areas of the leaf, painting over the top of the yellow tone. Make sure to leave plenty of yellow showing.
- Rinse out the paintbrush and dry the excess on a rag or paper towel. With the clean damp brush soften the edges of the green paint where it meets the yellow.
- Make sure not to over-blend the colors, just soften the edges a little bit.
- Daub on a few areas of red and then soften the edges with a clean damp brush.
Paint the second leaf
- Paint the leaf with yellow paint, leaving several small white areas.
- Add a few areas of red paint to the maple leaf, concentrating mostly on the outside edges of the leaf.
- Then use crimson paint to add more bright color to the leaf in a few areas.
- Clean the paintbrush and soften the edges of the different colors where they meet.
Paint the third leaf
- Fill in the last leaf with yellow paint except for a small white reflection area.
- Use yellow ocher to begin adding the layers of color. Follow this by adding daubs of burn Sienna and finally burnt umber.
- Where the colors join, gently soften the edges using a clean, damp paintbrush.
Add the veins
- Paint in a few veins in each leaf after they are slightly dry. Damp paper is ok but make sure there is no paint sitting on top of the surface.
- Using watered-down dark brown paint, push very lightly with the brush to just paint with the tip. Do not add too many veins, just a few lines give a nice impression.
- Twist the paintbrush slightly as you paint to create an irregular, organic-looking line. Do not add veins in the white reflected areas.
Paint the shadows
- Adding shadows is optional but I love the look of the shadow and it grounds the leaf within the space of the page.
- Add black paint to the right and bottom areas of the leaves. Rinse out the paintbrush and then blend the paint away from the leaf. Soften the edge of the shadow by gently painting over it again with a damp brush.
- When it is dry, erase any pencil lines that show through.
Notes
- Trace around the outside of the leaf for a quick sketch. Only trace one side of the stem and then draw in the other side by hand or it will be too thick.
- Paint the lightest colors first then move on to the darker colors.
- Paint one leaf at a time and work quickly while the first layer of paint is still damp.
- Make sure not to over-blend the different colors as you add them. Just soften the edges a little bit where they meet.
For More Practice
- Collect some fall leaves, sketch them, and then paint the colors you see.
- Practice painting leaves from different trees, and observe the differences in shape, color, size, texture, and veins
- Start a botanical sketchbook, draw specimens of different leaves that you see in nature
- Draw leaves using different artist's materials such as pencil, charcoal, colored pencils, pen and ink, or soft pastels.
Frequently Asked Questions
To paint a fall leaf sketch the leaf on watercolor paper. Paint the leaf with light yellow paint, leaving a small area white, where light is shining on it.
Add green paint to several areas of the leaf, leave plenty of yellow showing. Then daub red paint on a few areas of the leaf. With a clean damp brush soften the edges where the different color of paint meet.
Sketch in the leaf lightly in pencil. Fill it in with paint, leaving a small area white for a light reflection. Then add other tones in a few areas around the leaf for variation. Adding layers of different colors will help give the leaf more visual depth.
Fall leaves can vary greatly in color. It can be helpful to look at real leaves and paint the colors that you see. When painting fall leaves in watercolor I usually use Cadmium Yellow, Cadmium Red Light, Ultramarine Blue, Alizarin Crimson, Yellow Ocher, Burnt Sienna, Burnt Umber, and Black.
You Also Might Like
- How to Sketch a Fall Leaf
- Learn to Draw a Tree with Leaves
- Paint a Simple Watercolor Mountain Landscape
- How to Draw a Skull Step by Step
- Easy Watercolor Techniques
Please leave your questions, comments, and ratings below!


Leave a Reply