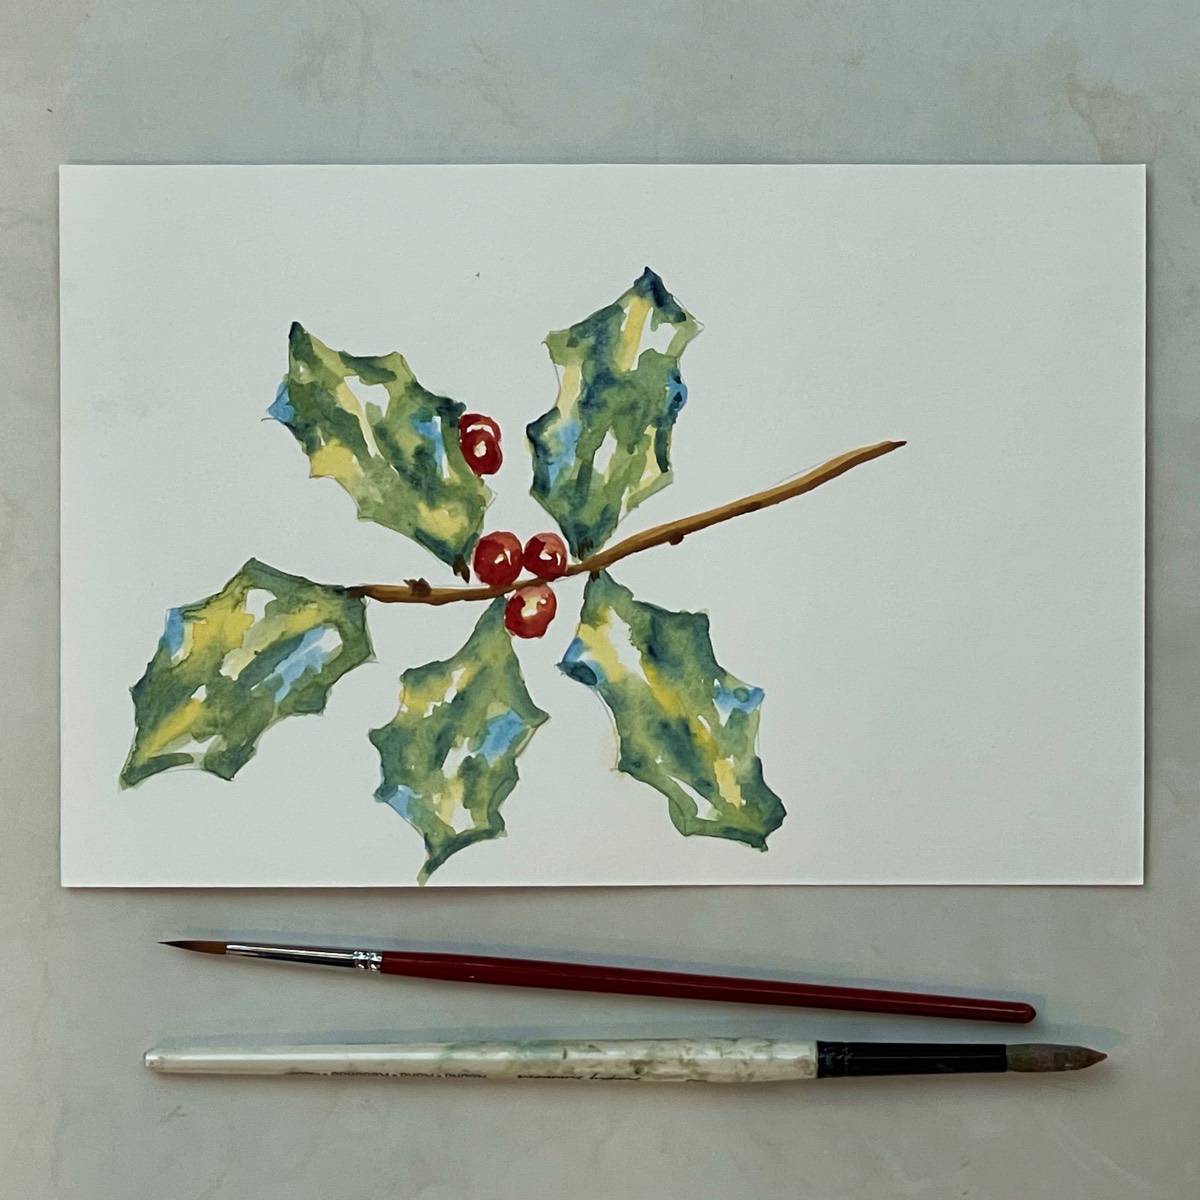
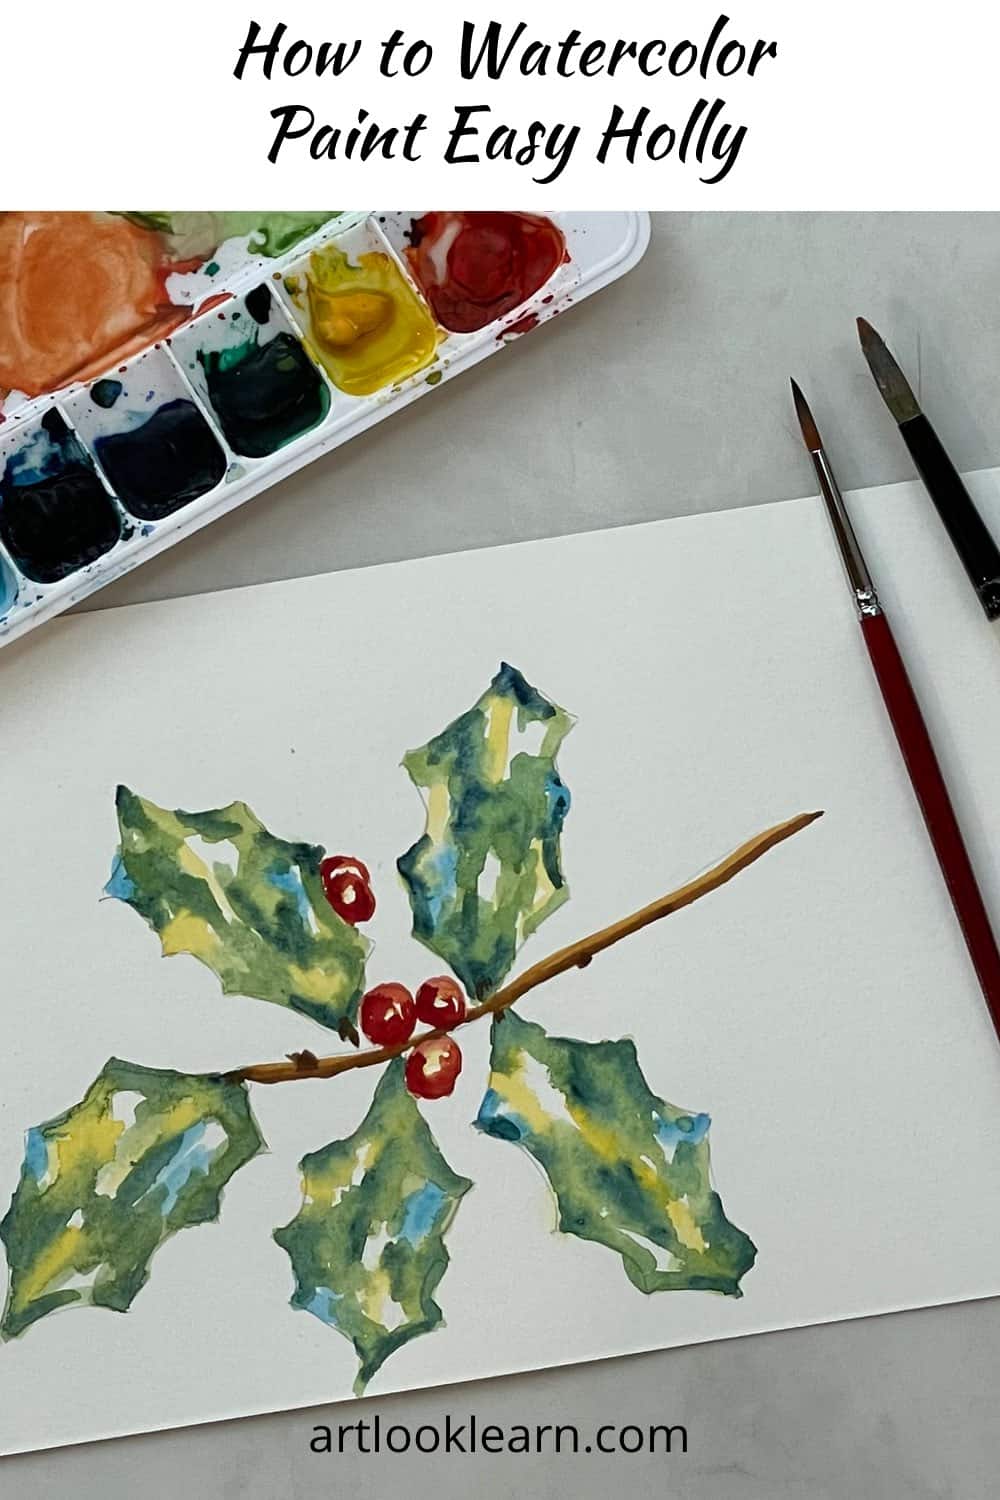
Learn how to create easy watercolor holly leaves in this Christmas painting tutorial. In this online art class, follow along step-by-step to paint and draw this beautiful winter plant, for beginners and more experienced artists.
Painting holly for the holidays or the winter season has never been easier with a simple sketch for the leaves and berries and loose paint strokes to build up the color little by little.
Jump to:
Need a project idea for a Christmas, holiday, or winter arts and crafts? Look no further, painting holly is simple and fun.
Painting or sketching holly on blank Christmas cards or holiday cards is a very fun and elegant project. Not to mention, it is a great way to share your watercolor art with friends and family.
Holly is one of my favorite subjects to paint in the winter when the berries turn bright red. The leaves are equally fascinating to depict because of their curved spiny leaves and tough but shiny surface.
Materials
- Pencil
- Watercolor paper - I am using 140 lb. Strathmore Vision cold press watercolor paper cut down into a 6 x 9-inch piece.
- Watercolor paint - tube watercolor paint on a pallet or a box kit of watercolor paints such as Crayola or Prang. Avoid cheap or off-brand watercolor boxes because the colors will not be very vibrant. Don’t worry if you don’t have the sam colors, you can use whatever you have on hand. I am using:
- Cerulean Blue
- Cadmium Yellow
- Viridian Green
- Prussian Blue
- Cadmium Red Light
- Alizarin Crimson
- Yellow Ocher
- Burnt Umber
- Watercolor brush - a soft round watercolor brush will work well. I am using a round number 9 and number 4.
- Water - A cup should do but if you will be doing a lot of painting and don’t want to change the water as often, use a small bucket.
- Paper towel or clean rag - for wiping the brush
How to Paint Easy Watercolor Holly Video Tutorial
Transcript
Read TranscriptArt Lesson
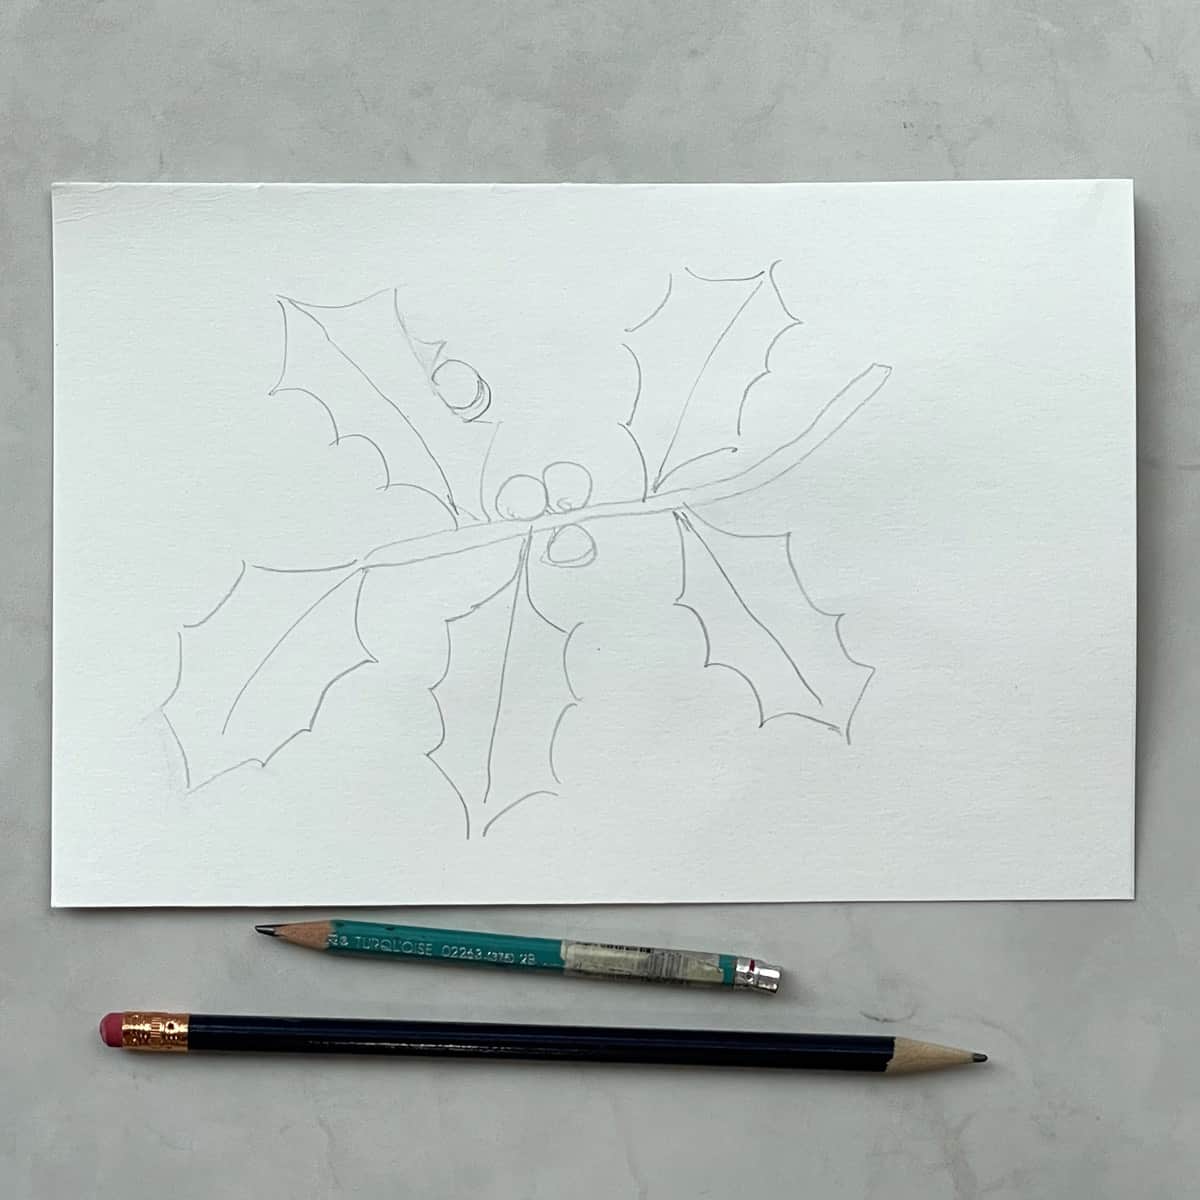
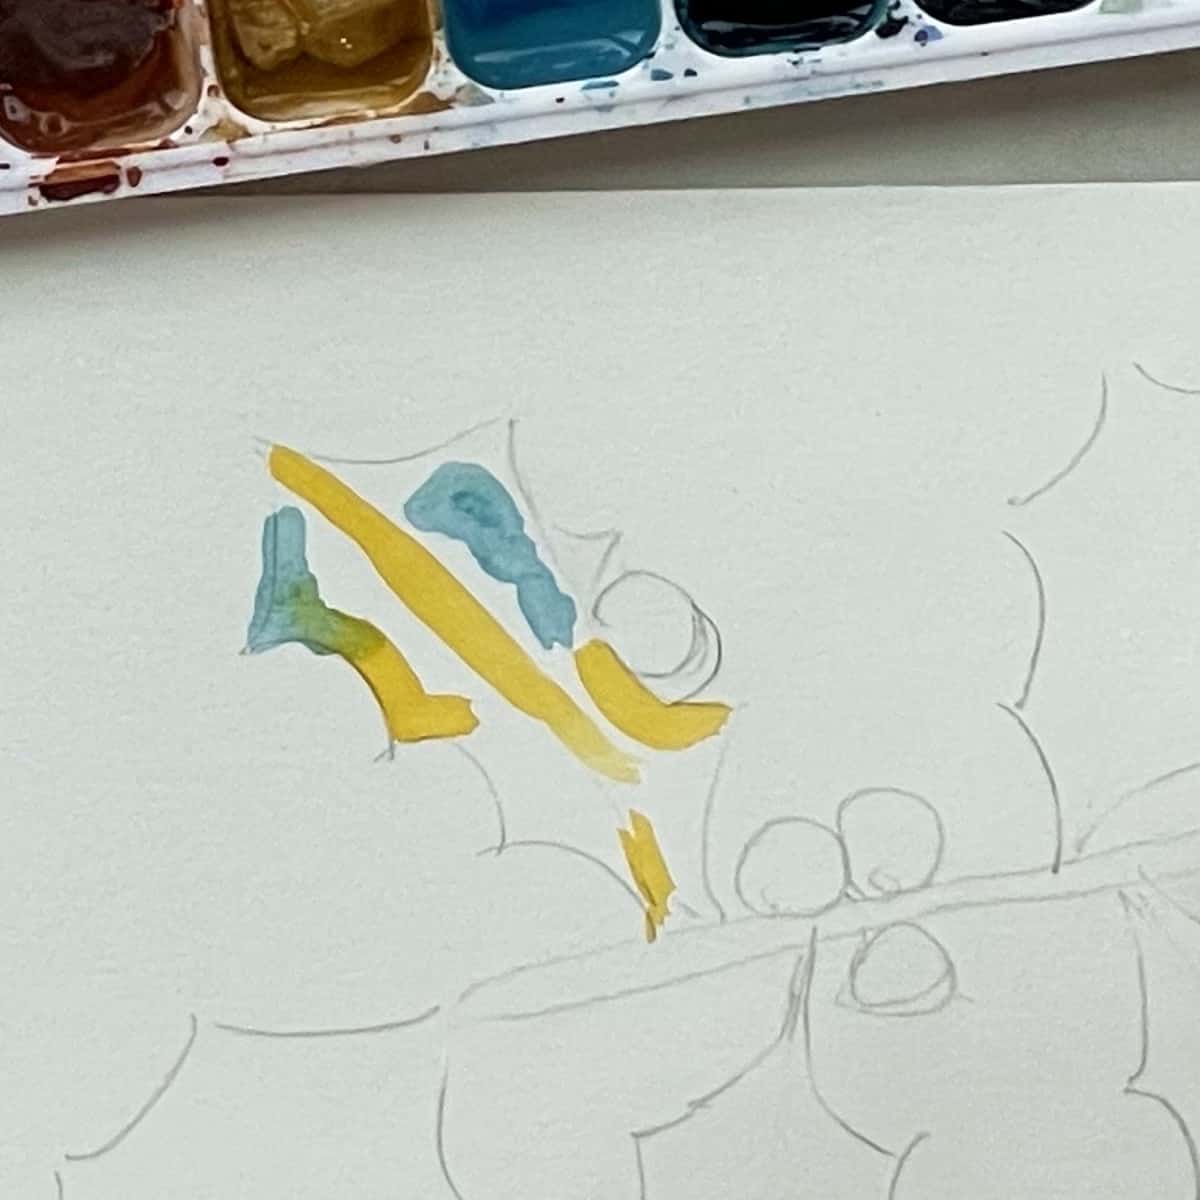
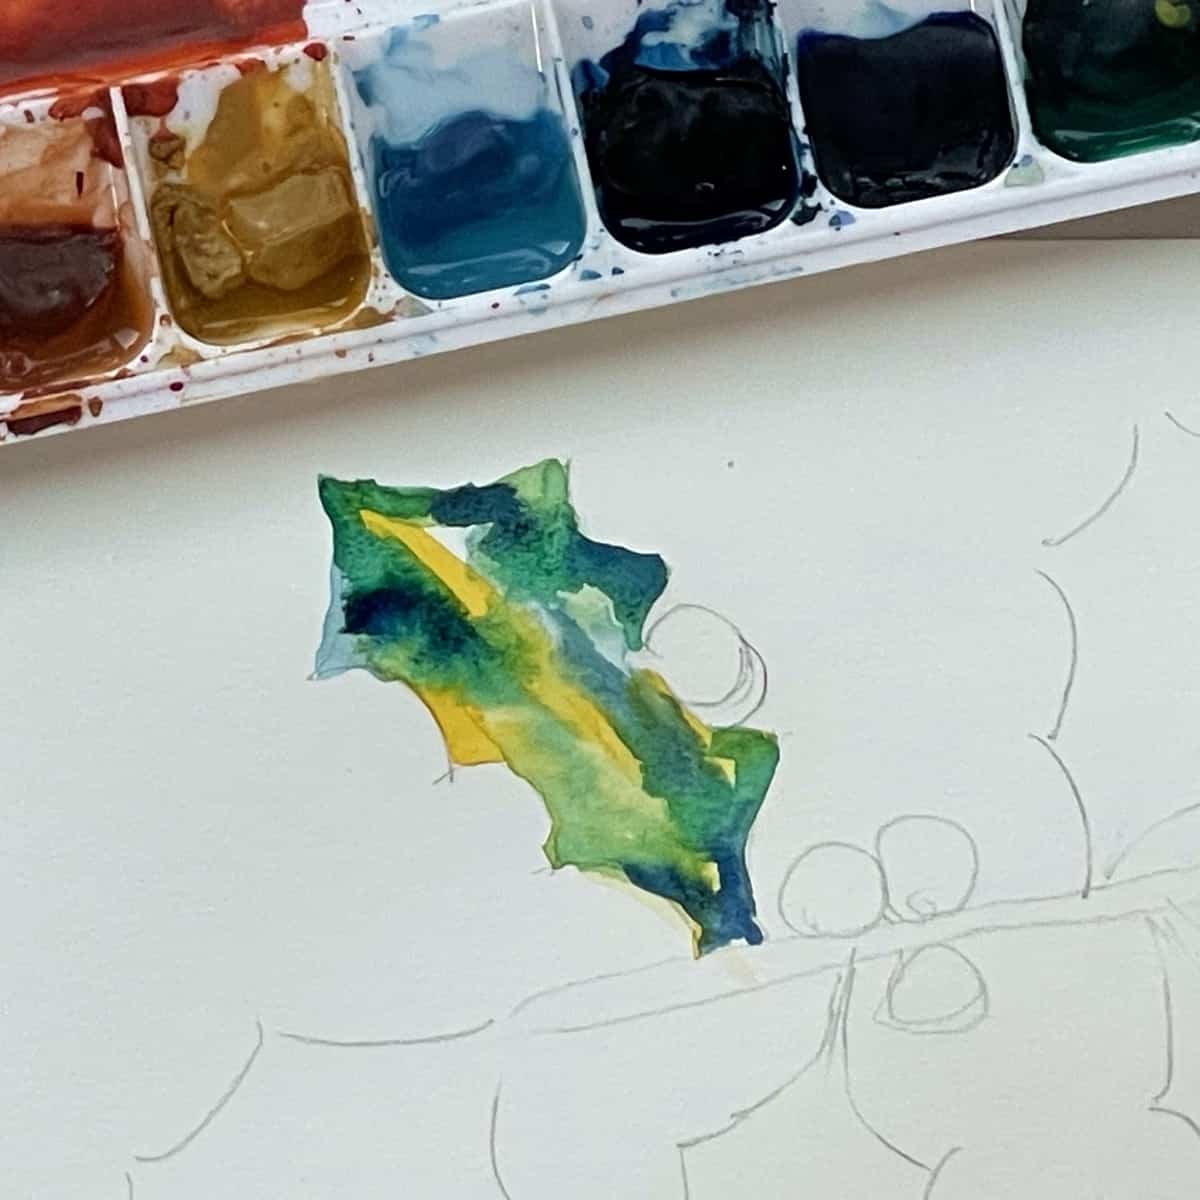
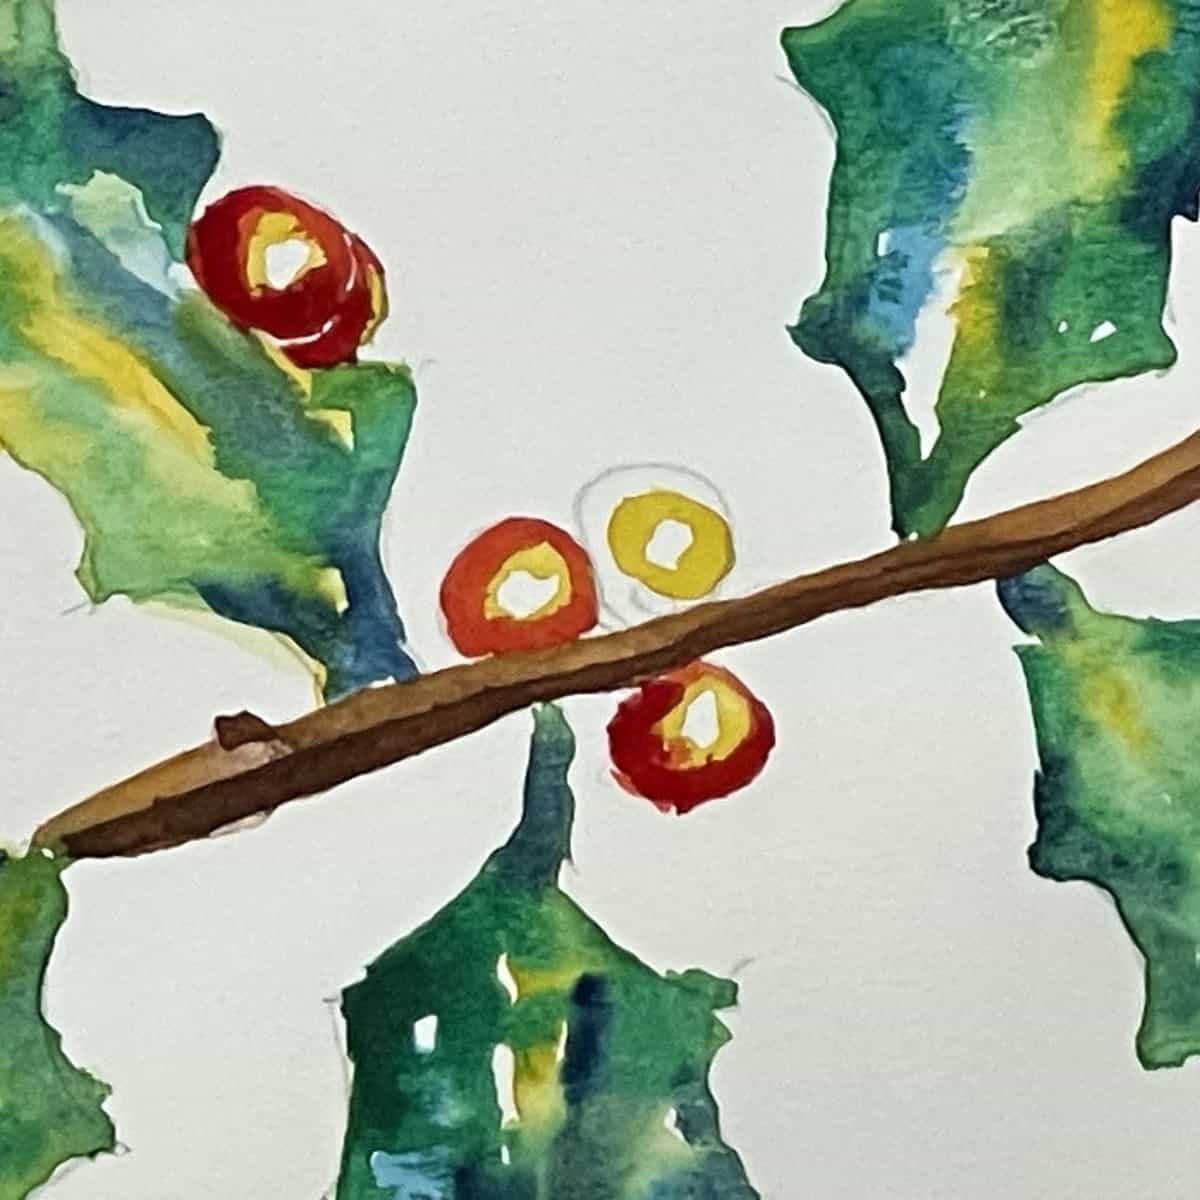
- Sketch, using very light lines that will not show up under the watercolor paint.
- Sketch in the stem of the holly sprig. Draw in the center guideline of the leaf. Then sketch in several rounded scallops connected by pointy spines on each side of the leaf.
- Surprisingly, holly leaves can vary in the number of lobes and spines that they have. It doesn’t matter how many scallops you add to each leaf. I recommend adding between 3 and 5 points.
- Draw in the rest of the leaves. Add a few berries clusters around the middle and a few more peaking out from behind a leaf.
- Erase any overlapping lines and the center guidelines of each leaf.
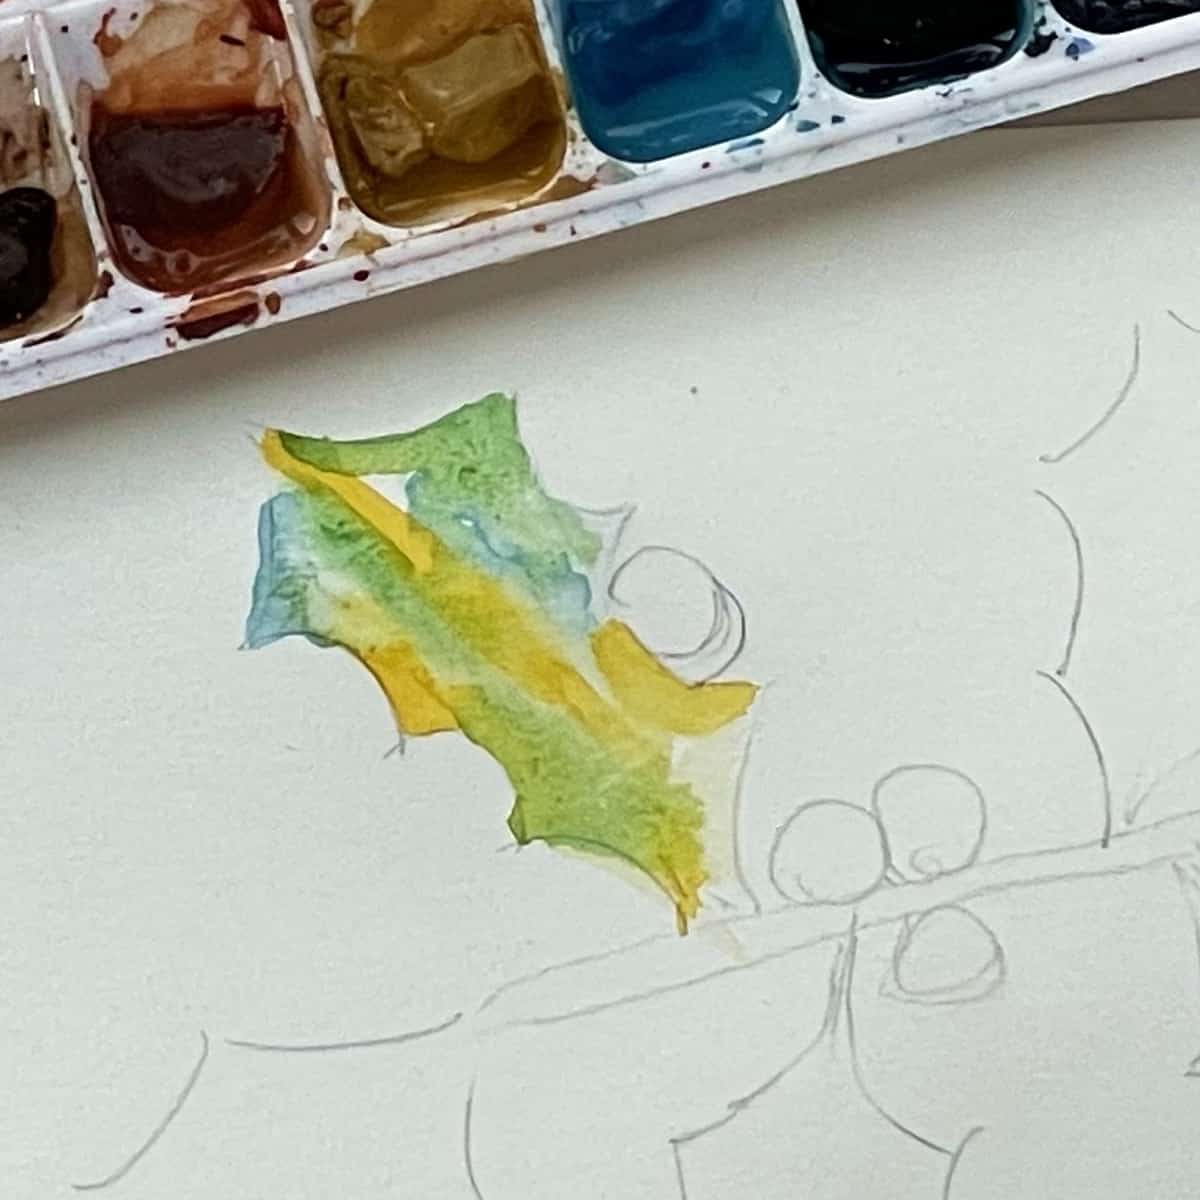
- Work on one leaf at a time. Paint clean water into the leaf area. Just enough to dampen the paper.
- Paint a little bit of Cerulean Blue (or light blue) in several random places on the leaf. Then rinse out the brush.
- Add a stroke of yellow (cadmium yellow or other yellow hue) down the middle for the center vein. This line can be broken or irregular. Add one or two other yellow highlights to the leaf.)
- Mix yellow (cadmium yellow), green (viridian green), and just a tiny bit of red (cadmium red light) together to make a light, earthy green. Paint it in some areas of the leaf.
- Leave a few spots white, or paper color, for highlights. Also, leave some room for the dark green paint.
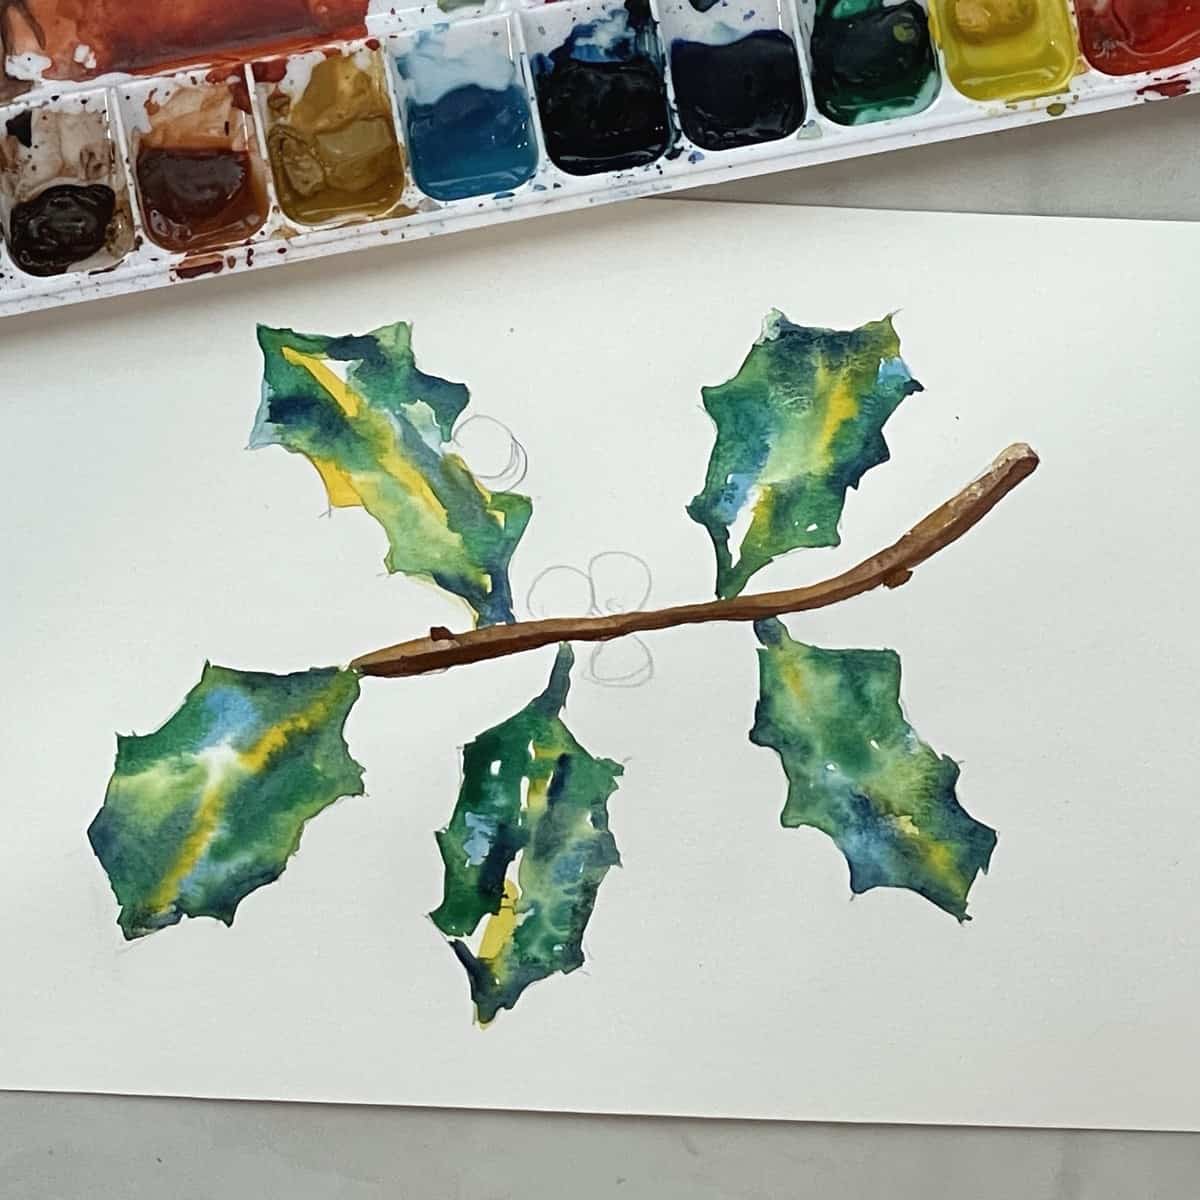
- Mix green (viridian green) and a tiny bit of red (cadmium red light) to make a darker green. Paint this in several areas of the leaf, especially around the edges and next to the center vein.
- Dip the paintbrush into dark blue (Prussian Blue) and add a few low-light areas near the center of the leaf and on the spines. Using clean water, blend the dark blue color out just a little bit.
- Paint in the stem using a tan color (yellow ocher) for the area where light is hitting and dark brown (burnt umber) for the shaded side.
- Using a smaller brush, add color to the berries by painting an “O” shape in the middle of each berry in yellow paint.
- Paint a circle outside of the yellow. Then dab some crimson paint on the bottom of each berry.
Variations
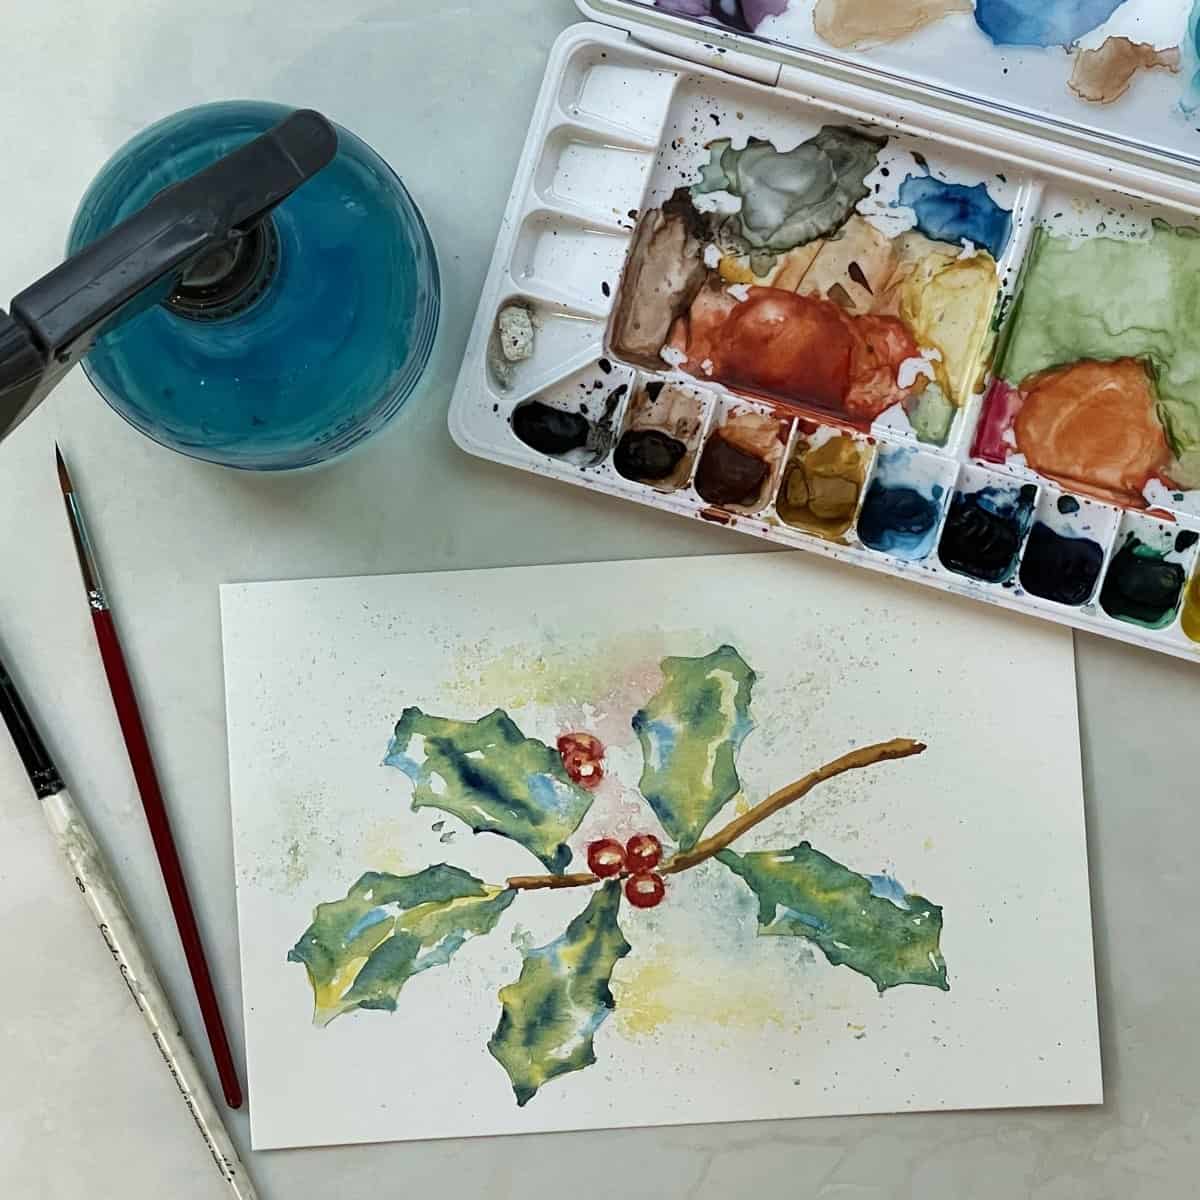
- Squirt water on your painting while you are working on it for a loose splattered effect.
- Paint with a different color palette. Instead of using yellow, green, and blue try using three other contiguous colors such as orange, red, and purple.
- Draw and paint while looking at a real sprig of holly or a photo of it. You could paint as many leaves on your holly plant as you like.
Tips and tricks
- Make your pencil lines very light so they don’t show up underneath the paint.
- Don’t forget to leave several white spots on each leaf for highlights.
- Paint slowly but keep the individual strokes loose.
- But don’t worry if you don’t have the same paint colors that I am, you can use whatever you have on hand.
- Keep practicing! This is a great project for beginning painters and more experienced artists.
Direction Card
Easy watercolor holly leaves (Christmas painting tutorial)
Equipment
- Pencil
- Watercolor paper - I am using 140 lb. Strathmore Vision cold press watercolor paper cut down into a 6 x 9-inch piece.
- Watercolor paint - tube watercolor paint on a pallet or a box kit of watercolor paints such as Crayola or Prang. Avoid cheap or off brand watercolor boxes because the colors will not be very vibrant. I am using Cerulean Blue, Cadmium Yellow, Viridian Green, Prussian Blue, Cadmium Red Light, Alizarin Crimson, Yellow Ocher, and Burnt Umber. But don’t worry if you don’t have these, you can use whatever you have on hand.
- Watercolor brush - a soft round watercolor brush will work well. I am using a round number 6 and number 4.
- Water - A cup should do but if you will be doing a lot of painting and don’t want to change the water as often, use a small bucket.
- Paper towel or clean rag - for wiping the brush
Instructions
- Sketch, using very light lines that will not show up under the watercolor paint.
- Sketch in the stem of the holly sprig. Draw in the center guideline of the leaf. Then sketch in several rounded scallops connected by pointy spines on each side of the leaf.
- Surprisingly, holly leaves can vary in the number of lobes and spines that they have. It doesn’t matter how many scallops you add to each leaf. I recommend adding between 3 and 5 points.
- Draw in the rest of the leaves. Add a few berries clusters around the middle and a few more peaking out from behind a leaf.
- Erase any overlapping lines and the center guidelines of each leaf.
- Work on one leaf at a time. Paint clean water into the leaf area. Just enough to dampen the paper.
- Paint a little bit of Cerulean Blue (or light blue) in several random places on the leaf. Then rinse out the brush.
- Add a stroke of yellow (cadmium yellow or other yellow hue) down the middle for the center vein. This line can be broken or irregular. Add one or two other yellow highlights to the leaf.)
- Mix yellow (cadmium yellow), green (viridian green), and just a tiny bit of red (cadmium red light) together to make a light, earthy green. Paint it in some areas of the leaf.
- Leave a few spots white, or paper color, for highlights. Also, leave some room for the dark green paint.
- Mix green (viridian green) and a tiny bit of red (cadmium red light) to make a darker green. Paint this in several areas of the leaf, especially around the edges and next to the center vein.
- Dip the paintbrush into dark blue (Prussian Blue) and add a few low-light areas near the center of the leaf and on the spines. Using clean water, blend the dark blue color out just a little bit.
- Paint in the stem using a tan color (yellow ocher) for the area where light is hitting and dark brown (burnt umber) for the shaded side.
- Using a smaller brush, add color to the berries by painting an “O” shape in the middle of each berry in yellow paint.
- Paint a circle outside of the yellow. Then dab some crimson paint on the bottom of each berry.
Notes
What to do with Your Sketch
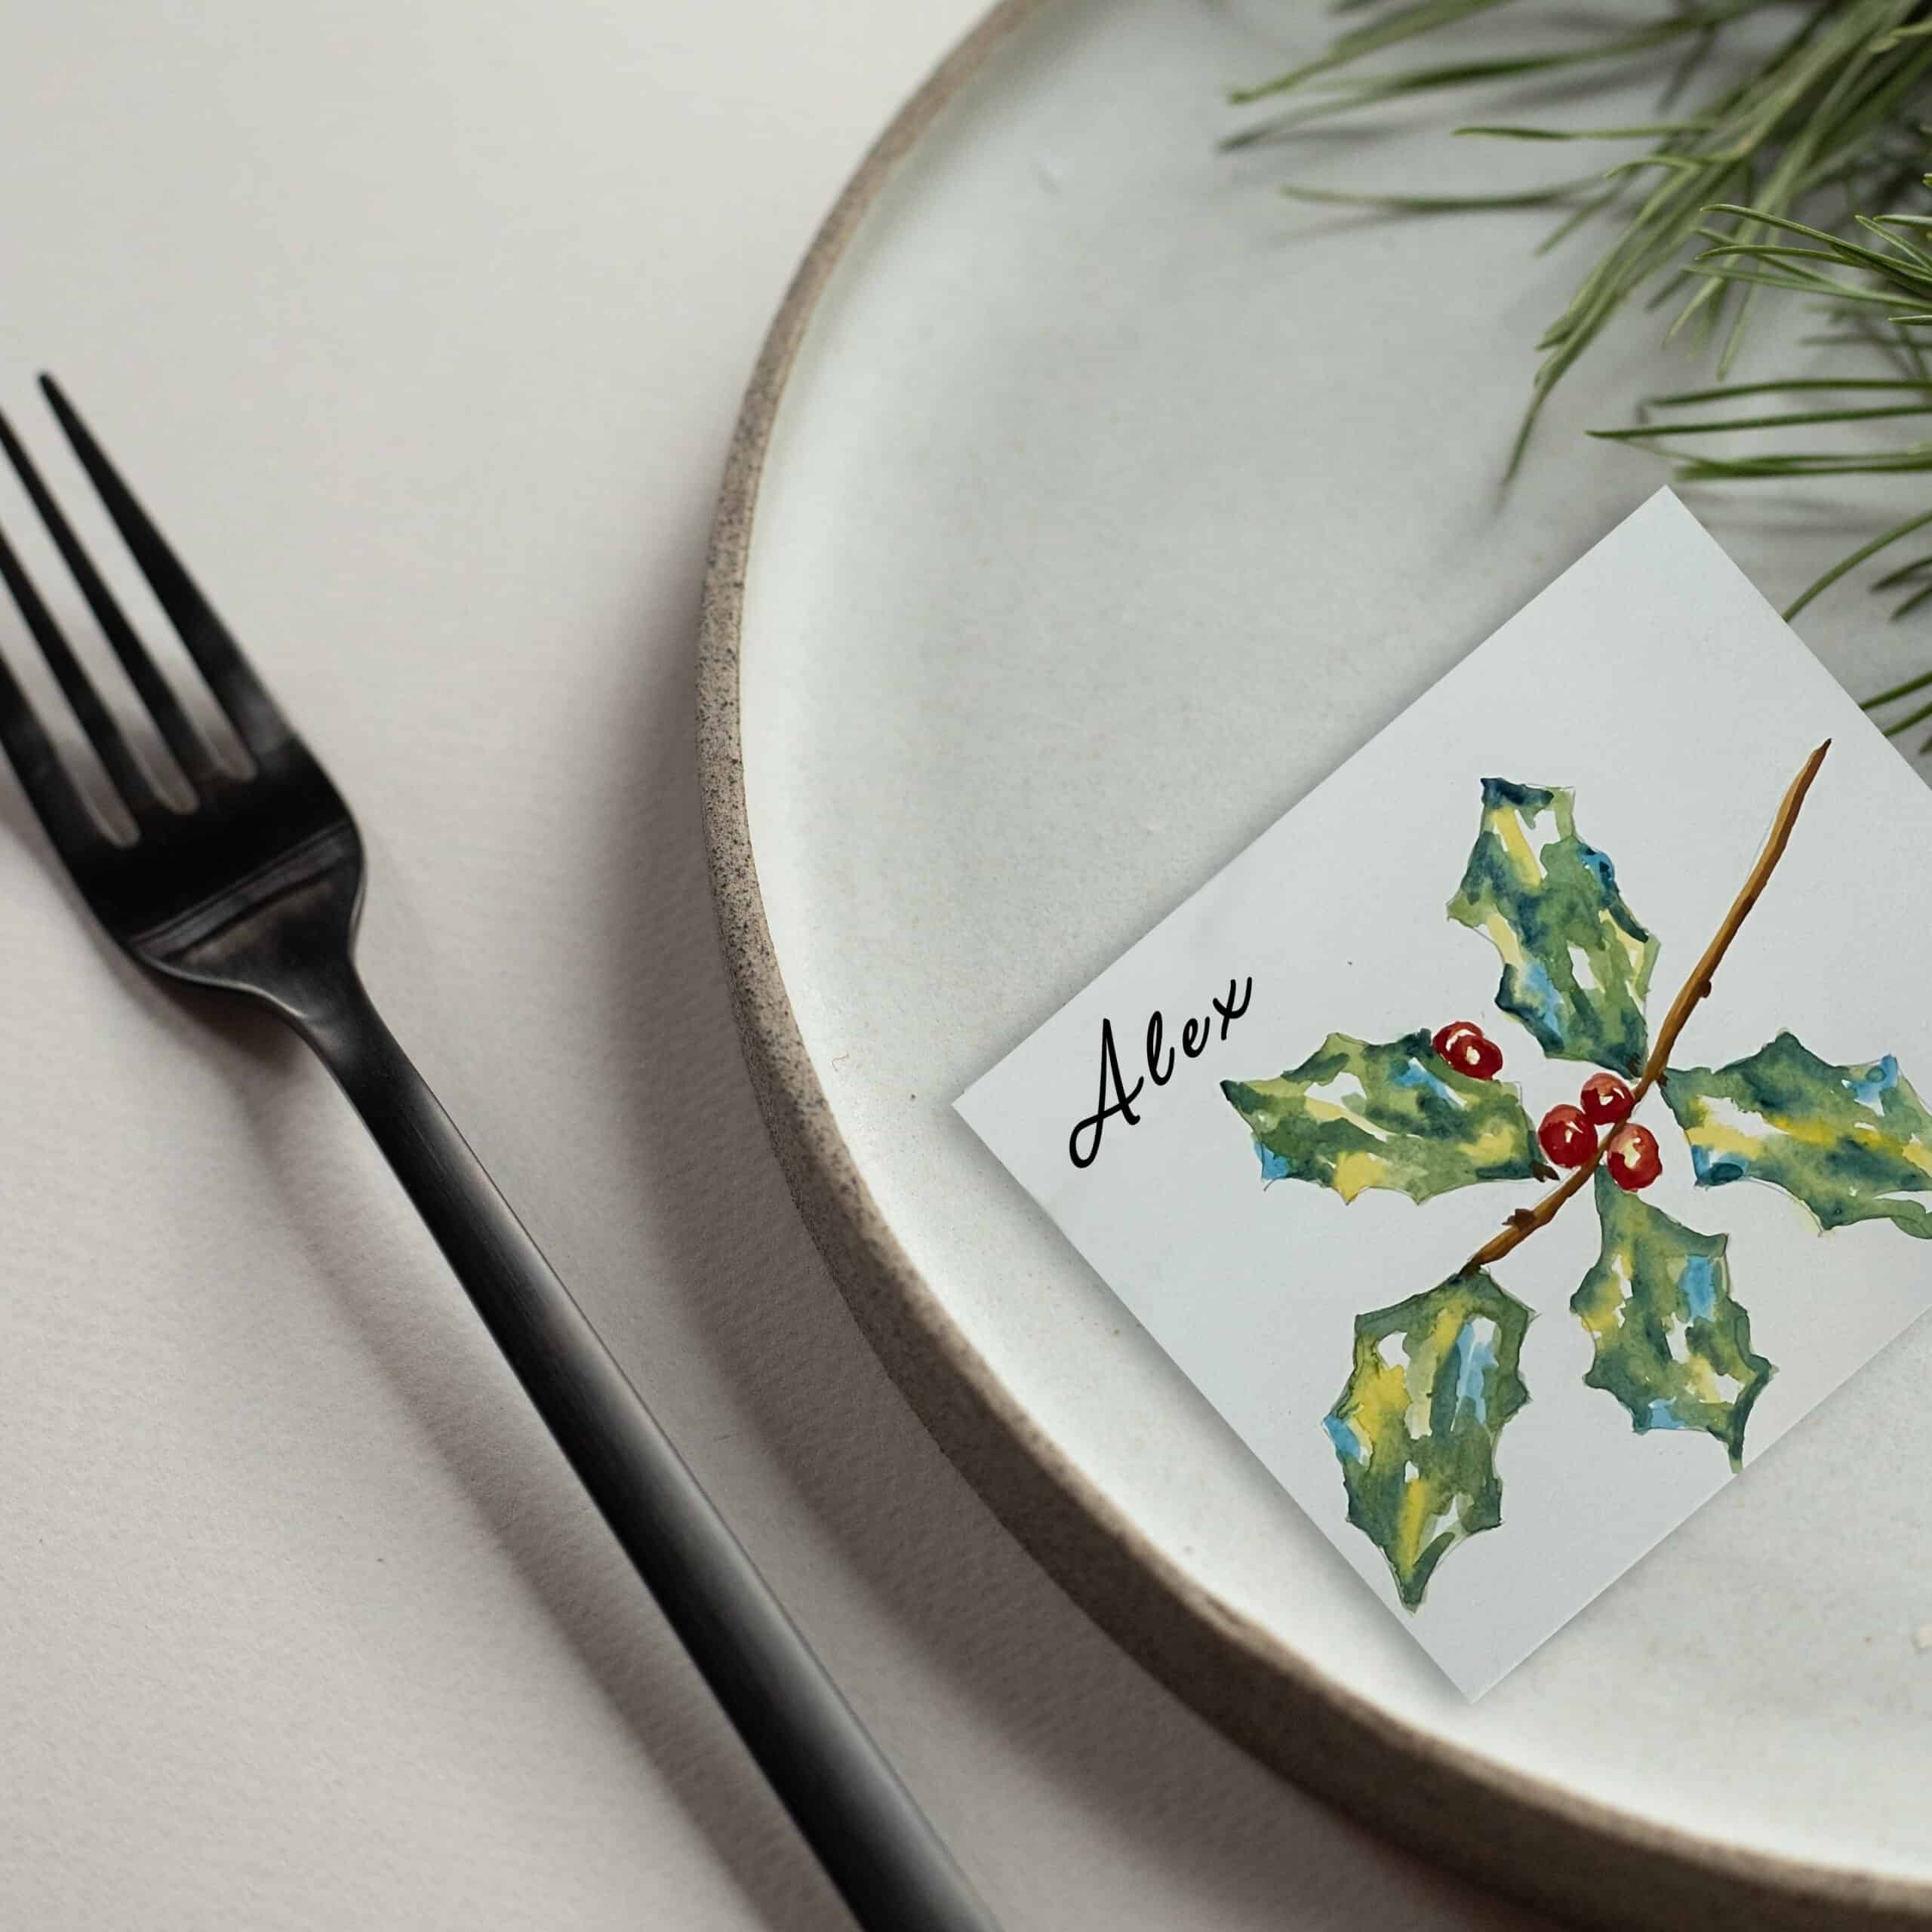
Paint holly leaves on holiday cards and send them to all your friends and family. Watercolor these lovely winter leaves on a large piece of construction paper and use them as a placemat for a special meal.
You could also create festive homemade gift tags painted with holly.
Paint the holly leaves and berries on place setting name cards to use at your next gathering. You could also frame and hang your holly for an extra special holiday decor around your home.
As always, you can add your painting to your portfolio to help keep track of your creative journey and process.
Structure of a Holly Leaf and Berries
Holly trees or bushes, are plants that have pointed green leaves and colorful berries. There are more than 500 species and they grow around the world.
The appearance of the leaves and berries can vary greatly depending on the type of plant. The number of spines on the leaves often differs depending on the species and how many predators are in the area.
Scientists have found that leaves near the bottom often will have more pokey spines than on the top. This is most likely to ward off hungry animals such as deer or it may be related to the age of the plant or leaves.
While most garden holly is spiny all over, not all holly leaves have spines. Some have smooth edges.
While often symmetrical, the lobes do not always mirror across the central stem of the leaf. Occasionally, some leaves are rounded on one side with several spins on the other.
For this painting, I recommend drawing each leaf with 3 to 5 spines on each side. If your leaves have a few more or a few less spines, go for it! Your drawing is correct.
Frequently Asked Questions
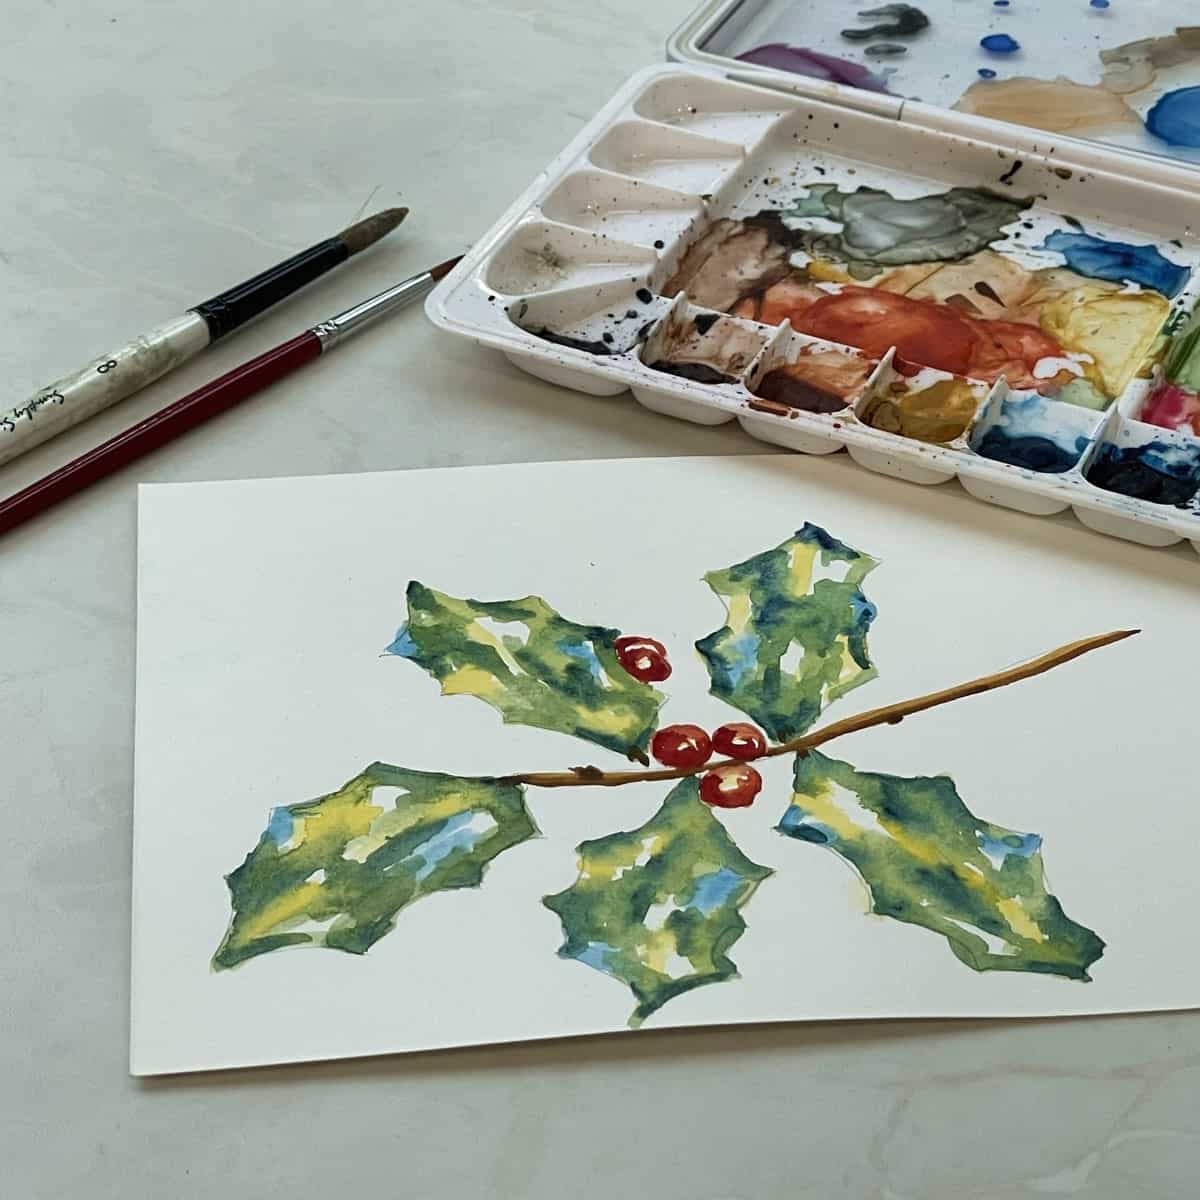
Paint a little bit of light blue in several random places on the leaf. Add some yellow highlights and a stroke of yellow down the middle for the center vein.
Leaving a few areas white, for a white highlight, paint some areas of the light green. Then paint the remaining areas dark green.
Add a few small strokes of dark blue for the low-light areas near the center of the leaf and on the spines.
Sketch in the stem of the holly sprig. Draw in the center guideline of the leaf. Then sketch in several rounded scallops connected by pointy spines on each side of the leaf.
Draw in the rest of the leaves. Add a few berries clusters around the middle and a few more peaking out from behind a leaf.
The number of spines on the holly leaves often differs depending on the species and how many predators are in the area. Some holly leaves have no spines while other have many smaller spines.
You also might like
Please leave your questions, comments, and ratings below!


Leave a Reply